11
LOGOUT
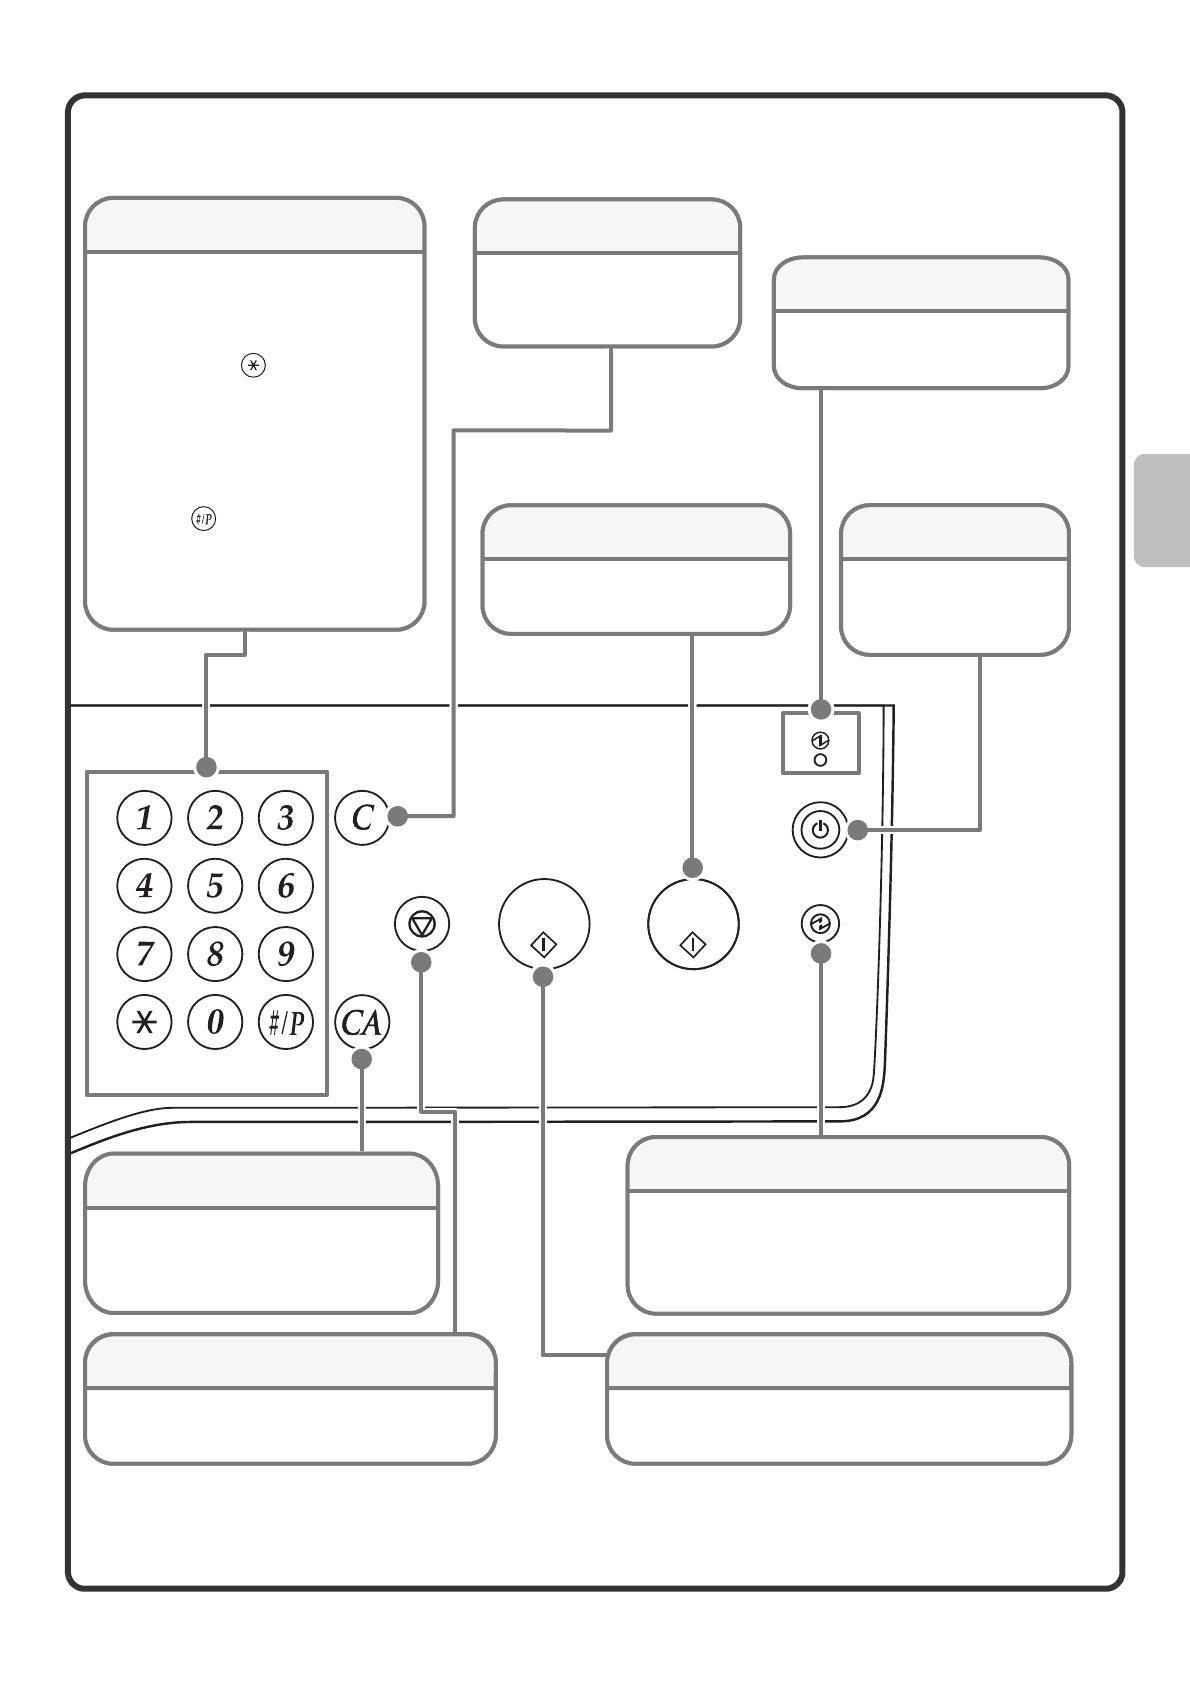
Main power indicator
[CLEAR ALL] key
Press this key to redo an operation from
the beginning.
All settings will be cleared and operation
will return to the initial state.
[STOP] key
Press this key to stop a copy job or scanning of
an original.
Numeric keys
These are used to enter the number of
copies, fax numbers, and other
numbers.
[LOGOUT] key ( )
When user authentication is enabled,
press this key to log out after using
the machine. When using the fax
function, this key can be pressed to
send tone signals on a pulse dial line.
[#/P] key ( )
Press this key to use a job program
when using the copier function. When
using the fax function, press this key
to dial using a program.
Use this key to copy or scan an
original in colour.
Use this key to activate power save mode. The
[POWER SAVE] key blinks when the machine is in
power save mode. This key is also used to
deactivate power save mode.
[COLOR START] key
This indicator lights when the
main power is switched on.
[POWER SAVE] key
[CLEAR] key
Press this key to return
settings such as the number
of copies to "0".
[POWER] key
Use this key to turn the
machine power on and
off.
[BLACK & WHITE START] key
Use this key to copy or scan an original in black and
white. This key is also used to send a fax in fax mode.
Main power indicator
[CLEAR ALL] key
Press this key to redo an operation from
the beginning.
All settings will be cleared and operation
will return to the initial state.
[STOP] key
Press this key to stop a copy job or scanning of
an original.
Numeric keys
These are used to enter the number of
copies, fax numbers, and other
numbers.
[LOGOUT] key ( )
When user authentication is enabled,
press this key to log out after using
the machine. When using the fax
function, this key can be pressed to
send tone signals on a pulse dial line.
[#/P] key ( )
Press this key to use a job program
when using the copier function. When
using the fax function, press this key
to dial using a program.
Use this key to copy or scan an
original in color.
Use this key to activate power save mode. The
[POWER SAVE] key blinks when the machine is in
power save mode. This key is also used to
deactivate power save mode.
[COLOR START] key
This indicator lights when the
main power is switched on.
[POWER SAVE] key
[CLEAR] key
Press this key to return
settings such as the number
of copies to "0".
[POWER] key
Use this key to turn the
machine power on and
off.
[BLACK & WHITE START] key
Use this key to copy or scan an original in black and
white. This key is also used to send a fax in fax mode.
01-1_Quick(General).fm 11 ページ 2008年5月14日 水曜日 午前8時25分


