Page is loading ...

®
Wiring Device-Kellems
Hubbell Incorporated (Delaware)
185 Plains Road
Milford, CT 06460-8897
(203) 882-4800
PD2056 Page 1 PRINTED IN USA 07/09
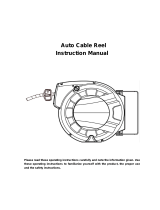
HUBBELL HOSE REELS
Cat. Nos. HBLHR2550C, HBLHR3835C, HBLHR3850C,
HBLHR2535, HBLHR2550
GENERAL INFORMATION
NOTICE: For installation by a qualified individual in accordance with national and local safety codes and the following instructions.
CAUTION: RISK OF EXPLOSION. Not for use with oxygen. Do not convert air hose to oxygen service. Compressed air
hoses are often contaminated with an oil coating, which can react explosively when oxygen is introduced.
CAUTION: RISK OF PHYSICAL INJURY OR DEATH. Disconnect and purge all system pressure before installing or
uninstalling reel.
Check that the supplied system pressure does not exceed the maximum working pressure rating of the reel (300 psi).
Ensure that reel is properly installed before connecting system pressure.
A high-tension spring assembly is enclosed in a tamper resistant compartment. Do not open. Exercise extreme caution when unwinding
or rewinding hose. If reel ceases to unwind or rewind, remove system pressure immediately. Do not pull or jerk on the hose.
Inspect the hose for rupture or damage before each use. Pull hose from reel by grasping the hose, not the attached tool.
If a leak should occur in the hose or reel, remove system pressure immediately.
DIMENSIONAL DATA
INSTALLATION INSTRUCTIONS
A E G X Y INLET
HBLHR2550C 5.75 16.50 17.63 2.25 6.00 3/8 NPTF
HBLHR2535 5.75 16.50 17.63 2.25 6.00 3/8 NPTF
HBLHR2550 5.75 16.50 17.63 2.25 6.00 3/8 NPTF
HBLHR3835C 5.75 16.50 17.63 2.25 6.00 3/8 NPTF
HBLHR3850C 6.25 16.50 17.63 2.25 6.00 1/2 NPTF
FIG. 1

PD2056 Page 2 PRINTED IN USA 07/09
MOUNTING
NOTICE: Maximum installation height is 16 feet (4.87 m). Do not exceed this distance.
1. Unpack and inspect reel for shipping damage. Turn by hand to check for smooth operation.
2. The reel can be mounted on the floor, wall or ceiling. Depending on where the reel is placed , it may be necessary to adjust the hose
bumper and guide arm position to dispense the hose properly.
CAUTION: RISK OF INJURY. Spring winding mechanism is under tension. REMOVE tension as follows. Pull out hose until latch
pawl is engaged. Remove bumper by removing slotted screws (item 4, Fig. 2). Carefully disengage latch pawl while maintaining a firm
hold on the spool. Turn spool by hand approximately two or three revolutions in the direction of the drive spring until all tension is
removed. Remove guide arm (item 2 , Fig. 2) and spool by removing the 4 nuts (Item 1, Fig. 2).
3. Position the base to floor, wall or ceiling. Secure into place using four (customer supplied) fasteners (item 3, Fig. 2).
CAUTION: Reel is heavy – mount securely! Recommended mounting hardware: 1/4”X 1 1/2”(6mm X 40mm) lag screws with
washers. If mounting over head, provide safety chain between reel base and mounting surface to prevent accidental reel
drop.
For installation on a wood, drywall or stucco surface, mount the reel to a 2” (51mm) thick piece of lumber that has been fastened into
studs. For installation on a brick, cement, cinder block or other hard surface, insert aluminum anchors into the hard mounting surface
before mounting the reel.
4. Determine new guide arm location and return spool and guide arm to base by replacing and securely tightening the 4 nuts. Tighten the
drive spring by turning the spool two or three revolutions and then engage the latch pawl. Pull hose through the roller opening in the
guide arm and replace the hose bumper.
5. Connect a (customer supplied) flexible hose supply line (item 5, Fig 2) to inlet. Do not use rigid plumbing. Apply pipe thread sealant to
threads and do not overtighten the connection. Torque should not exceed 70 ft-lbs.
ADJUSTMENTS
HOSE BUMPER
Pull out hose until latch pawl is engaged. Adjust hose bumper by loosening slotted screws. Slide the bumper to desired position and tighten
the screws before pulling hose to disengage latch pawl.
4
3
1
2
FIG. 2
5
/