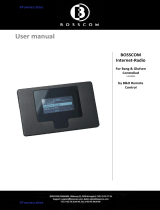
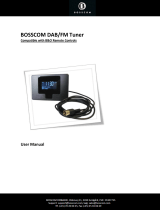
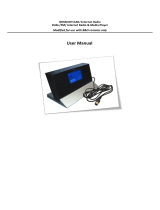
Page is loading ...

1
www.oneremote.dk
Everyday Control with Beo4, Beo5, Beo6
O Select
FD Maneuvering in menus
AS Maneuvering in menus
qq Power on/ off
Q Menu
E Favorite list
W Store favorite
R Mode – Internet/ UPnP
0 – 9 Select a preset program. *1
*1
Up to 250 channels can be stored in memory.
A preset channel is selected by entering one, two or three
digits.
Everyday Control with BeoLink 1000
P Select
CV Maneuvering in menus
ZX Maneuvering in menus
qq Power on/ off
qX Menu
qZ Favorite list
qC Store – favorite
qV Mode – Internet/ UPnP
0 – 9 Select a preset program. *1

2
www.oneremote.dk
Everyday Control with Beo4, Beo5, Beo6 .................................................................................................................... 1
Everyday Control with BeoLink 1000 .......................................................................................................................... 1
Getting Started ........................................................................................................................................................... 4
Direct Mode or CableLink Mode ................................................................................................................................. 4
Factory Settings .......................................................................................................................................................... 4
Functions .................................................................................................................................................................... 5
My MediaU ..................................................................................................................................................................... 5
Create a MediaU Account. .......................................................................................................................................... 5
Internet Radio ................................................................................................................................................................. 5
Create a List of Favorite Stations. ............................................................................................................................... 5
Media Center .................................................................................................................................................................. 5
UPnP, Play Music from PCs on the LAN. ..................................................................................................................... 5
Installation ................................................................................................................................................................. 6
iRadio2, Initial Set Up. ..................................................................................................................................................... 6
Setting Date and Clock. ................................................................................................................................................... 6
Buffer. ............................................................................................................................................................................. 6
Language. ....................................................................................................................................................................... 6
Factory Settings. ............................................................................................................................................................. 6
iRadio2 Connection to Bang & Olufsen Equipment ..................................................................................................... 7
Direct Control, “Direct Mode” ......................................................................................................................................... 7
Indirect control, ”CableLink Mode” ................................................................................................................................. 7
Option Programming .................................................................................................................................................. 8
Source & Option Selection .......................................................................................................................................... 9
Connection via a BeoLink Converter 1611/ 1612. ......................................................................................................15
Connection via a BeoLink Active in any Link Room ....................................................................................................16
Connection to a 21 Pin AV Socket on any Bang & Olufsen TV. ...................................................................................17

4
www.oneremote.dk
Getting Started
This OneRemote iRadio2 has been designed for operation in a Bang & Olufsen remote control system allowing full
control with a Bang & Olufsen remote control terminal either directly or via connection to Bang & Olufsen
equipment.
Thus the iRadio2 is BeoLink compatible.
Direct Mode or CableLink Mode
The OneRemote iRadio2 tuner is connected to Bang & Olufsen equipment via the 7-pin DIN cable with or without
adaptor, and through option programming it may be controlled as follows:
1. Via the tuner’s built in IR-receiver, ”Direct Mode”
Direct Mode is used when connection to an input with control data is not possible.
2. Via the cable connected Bang & Olufsen equipment, ”CableLink Mode”
CableLink Mode is used only when connection to an input with control data is possible.
See page 8 for Option Programming.
Factory Settings
The factory setting is for “Direct Mode” and manual power control.
The factory setting for input socket and selected source is:
Remote control
Source
Beo4, Beo5 or Beo6
N.MUSIC, A.MEM2 or TAPE2
BeoLink 1000
SHIFT A.TAPE
If the iRadio2 tuner is connected to a different input, the option should be programmed accordingly.
See page 8 for Option Programming

5
www.oneremote.dk
Functions
My MediaU
When logging into http://www.mediayou.net favorite lists for iRadio2 may be created. By the first log in an iRadio2
account needs to be created. The account is free of charge.
Create a MediaU Account.
1. Log into the home page and create an account.
2. Fill in the iRadio2’s serial number, which is the so called MAC address found in the iRadio2/ Main
Menu/Information Center/System Information/Wireless MAC.
A MAC address is 12 alfa-numerics.
3. Press Q to get to the main menu.
4. The MediaU list for iRadio2 is visible and may be accessed.
Internet Radio
Create a List of Favorite Stations.
250 favorite stations may be stored in iRadio2.
1. PressQ and select Internet Radio with S .
2. Select a station from one of the sub-menus, like Local Radio/Denmark/DAB.
3. Press W to store the favorite list.
4. Move the station to the desired place in the list and press Oto store this location.
These menus allow for name change of stations, removal or relocation in the favorite list, but these activities
are a lot easier via the internet and a MediaU account as described above.
Media Center
UPnP, Play Music from PCs on the LAN.
1. Select Main Menu with Q
2. Select Mediacenter/ UPnP
3. Show lists with accessible files withS
4. Select the desired file.

6
www.oneremote.dk
Installation
iRadio2, Initial Set Up.
Connect the iRadio2 tuner’s external power supply to a mains outlet and to the tuner’s DC-socket.
1) Turn on the tuner’s power switch on the cabinet’s rear.
2) Turn on iRadio2 by pressing N.MUSIC, A.MEM2 or TAPE2 followed by qq.
See Option Programming p.8 if another source selection is requested.
3) Connect the tuner to the corresponding input socket of the Bang & Olufsen equipment.
4) Select the chosen source on the Bang & Olufsen remote.
iRadio2 is starting up and is scanning for networks.
1. Having completed the scanning all available”ESSIDs” are listed. Select the desired one.
2. If the selected network is locked, a password has to be entered.
iRadio2 supports WEP (Wired Equivalent Privacy) and WPA (Wi-Fi Protected Access).
Setting Date and Clock.
1. Select Main Menu with Q
2. Select /Configuration/Date & Time withS
3. Select the desired date, time, 12/24 hours, GMT, Daylight Saving Time etc
Buffer.
1. Select Main Menu with Q
2. Select /Configuration/Buffer withS
3. Select the desired values for the buffer.
Language.
1. Select Main Menu with Q
2. Select /Configuration/Language withS
3. Select the desired display language.
Factory Settings.
1. Select Main Menu with Q
2. Select /Configuration/Reset to Default withS
3. Select YES to reset iRadio2 to the factory settings.

7
www.oneremote.dk
iRadio2 Connection to Bang & Olufsen Equipment
This OneRemote iRadio2 tuner connects to ALL Bang & Olufsen equipment having a vacant audio input, like
BeoSound, BeoCenter, BeoMaster, BeoSystem or BeoVision TV, and it is controlled by a Bang & Olufsen remote
control terminal. iRadio2 may be connected to any equipment of other brands too, but it requires control by a Bang &
Olufsen remote.
Over the years Bang & Olufsen has added, removed or renamed inputs for peripherals and in the most recent remote
controls N.Music has replaced the earlier SHIFT- A.TAPE or A.TAPE2.
Below tables list various Bang & Olufsen equipment with specified inputs, names and the corresponding source
selection to be used when opening an input. This enables selection of any named Bang & Olufsen product, its input,
the corresponding iRadio2 option and the remote command that allows for control of the tuner.
Some inputs allow for selection of a CableLink option, but most of the more recent Bang & Olufsen products require a
Direct Mode option, i.e. direct control of the iRadio2. Alternatively see the application of BeoLink Converter p. 15.
Direct Control, “Direct Mode”
The IRadio2 is controlled directly by a Bang & Olufsen remote control terminal. Thus control from a link room is NOT
possible, but the iRadio2 may be listened to anywhere, when it has been selected as a source.
Direct Mode
Direct Mode may be used in any Bang & Olufsen system.
The iRadio2 tuner’s IR receiver is not plasma safe.
Indirect control, ”CableLink Mode”
The iRadio2 is controlled with a Bang & Olufsen remote via the connected Bang & Olufsen equipment that relays
control commands via the connection cable. The iRadio2 may be controlled from any connected link room.
CableLink
The CableLink option allows for control from any link room.

8
www.oneremote.dk
Option Programming
Option programming is required only when installing the tuner. The programming is performed with a Bang &
Olufsen remote control terminal by initiating a 5 key sequence within 8 seconds after powering up the tuner.
When powering up the tuner the red control LED flashes for 8 seconds, and the programming has to be carried out
before the control LED stops flashing. When entering a key stroke the timeout is prolonged with another 8 seconds.
If not successful the operation may be repeated. Programming starts by pressing L and ends by pressing
w All options have 3 digits to be entered in between.
Option 106 is entered like this:
L *1 106w
Control LED indications
Red/green flash
By initial power up the LED starts flashing red/green, indicating that the tuner is in Option
Programming mode, i.e. an option may be entered.
The Option Programming Mode is terminated after 30 secs. or prior hereto, if any command except
for 0- 9, w or is received.
Red
The tuner is ready for control.
Intermittently turned off
The LED turns off very briefly as a command handshake indicator.
*1 If using a Beolink1000 remote control, LIGHT must be replaced with SHIFT-LINK.

9
www.oneremote.dk
Source & Option Selection
The following tables show the available input sockets on various Bang & Olufsen audio and video products, how to
select them using a remote control terminal and what the corresponding option program of the One Remote iRadio2
tuner should be.
The OneRemote iRadio2 tuner has to be programmed with the right option to operate correctly:
Input
Socket
Source Selected
Direct
Option
CableLink
Option
Remarks
BeoSound 5
MasterLink
v
T
-
410
If the MasterLink socket is
not used, the iRadio2 tuner
might be connected and
operated via a BeoLink
Converter.
See page 15 for details on
connection of the BeoLink
Converter 1611.
f
s
-
416
a
-
412
Input
Socket
Source Selected
Direct
Option
CableLink
Option
Remarks
BeoSound 5 Encore
LINE-IN
B
hu
100
-
The Encore input is a mini
jack socket.
Use a OneRemote adaptor
cable, type 39207437.
Input
Socket
Source Selected
Direct
Option
CableLink
Option
Remarks
BeoCenter 2
AUX-IN
B
hu
100
-
The input is RCA phono
sockets. Use a OneRemote
adaptor cable, type
39207438.

10
www.oneremote.dk
Input
Socket
Source Selected
Direct
Option
CableLink
Option
Remarks
BeoSound 4
AUX
B
hu
100
-
The input is RCA phono
sockets. Use a OneRemote
adaptor cable, type
39207438.
MasterLink
T
v
-
410
If the MasterLink socket is
not used, the iRadio2 tuner
might be connected and
operated via a BeoLink
Converter.
See page 15 for details on
connection of the BeoLink
Converter 1611.
f
s
-
416
a
-
412
Input
Socket
Source Selected
Direct
Option
CableLink
Option
Remarks
BeoSound 1
AUX
B
hu
100
-
AUX
b
y
102
-
Input
Socket
Source Selected
Direct
Option
CableLink
Option
Remarks
BeoSound Century
AUX
$
K
hy
103
-
AUX
U
Y
106
-
AUX
B
hu
100
-

11
www.oneremote.dk
Input
Socket
Source Selected
Direct
Option
CableLink
Option
Remarks
BeoSound 9000
AUX
B
hu
100
-
AUX
b
y
102
-
Input
Socket
Source Selected
Direct
Option
CableLink
Option
Remarks
BeoSound 3000
BeoSound 3200
AUX
B
hu
100
-
AUX
b
y
102
-
AUX
$
K
hy
103
-
AUX
U
Y
106
-
Input
Socket
Source Selected
Direct
Option
CableLink
Option
Remarks
BeoSound Ouverture
AUX
$
K
hy
103
302
In the CableLink mode
numeric commands are not
accepted.
AUX
U
Y
106
206
In the CableLink mode
numeric commands are not
accepted.
AUX
B
hu
100
-
In the CableLink mode
numeric commands are not
accepted.
MasterLink
T
v
-
410
If the MasterLink socket is
not used, the iRadio2 tuner
might be connected and
operated via a BeoLink
Converter.
See page 15 for details on
connection of the BeoLink
Converter 1611.
f
s
-
416
a
-
412

12
www.oneremote.dk
Input
Socket
Source Selected
Direct
Option
CableLink
Option
Remarks
BeoSystem 2500
BeoCenter 2500
AUX
B
hu
100
-
In the CableLink mode
numeric commands are not
accepted.
AUX
$
K
hy
103
302
In the CableLink mode
numeric commands are not
accepted.
AUX
U
Y
106
206
In the CableLink mode
numeric commands are not
accepted.
Input Socket
Source Selected
Direct
Option
CableLink
Option
Remarks
BeoCenter 2300
AUX
B
hu
100
300
In the CableLink mode numeric
commands are not accepted.
AUX
b
y
102
302
In the CableLink mode numeric
commands are not accepted.
AUX
$
K
hy
103
303
In the CableLink mode numeric
commands are not accepted.
AUX
U
Y
106
306
In the CableLink mode numeric
commands are not accepted.
Input Socket
Source Selected
Direct
Option
CableLink
Option
Remarks
BeoMaster 3300
BeoMaster 5500
TP
b
y
102
302
In the CableLink mode numeric
commands are not accepted.
CD
z
104
204
In the CableLink mode numeric
commands are not accepted.

13
www.oneremote.dk
Input Socket
Source Selected
Direct
Option
CableLink
Option
Remarks
BeoMaster 3500
BeoMaster 4500
TP1
b
y
102
302
In the CableLink mode numeric
commands are not accepted.
CD
z
104
204
In the CableLink mode numeric
commands are not accepted.
TP2
$
K
hy
103
302
In the CableLink mode numeric
commands are not accepted.
PHONO
U
Y
106
206
In the CableLink mode numeric
commands are not accepted.
Input Socket
Source Selected
Direct
Option
CableLink
Option
Remarks
BeoMaster 6500
BeoMaster 7000
TP1
b
y
102
302
CD
z
104
204
TP2
$
K
hy
103
302
PHONO
U
Y
106
206
Input Socket
Source Selected
Direct
Option
CableLink
Option
Remarks
BeoCenter 8000
TAPE2
$
K
hy
103
302
In the CableLink mode numeric
commands are not accepted.
Input Socket
Source Selected
Direct
Option
CableLink
Option
Remarks
BeoCenter 8500
BeoCenter 9000
BeoCenter 9500
TAPE2
$
K
hy
103
302
In the CableLink mode numeric
commands are not accepted.
AUX
B
100
-

14
www.oneremote.dk
Input Socket
Source Selected
Direct
Option
CableLink
Option
Remarks
BeoCenter 9300
PHONO
U
Y
106
206
In the CableLink mode numeric
commands are not accepted.
TAPE2
$
K
hy
103
302
In the CableLink mode numeric
commands are not accepted.
AUX
B
100
-
Input
Socket
Source Selected
Direct
Option
CableLink
Option
Remarks
BeoSystem 3
AV1
AV2
AV3
T
d
a
-
410
414
412
The input is a scart socket,
21 pin AV socket. Use a
OneRemote adaptor cable,
type 39207496.
AV4
AV5
AV6
T
d
a
-
410
414
412
The input is RCA phono
sockets. Use a OneRemote
adaptor cable, type
39207438.
MasterLink
uetc.
-
If the MasterLink socket is
not used, the iRadio2 tuner
might be connected and
operated via a BeoLink
Converter.
See page 15 for details on
connection of the BeoLink
Converter 1611.

15
www.oneremote.dk
Connection via a BeoLink Converter 1611/ 1612.
The OneRemote iRadio2 tuner may be connected to a Bang & Olufsen stand-alone audio or video master, TV, via a
BeoLink Converter using MasterLink and the AAL inputs.
Connected to an audio master and programmed as a ”video source” the iRadio2 may be selected as that, VMEM as an
example. Connected to a video master and programmed as an “audio source” the iRadio2 may be selected as that,
ATAPE as an example. Notice that the Bang & Olufsen equipment has to be programmed in option 2. See the relevant
Bang & Olufsen user guide.
Input
Socket
Source Selected
Direct
Option
CableLink
Option
Remarks
BeoLink Converter
1611 or 1612 used
with a Bang & Oluf-
sen audio master
and the iRadio2.
AAL
T
v
-
410
The iRadio2 connects
to the BeoLink
Converter with a
OneRemote VSNUT
adaptor cable, type
39207434.
AAL
a
-
412
AAL
d
-
414
AAL
f
s
-
416
The BeoLink Converter 1611 connects to a stand-alone Bang & Olufsen audio master
with a MasterLink cable. Connection of more Bang & Olufsen equipment might create
control conflicts.
Input
Socket
Source Selected
Direct
Option
CableLink
Option
Remarks
BeoLink Converter
1611 or 1612 used
with a Bang & Olufsen
TV and the iRadio2.
AAL
b
y
-
402
The iRadio2 connects
to the BeoLink
Converter with a
OneRemote ASNUT
adaptor cable, type
39207432.
AAL
z
-
404
AAL
U
Y
-
406
AAL
u
-
408
The BeoLink Converter 1611 connects to a stand-alone Bang & Olufsen TV with a
MasterLink cable. Connection of more Bang & Olufsen equipment might create control
conflicts.

16
www.oneremote.dk
Connection via a BeoLink Active in any Link Room
The OneRemote iRadio2 tuner may be connected to a Bang & Olufsen BeoLink Active with a vacant ‘PC’ socket.
Thus active speakers in any link room allow for the installation of the iRadio2 tuner and the opportunity of having a
local radio source controlled directly with the Bang & Olufsen remote control terminal.
Input
Socket
Source Selected
Direct
Option
CableLink
Option
Remarks
BeoLink Active
PC
c
hx
118
-
The iRadio2 connects
to the BeoLink Active
with a OneRemote
PCSNUT adaptor
cable, type 39207436.

17
www.oneremote.dk
Connection to a 21 Pin AV Socket on any Bang & Olufsen TV.
Input
Socket
Source Selected
Direct
Option
CableLink
Option
Remarks
All B&O TV models
BeoVision 10
BeoVision 8
BeoVision 7
BeoVision 6
BeoVision 4
BeoVision 3
BeoVision 1
BeoSystem 3
Avant models
LX models
LE models
LS models
L models
MX models
ME models
Scart
AV1 - AV6
NOT the
DECODER
input!!
T
v
110
410
The input is a scart socket, a
21 pin AV socket. Use a
OneRemote adaptor cable,
type 39207496.
Check the TV user guide for
programming of the AV
connections.
#
N
hv
110
410
f
s
116
416
a
112
412
d
114
414
/


