Canon MX320 User manual

Category
Scanner Transparancy Adapters
Type
User manual

This manual is also suitable for

How to Use This Manual
Printing This Manual
MC-3300-V1.00
Basic Guide
Describes the summary of
this product.
Advanced Guide
Describes the detailed
function of this product.
Troubleshooting
Page 1 of 817 pagesCanon MX320 series On-screen Manual
How to Use This Manual
Printing This Manual
MP-2721-V1.00
A
dvanced Guide
Contents
Safety Precautions
Overview of the Machine
Main Components
How to Navigate Menus on the LCD
Setting Up the Machine
Confirming the Telephone Line Connection
Specifying the Basic Settings for the Machine
Setting the Receive Mode
Copying
Making Copies
Using Various Copy Functions
Scanning
Saving Scanned Data
Printing from Your Computer
Printing Photos (Easy-PhotoPrint EX)
Printing Documents (Windows)
Printing Documents (Macintosh)
Faxing
Sending Faxes
Using Various Sending Functions
Receiving Faxes
Using Various Receiving Functions
Using Useful Fax Functions
Other Usages
Printing the Notebook or Graph Paper
Printing Photos Directly from Your Digital
Camera or Mobile Phone
Machine Settings
Solution Menu and My Printer
Loading Paper / Originals
Loading Paper
Loading Originals
Routine Maintenance
When Printing Becomes Faint or Colors Are
Incorrect
Replacing a FINE Cartridge
Cleaning the Paper Feed Roller
Appendix
Legal Limitations on Use of Your Product and
Use of Images
Tips on How to Use Your Machine
Page 2 of 817 pagesMX320 series Basic Guide
Advanced Guide
Troubleshooting
Contents
> Safety Precautions
Safety Precautions
Please read the safety warnings and cautions provided in this manual to ensure that you use the
machine safely. Do not attempt to use the machine in any way not described in this manual. It causes
unexpected accident, fire, or electric shock.
Warning
This product emits low level magnetic flux. If you use a cardiac pacemaker and feel abnormalities,
please move away from this product and consult your doctor.
The following are instructions that, if ignored, could result in death or serious personal injury
caused by incorrect operation of the equipment. These must be observed for safe operation.
Choosing a
location
Do not place the machine close to flammable solvents such as
alcohol or thinners.
Power
supply
Never attempt to plug in or unplug the machine from the
power supply when your hands are wet.
Always push the plug all the way into the power outlet.
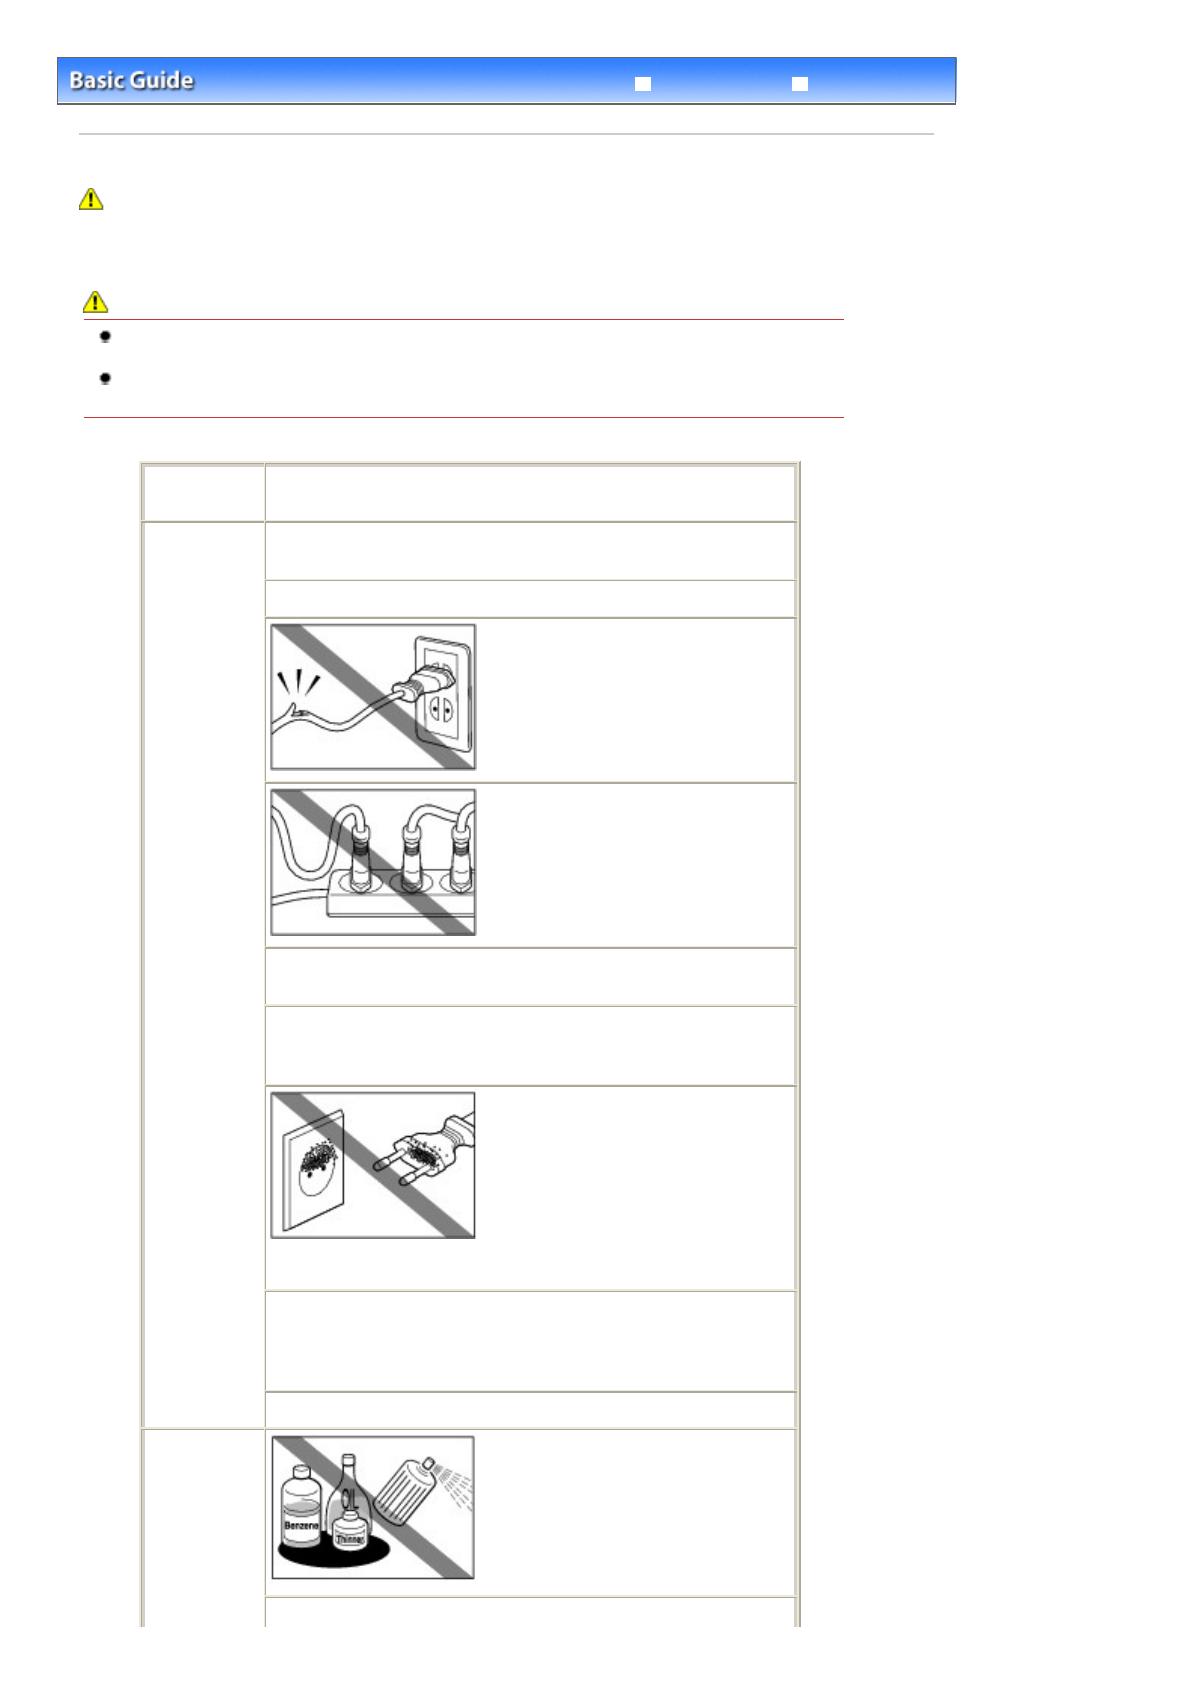
Never damage, modify, stretch or
excessively bend or twist the power
cord.
Do not place heavy objects on
the power cord.
Never plug the machine into a power
socket that is shared with other
equipment (extension lead/cord, 2- or
3-way adapter, etc.).
Never use the machine if the power cord is bundled or
knotted.
If you detect smoke, unusual smells or strange noises around
the machine, immediately unplug the machine at the power
supply and call for service.
Periodically, unplug the machine and
use a dry cloth to wipe off any dust or
dirt collected on the plug and the
power outlet.
If the machine is placed
at a location exposed to a lot of dust,
smoke, or high humidity, the dust
collected on the plug absorbs
moisture and may cause insulation
failure and fire.
If you hear thunder, disconnect the power supply of the
machine and refrain from using it. Leaving the machine
plugged in may cause fire, electric shock, or damage to the
machine, depending on the thunder storm.
Use the power cable included with the machine.
Cleaning the
machine
Use a damp cloth to clean the
machine.
Never use flammable
solvents such as alcohol, benzene or
thinners.
If flammable solvents come in contact with
electrical components inside the machine, it
could cause a fire or electric shock.
Always unplug the machine from the power outlet before
Page 3 of 817 pagesSafety Precautions
cleaning the machine.
If you accidentally switch the machine on while cleaning it, you could
injure yourself or damage the machine.
Maintaining
the machine
Do not attempt to disassemble or modify the machine.
There
are no user serviceable parts inside the machine.
The machine contains high-voltage components. Never attempt any
maintenance procedure not described in this guide.
Do not connect other than recommended devices to the Direct
Print Port or cable connector on the machine.
It could cause a
fire or electric shock.
Working
around the
machine
Do not use highly flammable sprays near the machine.
This could cause a fire or electric shock if the spray comes into contact
with electrical components inside the machine.
Caution
The following are instructions that, if ignored, could result in personal injury or material damage
caused by incorrect operation of the equipment. These must be observed for safe operation.
Choosing a
location
Do not install the machine in a location that is unstable or
subject to excessive vibration.
Do not install the machine in locations that are very humid or
dusty, in direct sunlight, outdoors, or close to a heating
source.
To avoid the risk of fire or electric shocks, install the
machine in a location with an ambient temperature range of
5°C to 35°C (41°F to 95°F) and humidity of 10% to 90%
(condensation free).
Do not place the machine on a thick rug or carpet.
Do not place the machine with its back attached to the wall.
Power supply Ensure that the area around the
power outlet is kept clear at all
times so you can easily unplug the
power cord if necessary.
Never remove the plug by pulling
on the cord.
Do not use an extension lead/cord.
Working around
the machine
Never put your hands or fingers in the machine while it is
printing.
When moving the machine, carry the machine at both ends.
Do not hold the Operation Panel.
Do not place any object on the machine.
Do not place metal objects (paper clips, staples, etc.) or
containers of flammable solvents (alcohol, thinners, etc.) on
top of the machine.
If any foreign object (metal or liquid) fall into the machine,
Page 4 of 817 pagesSafety Precautions
unplug the power cord and call for service.
Do not transport or use the machine on a slant, vertically or
upside-down, as the ink may leak and damage the machine.
When loading a thick book on the Platen Glass, do not press
hard on the Document Cover.The Platen Glass may break
and cause injury.
FINE Cartridges
(Ink Cartridges)
Keep FINE Cartridges (Ink Cartridges) out of the reach of
children.
In case ink is accidentally licked or swallowed, rinse out mouth or
give one or two glasses of water to drink.
If irritation or discomfort occurs, obtain medical advice immediately.
In case ink gets in contact with eyes, rinse with water
immediately.
In case ink gets in contact with skin, wash with soap and
water immediately.
If irritation to eyes or skin persists, obtain medical advice immediately.
Do not shake FINE Cartridges (Ink Cartridges).
Ink may spill out and stain clothing or the surrounding area.
Never touch the electrical contacts
or print head nozzles on a FINE
Cartridge (Ink Cartridge) after
printing.
The metal parts may be very hot and
could cause burns.
Do not throw FINE Cartridges (Ink Cartridges) into fire.
Do not attempt to disassemble or modify the FINE
Cartridges.
Do not handle the FINE Cartridges roughly such as applying
them excessive pressure or dropping them.
Do not rinse or wipe the FINE Cartridges.
Once you have installed the FINE Cartridges, do not remove
them unnecessarily.
Note when you place the machine near other electrical appliances such as fluorescent lamps
Place the machine at least 5.91 inches / 15 cm away from other electrical appliances such as
fluorescent lamps. If the machine is placed closer to those, it may not be able to work properly due
to fluorescent noises.
When you disconnect the power plug
When you disconnect the power plug, always press the
ON
button and be sure that the light of the
ON
button (in green) goes out. If you disconnect the power plug from the power outlet when the
ON
button is lit or flashing, the Print Head cannot be protected and you may not be able to print later.
Page top
Page 5 of 817 pagesSafety Precautions
Advanced Guide
Troubleshooting
Contents
> Overview of the Machine
Overview of the Machine
This section shows the component names of the machine and describes the basic operations you need
to know before using it.
Main Components
Front View
Rear View
Inside View
Operation Panel
How to Navigate Menus on the LCD
Basic Operation in Each Mode
Selecting Mode
Selecting Menu Item from Specified Mode
Basic Operation on the Setting Options
Page top
Page 6 of 817 pagesOverview of the Machine
Advanced Guide
Troubleshooting
Contents
>
Overview of the Machine
> Main Components
Main Components
Front View
Rear View
Inside View
Operation Panel
Front View
(1)
ADF (Auto Document Feeder)
Load a document to copy, scan, or fax. The document loaded in the Document Tray are scanned
automatically one sheet at a time.
See
Loading a Document in the ADF
.
(2)
Document Feeder Cover
Open when clearing jammed documents.
(3)
Document Guides
A
djust these guides to match the width of document in the ADF.
(4)
Paper Support
Supports paper loaded in the Rear Tray. Open it to load paper.
(5)
Rear Tray
Load various sizes or types of paper which you can use on the machine. Two or more sheets of the same
size and type of paper can be loaded at the same time, and fed automatically one sheet at a time.
See
Loading Paper
.
(6)
Paper Guides
Slide to align with both sides of the paper stack.
(7)
Document Cover
Open to load an original on the Platen Glass.
(8)
Document Tray
Open to load a document in the ADF. You can load two or more sheets of document of the same size and
thickness. Load the document with the side you want to scan facing up.
(9)
Document Output Slot
Documents scanned from the Document Tray are delivered here.
(10)
Paper Output Tray
Opens automatically when printing or copying starts and printed papers are ejected.
Page 7 of 817 pagesMain Components
(11)
Operation Panel
Use to change the settings of the machine or to operate it.
See
Operation Panel
.
(12)
Scanning Unit Detection Button
Locks the Scanning Unit (Cover) while the Document Cover is open. This button is pressed down when the
Document Cover is closed, so that you can open the Scanning Unit (Cover). (You do not need to touch this
button.)
For information on the Scanning Unit (Cover), see Scanning Unit (Cover)
.
(13)
Direct Print Port
Connect a PictBridge compliant device such as a digital camera or the optional Bluetooth Unit BU-30* to print
directly.
See
Printing Photos Directly from Your Digital Camera or Mobile Phone
.
You can also insert a USB flash drive to this port to save scanned data on it.
Refer to the on-screen manual:
A
dvanced Guide
.
* The Bluetooth Unit is not available in some countries or regions depending on the local laws and
regulations. For details, contact your service center.
Warning
Do not connect any equipment other than PictBridge compliant devices, the optional
Bluetooth Unit BU-30, and USB flash drives to the Direct Print Port of the machine. This
may cause fire, electric shock, or damage to the machine.
Important
Do not touch the metal casing.
(14)
Platen Glass
Load an original to copy, scan, or fax.
Rear View
(15)
External Device Jack
Connects an external device such as telephone, answering machine, or modem.
Page 8 of 817 pagesMain Components
Important
Do not touch the metal casing.
Note
Remove the Telephone connector cap to connect the external device.
(16)
Telephone Line Jack
Connects with the telephone line.
Caution
To avoid an electric shock, do not touch the metallic casing.
(17)
USB Port
Plug in the USB cable to connect the machine with a computer.
Important
Do not touch the metal casing.
Do not plug in or unplug the USB cable while the machine is printing from or scanning
originals to the computer.
(18)
Power Cord Connector
Plug in the supplied power cord.
Inside View
(19)
Ink Cartridge Locking Covers
Locks the FINE Cartridges into place.
(20)
Scanning Unit (Cover)
Scans an original. Open it to replace FINE Cartridges or to remove jammed paper inside the machine. To
open the Scanning Unit (Cover), lift it with the Document Cover closed.
(21)
Scanning Unit Support
Holds the Scanning Unit (Cover) being opened.
(22)
FINE Cartridge Holder
Install the FINE Cartridges.
The Color FINE Cartridge should be installed into the left slot and the Black FINE Cartridge should be installed
into the right slot.
(23)
FINE Cartridges (Ink Cartridges)
A
replaceable cartridge that is integrated with Print Head and ink tank.
Note
For details on installing the FINE Cartridges, refer to the printed manual:
Getting Started
.
Page 9 of 817 pagesMain Components
Important
The area (A) indicated in the figure below may be splattered with ink. It does not affect the
performance of the machine.
Do not touch the area (A). The machine may not print properly if you touch it.
Operation Panel
(1)
ON button (Power lamp)
Turns the power on or off. Lights or flashes green to indicate the power status. Before turning on the
power, make sure that the Document Cover is closed.
Important
Disconnecting the power plug
When disconnecting the power plug after turning off the power, be sure to confirm that
the
ON
button is not lit. If the power plug is disconnected from the wall outlet while the
ON
button is lit or flashing, the machine may become unable to print properly since the Print
Head is not protected.
If the power plug is disconnected, the date/time settings as well as all documents stored in
memory will be lost. Send an unsent fax or print a necessary document when the power
plug is disconnected.
Note
The machine cannot receive faxes when the power is turned off.
The power cannot be turned off while the machine is sending or receiving a fax, or when
there are unsent faxes in the machine's memory.
(2)
COPY button
Switches the machine to copy mode.
(3)
FAX button
Switches the machine to fax mode.
(4)
SCAN button
Switches the machine to scan mode.
(5)
Menu button
Displays the menu items.
(6)
Settings button
Page 10 of 817 pagesMain Components
Changes the page size, media type, and print quality settings in each mode.
(7)
LCD (Liquid Crystal Display)
Displays messages, menu selections, and the operational status.
Note
The LCD will turn off if the machine is not operated for about 5 minutes. To restore the
display, press any button except the
ON
button or perform the print operation. The display
will be also restored when receiving faxes.
(8)
Numeric buttons
Used to enter numerical values such as the number of copies, as well as fax/telephone numbers and
characters.
(9)
Redial/Pause button
Used to select and redial a number recently dialed using the Numeric buttons.
A
lso to enter pause time between or after numbers when dialing or registering numbers for example
International calls.
(10)
Coded Dial button
Displays the search telephone number screen. Enter the first letter of a pre-registered name to search a
pre-registered fax/telephone number or group, and use the
(-) or
(+) button to select a desired
destination.
Press the button to switch to the coded speed dial screen. Enter a two-digit code to select a desired
destination. You can also use the
(-) or
(+) button to select a desired destination.
(11)
Black button
Starts to make black & white print, copy, scan, fax, etc.
(12)
Stop button
Cancels operation when print, transmission, or scan job is in progress.
(13)
Color button
Starts to make color print, copy, scan, fax, etc.
(14)
FAX Quality button
Selects the scan resolution and contrast of the fax you are sending.
(15)
Tone button
In the fax mode, switches to tone dialing temporarily or used to dial with the Numeric buttons, and also
changes the input mode when entering characters.
(16)
OK button
Selects a menu or setting item. See How to Navigate Menus on the LCD
.
Resolves an error when printing is in progress or resumes the machine's normal operation after removing
j
ammed paper or to eject documents remaining in the ADF.
(17)
(-)
(+) buttons
Scrolls through menu selections and increases/decreases setting values, such as the number of copies.
A
lso, the
(-) button cancels the entered character, and the
(+) button enters a space between
characters when entering characters.
(18)
Back button
Cancels operations and returns the LCD to the previous screen.
(19)
Alarm lamp
Lights or flashes orange when an error, such as paper-out or ink-out, occurs.
(20)
In Use/Memory lamp
Flashes when sending or receiving faxes, and lights when there are documents saved in the machine's
memory.
Note
The machine makes the beep sound when pressing buttons on the Operation Panel.
To change the beep volume, see
Machine Settings
.
Page 11 of 817 pagesMain Components
Page top
Page 12 of 817 pagesMain Components
Advanced Guide
Troubleshooting
Contents
>
Overview of the Machine
> How to Navigate Menus on the LCD
How to Navigate Menus on the LCD
You can use the machine to make copies, send/receive faxes, or scan originals without a computer.You
can also make good use of the various functions of the machine with the menu items and the setting
options on the LCD.
This section describes the basic operation to use the menu items and the setting options in each mode.
Basic Operation in Each Mode
Selecting Mode
Selecting Menu Item from Specified Mode
Basic Operation on the Setting Options
Basic Operation in Each Mode
Press the mode button (A) to switch the screen to the desired mode first.
Then, use the
Menu
button (B) to select available functions in each mode.
To change the page size, media type, or print quality, press the
Settings
button (C).
Note
Press the
Menu
button repeatedly until the desired menu item appears.Use the
(-) or (+)
button to select the item, and press the
OK
button to set it.
You can return the LCD to the previous screen by pressing the
Back
button.
For details on each item, see
Selecting Menu Item from Specified Mode
.
To select Maintenance or Device settings, press the
Menu
button repeatedly until the desired menu
item appears in any mode.
Press the
Stop
button while menu items or setting options are displayed to return to the standby
screen for the current mode.
Selecting Mode
Press the appropriate mode button to switch to the desired mode.This section describes the menu
items displayed in each mode.
Switch to the copy mode.
The options such as Frame erase or 2-on-1 copy can be specified from the Special copy
menu.
The settings in Fax settings, Device settings, Maintenance, and Template print options can also
be specified.
Switch to the fax mode.
Printing report/list, printing faxes saved on the memory, registering numbers, selecting a
receive mode are available from the Fax settings menu.
The Device settings, Maintenance, and Template print options can also be specified.
Switch to the scan mode.
The place to save the scanned data can be specified from the Save to menu.
The Device settings, Maintenance, and Template print options can also be specified.
Selecting Menu Item from Specified Mode
Refer to the following list of the menu items to select the function from the specified mode.
Copy mode
Page 13 of 817 pagesHow to Navigate Menus on the LCD
Menu
Special copy
Frame erase
See
Using Various Copy Functions
.
Sticker copy
See
Using Various Copy Functions
.
Borderless copy
See
Using Various Copy Functions
.
Image repeat
See
Using Various Copy Functions
.
2-on-1 copy
See
Using Various Copy Functions
.
4-on-1 copy
See
Using Various Copy Functions
.
Collated copy
See
Using Various Copy Functions
.
Menu
Fax settings
See
Fax settings
in "Fax mode".
Menu
Device settings
See
Device settings
in "Maintenance/setting".
Menu
Maintenance
See
Maintenance
in "Maintenance/setting".
Menu
Template print
See
Printing the Notebook or Graph Paper
.
Fax mode
Menu
Fax settings
Page 14 of 817 pagesHow to Navigate Menus on the LCD
Receive mode set.
See
Setting the Receive Mode
.
Memory reference
See
Memory reference
.
Print reports/lists
See
Print reports/lists
.
TEL no. registration
See
TEL no. registration
.
User settings
See
Other Basic Setting Items
.
Transmission settings
See
Settings for Sending Faxes
.
Reception settings
See
Settings for Receiving Faxes
.
Menu
Device settings
See
Device settings
in "Maintenance/setting".
Menu
Maintenance
See
Maintenance
in "Maintenance/setting".
Menu
Template print
See
Printing the Notebook or Graph Paper
.
Scan mode
Menu
Save to
See
Saving Scanned Data
.
Menu
Device settings
See
Device settings
in "Maintenance/setting".
Menu
Maintenance
See
Maintenance
in "Maintenance/setting".
Page 15 of 817 pagesHow to Navigate Menus on the LCD
Menu
Template print
See
Printing the Notebook or Graph Paper
.
Maintenance/setting
Device settings
Print settings
See
Print settings
.
A
dvanced settings
See
A
dvanced settings.
Mobile phone settings*
1
See
Mobile phone settings
.
Bluetooth settings*
1
See
Bluetooth settings
.
PictBridge settings
See
PictBridge settings.
Reset setting
See
Reset setting
.
*1 Appears only when the optional Bluetooth unit is attached to the machine.
Maintenance
Nozzle check
See
Printing the Nozzle Check Pattern
.
Cleaning
See
Cleaning the Print Head
.
Deep cleaning
See
Cleaning the Print Head Deeply
.
Manual head align
See
A
ligning the Print Head
.
Print head align value
See
A
ligning the Print Head
.
Roller cleaning
See
Cleaning the Paper Feed Roller
.
Page 16 of 817 pagesHow to Navigate Menus on the LCD
Bottom cleaning*
2
*2 For details on the Bottom cleaning, refer to the on-screen manual:
dvanced
Guide
.
Basic Operation on the Setting Options
You can change the settings in each mode by pressing the
Settings
button, when printing in the copy
mode or fax mode or when saving scanned data on a USB flash drive in the scan mode.
You can change the print settings such as page size, media type, etc.
This section describes the procedure to change the settings, taking the procedure to specify
4"x6"(10x15cm) for the page size in the copy mode as an example.
When printing from a computer, see Printing from Your Computer
.
Note
To change the settings when printing from a PictBridge compliant device or wireless communication
device, refer to the on-screen manual:
A
dvanced Guide
.
1.
Display the setting options.
(1)
Press the
COPY
button to switch to the copy mode.
(2)
Press the
Settings
button repeatedly until Page size appears.
2.
Change the setting.
(1)
Use the
(-) or
(+) button to select the page size.
Example: Select 4"x6"(10x15cm) here.
(2)
Press the
OK
button.
Note
To change setting other than Page size, press the
Settings
button repeatedly until the desired
option appears.
For details on the setting options specified by the Settings button
For the settings in the copy mode, see
Changing the Settings
.
For the settings in the fax mode, see
Preparing for Receiving a Fax
.
You can also change the image quality or density of sending faxes with the
FAX Quality
button.For details, see
Sending a Fax with the Numeric Buttons
.
Page top
Page 17 of 817 pagesHow to Navigate Menus on the LCD
Advanced Guide
Troubleshooting
Contents
> Setting Up the Machine
Setting Up the Machine
This section describes typical examples of connecting and setting up the machine before using the
faxing functions.
Confirming the Telephone Line Connection
Connecting Various Lines
Setting the Telephone Line Type
Specifying the Basic Settings for the Machine
Registering Sender Information
Guidelines for Entering Numbers, Letters, and Symbols
Entering the Date and Time
Setting Daylight Saving Time (Summer Time)
Registering Your Fax/Telephone Number and Name
Other Basic Setting Items
Setting the Receive Mode
Selecting a Receive Mode
Page top
Page 18 of 817 pagesSetting Up the Machine
Advanced Guide
Troubleshooting
Contents
> Setting Up the Machine > Confirming the Telephone Line Connection
Confirming the Telephone Line Connection
For the basic connection of the machine, refer to the printed manual:
Getting Started
. This guide
describes other typical connection.
The machine cannot send/receive faxes if the connection is incorrect. Connect the machine correctly.
Connecting Various Lines
Setting the Telephone Line Type
Important
If the Power Disconnects Unexpectedly
If there is a power failure or if you accidentally disconnect the power plug, the date/time settings as
well as all documents stored in memory will be lost. The settings of user data, coded speed dial, group
dial, and rejected numbers are retained.
If the power disconnects, the following will apply:
You will not be able to send or receive faxes, make copies, or scan originals.
When you are connecting the telephone or answering machine, whether or not you can use it
depends upon your telephone line, telephone, or answering machine.
Connecting Various Lines
These are examples and could not be guaranteed to suit every connecting condition. For details, refer to
the instruction manual supplied with the network device (control devices such as an xDSL (Digital
Subscriber Line) modem or terminal adapter) you are connecting to this machine.
Note
xDSL is the generic term for the high speed digital communication technology with telephone line
such as ADSL/HDSL/SDSL/VDSL.
Connecting a Telephone or Answering Machine via a Computer
(A) Computer
(B) Telephone or answering machine
(C) Analog line
Note
Before connecting a telephone or answering machine, remove the Telephone connector cap.
For users in the UK
If the connector of the external device cannot be connected to the jack on the machine, you will need
to purchase a B.T. adapter to connect as follows:
A
ttach the B.T. adapter to the modular cable connecting the external device, then connect the B.T.
adapter to the
(External device) jack.
Page 19 of 817 pagesConfirming the Telephone Line Connection
Connecting to an xDSL
(A)
Telephone or answering machine
Note
Before connecting a telephone or answering machine, remove the Telephone connector cap.
(B) Splitter
(C) Digital Subscriber Line
(D) Computer
(E) xDSL modem (splitter may be built-in to the modem)
Important
Do not branch the telephone line before the splitter (wall side). And also, do not connect
splitters in parallel. The machine may not be able to operate properly.
Note
When connecting to the xDSL line, select the same line type as you are subscribing in
Telephone line type.
Connecting to an ISDN Line
For details on ISDN (Integrated Service Digital Network) connection and settings, refer to the
manuals supplied with your terminal adapter or dial-up router.
Setting the Telephone Line Type
Before using your machine, make sure you set the correct telephone line type for your telephone line. If
you are unsure of your telephone line type, contact your telephone company. For xDSL or ISDN
connections, contact the telephone company or service provider to confirm your line type.
Note
Rotary pulse is not supported depending on the selected country in Country select displayed when
you start the machine for the first time after purchase. The Telephone line type menu will not
appear in such country.
You can print the User's data list to check the current setting.
For details, refer to the on-screen manual:
A
dvanced Guide
.
1.
Display the Telephone line type screen.
(1)
Press the
FAX button, and press the
Menu
button.
The Fax settings menu will appear.
Page 20 of 817 pagesConfirming the Telephone Line Connection
  • Page 1 1
  • Page 2 2
  • Page 3 3
  • Page 4 4
  • Page 5 5
  • Page 6 6
  • Page 7 7
  • Page 8 8
  • Page 9 9
  • Page 10 10
  • Page 11 11
  • Page 12 12
  • Page 13 13
  • Page 14 14
  • Page 15 15
  • Page 16 16
  • Page 17 17
  • Page 18 18
  • Page 19 19
  • Page 20 20
  • Page 21 21
  • Page 22 22
  • Page 23 23
  • Page 24 24
  • Page 25 25
  • Page 26 26
  • Page 27 27
  • Page 28 28
  • Page 29 29
  • Page 30 30
  • Page 31 31
  • Page 32 32
  • Page 33 33
  • Page 34 34
  • Page 35 35
  • Page 36 36
  • Page 37 37
  • Page 38 38
  • Page 39 39
  • Page 40 40
  • Page 41 41
  • Page 42 42
  • Page 43 43
  • Page 44 44
  • Page 45 45
  • Page 46 46
  • Page 47 47
  • Page 48 48
  • Page 49 49
  • Page 50 50
  • Page 51 51
  • Page 52 52
  • Page 53 53
  • Page 54 54
  • Page 55 55
  • Page 56 56
  • Page 57 57
  • Page 58 58
  • Page 59 59
  • Page 60 60
  • Page 61 61
  • Page 62 62
  • Page 63 63
  • Page 64 64
  • Page 65 65
  • Page 66 66
  • Page 67 67
  • Page 68 68
  • Page 69 69
  • Page 70 70
  • Page 71 71
  • Page 72 72
  • Page 73 73
  • Page 74 74
  • Page 75 75
  • Page 76 76
  • Page 77 77
  • Page 78 78
  • Page 79 79
  • Page 80 80
  • Page 81 81
  • Page 82 82
  • Page 83 83
  • Page 84 84
  • Page 85 85
  • Page 86 86
  • Page 87 87
  • Page 88 88
  • Page 89 89
  • Page 90 90
  • Page 91 91
  • Page 92 92
  • Page 93 93
  • Page 94 94
  • Page 95 95
  • Page 96 96
  • Page 97 97
  • Page 98 98
  • Page 99 99
  • Page 100 100
  • Page 101 101
  • Page 102 102
  • Page 103 103
  • Page 104 104
  • Page 105 105
  • Page 106 106
  • Page 107 107
  • Page 108 108
  • Page 109 109
  • Page 110 110
  • Page 111 111
  • Page 112 112
  • Page 113 113
  • Page 114 114
  • Page 115 115
  • Page 116 116
  • Page 117 117
  • Page 118 118
  • Page 119 119
  • Page 120 120
  • Page 121 121
  • Page 122 122
  • Page 123 123
  • Page 124 124
  • Page 125 125
  • Page 126 126
  • Page 127 127
  • Page 128 128
  • Page 129 129
  • Page 130 130
  • Page 131 131
  • Page 132 132
  • Page 133 133
  • Page 134 134
  • Page 135 135
  • Page 136 136
  • Page 137 137
  • Page 138 138
  • Page 139 139
  • Page 140 140
  • Page 141 141
  • Page 142 142
  • Page 143 143
  • Page 144 144
  • Page 145 145
  • Page 146 146
  • Page 147 147
  • Page 148 148
  • Page 149 149
  • Page 150 150
  • Page 151 151
  • Page 152 152
  • Page 153 153
  • Page 154 154
  • Page 155 155
  • Page 156 156
  • Page 157 157
  • Page 158 158
  • Page 159 159
  • Page 160 160
  • Page 161 161
  • Page 162 162
  • Page 163 163
  • Page 164 164
  • Page 165 165
  • Page 166 166
  • Page 167 167
  • Page 168 168
  • Page 169 169
  • Page 170 170
  • Page 171 171
  • Page 172 172
  • Page 173 173
  • Page 174 174
  • Page 175 175
  • Page 176 176
  • Page 177 177
  • Page 178 178
  • Page 179 179
  • Page 180 180
  • Page 181 181
  • Page 182 182
  • Page 183 183
  • Page 184 184
  • Page 185 185
  • Page 186 186
  • Page 187 187
  • Page 188 188
  • Page 189 189
  • Page 190 190
  • Page 191 191
  • Page 192 192
  • Page 193 193
  • Page 194 194
  • Page 195 195
  • Page 196 196
  • Page 197 197
  • Page 198 198
  • Page 199 199
  • Page 200 200
  • Page 201 201
  • Page 202 202
  • Page 203 203
  • Page 204 204
  • Page 205 205
  • Page 206 206
  • Page 207 207
  • Page 208 208
  • Page 209 209
  • Page 210 210
  • Page 211 211
  • Page 212 212
  • Page 213 213
  • Page 214 214
  • Page 215 215
  • Page 216 216
  • Page 217 217
  • Page 218 218
  • Page 219 219
  • Page 220 220
  • Page 221 221
  • Page 222 222
  • Page 223 223
  • Page 224 224
  • Page 225 225
  • Page 226 226
  • Page 227 227
  • Page 228 228
  • Page 229 229
  • Page 230 230
  • Page 231 231
  • Page 232 232
  • Page 233 233
  • Page 234 234
  • Page 235 235
  • Page 236 236
  • Page 237 237
  • Page 238 238
  • Page 239 239
  • Page 240 240
  • Page 241 241
  • Page 242 242
  • Page 243 243
  • Page 244 244
  • Page 245 245
  • Page 246 246
  • Page 247 247
  • Page 248 248
  • Page 249 249
  • Page 250 250
  • Page 251 251
  • Page 252 252
  • Page 253 253
  • Page 254 254
  • Page 255 255
  • Page 256 256
  • Page 257 257
  • Page 258 258
  • Page 259 259
  • Page 260 260
  • Page 261 261
  • Page 262 262
  • Page 263 263
  • Page 264 264
  • Page 265 265
  • Page 266 266
  • Page 267 267
  • Page 268 268
  • Page 269 269
  • Page 270 270
  • Page 271 271
  • Page 272 272
  • Page 273 273
  • Page 274 274
  • Page 275 275
  • Page 276 276
  • Page 277 277
  • Page 278 278
  • Page 279 279
  • Page 280 280
  • Page 281 281
  • Page 282 282
  • Page 283 283
  • Page 284 284
  • Page 285 285
  • Page 286 286
  • Page 287 287
  • Page 288 288
  • Page 289 289
  • Page 290 290
  • Page 291 291
  • Page 292 292
  • Page 293 293
  • Page 294 294
  • Page 295 295
  • Page 296 296
  • Page 297 297
  • Page 298 298
  • Page 299 299
  • Page 300 300
  • Page 301 301
  • Page 302 302
  • Page 303 303
  • Page 304 304
  • Page 305 305
  • Page 306 306
  • Page 307 307
  • Page 308 308
  • Page 309 309
  • Page 310 310
  • Page 311 311
  • Page 312 312
  • Page 313 313
  • Page 314 314
  • Page 315 315
  • Page 316 316
  • Page 317 317
  • Page 318 318
  • Page 319 319
  • Page 320 320
  • Page 321 321
  • Page 322 322
  • Page 323 323
  • Page 324 324
  • Page 325 325
  • Page 326 326
  • Page 327 327
  • Page 328 328
  • Page 329 329
  • Page 330 330
  • Page 331 331
  • Page 332 332
  • Page 333 333
  • Page 334 334
  • Page 335 335
  • Page 336 336
  • Page 337 337
  • Page 338 338
  • Page 339 339
  • Page 340 340
  • Page 341 341
  • Page 342 342
  • Page 343 343
  • Page 344 344
  • Page 345 345
  • Page 346 346
  • Page 347 347
  • Page 348 348
  • Page 349 349
  • Page 350 350
  • Page 351 351
  • Page 352 352
  • Page 353 353
  • Page 354 354
  • Page 355 355
  • Page 356 356
  • Page 357 357
  • Page 358 358
  • Page 359 359
  • Page 360 360
  • Page 361 361
  • Page 362 362
  • Page 363 363
  • Page 364 364
  • Page 365 365
  • Page 366 366
  • Page 367 367
  • Page 368 368
  • Page 369 369
  • Page 370 370
  • Page 371 371
  • Page 372 372
  • Page 373 373
  • Page 374 374
  • Page 375 375
  • Page 376 376
  • Page 377 377
  • Page 378 378
  • Page 379 379
  • Page 380 380
  • Page 381 381
  • Page 382 382
  • Page 383 383
  • Page 384 384
  • Page 385 385
  • Page 386 386
  • Page 387 387
  • Page 388 388
  • Page 389 389
  • Page 390 390
  • Page 391 391
  • Page 392 392
  • Page 393 393
  • Page 394 394
  • Page 395 395
  • Page 396 396
  • Page 397 397
  • Page 398 398
  • Page 399 399
  • Page 400 400
  • Page 401 401
  • Page 402 402
  • Page 403 403
  • Page 404 404
  • Page 405 405
  • Page 406 406
  • Page 407 407
  • Page 408 408
  • Page 409 409
  • Page 410 410
  • Page 411 411
  • Page 412 412
  • Page 413 413
  • Page 414 414
  • Page 415 415
  • Page 416 416
  • Page 417 417
  • Page 418 418
  • Page 419 419
  • Page 420 420
  • Page 421 421
  • Page 422 422
  • Page 423 423
  • Page 424 424
  • Page 425 425
  • Page 426 426
  • Page 427 427
  • Page 428 428
  • Page 429 429
  • Page 430 430
  • Page 431 431
  • Page 432 432
  • Page 433 433
  • Page 434 434
  • Page 435 435
  • Page 436 436
  • Page 437 437
  • Page 438 438
  • Page 439 439
  • Page 440 440
  • Page 441 441
  • Page 442 442
  • Page 443 443
  • Page 444 444
  • Page 445 445
  • Page 446 446
  • Page 447 447
  • Page 448 448
  • Page 449 449
  • Page 450 450
  • Page 451 451
  • Page 452 452
  • Page 453 453
  • Page 454 454
  • Page 455 455
  • Page 456 456
  • Page 457 457
  • Page 458 458
  • Page 459 459
  • Page 460 460
  • Page 461 461
  • Page 462 462
  • Page 463 463
  • Page 464 464
  • Page 465 465
  • Page 466 466
  • Page 467 467
  • Page 468 468
  • Page 469 469
  • Page 470 470
  • Page 471 471
  • Page 472 472
  • Page 473 473
  • Page 474 474
  • Page 475 475
  • Page 476 476
  • Page 477 477
  • Page 478 478
  • Page 479 479
  • Page 480 480
  • Page 481 481
  • Page 482 482
  • Page 483 483
  • Page 484 484
  • Page 485 485
  • Page 486 486
  • Page 487 487
  • Page 488 488
  • Page 489 489
  • Page 490 490
  • Page 491 491
  • Page 492 492
  • Page 493 493
  • Page 494 494
  • Page 495 495
  • Page 496 496
  • Page 497 497
  • Page 498 498
  • Page 499 499
  • Page 500 500
  • Page 501 501
  • Page 502 502
  • Page 503 503
  • Page 504 504
  • Page 505 505
  • Page 506 506
  • Page 507 507
  • Page 508 508
  • Page 509 509
  • Page 510 510
  • Page 511 511
  • Page 512 512
  • Page 513 513
  • Page 514 514
  • Page 515 515
  • Page 516 516
  • Page 517 517
  • Page 518 518
  • Page 519 519
  • Page 520 520
  • Page 521 521
  • Page 522 522
  • Page 523 523
  • Page 524 524
  • Page 525 525
  • Page 526 526
  • Page 527 527
  • Page 528 528
  • Page 529 529
  • Page 530 530
  • Page 531 531
  • Page 532 532
  • Page 533 533
  • Page 534 534
  • Page 535 535
  • Page 536 536
  • Page 537 537
  • Page 538 538
  • Page 539 539
  • Page 540 540
  • Page 541 541
  • Page 542 542
  • Page 543 543
  • Page 544 544
  • Page 545 545
  • Page 546 546
  • Page 547 547
  • Page 548 548
  • Page 549 549
  • Page 550 550
  • Page 551 551
  • Page 552 552
  • Page 553 553
  • Page 554 554
  • Page 555 555
  • Page 556 556
  • Page 557 557
  • Page 558 558
  • Page 559 559
  • Page 560 560
  • Page 561 561
  • Page 562 562
  • Page 563 563
  • Page 564 564
  • Page 565 565
  • Page 566 566
  • Page 567 567
  • Page 568 568
  • Page 569 569
  • Page 570 570
  • Page 571 571
  • Page 572 572
  • Page 573 573
  • Page 574 574
  • Page 575 575
  • Page 576 576
  • Page 577 577
  • Page 578 578
  • Page 579 579
  • Page 580 580
  • Page 581 581
  • Page 582 582
  • Page 583 583
  • Page 584 584
  • Page 585 585
  • Page 586 586
  • Page 587 587
  • Page 588 588
  • Page 589 589
  • Page 590 590
  • Page 591 591
  • Page 592 592
  • Page 593 593
  • Page 594 594
  • Page 595 595
  • Page 596 596
  • Page 597 597
  • Page 598 598
  • Page 599 599
  • Page 600 600
  • Page 601 601
  • Page 602 602
  • Page 603 603
  • Page 604 604
  • Page 605 605
  • Page 606 606
  • Page 607 607
  • Page 608 608
  • Page 609 609
  • Page 610 610
  • Page 611 611
  • Page 612 612
  • Page 613 613
  • Page 614 614
  • Page 615 615
  • Page 616 616
  • Page 617 617
  • Page 618 618
  • Page 619 619
  • Page 620 620
  • Page 621 621
  • Page 622 622
  • Page 623 623
  • Page 624 624
  • Page 625 625
  • Page 626 626
  • Page 627 627
  • Page 628 628
  • Page 629 629
  • Page 630 630
  • Page 631 631
  • Page 632 632
  • Page 633 633
  • Page 634 634
  • Page 635 635
  • Page 636 636
  • Page 637 637
  • Page 638 638
  • Page 639 639
  • Page 640 640
  • Page 641 641
  • Page 642 642
  • Page 643 643
  • Page 644 644
  • Page 645 645
  • Page 646 646
  • Page 647 647
  • Page 648 648
  • Page 649 649
  • Page 650 650
  • Page 651 651
  • Page 652 652
  • Page 653 653
  • Page 654 654
  • Page 655 655
  • Page 656 656
  • Page 657 657
  • Page 658 658
  • Page 659 659
  • Page 660 660
  • Page 661 661
  • Page 662 662
  • Page 663 663
  • Page 664 664
  • Page 665 665
  • Page 666 666
  • Page 667 667
  • Page 668 668
  • Page 669 669
  • Page 670 670
  • Page 671 671
  • Page 672 672
  • Page 673 673
  • Page 674 674
  • Page 675 675
  • Page 676 676
  • Page 677 677
  • Page 678 678
  • Page 679 679
  • Page 680 680
  • Page 681 681
  • Page 682 682
  • Page 683 683
  • Page 684 684
  • Page 685 685
  • Page 686 686
  • Page 687 687
  • Page 688 688
  • Page 689 689
  • Page 690 690
  • Page 691 691
  • Page 692 692
  • Page 693 693
  • Page 694 694
  • Page 695 695
  • Page 696 696
  • Page 697 697
  • Page 698 698
  • Page 699 699
  • Page 700 700
  • Page 701 701
  • Page 702 702
  • Page 703 703
  • Page 704 704
  • Page 705 705
  • Page 706 706
  • Page 707 707
  • Page 708 708
  • Page 709 709
  • Page 710 710
  • Page 711 711
  • Page 712 712
  • Page 713 713
  • Page 714 714
  • Page 715 715
  • Page 716 716
  • Page 717 717
  • Page 718 718
  • Page 719 719
  • Page 720 720
  • Page 721 721
  • Page 722 722
  • Page 723 723
  • Page 724 724
  • Page 725 725
  • Page 726 726
  • Page 727 727
  • Page 728 728
  • Page 729 729
  • Page 730 730
  • Page 731 731
  • Page 732 732
  • Page 733 733
  • Page 734 734
  • Page 735 735
  • Page 736 736
  • Page 737 737
  • Page 738 738
  • Page 739 739
  • Page 740 740
  • Page 741 741
  • Page 742 742
  • Page 743 743
  • Page 744 744
  • Page 745 745
  • Page 746 746
  • Page 747 747
  • Page 748 748
  • Page 749 749
  • Page 750 750
  • Page 751 751
  • Page 752 752
  • Page 753 753
  • Page 754 754
  • Page 755 755
  • Page 756 756
  • Page 757 757
  • Page 758 758
  • Page 759 759
  • Page 760 760
  • Page 761 761
  • Page 762 762
  • Page 763 763
  • Page 764 764
  • Page 765 765
  • Page 766 766
  • Page 767 767
  • Page 768 768
  • Page 769 769
  • Page 770 770
  • Page 771 771
  • Page 772 772
  • Page 773 773
  • Page 774 774
  • Page 775 775
  • Page 776 776
  • Page 777 777
  • Page 778 778
  • Page 779 779
  • Page 780 780
  • Page 781 781
  • Page 782 782
  • Page 783 783
  • Page 784 784
  • Page 785 785
  • Page 786 786
  • Page 787 787
  • Page 788 788
  • Page 789 789
  • Page 790 790
  • Page 791 791
  • Page 792 792
  • Page 793 793
  • Page 794 794
  • Page 795 795
  • Page 796 796
  • Page 797 797
  • Page 798 798
  • Page 799 799
  • Page 800 800
  • Page 801 801
  • Page 802 802
  • Page 803 803
  • Page 804 804
  • Page 805 805
  • Page 806 806
  • Page 807 807
  • Page 808 808
  • Page 809 809
  • Page 810 810
  • Page 811 811
  • Page 812 812
  • Page 813 813
  • Page 814 814
  • Page 815 815
  • Page 816 816
  • Page 817 817

Canon MX320 User manual

Category
Scanner Transparancy Adapters
Type
User manual
This manual is also suitable for

Ask a question and I''ll find the answer in the document

Finding information in a document is now easier with AI