Page is loading ...

Ascon Tecnologic - T31- OPERATING INSTRUCTIONS - PAG. 1
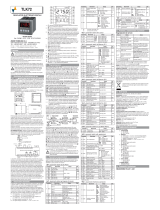
T31
DIGITAL ELECTRONIC
MICROPROCESSOR
TIMER
User Manual
Cod.: 21/11 - ISTR_M_T31_E_02_--
ASCON TECNOLOGIC S.r.l.
Viale Indipendenza 56, 27029 - VIGEVANO (PV) ITALY
TEL.: +39 0381 69871 - FAX: +39 0381 698730
sito: http:\\www.ascontecnologic.com
e-mail: [email protected]
PREFACE
D This manual contains the information necessary for
the product to be installed correctly and also instruc-
tions for its maintenance and use; we therefore recom-
mend that the utmost attention is paid to the following
instructions and to save it.
This document is the exclusive property of
Ascon Tecnologic
S.r.l. which forbids any reproduction and divulgation, even
partially, of the document, unless expressly authorized.
Ascon Tecnologic
S.r.l. reserves the right to make any formal
or functional changes at any moment and without any notice.
Ascon Tecnologic
S.r.l. and its legal representatives do not
assume any responsibility for any damage to people, things
or animals deriving from violation, wrong or improper use or
in any case not in compliance with the instrument features.
D Whenever a failure or a malfunction of the device may
cause dangerous situations for persons, thing or animals,
please remember that the plant has to be equipped with
additional devices which will guarantee safety.
1. INSTRUMENT DESCRIPTION
1.1 General description
T31 is a digital microprocessor timer, it offers the possibility
to program: up to 3 delay times (or Set Times), 6 operating
modes for Out1 output, 10 operating modes for Out2 out-
put, 4 time scales (allowing timings from 9999 hours max. to
0.01 s min.), 6 counting start modes and 2 counting modes
(UP or DOWN). The timer can also be equipped with an inter-
nal or external buzzer for signaling the end of the count.
The 4 digits display normally shows the counting status
while the outputs status is signalled by 2 LEDs. The instru-
ment has also 2 digital inputs for voltage-free contacts that
can be used for the count enabling (CNT EN) and Reset
(RES) commands and can have up to 2 relay outputs or
SSR for driving Solid State Relays.
The instrument is programmed by using the 3 of the front
panel keys while the counting commands can be submitted
using the -Start/Stop or through the digital inputs CNT
EN and RES. The operating parameters configuration can
be done through keypad, A01 device connected to TTL port
(standard) or using NFC communication (optional).
Index
1. Instrument description ............................................... 1
1.1 General description ........................................................... 1
1.2 Front panel description ..................................................... 2
2. Programming ............................................................... 2
2.1 Fast Set Times programming ............................................ 2
2.2 Standard mode parameters setting ................................... 2
2.3 Parameter protection using a password ............................ 3
2.4 Customized mode parameter programming
(parameters programming level) ......................................... 3
2.5 Reset parameters to default value .................................... 3
2.6 Keyboard lock function ......................................................3
3. Usage warnings ........................................................... 3
3.1 Allowed Usage ..................................................................3
4. Installation warnings ................................................... 4
4.1 Mechanical Mounting ........................................................ 4
4.2 Mechanical Dimensions [mm] ........................................... 4
4.2.1 Instrument dimensions ......................................................... 4
4.2.2 Panel cutout .......................................................................... 4
4.2.3 Mounting brackets ................................................................ 4
4.3 Electrical connections ....................................................... 4
4.3.1 Electrical connection diagram ............................................... 4
5. Operating mode ........................................................... 5
5.1 Display operation .............................................................. 5
5.2 Operation of the Counting commands .............................. 5
5.3 Out1 Operating mode ....................................................... 6
5.4 Out2 Operating mode ....................................................... 6
5.5 Internal buzzer operation ..................................................9
5.6 Operation in case of power supply failure (backup) ..........9
6. Accessories ................................................................. 9
6.1 Parameters configuration with A01 ................................... 9
6.2 Parameters configuration with AFC1 .............................. 10
7. Programmable parameters table .............................. 11
8. Problems and maintenance ...................................... 12
8.1 Cleaning .......................................................................... 12
8.2 Disposal .......................................................................... 12
9. Warranty and repairs ................................................. 12
10. Technical data ............................................................ 12
10.1 Electrical data ................................................................. 12
10.2 Mechanical characteristics .............................................. 12
10.3 Functional features ......................................................... 12
11. How to order .............................................................. 13

Ascon Tecnologic - T31- OPERATING INSTRUCTIONS - PAG. 2
1.2 Front panel description
P
U
T31
CNT Start / Stop
OUT1 OUT2
1
1
2
2
1
5
2
4
3
8
7
6
1.
:
Pressed and released allows to set the time delays
(if programmed with t.ed parameter). Pressed for 5 s
enters the parameters program mode, pressed again
accesses the parameters edit mode and confirms values.
In programming mode can be used together with the
key to change the programming level of the parameters.
When the keyboard is locked, and keys hold
pressed together for 5 s, unlock the keyboard.
2.
:
In parameteres program mode is used to decrease
the setting values and to select the parameters.
3.
:
In parameteres program mode is used to increase
the setting values and to select the parameters. In
programming mode can be used together with key to
change parameters level. Pressed together with the
key for 5 s allows the keyboard unlock.
4. -Start/Stop
:
Can be used for Start/Stop/Reset count
commands as programmed using the t.UF parameter;
5. LED SET: In normal operating mode, indicates the en-
tering to timings setting mode. In programming mode is
used to indicate the parameter programming level.
6. LED CNT: Indicates: count in progress (flashing with a
1 s frequency), count interrupted (on steady) or the reset
status (off);
7. LED Out1: Indicates the Out1 output status: ON (lit),
OFF (not lit);
8. LED Out2: Indicates the Out2 output status: ON (lit),
OFF (not lit).
2. PROGRAMMING
2.1 Fast Set Times programming
The normal mode to program the delay times (Set Times) is
done by shortly pressing key, the SET LED lights up and
display starts showing alternatively s.t1 (parameter acro-
nym) and its programmed value. To change the value press
the key to increase the number shown or to decrease
it. These 2 keys normally act in one digit steps a time, but
if kept pressed for more than 1 s the value increases or de-
creases faster and after 2 more seconds in the same condi-
tion, the speed further increases in order to quickly reach the
desired value. However, through t.edt parameter it is pos-
sible to define if and which Set Time can be set with the
short key. A further option provides the setting of S.T1 Set
Time value only, using the / keys without pressing in
advance the key (t.Ed = 8). t.ed parameter can assume a
value between oF and 8:
oF No Set Time can be set with the short key (if pressed
and released, the key has no effect);
1. Only s.t1 Set Time value can be set with this procedure;
2. Only s.t2 Set Time value can be set with this procedure;
3. s.t1 and s.t2 Set Times can be set with this procedure;
4. Only s.t3 Set Time value can be set with this procedure;
5. s.t1 and s.t3 Set Times can be set with this procedure;
6. s.t2 and s.t3 Set Times can be set with this procedure;
7. s.t1, s.t2 and s.t3 Set Times can be set with this procedure;
8. s.t1 Set Time value can be set directly using / .
For example, in case the parameter tEdt =
1
or
3
, the pro-
cedure is the following:
–Press and release the key, the display shows S.t1 alter-
nated to the S.t1 value.
–To change the Set Time, press the key to increase the
value or to decrease it.
–If tEd =
1
, once the desired value ha been set, press the
button to exit the fast programming mode.
–If tEd =
3
, pressing and releasing again the button the
display shows S.t2 alternated to its value. To change the
value use the / keys as for the S.t1 value.
–Once the Set Time time has been programmed, press the
key to exit the Set Time programming mode.
To exit the fast Set Time programming mode push the
key after the last Set Time time has been displayed or press-
ing no buttons for about 10 s, after which the display returns
to normal operation.
S.t1 and S.t3 can be set within the limits established by pa-
rameters S.Lt1 and S.Ht1 while S.t2 within the limits estab-
lished by S.Lt2 and S.Ht2.
2.2 Standard mode parameters setting
To access the instrument function parameters when pass-
word protection is disabled, press the key for 5 s, after
which the display shows the code that identifies the first
programmable parameter; use the / keys to select
the desired parameter then press the key, the display
shows the parameter code alternated to its value that can
be changed with the and keys. Once the desired
value has been set, press the key again: the new value
is stored and the display shows only the code of the modi-
fied parameter. Pressing the or keys, it is possible to
select another parameter and change it as described. To exit
the programming mode, press no keys for 30 s or keep the
key pressed for 2 s, the timer returns showing the actual
count value.
PARAMETERS
(PROGRAM MODE)
SET PA RAMETER
Previous
Parameter
Next
Parameter
Increase
Value
Decrease
Value
99.59.s.lt1.
30.50
NORMAL MODE
Hol
d
for 2
s
Hold
for 5 s

Ascon Tecnologic - T31- OPERATING INSTRUCTIONS - PAG. 3
2.3 Parameter protection using a password
The instrument has a parameter protection function using a
password that can be personalised through the t.PP parameter.
To protect the parameters, set the desired password number
at parameter t.PP.
When the protection is active, press the key for 5 s after
which the display shows r.p. Press the key, display
shows 0. Using / keys, insert the programmed pass-
word number and press the key again.
If Password is correct the instrument displays the code of the
first parameter. Now is possible to program the instrument in
the same way previously described.
Password protection can be disabled by setting t.PP = oF.
PARAMETERS
(PROGRAM MODE)
INS. CORRECT
PASSWORD
0.R.P.
30.50
PASSWORD
REQUEST
S.Lt1.
NORMAL MODE
Hol
d
for 2
s
Hold for 5 s Increase
Value
Decrease
Value
Notes: 1. All parameters are configured by default as “pro-
tected” so that by simply setting the t.PP param-
eter they are all protected by the Password.
2. If the Password gets lost, just switch OFF then
ON the instrument, push key during the initial
test keeping it pressed for 5 s. In this way it is
possible to access all the parameters, verify and
modify the parameter t.PP.
2.4 Customized mode parameter programming
(parameters programming level)
When activated, the password protection acts on all parame-
ters. If, once enabled the Password through the t.PP param-
eter, it is necessary to make certain parameters program-
mable without protection while keeping the protection on the
others, follow the procedure below:
–Enter the program mode using the t.PP Password and, with
/ keys, select the parameter that must be accessible
(no password protection).
–Once the parameter is selected, if the SET LED flashes,
the parameter is programmable only entering the password
(“
protected
”). If SET LED is steady ON the parameter is
programmable without password (“
unprotected
”).
–To change the parameter visibility, press the key and
keeping it pressed press also the button.
–The SET LED changes its state indicating the new level
of parameter accessibility (ON =
Not protected
; Flashing =
Password protected
).
In case some parameters are set as Not protected, access-
ing the programming mode the display first shows the Not
protected parameters, then the r.p parameter through which
will be possible to access also the protected parameters.
Previous
Parameter
Next
Parameter
SET
PA RAMETER
Increase
Value
Decrease
Value
up.
30.50
NOT Protected
PA RAMETERS
NORMAL MODE
Hol
d
for 2
s
Hold for 5 s
PARAMETERS
GROUP
(PROGRAM MODE)
INS. CORRECT
PASSWORD
Increase
Value
Decrease
Value
0.R.P.
PASSWORD
REQUEST
S.lt1.
f.Cnt.
2.5 Reset parameters to default value
The instrument allows to reset all parameters to the values
programmed in factory as default. To restore the default pa-
rameters value set value -48 at r.p password request There-
fore, to make the reset to the default parameters, enable the
Password using the t.PP parameter so that the r.p setting is
requested, at this point insert -48 instead of the programmed
access password. Once confirmed the password with the
key the display shows “---” for 2 s, then the instrument
resets all the parameters to factory default setting.
2.6 Keyboard lock function
It is possible to completely lock the keyboard. This function
is useful when the controller is used in an accessible area
and unauthorized changes must be avoided. To activate
the keyboard lock, program the parameter t.Lo to a value
different from oF. The t.Lo value is the keys inactivity time
after which the keyboard is automatically locked. When the
keyboard is locked, if any of the key is pressed, the display
shows L.n to indicate that the lock is active. To unlock the
keyboard, press contemporarily + keys and keep
them pressed for 5 s, after which the label LF appears on the
display and all the key functions will be available again.
3. USAGE WARNINGS
3.1 Allowed Usage
D The instrument has been projected as measure and
control device, built according to EN61812-1 for the
altitudes operation below 2000 ms.
Using the instrument for applications not expressly permitted
by the above mentioned rule must adopt all the necessary
protective measures.
The instrument must not be used in dangerous environ-
ments (flammable or explosive) without adequate protections.
D The installer must ensure that the EMC rules are
respected, also after the instrument installation, if
necessary using proper filters.

Ascon Tecnologic - T31- OPERATING INSTRUCTIONS - PAG. 4
4. INSTALLATION WARNINGS
4.1 Mechanical Mounting
The instrument, in 78 x 35 mm case, is designed for flush-
in panel mounting. Make a 71 x 29 mm hole and insert the
instrument, fixing it with the provided special brackets.
To obtain the declared protection degree (IP65), the optional
screw type bracket must be used.
Avoid placing the instrument in dirty environments or with very
high humidity levels that may create condensation and avoid
the introduction of conductive substances into the instrument.
Ensure adequate ventilation to the instrument and avoid
installation in containers that house devices which may
overheat or which may cause the instrument to function at a
temperature higher than the one permitted and declared.
Connect the instrument as far away as possible from sourc-
es of electromagnetic disturbances such as motors, power
relays, relays, solenoid valves, etc..
4.2 Mechanical Dimensions [mm]
4.2.1 Instrument dimensions
P
U
T31
CNT Start / Stop
OUT1 OUT2
1
1
2
2
35
78
12.2
14.5
8
664 14.5
28
= Fixed terminals
= Removable terminals
4.2.2 Panel cutout
Recommended
panel cutout
29
71
min. 12 mm
min. 12 mm
4.2.3 Mounting brackets
12 mm max. Panel + Gasket
“Butterfly” type brackets
“Screw type” bracket
34
4.3 Electrical connections
Carry out the electrical wiring by connecting only one wire to
each terminal, according to the following diagram, checking
that power supply is the same as indicated on the instrument
and the load current absorption is no higher than the maxi-
mum electricity current permitted.
As the instrument is built-in equipment with permanent con-
nection inside housing, it is not equipped with either switches
or internal devices to protect against current overloads: the
installation will include an overload protection and a two-
phase circuit-breaker, placed as near as possible to the in-
strument and located in a position that can easily be reached
by the user and marked as instrument disconnecting
device which interrupts the power supply to the equipment.
It is also recommended that the supply of all the electrical circuits
connected to the instrument must be properly protected, using
devices (ex. fuses) proportionate to the circulating currents.
It is strongly recommended that cables with proper insulation,
according to the working voltages and temperatures, be used.
If some cables are shielded, the shield must be connected to
ground at only one side.
D Moreover, check that the parameters set are the de-
sired ones and the application works correctly before
connecting the outputs to the actuators in order to
avoid malfunctions in the plant that could cause dam-
age to people, things or animals.
4.3.1 Electrical connection diagram
Out1 16 (9)A 10 (4)A 12A Res., 30 LRA, 5 FLA
Out2 5 (1)A 2 (1)A 2A Gen. Use
(12 A max. for ext. conn. models),
SSR output: 12 VDC, 15 mA
61810
EN
60730
EN UL
External
Buzzer
SUPPLY OUT1 OUT2
NCNO CNOC
123456789101112
INPUTS
+-
+-
T31
RST CNT
Internal
Buzzer

Ascon Tecnologic - T31- OPERATING INSTRUCTIONS - PAG. 5
5. OPERATING MODE
5.1 Display operation
CNT LED indicates:
–Count in progress (flashing);
–Count stopped before the end (steady on);
–Count ended/Reset status (off).
After Reset display shows 0000 when counting mode is UP
(F.Cnt = uP) or Set time value if the count mode is DOWN
(F.Cnt = dn).
While counting display shows the time that elapses: increas-
ing if F.Cnt = uP or decreasing if F.Cnt = dn.
For functions that require a Cycle end (F.o1t = 1, 2) at the
end of the count, the display shows: 0000 if F.Cnt = dn or the
Set time value if F.Cnt = uP.
At Count end, the Display flashes when parameter EndC = 0
or can be Steady ON when parameter EndC = 1.
5.2 Operation of the Counting commands
Counting can be enabled and disabled using the -Start/
Stop key or via the digital inputs CNT and RST.
The operating mode of the -Start/Stop key is established
by parameters t.UFt and I.Fct, the operating mode of CNT
input is established by i.Fct parameter while the RST input
always acts as a Reset, i.e. blocks and resets the count
when it is activated and also has priority over the other com-
mands (while RST is active, the count cannot start).
The counting Start signal can therefore be given by the
-Start/Stop key, which normally has bistable (toggle)
operation, or via the CNT count enable digital input.
The operating mode of the CNT input can be programmed
using the i.Fct parameter to operate in different modes:
i.Fct = 1 - Bistable Start/Stop
By activating the CNT input the count starts and it is
therefore possible to deactivate the input.
Activating CNT again, the count stops on the value reached
(without disabling the output if this was activated), the next
CNT impulse resumes the count from the point it stopped
and so on until the end of the count or the Reset signal.
In this mode, the front -Start/Stop button (if t.UFt = 2)
acts exactly in the same way as the CNT input with the
addition that, when kept pressed for 2 s during the count-
ing, carries out the Reset command.
If the counting is finished, pressing the key carries out
the Reset-Start command at the same time.
CNT
Count
RESET
0.1.2.3.4.5 .6.7.8.0
i.fct
= 1
Start Stop Start Stop/
Reset
i.Fct = 2 - Bistable Reset-Start/Stop
At the 1st impulse on the CNT input the timer is reset and
started, at the 2nd impulse, if given before the end of the
count, the count is stopped (disabling the output if active)
and the 3rd impulse starts a new cycle, otherwise, if the
2nd impulse should arrive after the end of the count it
starts directly a new cycle.
In this mode, the front -Start/Stop button (if t.UFt = 2)
acts in exactly the same way as the CNT input.
CNT
Count
RESET
0.1.2.3.4.5 0.1.2.3.0
i.fct
= 2
Reset/
Start
Stop Reset/
Start
Stop/
Reset
i.Fct = 3 - Monostable Start/Stop
Activating the CNT input and keeping it active, the count
is started; the count stops on the value reached when
the input is disabled (without disabling the output if ac-
tive); re-activating the CNT input, the count restarts from
the value reached and so on until the Reset signal.
In this operating mode, the front -Start/Stop key (if
t.UFt is different from oF) only acts as a Reset.
CNT
Count
RESET
0.1.2.3 .4.5.6.7 0
i.fct
= 3
Start Stop Start Stop Reset
i.Fct = 4 - Monostable Reset-Start/Stop
Activating the CNT input and keeping it active, the timer
resets and starts counting, disabling the CNT input the
count stops disabling the output if active.
This operating mode is similar to the one of the tradition-
al timers in which counting is enabled when the instru-
ment is powered while the Reset occurs when power
supply is removed.
In this operating mode, the front -Start/Stop key (if
t.UFt is different from oF) only acts as a Reset.
CNT
Count
RESET
0.1.2.3
i.fct
= 4
Reset/
Start
Reset/
Start
Stop
0.1.2.3 0.1.2.3 0
Stop Reset
i.Fct = 5 - Bistable Reset-Start/Stop
At 1st CNT impulse the timer is reset, at the 2nd the count
starts, at the 3rd impulse the count stops disabling the
output if active and so on.
In this mode, the front -Start/Stop button (if t.UFt = 2)
acts in exactly the same way as the CNT input.
CNT
Count
RESET
0.1.2.3000.1.2.3.4.0
i.fct
= 5
StartReset ResetStop Start Stop/
Reset

Ascon Tecnologic - T31- OPERATING INSTRUCTIONS - PAG. 6
i.Fct = 6 - Bistable Start/Stop-Reset
At 1st CNT impulse the count is started, while at the 2nd
impulse, if given before the end of the count, the count is
stopped disabling the output if active and reset, other-
wise, if the 2nd impulse should arrive after the end of the
count it starts directly a new cycle.
In this mode, the front -Start/Stop button (if t.UFt = 2)
at S.t1 time end acts exactly in the same way as the
CNT input.
CNT
Count
RESET
0.1.2.3.0 0.1.2.3.4.0 0.1.2.0
i.fct
= 6
Start Stop
Reset
Start Stop
Reset
Start End
Reset
5.3 Out1 Operating mode
The Output 1 operation can be programmed in 6 different
modes with F.o1t parameter:
F.o1t
= 1 - ON DELAY
Received the Start signal, instrument starts counting and,
at the end of S.t1 time, activates the Out1 output.
The
output is disabled by the Reset signal.
Reset
OUT1
Start
off off
S.t1
f.o1t
= 1
F.o1t
= 2 - Feed-through
Received the Start signal, the instrument starts counting
and activates the Out1 output; Out1 is disabled when
S.t1 time has elapsed. The output can be reactivated
only after a Reset and a new Start signal
Reset
OUT1
Start
off
f.o1t
= 2
S.t1
F.o1t
= 3 - Asymmetrical oscillator with start ON
This operating mode requires the setting of both S.t1
and S.t2 Set times.
Received the Start signal, Out1 is enabled for the S.t1
time then disabled, reactivated at the end of S.t2 time
and so on until the Stop/Reset.
S.t1: Out1 ON time, S.t2: Out1 OFF time..
Reset
OUT1
Start
off
f.o1t
= 3
S.t1 S.t1S.t2 S.t1S.t2
F.o1t
= 4 - Asymmetrical oscillator with start OFF
This operating mode implies the setting of both S.t1 and
S.t2 Set times.
Received the Start signal, Out1 remains disabled for the
S.t1 time then is activated for the time set at S.t2 and so
on until the Stop/Reset.
S.t1: Out1 OFF time, S.t2: Out1 ON time.
Reset
OUT1
Start
off off off off
f.o1t
= 4
S.t2 S.t2S.t1S.t1 S.t1
F.o1t
= 5 - Asymmetrical oscillator with start OFF 1 cycle
This operating mode operates as f.o1t = 4 but executes
only 1 Start/Pause cycle.
Received the Start signal, Out1 remains disabled for the
S.t1 time then is activated for the time set at S.t2.
The cycle can be repeated only after a Reset signal and
a new Start command.
Reset
OUT1
Start
off off
S.t1 S.t2
f.o1t
= 5
F.o1t
= 6 - Delay in lack of excitation (or delay in
de-excitation)
On the rising edge of the CNT input Start signal, Out1 is
energized. When the CNT signal is removed, Out1 re-
mains energized and starts the S.t1 count elapsed which
Out1 is de-energized. If, during the S.t1 count, a signal
is detected on the CNT input, the time is reset and will be
restarted when signal ceases.
Note: This functioning mode operates in this way regard-
less the i.Fct parameter setting. Out2 output (if
used) in this operating mode can only operate in
F.o2t = 1 or 2 modes.
CNT
OUT1
off off off
f.o1t
= 6
S.t1S.t1S.t1
5.4 Out2 Operating mode
The Output 2 operation can be programmed in 10 different
modes with F.o2t parameter:
F.o2t = oF - Out2 Output disabled
F.o2t = 1 - Out2 works like Out1
Out2 output operates exactly like Out1 output in order to
have a double output contact.
F.o2t = 2 - Out2 output works as an instant contact
(ON during count)
Out2 is activated during the counting phase and remains
active until the Reset command is received.
Reset
OUT1
f.o1t = 1
Start
off off
S.t1
OUT2 off
f.o2t
= 2

Ascon Tecnologic - T31- OPERATING INSTRUCTIONS - PAG. 7
F.o2t = 3 - Out2 works as Out1 (with s.t1 time)
but with an absolute s.T3 time
This operating mode requires the setting of S.t1 and S.t3
Set times. S.t3 has the same time range and cannot be
longer than S.t1.
Received the Start command, instrument starts counting
and operates on Out2 output in the same mode it oper-
ates on Out1 (as f.o1t).
If f.o1t = 1, 4, 5, Out2 operates with ON delay function
and s.t3 of Set time, when instead f.o1t = 2, 3 Out2 op-
erates with Feed-through function and s.t3 of Set time.
Reset
OUT1
Start
off
f.o1t
= 1,
f.o2t
= 3
S.t1
OUT2 off
off
off
S.t3
Reset
OUT1
Start
off
f.o1t
= 2,
f.o2t
= 3
S.t1
OUT2 off
S.t3
Reset
Start
f.o1t
= 3,
f.o2t
= 3
OUT1 off off
S.t1 S.t1S.t2
OUT2 off off
S.t3 S.t3
Reset
Start
f.o1t
= 4,
f.o2t
= 3
OUT1 off
S.t2S.t1
OUT2 off
off
off
off
off
S.t3
S.t2S.t1
S.t3
Reset
Start
f.o1t
= 5,
f.o2t
= 3
OUT1
S.t2S.t1
OUT2
off
off
off
off
S.t3
F.o2t = 4 - Out2 works as Out1 (with s.t1 time)
but with a relative s.t3 time in advance
This operating mode requires the setting of S.t1 and S.t3
Set times. S.t3 has the same time range and cannot be
longer than S.t1.
Received the Start command, instrument starts counting
and operates on Out2 output in the same mode it
operates on Out1 (as f.o1t).
If f.o1t = 1, 4, 5, Out2 operates with ON delay function
and [s.ti - s.t3] of Set time, when instead f.o1t = 2, 3,
Out2 operates with Feed-through function and [s.ti -
s.t3] of Set time.
Reset
Start
f.o1t
= 1,
f.o2t
= 4
OUT1
S.t1
OUT2
off
off
off
off
S.t3
Reset
Start
f.o1t
= 2,
f.o2t
= 4
OUT1
S.t1
OUT2
off
off
S.t3
Reset
Start
f.o1t
= 3,
f.o2t
= 4
OUT1 off off
S.t1 S.t1S.t2
OUT2 off off
S.t3 S.t3
Reset
Start
f.o1t
= 4,
f.o2t
= 4
OUT1 off off
S.t1 S.t2
OUT2 off off
S.t3 S.t3
S.t1 S.t2
Reset
Start
f.o1t
= 5,
f.o2t
= 4
OUT1 off off
S.t1 S.t2
OUT2 off off
S.t3
F.o2t = 5 -
Out2 works as
the internal buzzer with F.buF = 2
Out2 works as the internal buzzer to manage an external
acoustic or luminous signalling device.
Reset
Start
f.o1t
= 2,
f.o2t
= 5
OUT1 off
S.t1
OUT2 off off
S.t2

Ascon Tecnologic - T31- OPERATING INSTRUCTIONS - PAG. 8
F.o2t = 6 - Activation at S.t1 count end with S.t3 delay for
S.t2 time
Out2 thus configured is activated, as for F.o2t = 5, when
S.t1 count has elapsed for the time S.t2 but with a settable
delay S.t3. This function is intended to be used with
F.o1t = 2 only.
In this case, the display shows the t1 time count, elapsed
which it switches to display the t3 time and then the time t2.
Reset
Start
f.o1t
= 2,
f.o2t
= 6
OUT1 off
S.t1
OUT2 off off
S.t3 S.t2
F.o2t = 7 - Activation at the end of S.t1 count with delay S.t2
Out2 thus configured is activated when S.t1 count has
elapsed with a settable delay S.t2
.
This function is in-
tended to be used with F.o1t = 2 only and can be used to
create a star-delta starter where the time S.t1 is the Star
operating time while S.t2 is the Star-Delta transfer time.
Reset
Start
f.o1t
= 2,
f.o2t
= 7
OUT1 off
OUT2 off off
S.t1 S.t2
F.o2t = 8 - Counting operation negated with respect to Out1
Out2 output thus configured is activated, during the count,
with the opposite logic to Out1. This function is intended to
be used with F.o1t = 3 or 4 only (oscillator mode functioning)
in order to obtain the alternated operation of the two outputs.
In this mode the display shows the time count in progress
(t1 or t2)
.
Reset
OUT1
Start
off
S.t1 S.t1S.t2 S.t2 S.t1
OUT2 off
off
off
f.o1t
= 3,
f.o2t
= 8
off
offoff
Reset
OUT1
Start S.t1 S.t1 S.t1
S.t2 S.t2
OUT2
offoffoffoff
f.o1t
= 4,
f.o2t
= 8
off off off
F.o2t = 9 -
Counting operation negated with respect to Out1
but with an S.t3 dead time
As in F.o2t = 8, while counting Out2 output is activated
with the opposite logic to Out1, but with an S.t3 interme-
diate settable dead time.
Also in this case, this function is intended to be used with
F.o1t = 3 or 4 only (oscillator mode functioning) in order
to obtain the alternated operation of the two outputs, but
with a dead time between the activations.
In this mode the display shows the time count in pro-
gress (t1, t2 or t3).
Reset
OUT1
Start
off
S.t1
S.t3
OUT2
off
off
f.o1t
= 3,
f.o2t
= 9
off
offoff
S.t2
S.t3
S.t1
S.t3
S.t1
S.t3
S.t2
S.t3
Reset
OUT1
Start
off
S.t1
S.t3
OUT2 off
off
f.o1t
= 4,
f.o2t
= 9
off
offoff
S.t2
S.t3
S.t1
S.t3
S.t1
S.t3
S.t2
S.t3
F.o2t = 10 - Symmetrical denied operation with respect
to Out1 with dead time S.t3
As in F.o2t = 9 mode, while counting Out2 output is
activated with the opposite logic to Out1, with an S.t3
intermediate settable dead time, but with the same active
time of S.t1.
Also in this case, this function is intended to be used with
F.o1t = 3 or 4 only (oscillator mode functioning) in order
to obtain the alternated operation of the two outputs with
a dead time between the activations, but with the pos-
sibility to establish the total duration of the cycle through
the time S.t2 (for example for a washing, cleaning, pol-
ishing or similar treatment cycle)
.
In this mode the display always shows the t2 counting
timeas it is the total time of the cycle.
Reset
OUT1
Start
off
S.t1
S.t3
OUT2
off
f.o1t
= 3,
f.o2t
= 10
off
S.t3
S.t1 S.t1S.t1
S.t3 S.t3
S.t1S.t1
S.t2 S.t2
off
Reset
OUT1
Start
off
S.t1
S.t3
OUT2 off
f.o1t
= 4,
f.o2t
= 10
off
S.t3
S.t1 S.t1S.t1
S.t3 S.t3
S.t1S.t1
S.t2 S.t2
offoff off off

Ascon Tecnologic - T31- OPERATING INSTRUCTIONS - PAG. 9
5.5 Internal buzzer operation
The internal buzzer can be programmed using the F.buF
parameter to operate in the following ways:
oF
Internal buzzer disabled;
1. Activated at end of S.t1 time for S.t2 period; sound also
when keys are pressed. If Reset command is given (with
key or digital input), the buzzer is silenced immediately.
This mode is only active for operations that normally do
not involve the use of the S.t2 time (this is because S.t2
is used in work-pause operations that would not have
substantially a determined cycle end);
2. Activated at s.t1 end for s.t2 time; no sound when keys
are pressed;
3. Sounds when keys are pressed:
4. Only external buzzer (if configured on Out2 with F.o2t = 5)
with operation at the end of S.t1 time for a period of S.t2.
5.6 Operation in case of power supply
failure (backup)
F.but parameter establishes the count behavior when power
supply returns after a power supply failure during the current
count:
1. Resets the count;
2. Stops the count by storing the value reached (when the
power returns, it therefore waits for a command to restart);
3. Stores the reached value and, when the power returns,
the count restarts from that value if the conditions for
restarting are present (e.g. the instrument was counting
with a bistable command when the power was lost).
6. ACCESSORIES
The instrument is equipped with a 5-pole connector which
can be used to link some external accessories that allow to
perform some functions in “off-line” mode.
6.1 Parameters configuration with A01
The instrument is equipped with a 5 poles connector that
allows the transfer from and toward the instrument of the
functioning parameters through the device A01.
A01 is mainly usable for the serial programming of some
instruments which need to have the same parameters
configuration or to keep a copy of the parameters set-
ting of an instrument and allow its rapid retransmission.
The same device allows to connect a PC via USB with which,
through the
“AT UniversalConfig”
configuration software
the
operating parameters can be configured.
To use the device A01 it is necessary that the device or in-
strument are being powered directly or through the key.
AC supply
Supply adapter
12 VDC
Power
supply
Enter
PWS
12 V
A B C TTL
+-
USB
to PC
USB
Enter
PWS
12 V
A B C TTL
+-
USB
to PC
USB
For additional info, please read the “
A01 Instruction Manual
”.

Ascon Tecnologic - T31- OPERATING INSTRUCTIONS - PAG. 10
6.2 Parameters configuration with AFC1
When the instrument is equipped with the NFC communi-
cation option, the parameter configuration performed with
the “AT UniversalConfig” program (see previous paragraph)
can be transferred to the instrument also through the AFC1
device or a smartphone equipped with the NFC interface and
the dedicated App AT Conf.
To configure the instrument with the NFC, it is not necessary
to power the timer, but simply put its front panel on the sym-
bol of the AFC1 device surface (which is powered directly
by the USB port connected to the PC) or on the smartphone
part on the which is the NFC interface (for this consult the
smartphone user manual) then send the parameters to the
instrument’s memory.
USB
USB
AFC1
NFC

Ascon Tecnologic - T31- OPERATING INSTRUCTIONS - PAG. 11
7. PROGRAMMABLE PARAMETERS TABLE
Here below is a description of all the parameters available on the instrument. Some of them may not be present, either due
to the fact they depend on the type of instrument or because they are automatically disabled as unnecessary.
Parameter Description Range Default Note
1 S.Lt1 s.t1 min. Set time 0 ÷ S.Ht1 0
2 S.Ht1 s.t1 max. Set time S.Lt1 ÷ 9999 99.59
3 S.Lt2 s.t2 min. Set time 0 ÷ S.Ht2 0.00
4 S.Ht2 s.t2 max. Set time S.Lt2 ÷ 9999 99.59
5 S.St1 s.t1 Time range 1 Hours (9999 h);
2 Hours - Minutes (99 h 59 min);
3 Minutes - Seconds (99 min 59 s);
4 Seconds - Hundreds of seconf (99 s 99 1/100 s).
3
6 S.St2 s.t2 Time range 3
7 S.t1 s.t1 Set time S.Lt1 ÷ S.Ht1 1.00
8 S.t2 s.t2 Set time S.Lt2 ÷ S.Ht2 0.00
9 S.t3 s.t3 Set time S.Lt1 ÷ S.Ht1 0.00
10 i.Fct CNT input operating mode
1 Bistable START/STOP;
2 Bistable RESET-START/STOP;
3 Monostable START/STOP;
4 Monostable RESET-START/STOP;
5 Bistable RESET/START/STOP;
6 Bistable START/STOP-RESET.
2
11 F.o1t OUT1 output operating mode
1 On delay;
2 Feed-through;
3 Asymmetrical oscillator with start ON;
4 Asymmetrical oscillator with start OFF;
5 Asymmetrical oscillator with start OFF (one cycle only);
6 Delay in lack of excitation (or delay in de-excitation).
1
12 F.o2t OUT2 output operating mode
oF No function;
1 Out2 operates as Out1;
2 Instantaneous Contact Output (ON during count);
3 Out2 operates as Out1 but with absolute Set time s.t3;
4 Out2 operates as Out1 but with relative Set time s.t3 in advance;
5 Out2 operates as the buzzer;
6 Activation at S.t1 count end with S.t3 delay for S.t2 time;
7 Activation at S.t1 count end with S.t2 delay;
8 Counting operation negated with respect to Out1;
9
Counting operation negated with respect to Out1 but with an S.t3 dead time;
10 Symmetrical denied operation with respect to Out1 with S.t3 dead time.
oF
13 F.Cnt Count mode uP UP;
dn DOWN. uP
14 F.buF Buzzer operating mode
oF Disable;
1
Sounds at end of the cycle for the s.t2 period + key pressure;
2 Sounds at end of the cycle for the s.t2 period;
3 Key pressure sound only;
4 External buzzer only (if configured on Output 2 with F.o2t = 5) with end
of the cycle for the s.t2 period
1
15 t.UFt -START/STOP button
operating mode
oF No function
1 RESET only
2 RESET-START/STOP if i.Fct = 1 / 2, or
RESET/START/STOP if i.Fct = 5 / 6
2
16 t.Edt Times visibility with Fast Set
time procedure ( key)
oF No Set time visibility;
1 S.t1;
2 S.t2;
3 S.t1 and S.t2;
4 S.t3;
5 S.t1 and S.t3;
6 S.t2 and S.t3;
7 S.t1, S.t2 and S.t3;
8
S.t1 only directly with / keys with no key pressure.
1
17 F.but Backup operation mode
1 Resets the current count;
2 Stops the current count storing the value reached;
3 Stores the reached value and when the power returns, it restarts from
that value if the conditions for restarting are present.
1
18 EndC Display flashing at count end 0 Display flashing at count end;
1 Display steady ON at count end. 0
19 r.out Output relay exchange 1-2 Operation F.o1t with Out1; F.o2t with Out2;
2-1 Operation F.o1t with Out2; F.o2t with Out1.0
20 t.Lo Keyboard lock oF Lock disabled;
1 ÷ 9999 s oF
21 t.PP Password parameters
protection
oF Password disabled;
1 ÷ 9999 oF

Ascon Tecnologic - T31- OPERATING INSTRUCTIONS - PAG. 12
8. PROBLEMS AND MAINTENANCE
8.1 Cleaning
It is raccomended to clean the instrument only with a cloth
welted with water or with a detergent neither abrasive nor
containing solvents.
8.2 Disposal
The appliance (or the product) must be
disposed of separately in compliance
with the local standards in force on
waste disposal.
9. WARRANTY AND REPAIRS
The instrument is under warranty against construction vices
or defected material, noticed within 18 months from delivery
date. The warranty is limited to the repairs or to the substitu-
tion of the instrument. The eventual opening of the housing,
the violation of the instrument or the wrong use and installa-
tion of the product means the automatic decay of the warranty.
In case of defected instrument, noticed in warranty period or
out of warranty, do contact our sales department to obtain
the shipment authorisation.
The defected product must be shipped to Ascon Tecnologic with
the detailed description of the failures found and without any
fees or charge for Ascon Tecnologic, safe different agreements.
10. TECHNICAL DATA
10.1 Electrical data
Power supply: 12 VAC/VDC, 24 VAC/VDC,
100 ÷ 240 VAC ±10%;
AC frequency: 50/60 Hz;
Power consumption: About 3 VA;
Inputs: 2 free of voltage digital inputs;
Outputs: Up to 2 relay outputs or 12 VDC/15 mA for SSR
drive:
EN 61810 EN 60730 UL 60730
Out1 - SPDT - 16A -
1HP 250V,
1/2HP 125 VAC
16 (9) A 10 (4) A 12 A Res.,
30 LRA,
5 FLA
Out2 - SPST-NO - 5A -
1/10HP 125/250V
5 (1) A 2 (1) A 2 A Gen. Use
12 A max. for those with removable terminal model;
Relay output Electrical life: 100000 operations;
Overvoltage category: II;
Protection class: Class II;
Insulation: Reinforced insulation between low voltage parts
(H or L type power supply and relay outputs) and front panel;
Reinforced insulation between low voltage parts (H or L type
power supply and outputs if both are relays) and the extra
low voltage parts (inputs); Reinforced insulation between
power supply and relay outputs; Basic insulation between
relay outputs and between relay and SSR drive output; Basic
insulation between H or L type power supply and inputs
when a relay + SSR drive output combination is present; No
insulation between type F power supply terminals and input.
10.2 Mechanical characteristics
Housing: Self-extinguishing plastic, UL 94 V0;
Heat and fire resistance category: D;
Ball Pressure Test as described in EN60730: accessible
parts 75°C; support live parts 125°C;
Dimensions: 78 x 35 mm, depth 64 mm;
Weight: About 125 g;
Mounting: Incorporated flush in panel (thickness max. 12/29
mm) in a 71 x 29 mm hole;
Connections:
Inputs: Fixed or removable screw terminal block for
0.2 ÷ 2.5 mm2/AWG 24 ÷ 14 cables;
Power supply: Fixed or removable screw terminal block
or Faston 6.3 mm for 0.2 ÷ 2.5 mm2/AWG 24 ÷ 14 cables;
Protection degree: IP65 mounted with screw type bracket
(optional);
Pollution degree: 2;
Operating temperature: 0 ÷ 50°C;
Operating humidity: < 95 RH% with no condensation;
Storage temperature: -25 ÷ +60°C.
10.3 Functional features
Time range: 4 programmable timing scales:
9999 h,
99 h 59 min,
99 min 59 s,
99 s 99 hundreds of second;
Display resolution: Based on the time scale used:
hours,
minutes,
seconds,
hundreds of second;
Overall accuracy: ±0.1 fs;
Input delay: 15 ms max.;
Display: 4 Digit Red (Blue optional), height 12 mm;
Compliance:
Directive LV 2014/35/EU (EN 60730-1, EN 60730-2-7,
EN61812-1, UL 508);
Directive EMC 2014/30/EU (EN55011: class B;
EN61000-4-2: 8 kV air, 4 kV cont.; EN61000-4-3: 10V/m;
EN61000-4-4: 2 kV supply and relay outputs, 1 kV inputs;
EN61000-4-5: supply 2 kV com. mode, 1 kV\diff. mode;
EN61000-4-6: 3V).

Ascon Tecnologic - T31- OPERATING INSTRUCTIONS - PAG. 13
11. HOW TO ORDER
a: NFC PROGRAMMING OPTION
- =
Not present
N =
With NFC programming option
b: POWER SUPPLY
H = 100... 240 VAC
L = 24 VAC/VDC
F = 12 VAC/VDC
d: OUTPUT 2 (OUT 2)
R =
Relay
SPST 5A-AC1 (f
or resistive loads
)
O =
12 VDC for SSR or Buzzer
- =
Not present
c: OUTPUT 1 (OUT 1)
S =
Relay
SPDT 16A-AC1 (f
or resistive loads
)
O =
12 VDC for SSR
k: RESERVED CODE;
ll, mm: Hardware/Software personalization
---- (standard)
e: INTERNAL BUZZER
B = Buzzer
- =
Not present
f: POWER SUPPLY AND OUTPUT TERMINALS
V = Screw terminals (standard)
E = Complete removable screw terminals
(pitch 5.00)
N = Removable screw terminals (
pitch
5.00)
F = Faston 6.3 mm
g: INPUT
TERMINALS
V = Screw terminals (standard)
E =
Complete removable screw terminals
(
pitch
5.00)
N =
Removable screw terminals (
pitch
5.00)
h: DISPLAY
R = Red (standard)
U = Blue
j: PACKAGING + BRACKET TYPE
B = AT package + “Butterfly” type
brackets (standard)
D = AT package + screw type
bracket
MODEL
T31 - = Timer with mechanical keyboard
ca-b defghll
mm
ijk
i: FRONT PANEL COLOUR
A
= Black
W
= White

Ascon Tecnologic - T31- OPERATING INSTRUCTIONS - PAG. 14

Ascon Tecnologic - T31- OPERATING INSTRUCTIONS - PAG. 15

Ascon Tecnologic - T31- OPERATING INSTRUCTIONS - PAG. 16
/