Page is loading ...

Model: L850B
Owners &
Installation
PLEASE KEEP THESE INSTRUCTIONS FOR
FUTURE REFERENCE
Manual
November-20-2014
919-370
WARNING:
Improper installation, adjustment, alteration, service or maintenance can
cause injury or property damage. Refer to this manual. For assistance
or additional information consult an authorised installer, service agency
or the distributor.
It is highly recommended for protection of infants and inrm to place a
secure safety guard in front of this appliance when in operation.
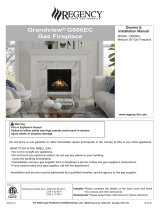
MONTROSE WOOD FIREPLACE
FPI - FIREPLACE PRODUCTS AUSTRALIA PTY LTD.
1 CONQUEST WAY HALLAM VICTORIA 3803

2Montrose Woodfire
Thank-you for purchasing a
REGENCY FIREPLACE PRODUCT
The pride of workmanship that goes into each of our products will give you years of trouble-free
enjoyment. Should you have any questions about your product that are not covered in this manual,
please contact the REGENCY DEALER in your area.
Keep those REGENCY FIRES burning.
SAFETY NOTE: If this wood re is not properly installed, a house re may result. For your safety,
follow the installation instructions, contact local building, re ofcials, or authority having jurisdiction
about restrictions and installation inspection requirements in your area.
The authority having jurisdiction should be consulted before installation to determine the need to
obtain a permit.
CAUTION: BURN UNTREATED WOOD ONLY. OTHER MATERIALS SUCH AS WOOD PRESER-
VATIVES, METAL FOILS, COAL, PLASTIC, GARBAGE, SULPHUR OR OIL WILL DAMAGE THE
FIRE AND ATMOSPHERE.
"This wood heater is designed to burn natural wood only. Higher efciencies and lower emissions
generally result when burning air dried seasoned hardwoods, as compared to green or freshly
cut hardwoods."
DO NOT BURN (WILL VOID WARRANTY)
• Treated wood
• Tea Tree
• Oil based woods
• Coal
• Garbage
• Cardboard
• Solvents
• Colored Paper
• Trash
SAVE THESE INSTRUCTIONS

Montrose Woodfire 3
table of
contents
Data Badge............................................................................4
Unit Dimensions ....................................................................5
Standard Features and Optional Accessories .......................6
INSTALLATION
Before Installing Your Fireplace ............................................. 7
Safety Guidelines and Warnings ...........................................8
Wood Fireplace Specications ..............................................9
Wood Fireplace Specics-Minimum Clearances .................10
Optional Base Frame...........................................................11
Flue and Chimney Requirements ........................................12
Installation Instructions ........................................................16
Optional Fan Kit Installation
Listing and Code Approvals..........................................20
General Information......................................................20
Minimum Framing Clearances .....................................20
Fan Kit Installation ........................................................ 21
Fan Duct Extension Kit ................................................. 22
Wiring Diagram .............................................................22
Optional Outside Air Kit Installation .....................................23
Brick Installation ..................................................................24
APPLIANCE MAINTENANCE
Creosote ..............................................................................25
Ash Removal .......................................................................25
Glass Installation .................................................................25
Glass Maintenance .............................................................. 25
Door Latch Adjustment ........................................................25
Trouble Shooting .................................................................26
OPERATING INSTRUCTIONS
Additional Warnings .....................................................27
Air Slide Control ...........................................................27
Fuel Requirements .......................................................27
Lighting the Appliance ..................................................28
PARTS LIST
Main Assembly ....................................................................29
WARRANTY
Installation of Appliance Checklist.......................................33
Warranty ..............................................................................34

4Montrose Woodfire
SAFETY LABEL
safety decal
This is a copy of the data badge that accompanies
each L850B Fireplace. We have included a copy of
the contents here for your review.
NOTE: Regency units are constantly being
improved. Check the data badge on the unit
and if there is a difference, the data badge on
the unit is the correct one.
COPY OF DATA BADGE
$
Please make note of the unit serial number and enter in the space provided

Montrose Woodfire 5
DIMENSIONS
dimensions
UNIT DIMENSIONS

6Montrose Woodfire
Regency Montrose
Slow Combustion Fireplace
Designed for modern living, the Regency Montrose will add ambience and
enjoyment to any room. The large viewing glass with black etched edge
provides an exceptional view of the re whilst complimenting the décor of any
home.
The Montrose is designed to t into a custom built wall without a brick replace
or chimney ensuring it can be featured in any room. As a slow combustion heater
the unit can be controlled to maximize heat output as well as wood usage.
Designed to not only meet, but exceed the very latest Australian requirements
for emissions and eciency this is the latest in heating technology.
www.regency-re.com.au
Standard Features Optional Features
• Large glass viewing area
(790mm x 310mm)
• 5mm steel rebox – lined with
high quality rebrick
• Zero clearance
• Low emissions 1.2g/kg
• Single draft control with airwash
• Removable door handle tool
• Stainless steel andiron
• Black 4 sided fascia
• Base frame kit – raises unit 300mm
on sturdy steel frame
• Fan forced duct kit (4.5m) up to 2 can be tted
• Extra ducting (4.5m) kit
• Outside air kit
Above: Regency Montrose shown as a clean edge install.
Montrose shown with 4 sided fascia
www.regency-re.co.nz

Montrose Woodfire 7
installation
BEFORE INSTALLING YOUR FIREPLACE
1) Please read this entire manual before you install and use your new wood fireplace. Failure to follow instructions may result in property damage, bodily
injury or even death. Install and use only in accordance with manufacturer’s installation and operating instructions.
2) Check your local building codes - Building Inspection Department. You may require a permit before installing your fireplace. Be aware that local codes
and regulations may override some items in the manual.
3) Notify your home insurance company that you plan to install a fireplace insert or freestanding heater.
4) THE FIREPLACE CAN GET VERY HOT. DO NOT INSTALL, PLACE OR POSITION TV’S, PAINTINGS, PICTURES, CANDLES, FURNITURE, DRAPES
OR ANY OTHER COMBUSTIBLE ITEMS ON THE WALL OR NEAR THE FIREPLACE.
5) ENSURE THERE ARE NO EXHAUST FANS WITHIN THE VICINITY OF THE FIREPLACE AS THIS CAN CAUSE THE FIREPLACE TO EMIT FUMES
BACK INTO THE ROOM.
6) ENSURE THERE IS ADEQUATE AIR SUPPLY WITHIN THE ROOM/AREA THE FIREPLACE IS BEING INSTALLED IN TO ENSURE PROPER
OPERATION OF THE FIREPLACE. INSTALL OPTIONAL OUTSIDE AIR KIT IF IN DOUBT.
7) EVALUATE THE LOCATION OF YOUR FIREPLACE AND OPTIONAL COMPONENTS. IT IS VERY IMPORTANT TO DETERMINE HOW THE FIREPLACE
IS GOING TO BE FINISHED. THE FEATURES YOU WOULD LIKE TO INCORPORATE SUCH AS FACEPLATE, OUTSIDE AIR AND FAN KIT NEED TO
BE EVALUATED.
8) DETERMINE WHAT THE THICKNESS OF YOUR DESIRED NON-COMBUSTIBLE FINISHING MATERIALS WILL BE INCLUDING THE
NON-COMBUSTIBLE BOARD. THIS PRE-DETERMINED THICKNESS WILL DICTATE THE POSITION OF THE NAILING FLANGES, FRAMING AND
OVERALL FINAL LOOK OF YOUR FIREPLACE.
9) Your fireplace is heavy and requires two or more people to move it safely. The fireplace can be badly damaged by mishandling and or injury can occur.
10) Do not connect the fireplace to a chimney system servicing another appliance or an air distribution duct.
WARNING: CARELESS INSTALLATION IS THE MAJOR CAUSE OF SAFETY HAZARD. CHECK ALL LOCAL BUILDING AND SAFETY CODES BEFORE
INSTALLATION OF UNIT.
THE APPLIANCE, WHEN INSTALLED, MUST BE ELECTRICALLY GROUNDED IN ACCORDANCE WITH LOCAL CODES.
Regency Fireplaces are constructed with the highest quality materials and assembled under strict quality control procedures that insure years of trouble free
and reliable performance.
It is important that you read this manual thoroughly and fully understand the safe installation and operating procedures. The more you understand the way
your Regency Fireplace operates, the more enjoyment you will experience from knowing that your unit is operating at peak performance.

8Montrose Woodfire
installation
1) Never use petrol, petrol type lantern fuels, kerosene, charcoal lighter
fuel, or similar liquids to start or ‘freshen up’ a fire in your heater. Keep
all such liquids well away from the heater while it is in use.
2) Keep the door closed during operation and maintain all seals in
good condition.
3) Do not burn any quantities of paper, garbage, and never burn flam-
mable fluids such as petrol, naptha or engine oil in your stove.
4) If you have smoke detectors, prevent smoke spillage as this may
set off a false alarm.
5) Do not overfire heater. If the chimney connector, flue baffle or the
stove top begin to glow, you are overfiring. Stop adding fuel and close
the draft control. Overfiring can cause extensive damage to your stove
including warpage and premature steel corrosion. Overfiring will void
your warranty.
6) Do not permit creosote or soot build-up in the chimney system.
Check and clean chimney at regular intervals. Failure to do so can
result in a serious chimney fire.
7) Your Regency stove can be very hot. You may be seriously burned
if you touch the stove while it is operating, keep children, clothing and
furniture away. Warn children of the burn hazard. For safety reasons
a guard around the fire is recommended.
8) The stove consumes air while operating, provide adequate ventila-
tion with an air duct or open a window while the stove is in use or use
optional outside air kit.
9) Do not use grates or andirons or other methods for supporting fuel.
Burn directly on the base or bricks where supplied.
10) Open the draft control fully for 10 to 15 seconds prior to slowly
opening the door when refuelling the fire.
11) Do not connect your unit to any air distribution duct.
12) Your wood fire should burn dry, standard firewood only. The use of
cut timber, plywood, “mill ends”, etc. is not allowed as this fuel can easily
overheat your wood fire. Evidence of excessive overheating will void
your warranty. As well, a large portion of sawmill waste is chemically
treated timber, which is illegal to burn in many areas. Salt drift wood
and chemically treated fire logs also must not be burned in your wood
fire.
13) DO NOT OPERATE WITH BROKEN GLASS.
WARNING: THE APPLIANCE AND FLUE-SYSTEM SHALL BE
INSTALLED IN ACCORDANCE WITH AS/NZS 2918 AND THE
APPROPRIATE REQUIREMENTS OF THE RELEVANT BUILDING
CODE OR CODES.
WARNING: APPLIANCES INSTALLED IN ACCORDANCE WITH
THIS STANDARD SHALL COMPLY WITH THE REQUIREMENTS
OF AS/NZS 4013 WHERE REQUIRED BY THE REGULATORY
AUTHORITY. I.E. THE APPLIANCE SHALL BE INDENTIFIABLE
BY A COMPLIANCE PLATE WITH THE MARKING 'TESTED TO
AS/NZS 4013'.
ANY MODIFICATION OF THE APPLIANCE THAT HAS NOT BEEN
APPROVED IN WRITING BY THE TESTING AUTHORITY IS CON-
SIDERED TO BE IN BREACH OF THE APPROVAL GRANTED FOR
COMPLIANCE WITH AS/NZS 4013.
CAUTION: MIXING OF APPLIANCE OR FLUE-SYSTEM COM-
PONENTS FROM DIFFERENT SOURCES OR MODIFYING THE
DIMENSIONAL SPECIFICATION OF COMPONENTS MAY RESULT
IN HAZARDOUS CONDITIONS. WHERE SUCH ACTION IS CON-
SIDERED, THE MANUFACTURER SHOULD BE CONSULTED IN
THE FIRST INSTANCE.
CAUTION: CRACKED AND BROKEN COMPONENTS, e.g. GLASS
PANELS OR CERAMIC TILES MAY RENDER THE INSTALLATION
UNSAFE.
WARNING: ANY MODIFICATION OF THE APPLIANCE THAT HAS
NOT BEEN APPROVED IN WRITING BY THE TESTING AUTHOR-
ITY IS CONSIDERED AS BREACHING AS/NZS 4013.
WARNING: DO NOT USE FLAMMABLE LIQUIDS OR AEROSOLS
TO START OR REKINDLE THE FIRE.
WARNING DO NOT USE FLAMMABLE LIQUIDS OR AEROSOLS
IN THE VICINITY OF THIS APPLIANCE WHEN IT IS OPERATING.
WARNING: DO NOT STORE FUEL WITHIN HEATER INSTALLA-
TION CLEARANCES.
WARNING: DO NOT USE AS AN OPEN FIRE OR OPERATE WITH
THE DOOR OPEN.
WARNING: OPEN AIR CONTROL (AND DAMPER WHEN FITTED)
BEFORE OPENING FIRE DOOR.
CAUTION: THIS APPLIANCE SHOULD NOT BE OPERATED WITH
A CRACKED GLASS.
CAUTION: THIS APPLIANCE SHOULD BE MAINTAINED AND
OPERATED AT ALL TIMES IN ACCORDANCE WITH THESE IN-
STRUCTIONS
SAFETY GUIDELINES AND WARNINGS/CAUTIONS
CAUTION: THE USE OF SOME TYPES PRESERVATIVE-
TREATED WOOD AS A FUEL CAN BE HAZARDOUS

Montrose Woodfire 9
installation
UNIT DIMENSIONS
Dimensions
The outside dimensions of the Montrose L850 including the Zero
Clearance Box is as follows:
● Width 1097mm
● Depth = 448mm
● Height = 801mm
Height of optional Base Framing Kit = 300mm
Note: Base is non-combustible and needs assembly
Cavity Requirements
Cavity Depth = 698mm - 720mm
Note: Cavity depth is determined by the position of nailing strips and
thickness of non-combustible wall nish. Rear clearance must be 250mm
Cavity Width = 1597mm
Height of zero clearance box off the ground should be a minimum of
300mm and supported by a non-combustible stand able to support 265kg.
● No Ceiling within the cavity.
Flue
● Minimum 4.5 Meters of triple skin
ue required with approved cowling
Optional Ducting
● 2 x Optional fan forced ducting vents
are available, using 150mm ducting to
a max run of 9 Meters

10 Montrose Woodfire
installation
Hearth Requirements
Hearth needs to be 6mm thick and 1470mm wide and 995mm deep to allow for
300mm leading edge. We do recommend though that your non-combustible hearth
extend 900mm in front of the unit. This allows the floor to be protected when the
door is fully open in case of ember drop.
Floor Protection
The floor protector must be a minimum of 300mm deep in front of the appliance
base. However it is highly recommended due to the width of the appliance door
that this dimension is increased in case of ember or hot ash spillage.
The floor protector must also be a minimum of 1470mm wide by 945 mm deep
x 6 mm thick cement fiber sheet with a thermal resistance value of 0.8m2 kw
per 4mm thickness.
The appliance must be installed on a non combustible stand 300mm above the
hearth.
698-720mm
300mm
1597mm
1470mm
WOOD FIREPLACE SPECIFICS AND MINIMUM CLEARANCES
Framing Guide
Unit cavity to be open into the roof cavity.
Cavity Must be open extending to attic. No ceiling within cavity.
Wall Cladding
Non-combustible material such as 9mm cement sheeting
must be used on front wall of zero enclosure.
750mm
6MM THICK CEMENT FIBRE
SHEET AS HEARTH
1470MM x 995MM

Montrose Woodfire 11
installation
OPTIONAL BASE FRAME - REVISION B (HEIGHT CHANGED TO 300MM)
CONSTRUCTING YOUR OWN BASE FRAME
WHEN BUILDING YOUR OWN BASE FRAME OR PEDESTAL BASE PLEASE
ENSURE THE FOLLOWING CONDITIONS ARE MET.
1. MINIMUM HEIGHT OF THE BASE FRAME IS 300MM FROM THE FINISHED FLOOR TO THE UNDERSIDE OF THE ZERO SHELL. IF BASE FRAME
DOES NOT SIT ON THE SAME LEVEL OF THE FINISHED FLOOR, THEN THE FRAME NEEDS TO BE MADE TALLER TO ENSURE THE 300MM
CLEARANCE IS MET. (SEE PAGE 10).
2. ENSURE THE CENTER OF THE BASE IS HOLLOW TO ALLOW THE HOOK-UP OF THE OPTIONAL OUTSIDE AIR KIT.
3. ENSURE THE BASE IS CONSTRUCTED OF NON-COMBUSTIBLE MATERIALS
4. ENSURE THE BASE CAN WITHSTAND THE WEIGHT OF AT LEAST 265KG PLUS.
5. ENSURE THE FLOOR BENEATH THE BASE CAN WITHSTAND AT LEAST 265KG PLUS.

12 Montrose Woodfire
installation
1. 6" starter ue tted. Note the crimped end is down (into unit)
FLUE AND CHIMNEY REQUIREMENTS
PLEASE READ AND REFER TO INSTALLATION INSTRUCTIONS UNIT PREPARATION ON PAGE 16
2. 6" Flue tted. Note: crimped end is down. Must connect active pipe using
stainless steel rivets or self drilling screws. 2 for each join..
3. 8" inner galvanized skin tted. The ue sits down in the box. Note: Crimped
end is up.
4. 10" galvanized ue skin tted. The 10" skin sits on top of the box over
ventilation holes in plate. Note: Crimped end is up.
Top of Unit prior to installation of the ue. The packaging material has been
removed
5. Bend up the 2 tabs on each side of the 10" ue and secure via self drill-
ing screws

Montrose Woodfire 13
installation
6. Before the next steps ensure all clearances/installation codes have been
met. Test the fan for proper operation.
7. Note ventilation at top of outer ue where it meets the cowl. It must be
vented to allow heat to escape.
Note that 8" skin will be shorter than 10" skin at top. This is ne as it allows
the 8" skin to vent into the outer skin and cowl.
10" galvanized ue skin over ventilation plate.
Note tab on either side-bent up to secure ue via self drilling screws
At this stage of the installation the unit is installed with the ue system
and any optional kits. The next step is to install and set the nailing
anges in the correct position to accommodate the front wall framing
and nishing for BOTH THE FACEPLATE AND CLEAN EDGE FRAME.

14 Montrose Woodfire
installation
FLUE AND CHIMNEY REQUIREMENTS
THE FLUE PIPE SHALL EXTEND NOT LESS THAN 4.6 M ABOVE THE TOP OF THE FLOOR PROTECTOR.
NOTE: INSTALLATION MUST BE CARRIED OUT BY A LICENSED INSTALLER IN ACCORDANCE WITH AS/NZS 2918:2001

Montrose Woodfire 15
installation
FLUE AND CHIMNEY REQUIREMENTS
Typical Example of a Sloped Ceiling Penetration
Example of Roof Penetration

16 Montrose Woodfire
installation
INSTALLATION INSTRUCTIONS
UNIT PREPARATION/FRAMING/CLEAN EDGE AND FACEPLATE WALL FINISHING
BEFORE INSTALLING ENSURE THE FOLLOWING:
READ THE ENTIRE MANUAL
EVALUATE THE LOCATION OF YOUR FIREPLACE AND LOCA-
TION OF OPTIONAL COMPONENTS SUCH AS FAN, OUTSIDE
AIR AND FACEPLATE.
DETERMINE WHAT THE THICKNESS OF YOUR DESIRED NON-
COMBUSTIBLE FINISHING MATERIALS INCLUDING THE RE-
QUIRED NON-COMBUSTIBLE BOARD. THIS PREDETERMINED
THICKNESS WILL DICTATE THE CAVITY DEPTH, POSITION OF
THE NAILING FLANGES, FRAMING AND OVERALL FINAL LOOK
OF YOUR FIREPLACE.
The unit comes standard with nailing anges and clean edge frame installed.
Clean edge frame: MAXIMUM THICKNESS OF FINISHING MATERIAL: 32MM
Optional Faceplate: MAXIMUM THICKNESS OF FINISHING MATERIAL:
32MM
1. Determine the location of the replace, ueing location and locations of the
options such as the Fan Kit and outside air. Determine if the replace will be
using the clean edge frame or faceplate.
2. Construct your base frame. Please see BASE FRAME instructions on page
11. The base frame is required TO RAISE THE UNIT in order to meet the
300mm clearance to the nished oor.
3 Position your base frame in the predetermined location of replace. Level
then mark the position of the base frame. Remove the frame and set aside.
4. Frame out back wall if required and side walls only of the replace cavity.
DO NOT FRAME FRONT WALL. The back and side walls of the cavity can
be constructed using timber. Please refer to page 9 and 10 for clearances
and cavity depth.
5. Reinstall the base frame and secure to the oor.
6. If using optional outside air kit please refer to page 23. The optional air kit
adapter must be installed must be installed prior to the unit being positioned
on to the base frame
7. Install the replace on the base frame. Secure unit to the base frame
Base Frame
Packing Screw locations
9. Pull the rebox forward out of the Zero Shell enough to access the
backside of the Clean Edge. When using the Faceplate Option the Clean
Edge frame needs to be removed and discarded.
FIREBOX PULLED FORWARD FROM ZERO SHELL
Zero Shell Firebox
Shell pulled
forward Clean
Edge
Frame
8. Remove the two screws on the back of the unit labelled "packing screws".

Montrose Woodfire 17
installation
10. Remove the six nuts and bolts and bolts that are used to secure the Clean
Edge Frame to the unit. Discard the Clean Edge Frame and hardware.
Remove six nuts and bolts
11. DETERMINE THE THICKNESS OF THE FINISHING MATERIAL. Maximum
of 32mm on both the Clean Edge Frame and Faceplate.
Maximum 32mm
nish material
12. When using the Faceplate Option, the rebox needs to be pulled forward
out of the Zero Shell to the predetermined thickness of the nish material. Posi-
tion the rebox forward out of the Zero Shell to the predetermined thickness
of the nish material. It is very helpful to use scrap piece of non-combustible
board and tile as a gauge. Ensure unit is centered and in correct position as
this will dictate the location of the spigot, framing and nishing. When using the
clean edge frame, the unit does not require to be pulled out of the zero shell.
Non-Combustible Board
Tile
Finish material sits
behind return ange
of rebox when using
Faceplate
INSTALLATION INSTRUCTIONS
UNIT PREPARATION/FRAMING/CLEAN EDGE AND FACEPLATE WALL FINISHING
13. You are now ready to install the ueing. Loosen the 4 screws on the top of
the unit that secure the adjustable ue plate. Set the plate so the unit spigot
is centered. This is not required when using clean edge frame. Only required
to do when using faceplate option.
Below is the view of the top of the unit prior to installation of the ue. The
packaging material has been removed.
Please refer to Flue requirements on page 12. Install your ue system.
14. After ueing has been installed, complete the install of your optional kits
such as fan and/or outside air kit
Unit without Clean Edge Frame and pulled forward from Zero Shell

18 Montrose Woodfire
installation
INSTALLATION INSTRUCTIONS
UNIT PREPARATION/FRAMING/CLEAN EDGE AND FACEPLATE WALL FINISHING
15. Install the nailing strips. The unit comes with four nailing strips. The top,
left and right side are all the same and the bottom one is the smaller piece.
Install the top and side nailing strips with the slotted side on the unit. The left
and right should NOT be touching the oor. Secure with the screws provided.
Install the bottom small nailing ange and secure to the left and right vertical
ones. DO NOT TIGHTEN SCREWS on the top, left and right nailing anges.
THIS APPLIES TO FACEPLATE AND CLEAN EDGE FRAME.
Nailing strip installed with slotted side on unit. The slot allows the movement
of the nailing strip to be adjusted depending upon thickness of nish material.
Smaller Bottom Nailing
Flange
16. When using the Faceplate option, the nishing materials sit behind the
rebox ange when the unit is pulled forward to the pre-determined depth.
Using the scrap pieces of non-combustible board and tile as gauge, insert them
so they are tight against the backside the return edge of the rebox frame.
Then slide the nailing anges up against the backside of the non-combustible
board/ nishing materials. Tighten the screws on the nailing anges. Do this
on the all three sides: top/ left and right.
THE NAILING FLANGES ARE NOW SET TO THE THICKNESS OF THE
FINISH MATERIAL
Finish Materials
Nailing anges pulled forward to
butt up against backside of nish
material
Top nailing ange-secure
to steel framing
Nailing ange-secure
to steel framing
Nailing flange-
secure to steel
framing
Bottom nailing flange-
secure to left and right
vertical nailing anges
Note: Keep left and right nail-
ing anges off the oor to allow
for adjust ability

Montrose Woodfire 19
installation
17. When using the Clean Edge Frame, position the nailing anges to the
pre-determined thickness of the nish material. The nish materials and non-
combustible board are to sit ush with the edge of the Clean Edge Frame.
Using the scrap pieces as a gauge position them so they are ush with the
front edge of the clean edge frame. Then slide the top nailing ange so it is
tight against the back of the non-combustible board/nish material and tighten
the screws. Do the same to the left and right sides.
THE NAILING FLANGES ARE NOW SET TO THE THICKNESS OF THE
FINISH MATERIAL
INSTALLATION INSTRUCTIONS
UNIT PREPARATION/FRAMING/CLEAN EDGE AND FACEPLATE WALL FINISHING
Finish Material
Finish material to this
edge
Nailing flanges
pulled forward to
butt up against
backside of nish
material
Nailing anges pulled forward
against the backside of nish
material to provide backing
and support
Finish material to this edge when using
the Clean Edge Frame
18. Install the steel framing: The front wall requires to be constructed of non-
combustible materials including the framing. Steel stud framing must be used.
Install the left and right vertical steel frame and secure to the nailing anges.
Position the steel frame behind the nailing ange. Install the top horizontal
steel frame and secure to the top nailing ange. Applies to both Clean Edge
Frame and Faceplate.
Secure nailing anges to steel framing
Steel framing installed
19. Finish constructing the remainder of the front wall using steel framing.
Ensure the framing is level and plumb and there is enough framing to secure
the required non-combustible board.
20. Install the non-combustible board. Ensure there are no seams on the top
and sides as these areas get extremely hot. Having no seams on the top and
side will prevent cracking. Use only high heat non-combustible board.
21. Install the nal layer of nishing material such as tile, slate. Etc. ENSURE
ALL ADHESIVES/ GLUES/ ETC ARE HIGH HEAT RESISTANT. ALLOW
BONDING AGENTS TO CURE PROPERLY BEFORE FIRING UNIT.
Clean Edge
Frame Comes
with Unit
Nailing flanges
pulled forward to
material thickness

20 Montrose Woodfire
installation
OPTIONAL FAN KIT INSTALLATION
L850 Montrose
11.06.14
1
919-478
LISTINGS AND CODE
APPROVALS
This Fan Kit has been approved for use with
Montrose L850.
Check with your local building code agency
before you begin your installation to ensure
compliance with local codes, including the
need for "permits" and follow-up inspections.
If any problems are encountered regarding
code approvals, or if you wish clarication on
any of the instructions contained here, contact
your local dealer.
OPTIONAL FAN KIT INSTALLATION
GENERAL
INFORMATION
The Fan Kit increases the effectiveness of
your replace by dispersing warm air from the
replace to remote locations in the same room
or other rooms in your home.
Up to two kits may be installed on the replace.
Important Installation Notes
1) The appliance installation must conform with
local codes and installation codes.
2) The appliance when installed, must be
electrically grounded in accordance with local
codes.
3) This kit is tested and safe when installed
in accordance with this installation manual.
Please read all instructions before starting
installation and follow all instructions carefully
during installation.
4) Installation of this kit must be performed by
a qualified service technician.
5) The Fan Kit must be installed only as speci-
fied. Any modifications of the kit or components
will void the warranty and may cause a fire
hazard.
6) Plan the location of the fireplace and the
warm air duct runs, see diagram 1 as a guide
for possible duct runs and locations.
Diagram 1: Guide for possible air duct runs and
locations. Keep duct length and number of bends
to a miniumum. Maximum duct length is 9.0m.
The Fan Kit contains a maximum of up to 4.5m.
Please purchase the Fan Duct Extension Kit to
increase the 9.0m
MINIMUM FRAMING
CLEARANCES
* Wall studs must be 407mm on center for
mounting fan housing.
* Fan Housing: Maintain a (6mm) clearance
from fan housing to combustible material.
* Wall Registers must be 102mm above oor
and / or 102mm below ceiling.
1) Determine the location of the air register/fan
housing assembly. Cut a 121mm x 406mm hole
between framing members (wall studs or floor
joists). Maintain a 6mm clearance from fan housing
to combustible material. See Framing Clearances
section.
Minimum Fan Duct
Clearances
The fan ducting requires a minimum of
25mm clearance to combustibles.
Minimum 102mm
from oor
Minimum 102mm
from ceiling
Maximum Duct Run: 9.0m
Kit Contains 4.5m
If you require more than 4.5m please purchase Fan
Duct Extension Kit.
NOTE: Airflow through the duct system is af-
fected by the duct length and number of bends. Keep
the length and bends to a minimum to maximize
performance.
Item No. Description No Description
1240V Fan As-
sembly
7 Aluminum Flex 4.5m
2 Duct Flange-
Fan
8 Duct Mounting Plate
3 Adapter Round
to Oval
9 Duct Flange-Stove
4 Angle Bracket 10 Sidewall Grille
5 Junction Box 11 Connector Clamp
6Wall Adapter
Plate
/