Page is loading ...

P/N: 11302.03 (Chrome) 11210.10 (Black)
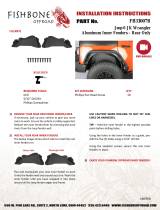
TJ Wrangler Locking Hood Latches
For 97-06 Jeep® TJ Models
Important notice:
Because of the need for proper alignment of the hood and fenders for locks to secure correctly some adjustments to the
hood and fenders may be required. If your vehicle has been involved in an accident and or had the front fenders and
hood removed there may be some fitment adjustments needed to these parts not covered in the instructions. Carefully
read instructions before attempting to install this product.
Rugged Ridge is in no way responsible for any damage to the vehicle or personal injury that may occur during the
installation or use of this product. It is the installer’s responsibility for proper installation and alignment of locks.
NO DRILLING REQUIRED.
Supplied components:
Hood Lock Upper Assemble w/gasket (2) Lock Post retainer nut lower washer (2)
Phillips Head Keys (2) Lock Post upper gasket (2)
Locking Post with hex head bolt (2) Lock Post stainless steal cover (2)
Lock Post ret ainer nut (2) Stainless Washer (12)
Upper Assemble Nylock nut (4)
Installation Instructions:
(Step 1): Remove original hood latch assembles form the hood and fender. Repeat for both left and right
sides. (See Fig. 1 & 2)
Fig.1 Fig.2
(Step 2): Install upper lock assemble to vehicle. Install (2) stainless washer, and (2) Nylock nuts to each
assemble. Tighten bolts. Make sure the lock face is pointed towards the rear of the hood. (Fig.3)
Insert Lock Post into the lock assemble heads as seen in (Fig. 4) and turn lock to hold in place.
Lower hood to see if they align with center mounting hole in the fender. If they do not align
correctly additional adjustments may be needed to hood or fenders.
Fig.3 Fig. 4

(Step 3): Remove plastic protective cover from Lock Post stainless steal cover plate (Fig.5). Place Lock Post rubber
gasket and cover plate on fender and align the center mounting hole (Fig.6). Remove Lock Post from lock
assemble and unscrew top cap to expose Allen head bolt. Insert into cover plate as seen in (Fig.7).
Fig.5 Fig.6 Fig.7
(Step 4): Attach the Lock Post retainer nut to the Allen head bolt threads from under the fender. Be sure to install
the retainer nut washer at this time. (See Fig.8) repeat above steps for the other side and loosely tighten
the Allen head bolt to the retainer nut. Reinstall the cap to the Lock Post and lower hood. Some adjustment
to the Lock Post may be needed at this time. When secured in upper lock assemble tighten retainer nut to
secure Lock Post position. Raise hood and remove Lock Post caps and tighten Allen head bolt completely.
(Step 5): Additional washers are supplied to raise the Lock Post if needed. Install washers as needed for proper fitment.
(See Fig. 9)
Fig. 8 Fig.9
Note: Please take care when assembling and installing this product to protect the finish and your
investment.
/