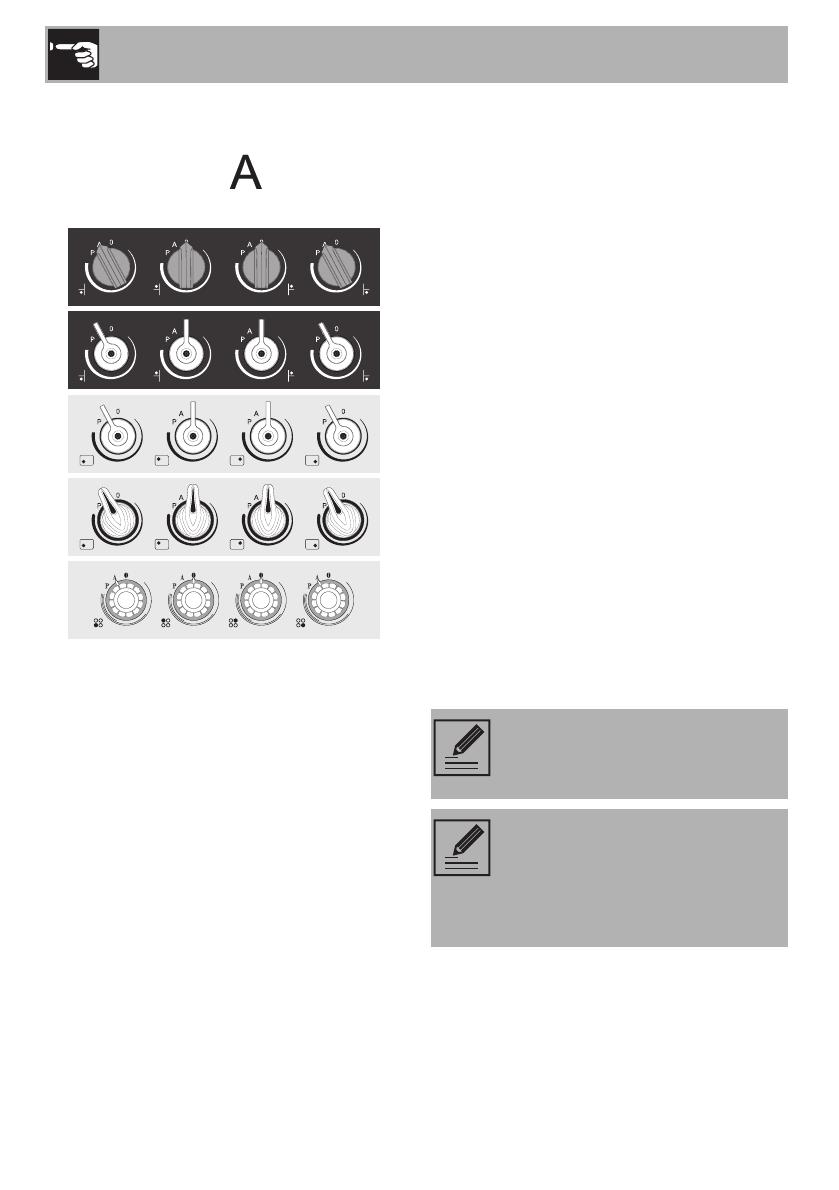
Smeg SI364BM INDUKSJONSTOPP User manual

Category
Hobs
Type
User manual
Contents
31
EN
1 Instructions 32
1.2 Appliance purpose 35
1.7 How to read the user manual 37
2 Description 38
2.1 General Description 38
2.2 Cooking zones 38
2.3 Symbols 40
3 Use 41
3.1 Preliminary operations 42
3.2 Using the hob 42
4 Cleaning and maintenance 50
4.1 Cleaning the surfaces 50
4.2 Ordinary weekly cleaning 50
4.3 Food stains or residues 50
4.4 What to do if... 52
5 Installation 53
5.1 Safety instructions 53
5.2 Section cut from the countertop 53
5.3 Mounting 56
5.4 Electrical connection 57
5.5 Instructions for the installer 58
We advise you to read this manual carefully, which contains all the instructions for
maintaining the appliance’s aesthetic and functional qualities.
For further information on the product: www.smeg.com
TRANSLATION OF THE ORIGINAL INSTRUCTIONS
Instructions
32
1 Instructions
1.1 General safety instructions
Risk of personal injury
• During use the appliance and its
accessible parts become very hot.
Never touch the heating elements
during use.
• WARNING: if the surface is
cracked, switch off the appliance
to avoid the possibility of electric
shock.
• Protect your hands wearing heat-
proof gloves during use.
• Never try to put out a fire or
flames with water: turn off the
appliance and smother the flames
with a fire blanket or other
appropriate cover.
• The appliance is not intended for
use by persons (including
children) with reduced physical,
sensory or mental capabilities, or
lack of experience and
knowledge, unless they have
been given supervised or
instruction concerning use of the
appliance by a responsible
person for their safety.
• Young children should be
supervised to ensure that they do
not play with the appliance.
• Keep children under eight years
of age at a safe distance if they
are not constantly supervised.
• Do not allow children younger
than 8 years old to come near the
appliance when in operation.
• Cleaning and maintenance must
not be carried out by
unsupervised children.
• Be aware of how rapidly the
cooking zones heat up. Do not
place empty pans on the heat:
danger of overheating.
• Fats and oils can catch fire if they
overheat. Do not leave the
appliance unattended while
preparing foods containing oils or
fats. If fats or oils catch fire, never
put water on them. Place the lid
on the pan and turn off the
relevant cooking zone.
CAUTION - The cooking process
has to be supervised. A short term
cooking processes has to be
supervised continuously.
• WARNING - Unattended
cooking on a hob with fat or oil
can be dangerous and may result
in a fire.
• When in use, do not place metal
objects, such as dishes or cutlery,
on the surface of the cooktop as
they may overheat.
• Do not insert pointed metal
objects (cutlery or utensils) into the
slots in the appliance.
• Do not pour water directly onto
very hot trays.
Instructions
33
EN
• Do not use or store flammable
materials near the appliance or
directly underneath the cooktop.
• NEVER USE AEROSOL CANS
NEAR THE APPLIANCE WHILE IT
IS IN OPERATION.
• Switch the appliance off
immediately after use.
• DO NOT MODIFY THIS
APPLIANCE.
• Before carrying out any work on
the appliance (installation,
maintenance, positioning or
moving), wear personal
protective equipment.
• Before carrying out any work on
the appliance, disconnect the
mains power supply.
• Have authorised persons carry
out installation and assistance
interventions according to the
standards in force.
• Do not try to repair the appliance
yourself or without the intervention
of authorised persons.
• If the power supply cord is
damaged, it must be replaced by
the manufacturer or its service
agent or a similarly qualified
person in order to avoid hazard.
Risk of damaging the appliance
• Do not use abrasive or corrosive
detergents (e.g. scouring
powders, stain removers and
metallic sponges) on glass parts.
• Use wooden or plastic utensils.
• Do not seat on the appliance.
• Do not use as a support surface.
• Do not obstruct ventilation
openings and heat dispersal slots.
• Do not use a steam cleaner to
clean this appliance.
• Never leave the appliance
unattended during cooking
operations in which fats or oils
could be released that could
overheat and catch fire. Be very
careful.
• Metallic objects such as knives,
forks, spoons and lids should not
be placed on the hotplate since
they can get hot.
• Danger of fire: Do not store
objects on the cooking surface.
• DO NOT USE THE APPLIANCE
TO HEAT ROOMS FOR ANY
REASON.
• The cooking vessels or griddle
plates should be placed inside the
perimeter of the cooktop.
• All cookware must have smooth,
flat bottoms.
If any liquid does boil over or spill,
remove the excess from the
cooktop.
• Take care not to spill acidic
substances such as lemon juice or
vinegar onto the cooktop.
Instructions
34
• Do not spill sugar or sweet
mixtures on the cooktop during
cooking.
• Do not place materials or
substances that could melt (plastic
or aluminium foil).
• Do not put empty pans or frying
pans on switched on cooking
zones.
• Do not use rough or abrasive
materials or sharp metal scrapers.
• Do not use cleaning products
containing chlorine, ammonia or
bleach on steel parts or parts with
metallic surface finishes (e.g.
anodizing, nickel- or chromium-
plating).
Installation
THIS APPLIANCE MUST NOT BE
INSTALLED IN BOATS OR
CARAVANS.
• Position the appliance into the
cabinet cutout with the help of a
second person.
• Check that the piece of furniture
material is heat resistant.
• Check that the piece of furniture
has the required slots.
• To prevent overheating, the
appliance must not be installed
behind a decorative door or a
panel.
• Have the electrical connection
performed by authorised persons.
The appliance must be connected
to earth in compliance with
electrical system safety standards.
• Use cables withstanding a
temperature of at least 90°C.
• The tightening torque of the
screws of the terminal supply
wires must be 1.5 - 2 Nm.
• The power cable must only be
installed and replaced by
authorised persons.
If the electrical supply is restricted,
means of all-pole disconnection
must be accessible and
incorporated in the fixed wiring in
accordance with the wiring rules.
For this appliance
• If cracks or fissures form, or if the
glass ceramic cooking surface
breaks, turn off the appliance
immediately. Disconnect the
power supply and call Technical
Support.
• Avoid hard, solid objects falling
on the cooking surface.
• Do not use the cooktop if the
pyrolytic cycle is taking place
inside any oven installed below.
Do not touch or clean the cooktop
surface during operation or when
the residual heat indicator lights
are still on.
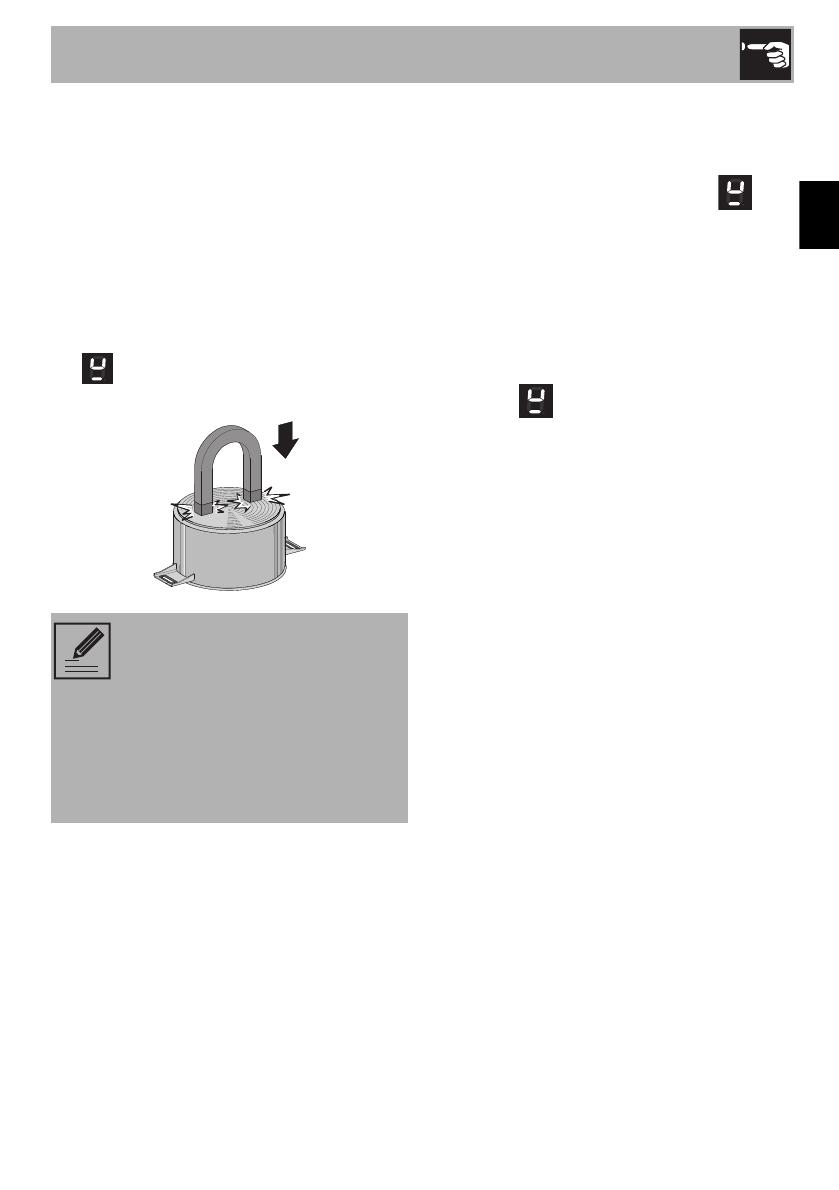
• Activate the control lock when
you have children or pets which
Instructions
35
EN
could reach the cooktop.
• After use the cooking zones
remain hot for a certain period of
time after they have been turned
off. Do not touch the cooktop
surfaces.
Switch off the hot plates after use.
Never rely solely on the
cookware detector.
Supervise children carefully as
they cannot easily see the
indication that there is residual
heat. Keep children away from
the cooking zones.
The glass ceramic surface is
highly resistant to impact.
However, prevent hard, solid
objects falling onto the cooking
surface as they may cause it to
break if they are sharp.
The glass ceramic cooking
surface must not be used as a
surface for placing objects.
• Remove any traces of liquid from
the lid (if fitted) before opening.
Leave the cooking surface to cool
before closing the lid.
• People who have pacemakers or
other similar devices fitted must
make sure that the operation of
these devices is not jeopardised
by the inductive field, whose
frequency range is between 20
and 50 kHz.
• In conformity with the provisions
regarding electromagnetic
compatibility, the electromagnetic
induction cooktop comes under
group 2 and class B (EN 55011).
1.2 Appliance purpose
• This appliance is intended for
cooking food in the home
environment. Every other use is
considered improper.
• This appliance is not intended to
be operated by means of external
timer or separate remote control
system.
1.3 Manufacturer’s liability
• The manufacturer declines all
liability for damage to persons or
property caused by:
• Use of the appliance other than
that specified
• Failure to comply with the
instructions in the user manual
• Tampering with any part of the
appliance
• The use of non-original spare
parts.
1.4 Identification plate
The identification plate bears the
technical data, serial number and
brand name of the appliance. Do not
remove the identification plate for
any reason.
Instructions
36
1.5 This user manual
This user manual is an integral part of
the appliance and must therefore be
kept in its entirety and within the
user’s reach for the whole working
life of the appliance.
Read this user manual carefully
before using the appliance.
1.6 Disposal
This appliance must be disposed of
separately from other waste
(Directives 2002/95/EC, 2002/
96/EC, 2003/108/EC). The appliance
does not contain substances in quantities
sufficient to be considered hazardous to
health and the environment, in accordance
with current European directives.
To dispose of the appliance:
• Deliver the appliance to the appropriate
recycling centre for electrical and
electronic equipment waste, or return it to
the retailer when purchasing an
equivalent product, on a one for one
basis.
Our appliances are packaged in non-
polluting and recyclable materials.
• Deliver the packing materials to the
appropriate recycling centre.
Power voltage
Danger of electrocution
• Disconnect the mains power supply.
Plastic packaging
Danger of suffocation
• Do not leave the packaging or any part
of it unattended.
• Do not let children play with the plastic
bags.
Instructions
37
EN
1.7 How to read the user manual
This user manual uses the following reading
conventions:
1. Sequence of instructions for use.
• Standalone instruction.
Instructions
General information on this user
manual, on safety and final
disposal.
Description
Description of the appliance and its
accessories.
Use
Information on the use of the
appliance and its accessories,
cooking advice.
Cleaning and maintenance
Information for proper cleaning and
maintenance of the appliance.
Installation
Information for the qualified
technician: Installation, operation
and inspection.
Safety instructions
Suggestion / Information
Description
38
2 Description
2.1 General Description
Advantages of induction cooking
Energy saving thanks to the direct
transmission of energy to the pan
(suitable magnetisable cookware is
required) compared to traditional
electric cooking.
Improved safety as the energy is only
transmitted to the pan placed on the hob.
High level of energy transmitted from the
induction cooking zone to the base of
the pan.
Rapid heating speed.
Reduced danger of burns as the cooking
surface is only heated under the base of
the pan; foods which overflow do not
stick.
2.2 Cooking zones
Model with straight edge Model with angled edge
The hob is equipped with an
induction generator for each
cooking zone. Each generator
located under the glass ceramic
cooking surface creates an
electromagnetic field which
induces a thermal current in the
base of the pan. This means the
heat is no longer transmitted from
the hob to the pan but created
directly inside the pan by the
inductive current.
Description
39
EN
Model with frame
* power levels are approximate and may vary according to the settings made and the
mains voltage.
Zone Diameter
external (mm)
Min. pan Ø
(mm)
Max. power
draw (W)*
Power draw in
Booster function (W)*
1 160 110 1300 1400
2 210 120 2300 3000
3 160 110 1300 1400
4 210 120 2300 3000
Description
40
2.3 Symbols
Knobs
Turn the knob clockwise or anti-clockwise to
increase or decrease the power for the
cooking zone whose value is shown on the
displays.
OFF setting
The cooking zone is OFF.
Booster setting
Using this setting the Booster function of the
cooking zone activates.
Accelerator setting
Using this setting the accelerator function of
the cooking zone activates.
Cooking zones
/ / Front left
/ / Rear left
/ / Rear right
/ / Front right
Use
41
EN
3 Use
Instructions
High temperature
Danger of burns
• Protect your hands by wearing heat-
proof gloves during use.
• Do not touch or clean the hob surface
during operation or when the residual
heat indicator lights are still on.
Do not put empty pans or frying pans on
switched on cooking zones.
• Keep children under the age of 8 away
from the appliance when it is in use.
• Activate the controls lock when you
have children or pets which could reach
the hob.
• After use the cooking zones remain hot
for a certain period of time after they
have been turned off. Do not touch the
hob surfaces.
High temperature
Danger of fire or explosion
Do not use or leave flammable materials
near the appliance or directly
underneath the hob.
• Do not cook in closed tins or containers,
plastic kitchenware or containers.
• Do not leave the appliance unattended
during cooking operations where fats or
oils could be released.
• In case you notice cracks or fissures or
you cannot turn off the appliance,
disconnect the power supply and
contact the Assistance Centre.
Improper use
Risk of damage to surfaces
• Do not use the hob if the pyrolytic cycle
is taking place inside any oven installed
below.
Never place pans with bases which are
not perfectly flat and smooth.
• Avoid hard, solid objects falling on the
cooking surface.
In case you notice cracks or fissures, turn
off the appliance immediately,
disconnect the power supply and
contact Technical Support.
• Do not use the hob as a support surface.
Use
42
3.1 Preliminary operations
In order to remove any moisture that could
have accumulated during the manufacturing
process and for the electronic circuits and
control keypad to work properly:
1. Remove the protective films from the
external surfaces of the appliance and
accessories.
2. Remove any labels (apart from the
technical data plate).
3. Place a pan full of water on each of the
front cooking zones and switch them on
to the maximum power setting for at least
30 minutes.
4. After 30 minutes, switch off the front
cooking zones and repeat this operation
for the rear cooking zones and any
central cooking zone.
5. If after carrying out the above operations
the controls do not work properly, it
might be necessary to extend the
operations until the moisture has
completely evaporated.
3.2 Using the hob
All the appliance’s control and monitoring
devices are located together on the front
panel. The relevant cooking zone is
indicated next to each knob.
Just turn the knob clockwise to the required
power setting.
Cookware suitable for use in induction
cooking
Cookware used on the induction cooking
surface must be made of metal, with
magnetic properties and a sufficiently large
base.
Suitable cookware:
• Enamelled steel cookware with thick
bases.
• Cast iron cookware with an enamelled
base.
• Cookware in multilayer stainless steel,
ferritic stainless steel and aluminium with
a special base.
On first connection to the electrical
mains, an automatic check will be
carried out that will switch on all
indicator lights for a few seconds.
Use
43
EN
Unsuitable cookware:
• Copper, stainless steel, aluminium,
fireproof glass, wood, ceramic and
terracotta cookware.
To see whether the pan is suitable, bring a
magnet close to the bottom: if it is attracted,
the pan is suitable for induction cooking. If
you do not have a magnet, you can put a
small amount of water in the pan, place it
on a cooking zone and start the hot plate. If
the symbol appears on the display, it
means the pan is not suitable.
Cookware recognition
When there is no saucepan on a cooking
zone or if the saucepan is too small, no
energy will be transmitted and the
symbol will appear on the display.
If there is a suitable saucepan on the
cooking zone, the recognition system
detects it and switches on the hob to the
power level set using the knob. Energy
transmission is also interrupted when the
saucepan is removed from the cooking
zone (the symbol will be shown on the
display).
If the cookware recognition function is
activated in spite of the saucepan or frying
pan on the cooking zone being smaller
than the zone itself, only the necessary
energy will be transmitted.
Cookware recognition limits: The minimum
diameter of the pan base is indicated by a
circle or a cross on the cooking zone
(depending on the model).
Pans with smaller diameters risk not being
detected and therefore not activating the
inductor.
Use only cookware with a
perfectly flat bottom which is
suitable for induction hot plates.
Using cookware with an irregular
bottom could jeopardise the
efficiency of the heating system
and prevent cookware from being
detected on the hot plate.
Use
44
Limiting the cooking duration
The hob has an automatic device which
limits the duration of use.
If the cooking zone settings are not
changed, the maximum duration of
operation for each zone depends on the
power level selected.
When the device for limiting the duration of
use is activated, the cooking zone turns off,
a short alert sounds and, if the zone is hot,
the symbol appears on the display.
Protection from overheating
If the hob is used on full power for a long
period, the electronics will have trouble
cooling down if the room temperature is
high.
To avoid excessively high temperatures
forming in the electronics, the power to the
cooking zone is reduced automatically.
Advice on energy-saving
The diameter of the base of the pan must
correspond to the diameter of the
cooking zone.
• When buying a pan, check whether the
diameter indicated is that of the base or
the top of the pan, as the top is almost
always larger than the base.
• When preparing dishes with long
cooking times, you can save time and
energy by using a pressure cooker,
which also helps to retain vitamins
contained in the food.
• Make sure that the pressure cooker
contains enough liquid as, if there is not
enough and it overheats, this may cause
damage to both the pressure cooker and
the cooking zone.
• If possible, always cover pans with a
suitable lid.
Choose a pan suitable for the quantity of
food to be cooked. A large, half-empty
saucepan leads to a waste of energy.
Set power level Maximum cooking
duration in hours
1 8
26
3 - 4 5
54
6 - 7 - 8 - 9 1 ½
Under certain circumstances, if the
hob and the oven are being used
at the same time, the maximum
power limit that can be used by the
electrical system might be
exceeded.
Use
45
EN
Power levels
The power in the cooking zone can be
adjusted to various levels. The table shows
the levels suitable for various types of
cooking.
* see booster function
Residual heat
If the cooking zone is still hot after being
switched off, the symbol will be
displayed on the display. The symbol clears
once the temperature drops below 60°C.
Booster function
• Turn the knob clockwise to position
for two seconds and then release it. The
display shows the symbol.
(Only for cooking zones 2 and 4): After 5
minutes the booster function will
automatically be disabled and cooking will
continue at power level 9.
Power level Suitable for:
0OFF setting
1 - 2 Cooking small amounts of food
(minimum power)
3 - 4 Cooking
5 - 6 Cooking large quantities of
food, roasting larger portions
7 - 8 Roasting, slow frying with flour
9Roasting
P * Roasting / browning, cooking
(maximum power)
Improper use
Danger of burns
• Supervise children carefully as they
cannot easily see the residual heat
indicator. The cooking zones remain hot
for a certain period of time even after
they have been turned off. Make sure
that children never touch the hob.
The booster function allows you to
activate the cooking zone at
maximum power as long as 5
minutes. It can be used to bring a
large quantity of water to a boil
rapidly or to broil meat.
The Booster function has priority
over the heating accelerator
function.
Use
46
Heating accelerator
1. Turn the knob anti-clockwise to
position and release it. The display
shows the symbol.
2. Select the required heating power (1 - 8)
within 3 seconds. The selected power
and the symbol will flash alternately
on the display.
The power level can be increased at any
moment. The “maximum power” period will
automatically be modified.
Power control
The hob is fitted with a power control
module that optimises/limits consumption. If
the overall set power level exceeds the
maximum limit permitted, the electronic
circuit board will automatically manage the
power supplied by the hot plates.
The module tries to maintain the maximum
deliverable power levels. Levels set by the
automatic control will appear on the
display.
The flashing of a power level indicates that
it will be automatically limited to a new level
selected by the power control module.
Each cooking zone is equipped
with a heating accelerator that
allows the maximum power to be
delivered for a time that is
proportional to the selected power
(the zone is switched on at the
highest setting and then continues
at the selected power level).
Turn the knob to power level 9 to
disable the heating accelerator.
Then set the knob to the required
heating level (1...8).
If the heating accelerator has been
set to 9, turn the knob anti-
clockwise.
Priority is given to the first zone that
is set.
The power control module does
not affect the total power
consumption of the appliance.
Use
47
EN
Controls lock
1. When all the cooking zones are turned
off, simultaneously turn the two cooking
zone control knobs anti-clockwise to the
left (position ).
2. Keep them turned until the symbols
appear on the display.
3. Release the knobs.
In order to remove the control lock repeat
the same operations described previously.
Error codes
If the display shows one of the following
error codes , , contact Technical
Assistance.
Power limitation
1. Disconnect the appliance from the mains
power supply and wait 10 seconds
before turning the power back on.
The controls lock is a device that
protects the appliance from
accidental or inappropriate use. If a knob is turned to for more
than 30 seconds, an error
message will appear on the
displays
The induction hob is configured to
operate at 7.4 kW, but the power
can be limited so that it can work
at 4.5 kW, 3.8 kW, 3 kW, 2.6 kW
or 1.9 kW.
The power level has to be set
within 2 minutes from the power
being switched on.
Use
48
2. Turn and hold the front left and front right
cooking zone control knobs anti-
clockwise (position ) at the same
time.
The rear left and rear right cooking zone
displays will indicate “7.” and “4”.
3. Release the knobs.
4. Turn and hold both knobs anti-clockwise
again.
The rear left and rear right cooking zone
displays will indicate the power levels “4.
and “5”.
5. Release the knobs.
6. Turn and hold both knobs anti-clockwise
again.
The rear left and rear right cooking zone
displays will indicate the power levels “3.
and “8”.
7. Release the knobs.
8. Turn and hold both knobs anti-clockwise
again.
The rear left and rear right cooking zone
displays will indicate the power levels “3.
and “0”.
9. Release the knobs.
10. Turn and hold both knobs anti-
clockwise again.
The rear left and rear right cooking zone
displays will indicate the power levels “2.
and “6”.
11. Release the knobs.
12. Turn and hold both knobs anti-
clockwise again.
The rear left and rear right cooking zone
displays will indicate the power levels “1.
and “9”.
13. Release the knobs.
After having released the knobs at
the required power level, wait until
the displays turn off.
The power level can be changed
again up to 4 minutes after the
displays have turned off (without
having to disconnect the appliance
from the power supply).
Use
49
EN
To reset the product to its original power
setting (or to a different power level), repeat
the configuration procedure.
Possible cooking zone combinations
The last power setting will remain
in memory even in the event of a
power failure.
POWER Zone
1
Zone
2
Zone
3
Zone
4
7.4 kW
9999
7P7P
P97P
P9P9
79P9
4.5 kW
8888
8-99
88-9
- 889
989 -
9-98
89-8
- 988
3.8 kW
7777
--99
-8-9
9- -9
--7P
8- -P
9-P7
97P -
P79-
P-97
POWER Zone
1
Zone
2
Zone
3
Zone
4
3.0 kW
8-88
-8-8
--79
7- -9
-89-
9-9-
-89-
9-9-
--98
2.6 kW
7-77
-7-7
--88
8- -8
9-9-
-79-
--97
97 - -
9- -7
88 - -
1.9 kW
7- -7
--77
---8
7-9-
-88-
-8- -
Cleaning and maintenance
50
4 Cleaning and maintenance
Instructions
4.1 Cleaning the surfaces
To keep the surfaces in good condition,
they should be cleaned regularly after use.
Let them cool first.
4.2 Ordinary weekly cleaning
Clean and maintain the hob once a week
using an ordinary glass cleaning product.
Always follow the manufacturer’s
instructions. The silicon in these products
creates a protective, water-repellent
membrane which also resists dirt. All marks
stay on the membrane and can therefore be
removed easily. After cleaning, dry the
surface with a clean cloth. Make sure that
there is no detergent left on the cooking
surface as it will undergo a corrosive
reaction when heated up and could modify
the structure of the cooking surface.
4.3 Food stains or residues
Light coloured marks from pans with
aluminium bases can be easily cleaned off
with a cloth moistened in vinegar.
Remove any burnt-on residues after
cooking; then rinse with water and dry
thoroughly with a clean cloth.
Dirt which may have fallen on the hob
while cleaning lettuce or potatoes can
scratch the hob when moving pans.
Consequently, remove any dirt from the
cooking surface immediately.
Improper use
Risk of damage to surfaces
• Do not use steam jets to clean the
appliance.
• Do not spill sugar or sweet mixtures on
the hob during cooking.
• Do not place materials or substances
that could melt (plastic or aluminium foil).
Do not use cleaning products containing
chlorine, ammonia or bleach on parts
made of steel or that have metallic
surface finishes (e.g. anodizing, nickel-
or chromium-plating).
• Do not use abrasive or corrosive
detergents (e.g. scouring powders, stain
removers and metallic sponges) on
glass parts. Use wooden or plastic
utensils.
We recommend the use of
cleaning products distributed by
the manufacturer.
  • Page 1 1
  • Page 2 2
  • Page 3 3
  • Page 4 4
  • Page 5 5
  • Page 6 6
  • Page 7 7
  • Page 8 8
  • Page 9 9
  • Page 10 10
  • Page 11 11
  • Page 12 12
  • Page 13 13
  • Page 14 14
  • Page 15 15
  • Page 16 16
  • Page 17 17
  • Page 18 18
  • Page 19 19
  • Page 20 20
  • Page 21 21
  • Page 22 22
  • Page 23 23
  • Page 24 24
  • Page 25 25
  • Page 26 26
  • Page 27 27
  • Page 28 28

Smeg SI364BM INDUKSJONSTOPP User manual

Category
Hobs
Type
User manual

Ask a question and I''ll find the answer in the document

Finding information in a document is now easier with AI