Page is loading ...

BN Thermic Ltd
34 Stephenson Way
Three Bridges,
Crawley,
West Sussex
RH10 1TN
England
Tel: +44 (0)1293 547361
Fax: +44 (0)1293 531432
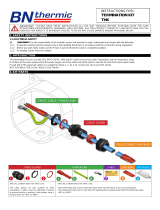
Installation instructions for
CRJ-T1
Termination kit
All terminations and connections must be completed by a qualified electrician and carried
out in accordance with current regulations.
This CRJ-T1 termination kit is intended to be used with all BN Thermic CRJ and CRJM
Self Regulating Cable. This kit includes all the parts required to terminate both ends of a
single piece of cable. If you wish to join two lengths of cable or T join another piece of
cable you will also require a CRJ-S Splice / T Joint Kit for each join or T joint you wish to
make. Please make sure you do not exceed the maximum length for each type of cable
as shown in the cable instruction leaflet.
Termination Kit
CRJ T1 kit contains:
1 - Grey cable gland 20mm
1 - Red 40mm x 3.2mm dia heat shrink
1 - Blue 40mm x 3.2mm dia heat shrink
1 - Green / yellow 65mm x 3.2mm dia
heat shrink
1 - Black 70mm x 16.4mm dia heat shrink
1 - Black 50mm x 16.4mm dia heat shrink
1 - Black 35mm x 16.4mm dia heat shrink
2 - Insulated barrel connectors
1 - Warning label
Tools required
Sharp knife
Side cutters
Long nose pliers
Small screwdriver
Heat gun
Crimp tool
Spanner

STEP
1
Preparation for termination
STEP
3
STEP
8
First slide the cable gland and then the 70mm heat
shrink onto the cable. Cut around the outer cable
sheath 80mm from the end the gently bend the cable
to break the sheath free.
Carefully cut along the centre of the outer sheath as
shown. Discard the 80mm length of the outer sheath.
Gently bend the cable and feed the inner core through
the braid opening.
Pull the braid tight to form a ‘pig tail’
50mm
Push back the earth braid to create a bulge .
STEP
7
Carefully score around the inner sheath 50mm from
the end. Gently bend the cable to break this section of
the sheath free.
STEP
4
Then using a small screwdriver make an opening at
the bulge. Carefully cut along the centre of the inner jacket as
shown gently bend the inner jacket, remove and
discard.
STEP
5
STEP
2
STEP
6

30m
m
STEP
13
STEP
10
STEP
14
STEP
11
STEP
16
Blue
Re
d
STEP
12
Taking care not to cut into the two conductors, working
from the outside, expose the conductors (Buss wires).
Slide the black adhesive lined 50mm long x 16mm
diameter heat shrink over the cable leaving 10mm over
the exposed red and blue insulated Buss wires. Have
on hand the long nose pliers. Using the heat gun shrink
this sleeve.
Starting from the ends pull each Buss wire away from
the inner core material.
As the heat shrink reduces down immediately squeeze
the overhung portion with the pliers for 20 seconds to
form a fork like arrangement. (The heat shrink has an
inner glue like material to ensure good adhesion.)
Crimp, using a suitable tool, the two insulated barrel
connectors to the conductors to facilitate connection to
the power feed cable.
Remove and discard the inner core material leaving
the two bare Buss wires exposed.
Slide the 70mm length back over the terminated
section including the green/yellow covered earth wire
to the base of the forked conductors and shrink into
place. Finally slide the gland over the assembly in
preparation for connection into a suitable junction box.
Tighten the cable gland.
Slide the red 40mm long x 3mm diameter heat shrink
over either of the exposed Buss wires and using a
suitably rated heat shrink gun shrink into place. Repeat
using the blue sleeve on the other exposed wire. Slide
the green/yellow sleeve over the earth wire.
STEP
9
STEP
15

4m
m
STEP
2
Remote End Preparation
15mm
STEP
1
Using the same method to expose and separate the
earth braid as shown in the termination detail, strip the
outer, inner and earth braid back 15mm from the cable
end. Fold the earth wire around the sheath. DO NOT
EXPOSE THE BUSS WIRES.
Slide the 35mm length of black heat shrink over the
cable end so that there is 15mm overhanging the cable
end.
STEP
4
Using a pair of side cutters cut down the centre of
the 15mm length of inner core and then remove 4mm
of one of the Buss wires so as to form a notch. This
ensures that there is no way in which the Buss wires
can come into contact with each other.
Apply heat to the shrink tubing and when the
overhanging portion is fully shrunk squeeze the ends
together to enable the inner glue to adhere to itself. A
bead of the clear colour glue should be visible at the
end.
STEP
3
BN Thermic Ltd. 34 Stephenson Way, Three Bridges, Crawley, West Sussex RH10 1TN England
Tel: +44 (0)1293 547361 Fax: +44 (0)1293 531432
/