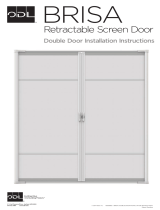
BRISA
Retractable Screen Door
Double Door Installation Instructions
CALL US FIRST Do not return to the store.
For assistance with your installation, or for additional
product information, contact our Customer Care Team
at 888-483-3768 or visit www.LARSONdoors.com.
© 2019 Larson Manufacturing 202221006
Patent 9,624,722
2333 Eastbrook Drive, Brookings, SD 57006
888-483-3768 www.larsondoors.com

2
OPTIONAL TOOL
A hack saw is required if your
door width is less than 68" wide.
CONTACT US FIRST
Do not return to the store.
For assistance with your
installation, or for additional
product information, contact our
Customer Care Team at
www.LARSONdoors.com.
Important
Be sure to first read through and
then follow completely all step-
by-step instructions. This will help
to insure proper installation and
functionality. Expect installation
to take less than 30 minutes.
Attention
Retractable screen doors are
not intended to provide security
or provide for the retention of
objects, animals, or persons
within the interior.
A fresh approach to fresh air
Thank you for purchasing a Brisa Retractable Screen Door from LARSON
®
. Make
sure the retractable screen door you purchased is the correct size to fit your
door. This retractable screen door fits a double inswing or double outswing door.
TOOLS
PARTS
Power Drill/Screwdriver and
No. 2 Phillips Head Driver Bit

3
Product terminology
Use the following illustration and terminology to become familiar with your Brisa
Retractable Screen Door parts and location. This will be helpful for following
installation instructions.
PARTS
Bottom Track
To p Track
La
tch Hook Housing
End Cap (Bottom)
Latch Hook Housing
End Cap (Top)
Latch Hook Housing
Latch Housing
End Cap (Bottom)
Latch Housing
Slider Bars
Slider Bar End Caps
(Bottom)
Screen
Sill Plate
Sill Plate
Extender
Sill Plate
Extender
Latch Housing
End Cap (Top)
Handles
Slider Bar End Caps
(Top)

4
DOOR TYPE
Identify your sill and door type
Before you begin installing your new retractable screen door, it is important to
identify your sill and door type. If you have a short sill you may need to make some
modifications before proceeding to the installation steps.
Double Inswing
Screen assembly will mount
on outside of the home.
Double Outswing*
Screen assembly will mount
on inside of the home.
Handle Modifications
If you have an outswing door
you will need to move the
lock mechanism to the inside
of the home.
NOTE: This step should be
done after the retractable
screen is installed (see pg 9).
Additional steps required
When installing the screen
assembly make sure the
housing flange is installed onto
the door trim (or brickmold).
Inswing
door
Trim
Screen assembly
Jamb
Top-down view
Flush Sill
Sill is flush with the exterior trim.
Long/Extended Sill
Sill extends past the exterior trim.
SILL TYPE
Short Sill
Sill stops short of the exterior trim.
• A filler board is not needed
when short sills have ground
directly underneath sill.
• A filler board is needed when
short sill sits on top of a step.
• Cut the filler board and place
under the trim so the top of the
filler board is even with the sill.
Filler Board

5
Assembly process
These instructions outline the step-by-step process to install a retractable screen
door. Before starting, review all instructions and become familiar with the parts
included. It may be helpful to have a second person assist you during the installation.
MEASURE YOUR
DOOR TRIM OPENING
This screen door is designed to fit
door trim openings between 68" and
72" without modifications. If your
door trim opening measures less than
68" wide, the top and bottom tracks
will require cutting. Go to page 9 to
complete this modification first.
STEP 1
ASSEMBLE COMPONENTS
Determine which side you wish to
open and close and make this the
latch housing side (without the
slide bolts).
TIP: Place housings face down on a
soft surface to protect the finish
during assembly.
Interior View
Insert one end of each track into the screen housing.
Make sure the screen threads through the tracks.
Screen
Housing
Bottom Track

6
Slide sill plate assembly onto bottom track.
STEP 2
INSERT SCREEN
Place screen assembly onto door
sill and lift into place.
Flush and short sill – Assembly
rests in a position where top of
track is flush with edge of sill.
Long sill – Assembly rests in a
position on top of sill.
Insert the other end of the tracks
into the latch hook housing.
Sill Plate
Assembly
Bottom Track
Do not deploy screen until it is assembled to doorway.
When installing the screen assembly make sure
the housing flange is snug to the end/edge of the
door jamb.

7
Extend housings to the left and right evenly until
snug to the door inside trim.
Drive sill screws 4" from either end
and 10" to the left and right of center.
STEP 3
SECURE SCREEN
Insert a housing screw into the pre-drilled
screw hole at the top of the housing
flanges on both sides to hold frame in
place. Do not tighten completely.
Center sill plate assembly on the door
sill. Slide sill plate assembly extenders to
each side to fill gaps.
Center sill plate assembly on the door sill. Slide sill
plate assembly extenders to each side to fill gaps.
Interior View
4" 10" 10" 4"
NOTE: For a tailored fit around door
moldings, notch each plastic
sill plate extender using a
utility knife. See page 8

8
Tighten the top screw and insert housing
screws into all remaining pre-drilled holes
on each vertical housing flange (2 total
per side). Tighten all screws.
Release the slider bar and drill 1/4" holes
in the sill and the top molding. Deploy
the slider bar with latch hook to the
middle of the track. Drop slide bolts into
these top and bottom holes.
TIP: For a tailored fit around door
moldings, notch each plastic sill
plate extender using a utility knife.
Interior View
Interior View
Deploy slider bar with latch hook
until it reaches the middle of the
track. Mark the position of the slide
bolts on the sill and top molding.
Deploy slider bar with latch until it
reaches the middle of the track and
latches onto the hook.
Verify the latch and latch hook align
properly. Latch hook can be adjusted as
needed with a hand screwdriver.
TIP: Latch hook can be oriented either
hook up or down to connect with latch.
If the top slide bolt is not extending far
enough to engage in the drilled hole,
loosen the bottom screw on the slide
bolt bracket. Slide the bracket with
the slide bolt fully extended until it is
engaged in the drilled hole. Re-tighten
the screw.

9
EXAMPLE
68" standard door width
- 66" existing door width
= 2"
+ 1-7/8"
= 3-7/8" total amount to be cut
from the ends of the top
and bottom tracks
Product modification
Minor modifications may be necessary to tailor the retractable screen to your
application. Door trim openings that measure less than 68" will require track
cutting to fit the door width. Outswing door installations require a change to the
handle/lock assembly to move the lock mechanism to the inside of the home.
OUTSWING DOOR
HANDLE MODIFICATION
Once the unit is installed, follow these
steps to move the lock mechanism to
the inside of the home.
Engage the lock and remove the (2)
screws from the handle.
Remove both handles (the grey latch
will be loose).
Remove the latch from the
slider bar and reverse it so the
logo faces the inside the home.
Then press the latch over the
slider bar.
Place the handle with the lock on the
logo side of the latch.
Align and insert the screws through
the screw holes. Position the
remaining handle over the screws
and align the (6) small dimples with
corresponding indentations on the
other handle.
Tighten the (2) screws.
NARROW DOOR
TRACK MODIFICATION
Measure your door trim opening and
follow the example below to make
your modifications. Cut the ends of
the tracks that will be inserted into the
decorative housing.

10
Frequently Asked Questions
Is maintenance required on my Brisa Retractable Screen Door?
Dirt and debris should be vacuumed out of the tracks periodically. Do not use oily lubricants
(like WD40) on the track as these tend to attract dirt, which can hinder the operation. If
needed, occasional use of a silicone-based lubricant is acceptable.
Can Brisa Retractable Screen Doors be installed on stucco homes without a
wood door frame?
No, Brisa is a face-mount installation that requires a door frame/brick mold for proper
attachment.
What if my retractable screen door retracts slowly or doesn’t deploy at all?
There could be various reasons for slow retraction or no deployment of the screen. Be sure
to clean dirt and debris out of the track. Look for nicks or bends in the track itself. Examine
the weather stripping (the black pile material in the track) for displacements or rips that
prevent the screen from operating smoothly. Check to make sure the bottom end of the
slider bar is fully seated in the track. Also confirm the unit has been installed square to the
door frame. If you still are experiencing diculty, contact our Customer Care Team or visit
www.LARSONdoors.com for assistance or replacement parts.
Someone walked through my screen and now it does not function properly.
What should I do?
If the screen is frayed, has holes, or the fabric is creased, please contact our Customer Care
Team at www.LARSONdoors.com to learn more about how to order a replacement screen. If
the track is bent, it can be replaced as well.
Can I purchase a replacement screen or other parts?
Yes, visit www.LARSONdoors.com.
Limited Lifetime Warranty
Your purchase of a LARSON Brisa Retractable Screen Door includes a Limited Lifetime
Warranty. Visit www.LARSONdoors.com/Register to register your product. Damage to
screen such as tears are not covered under the warranty. Labor cost, reinstallation fees are
not covered under warranty.
Garantía limitada de por vida
Su compra de una puerta de malla retráctil Brisa de LARSON tiene garantía limitada de por
vida. Visite www.LARSONdoors.com/Register para registrar su product. Los daños a la
pantalla, como roturas, no están cubiertos por la garantía. El costo de mano de obra, las
tarifas de reinstalación no están cubiertas por la garantía.
.
Garantie à vie limitée
L’achat de votre porte-moustiquaire rétractable LARSON comprend une garantie à vie
limitée. Visitez le www.LARSONdoors.com/Register pour enregistrer votre produit. Les
dommages causés à l’écran, tels que les déchirures, ne sont pas couverts par la garantie. Le
coût de la main d’œuvre, les frais de réinstallation ne sont pas couverts par la garantie.
Page is loading ...
Page is loading ...
Page is loading ...
Page is loading ...
Page is loading ...
Page is loading ...
Page is loading ...
Page is loading ...
Page is loading ...
Page is loading ...
/
