
See instruction manual for additional options & information
Press POWER button to turn on oven & activate control panel.
Press TEMPERATURE icon. It will turn red.
1
3
4
5
6
7
Set HUMIDITY by pressing or until desired humidity %
appears (from oFF to 100% in 20% increments.)
Set COOKING TEMPERATURE by pressing / , or use
the slider bar, until desired temperature appears.
(Optional - for humidity; otherwise skip to 10.)
Press HUMIDITY icon. It will turn blue.
To start the cooking cycle without saving the program for another
occasion, press START / STOP icon. (If preheating, wait until INSERT
TRAY screen appears before putting food in oven.)
MANUAL OPERATION
Press TIMER icon. It will turn red. This will allow you to set
cooking time for STEP 1 of your program.
8
Set TIMER by pressing / , or use the slider bar until
desired time appears.
(For continuous run, press until INF appears on LED screen.)
2
Press MANUAL COOKING CYCLE icon to bring up
Parameter Settings Screen.
9
Set fan speed by pressing FAN SPEED icon. It will turn
red. Press / to set 1 (low) or 2 (high).
10
(Optional - for PREHEAT; otherwise skip to 13.)
Press icon to add
PREHEAT TEMPERATURE.
Press TEMPERATURE icon. It will turn red.
Set PREHEAT TEMPERATURE by pressing /
, or use
the slider bar until desired temperature appears.
11
12
Press icon to return to parameter setting screen.
(Optional - for adding up to 8 additional steps to cooking cycle;
otherwise skip to 14 OR 15.)
Press icon to pass STEP 1 and access parameters
settings for STEP 2. Follow directions 3 - 9 above as applicable.
Repeat for each additional step desired.
13
14
To SAVE the program before starting the cooking cycle, continue
with PROGRAM RECIPES (see 2 above right.)
15
STOP
START
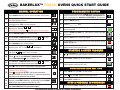
BAKERLUX
TM
TOUCH OVENS QUICK START GUIDE
If starting from scratch, press POWER button to turn on oven &
activate control board. Then follow MANUAL OPERATION 2-13
at left. If continuing from MANUAL OPERATION 15, see 2 below.
Press the MODIFY icon.
Press the "_ _ _ _ _ _" field.
Set a NAME for the program by typing it on the KEYPAD and
then pressing OK.
Press the PROG PICTURE icon, then choose a photo to go with
the program.
Press the SAVE icon to save the program.
PROGRAMMING/ SAVING
1
2
3
4
5
6
7
8
Press PROGRAMS icon. Scroll through saved programs by pressing
/ until desired program appears. Press the desired program.
1
2
Press START / STOP icon to start program.
3
STARTING A SAVED PROGRAM
CONTINUOUS RUN SETTING
Press START / STOP icon.
Press TIMER icon until 000 is on the screen..
Press icon until INF appears on the LED screen.
1
2
3
OK
To immediately start cooking with the new saved program, press
START / STOP icon.
If program includes preheating, wait until INSERT TRAYS screen
appears before placing food in oven.
If program includes preheating, wait until INSERT TRAYS screen
appears before placing food in oven.
Press and hold START / STOP icon for 2-3 seconds.
STOP A PROGRAM IN PROGRESS
STOP
START
STOP
START
STOP
START
STOP
START
INSERT TRAYS
INSERT TRAYS
_ _ _ _ _ _
OR
8/7/2019 RV02

Wipe up any spills as they occur (after the oven has cooled down for
10-15 minutes.)
Never clean the oven cavity with acids, abrasives or aggressive detergents.
Never use a spray of water to clean the outside of your oven. This may
damage the electrical components and void your warranty.
GENERAL
1.
2.
3.
5.
6.
7.
DAILY CLEANING
WARNING: Before starting any maintenance or cleaning operation, you must disconnect the electrical power supply and wait for your oven to cool down.
Follow protocol for Daily Cleaning.
Remove and clean oven door gasket
l Pull gasket out of the channel.
l Clean with detergent & water or dishwasher.
l Dry and let sit.
l
To replace after cleaning, push back into channel around oven door.
Clean the outside of the oven using only proper products (degreaser,
damp cloth.)
Never clean the oven with acids, abrasives, or aggressive detergents.
Wipe dry after each cleaning process.
Unplug oven and let it cool down for 10-15 minutes. Door glass
must be completely cool before cleaning.
Clean the oven cavity and oven door gasket using only proper products
(degreaser, damp cloth.)
Never clean the oven cavity with acids, abrasives, or aggressive
detergents.
Pull out and clean oven side racks and wire shelves separately, then
replace when done.
For heavily soiled areas, let degreaser sit to penetrate before wiping
with damp cloth or scrub pad.
Wipe door handle, door glass (inner and outer), and oven control panel
using only proper products (detergent, damp cloth.)
Wipe dry after each cleaning process.
1.
2.
3.
4.
WEEKLY CLEANING
5.
1.
2.
3.
4.
CLEANING THE OVEN DOOR GLASS
1.
Open oven door fully.
Door glass must be completely cool before cleaning.
*Clean each door glass using only proper products (detergent, damp cloth
or sponge, &/or Scotchbrite pad.) Rinse glass and dry it completely.
BAKERLUX
TM
OVENS QUICK CLEANING GUIDE
2.
Clean back of outer door glass
& front of inner door glass.*
3.
Clean back of inner
door glass.*
4.
Close door & clean front
of outer door glass.*
FOR SIDE-OPENING DOORS:
FOR TOP-OPENING DOORS:
1.
Open door fully.
Depress glass holder
clips on top & bottom
of inside door,
& swing open inner
door glass.
2.
Clean back of outer
door glass & front of
inner door glass.*
3.
Swing inner door glass
forward until top &
bottom glass holder
clips click & hold glass.
Clean back of inner
door glass.*
8/7/2019 RV02
-
 1
1
-
 2
2


Cadco XAFT-03HS-TD User guide
- Type
- User guide
- This manual is also suitable for
Ask a question and I''ll find the answer in the document
Finding information in a document is now easier with AI
Related papers
Other documents
-
Asko OP8687A User manual
-
Asko BO6CO4F3-42 User manual
-
 Alto-Shaam COMBITOUCH SERIES 20•20ESG Technical & Service Manual
-
 Frigidaire Professional PCFE3078AF User manual
-
LG STUDIO LSWC307ST User guide
-
LG Electronics LWC3063BD User manual
-
 Frigidaire Professional PCFG3078AF User guide
-
 Kenmore Elite 79077553805 User manual
-
Frigidaire 1133867 Owner's manual
-
Belling BI90FMW Owner's manual


