18
the top element, which directs heat downwards
onto the food. This function is suitable for grilling portions of
e a
table where quick
rowning is required and “sealing” the juices in, such as
hich
h as
an cook on different shelf levels, as long as
e food being cooked requires the same cooking
simultaneously on different
shelves, preventing the transmission of smells and tastes
frost
pend on the room temperature, the quantity
and type of food. Always check food packaging for the
ons.
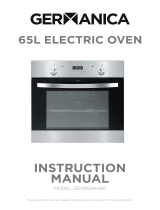
nob
ired
mperature of the oven. It is possible to regulate
- 250°C.
urn the control knob clockwise.
the control knob shown in the drawing above will not
XACTLY with the control knob on the
ppliance itself.
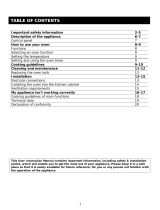
GRILL MODE: This method of cooking utilises the inner
sections of
bacon, toast and meat etc.
FAN AND GRILL: This method of cooking utilises the top
element in conjunction with the fan, which helps to provid
quick circulation of heat. This function is sui
b
steaks, hamburgers, some vegetables etc.
CONVENTIONAL OVEN & FAN: This method of cooking
provides traditional cooking with heat from the top and
bottom element. It also switches on the circulation fan w
helps to ensure fast, even distribution of the heat. This
function is suitable for light and delicate baking suc
pastries. You c
th
temperature.
FAN OVEN: This method of cooking uses the circular
element while the heat is distributed by the fan. This results
in a faster and more economical cooking process. The fan
oven allows food to be cooked
from one dish onto another.
DEFROST MODE: The fan runs without heat to reduce the
defrosting time of frozen foods. The time required to de
the food will de
defrosting instructi
Thermostat control k
The oven thermostat control knob sets the requ
te
the temperature within a range of 50
T
Please note that
necessarily correspond E
a