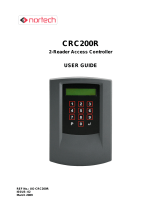
EFC-02-1A

EverFocus EFC-02-1A, EFC--02-1-A User manual

  • Hello! I am an AI chatbot trained to assist you with the EverFocus EFC-02-1A User manual. I’ve already reviewed the document and can help you find the information you need or explain it in simple terms. Just ask your questions, and providing more details will help me assist you more effectively!
User Manual
F
F
l
l
e
e
x
x
S
S
e
e
r
r
i
i
e
e
s
s
C
C
o
o
n
n
t
t
r
r
o
o
l
l
l
l
e
e
r
r
E
E
F
F
C
C
-
-
0
0
2
2
-
-
1
1
A
A
Volume
1
EverAccess
EVERFOCUS ELECTRONICS CORPORATION
EFC-02-1A
Instruction Guide
© 2005 EverFocus Electronics Corp
1801 Highland Ave Duarte CA 91010
Phone 626.844.8888 • Fax 626.844.8838
All rights reserved. No part of the contents of this manual may be reproduced or transmitted in any
form or by any means without written permission of the Everfocus Electronics Corporation.
Table of Contents
CHAPTER 1
Product Overview
1
Features
1
Parts List
2
Controller Layout
3
Installation Review
5
Preparing for the Installation
6
Obtain a Floor Plan
6
Determining the Hardware and Location
6
Determining System Structure as well as the Number of Controller and Modules
7
CHAPTER 2
Hardware Installation
8
Mounting the Enclosure and Controller
8
Installing a Module to Controller
10
Reader /Door Index Conversion
11
Terminal/LED Definitions
11
Main Module Terminal Definition
11
Main Module LED Definition
12
Door Module Terminal Definition
13
Door Module LED Definition
14
Alarm Module Terminal Definition
15
Alarm Module LED Definition
16
Connection to Readers
16
RS232 Format
17
Wiegand 26 Format
17
Connection to Door Lock
18
Connection to an Electric Strike
18
Connection to a Magnetic Lock
19
Connection to Door Sensor
19
Connection to Request-to-Exit
20
Connection to Fire & Alarm Input 0
20
Connection to Alarm Input
20
Connection to Alarm Output
21
CHAPTER 3
Connecting Controller to Computer
23
Connection to Computer via RS232
23
Connection to Desktop Reader via RS485
24
RS485 Bus Based Networking System
24
RS485 Bus Extension
25
Connection to Multiple Controllers via RS485
26
TCP/IP Based System
27
CHAPTER 4
Connecting Power
29
Connection to Power Supply
29
Mount a Backup Battery in the Enclosure (Optional)
30
Connection to Backup Battery
30
Reset Controller
30
Cover Placement
31
Before First Use
31
CHAPTER 5
Controller Functionality and Configuration
33
General Operation Guideline
33
Enter System Configuration
33
Display the Firmware Version
34
Display the number of the Installed Modules
34
Main Setting Items
34
System Setting
35
Enter System Setting Menu
35
Set Date Format
35
Set Date
36
Auto Daylight Savings Time
36
Set Time
36
Set System PIN
37
Set Arm PIN
37
Erase All Events
37
Reset All Data and Settings
38
Card Setting
38
Enter Card Setting Menu
38
Add Cards
39
Delete Cards
39
Delete a Card by Serial Number
39
Delete All Cards
40
Set Card Properties
40
Status Setting
40
Access Right Setting
41
Group Setting
41
Set Card PIN Setting
41
Anti Passback (APB) Setting
42
Card ARM Setting
43
Show Card Number
43
Reader Setting
43
Enter Reader Setting Menu
44
Keypad Setting
44
Reader to Door Allocation
44
System Reader Setting
45
Door Setting
45
Enter Door Setting Menu
45
Open Time Setting
45
Set Door Hold Open Time
46
Set Door Behavior at Fire Alarm
46
Alarm Setting
47
Components for Alarm
47
Alarm Configuration Basics
47
Enter Alarm Setting Menu
48
Alarm Setting Menu Structure
48
Enter Alarm Action Setting Sub-menu
49
Enter Extended Alarm Setting Sub-menu
50
Fire Alarm
50
Zone Alarm 1~8
51
SYS PIN Fail
51
ARM PIN Fail
51
Alarm IN 0
52
Remote Alarm
52
Unknown Card
52
Expired Card
52
Invalid Card
53
Invalid Door
53
Invalid Time
53
Card Anti-Passback Fail
53
Card PIN Fail
54
Door Forced Open
54
Door Held Open
54
Reader Lost
55
Enter Alarm Time Setting Sub-menu
55
Armzone Setting
55
Enter Armzone Setting Menu
55
Set Active Armzone
56
Set ARM Delay Time
56
Address Setting
57
ARM/DISARM
57
ARM The System using the Controller Keypad
57
Disarm the System using the Controller Keypad
58
Clear the Alarm
58
Arm/Disarm the system using a reader
59
CHAPTER 6
Software Setup
61
Install the Software in the Control Computer
61
Setup the User Accounts for the Software
62
Configure the Controller and All Other Hardware
62
Configure the Holidays, Access Group and Door Control Schedule
63
Enroll Cards
63
Notes
65
Specifications
Items Parameter
Maximum cards 9999
Maximum records 16000
Supported readers 2 (expandable up to 8)
Maximum controllers connected via RS
485
127
Controlled doors 2 (expandable up to 8)
Communication format Wiegand26 or EverAccess RS-232 format
Cardholder PIN 6 digit
System PIN 6 digit
ARM PIN 6 digit
Alarm input 1 fire alarm, 1 general alarm input(Alarm In 0)and 8 alarm
input extendable
Alarm output 2 alarm outputs on main module, 2 alarm outputs on each
door module, 8 alarm outputs on alarm module
Maximum 18 alarm outputs with 4 installed door module
and 1 alarm module
Communication ports RS232 or RS485
Band rate 9600
Programmable duration Maximum 10 per day with minimum duration of 5 min
Programmable date 3 types, up to 255 date in total
Access group Max 64
Card Expiration Yes
Auto day-light saving Yes
Anti-passback Yes
Build-in keypad Yes
LCD screen 2 x 16 with background light
Real-time clock Yes
Max current draw for door control relay 5A
Max current draw for alarm relay 2A
Supply voltage DC 9~18V
DC 15V when backup battery connected
Power Maximum power 50 w
Dimension length x width x height
300 x 216 x 33 (cm)
118 x 85 x 13 (in)
Weight 7 lbs
Federal Communication Commission
Interference Statement
This equipment has been tested and found to comply with the limits for a Class B
digital device, pursuant to Part 15 of the FCC Rules. These limits are designed to
provide reasonable protection against harmful interference in a residential installation.
This equipment generates, uses and can radiate radio frequency energy and, if not
installed and used in accordance with the instructions, may cause harmful interference
to radio communications. However, there is no guarantee that interference will not
occur in a particular installation. If this equipment does cause harmful interference to
radio or television reception, which can be determined by turning the equipment off
and on, the user is encouraged to try to correct the interference by one of the
following measures:
- Reorient or relocate the receiving antenna.
- Increase the separation between the equipment and receiver.
- Connect the equipment into an outlet on a circuit different from that to
which the receiver is connected.
- Consult the dealer or an experienced radio/TV technician for help.
FCC Caution: Any changes or modifications not expressly approved by the party
responsible for compliance could void the user's authority to operate this equipment.
This device complies with Part 15 of the FCC Rules. Operation is subject to the
following two conditions: (1) This device may not cause harmful interference, and (2)
this device must accept any interference received, including interference that may
cause undesired operation.
1
Product Overview
EverAccess® Flex Series controller (part number: EFC-02-1A) incorporates state-of-
the-art technology and modular design to provide reliable performance, user-friendly
installation, expansion capabilities, and flexible but powerful configuration options.
This controller is the ideal solution for any application that requires electronic access
control.
¾ Powerful management: each controller can be expanded with additional door
modules to support up to 8 readers.
¾ Stand alone or real time PC communication: the controller can operate stand-
alone without a PC connection, or can be managed by the Flex Series
software to communicate in real time, sending data to the PC once per
second.
¾ Expandable network: up to 127 controllers can be connected via RS-485 bus
or TCP/IP networking (requires additional LAN interface device).
¾ Easy-to-use: simple configuration operations can be performed at the
controller using the integrated keypad.
¾ Extra alarm module: an additional alarm module can be added to the
controller to offer up to 10 alarm inputs and 18 alarm outputs.
Features
¾ Modular design, easy-to-expand
¾ Up to 4 door modules and 8 readers are supported by each controller
¾ The additional alarm module provides up to 18 alarm signal output interfaces
¾ Large capacity: 9,999 cards and 16,000 events can be stored in the controller
¾ Flexible work mode: the controller can operate stand-alone without a PC
connection, or can be managed by the Flex Series software to communicate
in real time, sending data to the PC once per second via RS-485 or TCP/IP.
¾ Powerful management capabilities: access can be managed based on time and
date, location, cardholder privileges, etc.
Chapte
r
1
2
¾ Powerful alarm functions, ability to arm/disarm, specific fire alarm input with
corresponding door control, easy connection to alarm panel
¾ Built-in LCD screen and keypad allow basic configuration changes at the
controller
¾ Wiegand 26 and EverAccess RS232 formats supported
¾ Built-in transient voltage suppressor (TVS) to protect controller from electric
surge
Parts List
Please be careful when you unpack the box due to the electronics devices inside.
Check and make sure that you have all the items listed below inside the original box:
¾ 1 EverAccess Flex Series Controller
¾ 1 controller user manual
¾ 1 Flex Series software CD
¾ 1 software manual
¾ 2 supporting frames (left and right)
¾ 2 (3mm*6mm) screws (to mount the controller to the frames)
Please Note: If an item appears to have been damaged in shipment, replace it
properly in its carton and notify the shipper. If any items are missing, notify your
Everfocus Electronics Corp. Sales Representative or Customer Service. The
shipping carton is the safest container in which the unit may be transported. Save
it for possible future use.
In addition, you may order the following EverAccess products which are
recommended for use with the controller to achieve the best performance:
¾ EverAccess metal enclosure (part number EPN-871-B)
¾ EverAccess desktop reader (part number ERS-871)
¾ EverAccess proximity readers (part numbers ERR-871, ERK-871, ERM-
871)
3
Controller Layout
Figure 1.1 shows the layout of the EverAccess Flex Series Controller along with its
main components and their functions.
Fig. 1.1 Controller Layout
(1) Main module
The main module controls the fundamental functions of the controller,
including the power supply, event records, communication via RS232 or
RS485 port, fire alarm input, a general alarm input and two alarm outputs.
The LCD â‘¢ and keypad â‘£ provide an interface for the users to directly
operate the controller. The main module also controls the door and alarm
modules.
(2) Terminals on main module
Please refer to Ch 2 (p 11) for the definitions and wiring directions.
(3) LCD screen
The LCD screen displays the current status of the controller and the menu.
Please refer to Table 2.1 (p 12) for more details.
(4) The keypad
The keypad provides an interface to operate the controller.
(5) LEDs on the main module
There are 4 indication LEDs on the controller. Please refer to Ch 2 (p 12) for
their definitions.
T
erminals on
door module
T
erminals on
alarm module
T
erminals on
main module
2*16
L
CD
Base board
Door module
LEDs on
door module
LEDs on
alarm module
A
larm
module
LEDs on
main module
T
erminals on
main module
Main
module
Key
p
ad
4
(6) Door module
Each door module controls up to 2 readers and relays event signals to the
main module.
(7) Door module terminals
The door module terminals provide an interface to peripherals like door
sensors, door locks, request-to-exit devices and alarm outputs. Please refer to
Ch 2 (p 13) for more details.
(8) Door module LEDs
The LED on the door module shows the status of the door module. Please
refer to Ch 2 (p 14) for more details.
(9) Alarm module
The alarm module is used to extend the controller’s alarm function, adding
up to 8 alarm signal inputs and 8 alarm signal outputs.
(10) Alarm module terminals
The alarm module terminals provide an interface to connect the alarm signal
input and output devices. Please refer to Ch 2 (p 15) for the terminal
definitions.
(11) Alarm module LEDs
The LED indicates the alarm status. Please refer to Ch 2 (p 16) for details.
5
Installation Review
The overall installation steps are shown in the following block diagram. The detailed
descriptions are given in the subsection below.
Step 1: Preparing for the Installation
• Obtain a floor plan
• Determine the hardware and location
• Determine the number of controller and
modules and system architecture
Step 2: Hardware Installation
• Mount the controller and enclosure
• Install and connect the card readers
• Connect the electric strikes or mag locks
• Connect the controller to the system
computer and desktop reader
• Mount a backup battery in the enclosure
Step
3
:
Software
etup
/
C
onfiguratio
n
• Install the software in the control computer
• Setup the user accounts who will use the software
• Configure the controller and all other hardware settings
• Configure the holidays, access group and the door control
schedule
• Enroll the cards and set the cardholders’ properties
6
Preparing for the Installation
Before beginning the installation process, EverAccess recommends that the user
properly prepares by gathering certain information. Proper preparation will help
ensure a smooth installation, and will save the installer time and hassle in the
long run. The following information is essential for a professional installation:
Obtain a Floor Plan
Obtain a floor plan of the building in which the access control system is to be
installed. Obtaining a floor plan helps the installer determine what components
need to be installed, and where. It also is essential in determining the length of
cable needed to connect readers to the controller. A floor plan can be a blue
print of the building, a design, or simply a drawing of the facility. Any document
showing the footprint of the building can be used. The dimensions are
important to note, especially when determining cable lengths. A floor plan may
be obtained from your local city hall.
Determining Hardware and Location
Determining which hardware to use and where it will be installed.This is the most
crucial step in the preparation stage. First, determine how many access points, or
doors, need to be managed by the access control system. These access points will
control the security of the facility, and can limit the entry and exit to and from any
given area of the building. After deciding which doors need to be controlled, the user
must also determine the level of security needed at each door. There are many ways
to manage each door, using different resources. These resources include, but are not
limited to: prox readers, mag stripe readers, relays, and request to exits. A few
common door configurations are described below:
1. One reader, basic access control
The most basic configuration involves one card reader and an electric
strike. In this configuration, a person presents a card to the reader, and is
either granted or denied access. The electric strike unlocks if the system
grants access. Another variation of this scenario involves setting the
system up to monitor whether the door is open, which allows the system
to protect against propped open doors, or doors being held open for too
long.
2. One reader, with request to exit device
Adding a request to exit device to scenario 1 allows the system to control
when to allow people to exit through a door. Request to exit devices
include buttons that a person must press in order to exit, or a motion
detector that automatically unlocks the door when a person approaches.
These devices are always installed on the secure side of the door.
7
Fig. 1.2 A Common Door Configuration with Entry Reader
3. Two readers, entry and exit access control
If additional security is needed at a particular door, or if the administrator
needs a record of the time and date that people enter AND exit a door.
Adding a second reader on the secure side of the door will require people
to present a card to exit as well as enter. This scenario provides the
added security benefit of allowing the system to control who can enter,
and who can exit. It also allows the administrator to control when
people can enter and exit.
Scenario 1 and 2 require one reader. Scenario 3 requires two. Each door module
on the EverAccess controller can control two readers. Therefore, scenarios 1
and 2 allow one door module to control two doors. Scenario 3 requires one
door module for each door. This is important to consider when choosing the
appropriate number of modules and readers.
Determining System Structure as well as the Number of Controller
and Modules
Determine how many controllers are needed, and whether an Ethernet interface
is required.
1. Each EverAccess controller can accommodate up to 8 card readers. If
the system to be installed requires more than 8 readers, additional
controllers are necessary. These controllers can be connected to the
system as described in chapter 4.
2. If one or more controller is to be installed at a different location than the
system computer is to be installed, an Ethernet interface is required to
connect over the internet. An Ethernet interface may also be used in
locations at which the controllers are installed a long distance away from
the system PC. Please refer to chapter 4 for more details on installing the
Ethernet interface.
Entry Card
Readers
Door
Sensor
Door lock
Additional
Power Supply
EverAccess
EXIT
V
+
V
-
Re
q
uest-to-exit
8
Hardware Installation
In this chapter, after preparing for the installation, the user is ready to begin the
install. This section will describe, in general terms, how to install the hardware. Here
are the following processes:
• Mount the enclosure (enclosure optional) and controller
• Install and connect the card readers
• Connect the electric strikes or mag locks
• Connect the controller to the system computer and system reader (system
reader optional)
• Mount a backup battery in the enclosure (optional)
Mounting the Enclosure and Controller
The controller is an essential part of the access control system. We recommend
mounting it in an EverAccess EPN-871-B metal enclosure (also sometimes referred
to as a panel or a can). The controller should be mounted in a location that is
convenient and easily accessible, but also secure. The controller acts as the brain of
the access control system and can be used to make changes to the database. When
choosing a location to mount the controller, choose a clean, dry location that will
allow the administrator easy access to make changes to the system, but that can be
secured from the general public. The enclosure must be mounted on a sturdy wall
using fasteners or anchors (to be provided by the installer). If you are using an
EverAccess EPN-871-B metal enclosure there must be an AC power outlet for the
enclosure in order to power the controller. (The EverAccess EPN-871-B metal
enclosure uses a 24 V AC power supply with a built in 12 V DC converter.) In
addition, the system computer should be near the controller, so that the controller
can be connected to the PC, allowing the administrator to utilize the Flex Series
software. If the system requires additional door or alarm modules, install them in the
controller before mounting the controller in the enclosure or on the wall.
Please Note: If the controller screw holes due not line up properly with the
enclosure some filing may be needed for adjustment.
Chapte
r
2
9
The EverAccess Controller package includes two support frames to elevate the
controller in order to make wire connections more convenient. The installation is
described in the steps below:
Step 1. Mount the two support frames on a wall or on the interior of the EverAccess
enclosure. When mounting to a wall, use the mounting template included in
the packaging to help position the holes to mount the controller on a wall. If
using the EverAccess enclosure, use the four pre-drilled holes on the back
wall of the enclosure.
Step 1 Step 2
Step 2. Mount the controller base board.
a. Place the controller base board on the support frames. Line up the four
latches on the support frames with the holes on the controller base
board. Once lined up, slide the controller base board down to secure it
in place. At this point the two screw holes on the top two corners of
the controller base board should be aligned with the corresponding
holes on the support frame.
b. Secure the controller base board to the support frames with the two
screws (provided in the controller package).
Step 3. Install and mount additional door modules or the alarm module
a. Connect the pins on the lower right corner of the new module to the
connector on the bottom left corner of the installed module. Make sure
that the pins fit snugly into the receiving module.
b. Secure the module to the controller base board using the three screws
(provided in the module package).
10
Step 3
Installing a Module to Controller
EverAccess Flex series controller can hook up to 4 door modules and 1 alarm
module. Please note only ONE alarm module can be installed to the controller. Each
door module is cascaded to its left side module till the main module. The door
modules and the alarm module can be placed in any sequence. The index will follow
the same rules (refer to next subsection). The steps to install a new module are
described below:
Figure 2.1 Install a New Module to Controller
1
2
11
1. Connect the pins on the lower right corner of the new module to the connector
on the bottom left corner of the installed module. Make sure that the pins fit
snugly into the receiving module.
2. Secure the module to the controller base board using the three screws (provided
in the module package).
Reader/Door Index Conversion
One EverAccess Flex Series controller can accommodate up to 4 door modules,
each of which controls 2 readers. The index conversion of readers and is displayed
below. The readers/doors are counted 1 to 8 from right to left:
Figure 2.2 Reader/Door Index Conversions
Please Note: Each card reader can be associated with any door index.
Please refer to section 5 for more details.
Terminal / LED Definitions
Main Module Terminal Definition
21 terminals are located on the main module, as shown in Figure 2.3:
12
Figure 2.3 The main module and its terminals
The terminal definitions are shown in the following table.
Table 2.1 The Definition of the Main Module Terminals
No Terminal name Function No Terminal name Function
1 Alarm In 0 General alarm input 0 12 COMM_GND GND of RS485 and RS232
2 GND Alarm input GND 13 RS232_RXD RXD of RS232
3 FireIn Fire alarm input 14 RS232_TXD TXD of RS232
4 AUXAlarmOutNo
Normally open pin of auxiliary
alarm output
15 Reserved
5 AUXAlarmOutCom
Common pin of auxiliary
alarm output
16 Reserved
6 AUXAlarmOutNC
Normally close pin of auxiliary
alarm output
17 Reserved
7 MainAlarmOutNo
Normally open pin of main
alarm output
18 Power Power input
8 MainAlarmOutCOM
Common pin of main alarm
output
19 GND Power GND
9 MainAlarmOutNC
Normally close pin of main
alarm output
20 BATT+ Battery positive pin
10 RS485_A Signal A of RS 485 bus 21 BATT- Battery negative pin
11 RS485_B Signal B of RS 485 bus
Main Module LED Definition
There are 4 LEDs on the main module. The positions and indexes are defined in Fig.
2.4 and table 2.2.
/