Page is loading ...

CeraRoma Groutable Tile Installation
Installation Systems \ Vinyl Tile\CeraRoma Groutable Tile Installation
Subfloors:
Adhesive:
S-288
Installation
System:
CeraRoma™ Groutable Tile Installation
Pattern Match:
Seams:
Fittings:
Special Recommendations and Precautions:
General Information and Guidelines for CeraRoma™ Groutable Tile
CeraRoma™ Groutable Tile is designed to be installed as a grouted installation using a premixed
sanded acrylic grout having good flexural strength and adhesion properties. It may also be installed
without grout. The choice is yours. In either case, the floor is installed using Armstrong S-288
Flooring Adhesive.
If using grout, tiles should be laid with a grout joint spacing of 1/16" to 1/4" utilizing tile spacers
designed for this purpose. Because of the rounded edges, the appearance of the finished grout joint
will be 1/16" wider than the actual tile spacing.
Due to the floor's large format and increased thickness, care is required in handling and storage to
keep the product from becoming damaged or distorted. Always store the product on a flat surface.
Temperature control
and subfloor flatness are important in the prevention of raised or curled edges,
and performance of the grouted joints. Maintain the temperature of the room, subfloor, tile and
adhesive at a minimum of 65° F (18° C) and a maximum of 85° F (29° C) for 48 hours prior to
installation, during installation and 48 hours after installation. Maintain a minimum room temperature
of 55° F (13° C) thereafter.
CAUTION: Do not use high temperature heat sources to aid in cutting or making the tile conform to
irregularities in the substrate. Multi-layered engineered tile structures such as CeraRoma™ can warp
or curl after significant heating from sources such as hot plates and heat guns. Condition the room
and all flooring materials to the temperature guidelines stated above. If you must warm the tile,
always heat from the back and limit the temperature of the tile to warm conditions--less than 110° F
(43° C).
Suitable Substrates
All substrates listed below must be properly prepared and meet certain requirements. (Refer to
www.floorexpert.com for more details.)
Concrete (on all grade levels)
Approved suspended wood underlayments
Most single-layer, fully adhered, existing resilient floors on approved subfloors and
underlayments
Ceramic tile, terrazzo, marble
Polymeric poured (seamless) floors
Do not install over:
Particleboard, waferboard, OSB or single-layer STURD-I-FLOOR panels
Existing resilient tile floors that are on-grade or below-grade
Existing cushioned vinyl flooring
Carpet
Hardwood flooring that has been installed directly over concrete

Job Conditions/Preparation
Substrates must be sound, dry, clean, smooth, and free from excessive moisture or alkali.
Remove dirt, paint, varnish, wax, oils, solvents and other foreign matter that would
interfere with a good bond such as curing agents and sealers.
Substrates must be flat. Variations in flatness must not exceed 1/16” in 1’ or 3/16” in 10’.
Fill low areas in the substrate with S-194 Patch, Underlayment & Embossing Leveler/S-195
Underlayment Additive.
Suspended wood subfloors and underlayments must have a total thickness of 1" and a
minimum 18" well-ventilated air space below. Joist spacing should be on 16" centers to
minimize subfloor deflection.
When going over single-layer existing resilient flooring, use S-199 One-Part Embossing
Leveler or S-194 Patch, Underlayment & Embossing leveler/S-195 Underlayment
Additive to fill and smooth any embossing in the old floor.
In renovation or remodel work, remove any existing adhesive so that no ridges or puddles are evident
and what remains is a thin, smooth film. When installing over single-layer existing resilient flooring,
use S-199 One-Part Embossing Leveler or S-194 Patch, Underlayment & Embossing Leveler/S-195
Underlayment Additive to fill and smooth any embossing in the old floor.
Remove wall base and trim moldings should be removed prior to the installation and replaced
after the installation is complete.
Undercut doorframes (optional) to allow the tile to slip underneath and make fitting around
doorframes easier.
Leave a 1/8” gap should be left between the tile and vertical surfaces such as walls and
cabinets. Cover the gap after floor is installed with wall base or moldings.
Concrete subfloor water vapor emission levels must not exceed 5 lbs. /1000 sq.ft./24 hrs as
determined by calcium chloride tests. If moisture transmission levels exceed the recommended limit,
the concrete must be allowed to dry prior to installing the floor.
Radiant heated substrates must not exceed a maximum surface temperature of 85° F (29° C)
* Warning: Existing In-Place Resilient Floor Covering and Asphaltic Adhesives. Do not sand,
dry sweep, dry scrape, drill, saw, beadblast, or mechanically chip or pulverize existing
resilient flooring, backing, lining felt, asphaltic “cutback” adhesive, or other adhesive.
These existing in-place products may contain asbestos fibers and/or crystalline silica.
Avoid creating dust. Inhalation of such dust is a cancer and respiratory tract hazard.
Smoking by individuals exposed to asbestos fibers greatly increases the risk of serious bodily harm.
Unless positively certain that the existing in-place product is a non-asbestos-containing material, you
must presume it contains asbestos. Regulations may require that the material be tested to determine
asbestos content and may govern removal and disposal of material.
See current edition of the Resilient Floor Covering Institute (RFCI) publication Recommended Work
Practices for Removal of Resilient Floor Coverings for instructions on removing all resilient floor
covering structures or contact your retailer or Armstrong World Industries, Inc. 1 800 233 3823.
The floor covering in this package does NOT contain asbestos.

Layout:
Before installing CeraRoma™ , plan the layout so tile joints fall at least 6" away from
subfloor/underlayment joints. Do not install over expansion joints. When installing over existing
resilient sheet or tile flooring, plan the layout to avoid new joints falling near the joints in the existing
flooring.
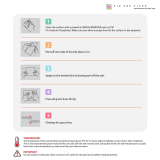
Using the most prominent walls in the room, find the center point in the room.
Divide the room into equal quadrants by making two perpendicular lines on the subfloor
intersecting at the center point.
Starting from the center point, and whether by measurements, or by doing a dry layout of the
tiles (with proper grout joint spacing), determine the distance between the last full tile and
the perimeter walls and cabinets. A balanced layout will result in border tiles being 8” or
greater for the 16”x16” tiles.
If the border pieces are less than 8" wide, particularly at the prominent walls, you will need to shift the
starting point in the middle of the room ½ the dimension of the tile (8” for a 16”x16” tile) to balance the
layout. After balancing the layout, make two new perpendicular lines on the subfloor intersecting at
the new starting point near the center of the room.
Procedure:
To install CeraRoma, apply Armstrong S-288 Flooring Adhesive the fine notching of the Armstrong S-
891 trowel. Notching is 1/32"deep, 1/16"wide and 5/64" apart.
Apply adhesive to ¼ or ½ of the room area at one time so you can begin the installation where the
guidelines intersect. Allow adhesive to set until dry to the touch, as recommended on the adhesive
label. The adhesive must be tacky to the touch without transfer to fingers when ready for bonding.
Allow 30 minutes or more depending on the temperature, humidity and air flow in the room. Do not
use fans directly on the adhesive/substrate to accelerate drying.
Install the tile along the chalk lines using tile spacers to maintain the desired grout joint width.
Lay the field area first in step fashion. Do not use tile spacers if you do not plan to grout
the installation.
Do not slide the tile into place.
Press the tile firmly into the adhesive.
Note: Tile spacers do a very good job of maintaining tile alignment. However, the installer should
also re-check for proper alignment by using measurements or creating additional lines on the subfloor
about every 4’ (3 rows of tile) to ensure straight lines and rows of tile.
Cut and fit the border tile at the perimeter. Use mechanical tile cutters or the score and snap
method of using a utility knife to score through the wear surface. Be sure to allow for the
grout joint and a 1/8” gap at perimeter walls when cutting the border pieces.
For irregular cuts, make a pattern out of kraft paper or cardboard and transfer it to the tile. Score
along the markings and snap off small pieces. Ceramic tile nippers or a coping saw are useful in
making more intricate cutouts for complicated fitting.
Spread adhesive in remainder of room, allowing proper time to dry.
Finish installing the tile as recommended above.
Remove tile spacers.
Roll entire floor with a 100lb roller. Roll floor diagonally across the tile joints in both
directions. Use a hand roller in confined areas, such as under the toe kicks.

Grouting:
Grouting may be done immediately. Grouting can also be completed the following day. A premixed
sanded acrylic grout with good flexural strength and adhesion is recommended. Traditional cement
grouts are not recommended with CeraRoma™ and should not be used.
Verify that all tile edges are firmly seated in the adhesive before starting the grouting process.
Follow the application instructions as specified on the grout container, working small sections
of the floor at a time.
Use a ‘hard’ epoxy grout float to apply the grout.
Do not spread the grout over the entire surface of the tile as is customary with some ceramic
tiles.
Apply the grout and pack it down only in the immediate area of the open joints to minimize
cleanup.
Hold the float in almost vertical position and strike off excess grout, pulling the float diagonally
across the joints.
Do not allow grout to dry hard on the face of before starting cleanup.
Clean-Up
Use two buckets of clear, cool water with sponges during the first cleanup.
Use firm, square-edged cellulose sponges for cleaning grout residue from the tile without
pulling excessive grout from the joints.
Use the first bucket and sponge to loosen the grout on the face of the tile and pick up most of
the residue.
Use the second bucket and sponge for final removal of the residue and for smoothing the
joints.
Hold the sponge flat and wipe diagonally across the joints.
Do not allow the rinse water to accumulate in the adjacent ungrouted joints.
Note: If grout sponges alone are not sufficient to clean the face of the tile, use a white 3M pad with
light pressure may be used. Do not overwork the grout during the cleanup or it will result in shallow
joints. It is normal to have a slight
grout haze remaining after the initial cleanup. It will be removed in
the final cleanup after the grout joint has completely dried.
Traffic should be kept off the installation until the grout has completely dried, usually a minimum of 24
hours.
After the grout joints have dried and hardened:
Use properly diluted Armstrong Once ’n Done® Resilient & Ceramic Floor Cleaner and a
white 3M pad to remove the slight haze of grout residue that remains.
Use two buckets of clear, cool water.
Pick up residue with a clean damp sponge using bucket one.
Use bucket two and sponges for final rinse and cleanup.
Buff dry with a soft cloth.
Replace wall base and trim moldings.
Do not use solvents or grout haze removers. Do not use Armstrong New Beginning Floor Stripper or
other floor strippers for cleaning the grout or maintaining the CeraRoma™ Groutable Tile installation
as they are too harsh and will degrade most premixed acrylic grouts.
Replace wall base and trim moldings.
Tile may be walked on immediately. However, do not expose the floor to heavy rolling load traffic for
an additional 72 hours after the installation. Use pieces of hardboard or underlayment panels to
protect the floor when moving heavy furniture and appliances back into the room.
/