Nextar MA715 User manual

Category
MP3/MP4 players
Type
User manual

This manual is also suitable for

MA715 | MP3/MP4 Digital Audio/Video Player
Instruction Manual
1. WELCOME
Thank you for purchasing our Digital Media Player. This uniquely designed device
combines an MP3 Player, Video Player and removable Flash Memory drive all in one
unit. You can move and store files between computers and enjoy your MP3 music
collection anytime and anywhere. Plus, you can store and watch videos on this player !
(1) We have made every attempt to ensure the correctness and completeness of this manual,
however mistakes and omission may still exist.
(2) Our guarantee will cover repair and maintenance to the player itself, but we are not
responsible for any data loss caused by malfunction of software, unauthorized repair or other
accidents
(3) Revisions to the software and hardware or user manual updates are not subject to further
notification
1
2. PRECAUTIONS
(1) Do not use this player when driving, riding or operating any other vehicles as it may lead to
traffic accidents.
(2) Keep your player clean. Do not place it near heat or subject to direct sunlight, dust, humidity
or rain/moisture.
(3) If the surface becomes dusty or dirty, clean it with a soft, slightly dampened cloth. Never use
any alcohol or diluted detergents to clean the cabinet.
(4) Do not use in extra-dry environment to avoid static discharges which can damage the unit.
(5) Please make sure that the player will not be disconnected in the process of formatting or
uploading and. Doing so may cause permanent data loss..
(6) When it is used as mobile disc, make sure read and write files using the correct method. Any
improper operation may lead to the loss of data.
(7) As the software provided by original equipment manufacturer has the optimum flash storage
speed, all players with memory less than 128MB cannot be formatted as FAT-32 in the operating
system.
(9) Attention: Because of different memory calculating methods and because the player software (firmware)
is stored on the device’s flash memory, there may be a difference between flash memory stated
capacity and actual capacity. Due to different firmware sizes, the amount of actual free memory will
vary. Please refer to the chart below:
Marked
capacity
Real capacity range Free capacity range after stored firmware
128MB 122MB~128MB 73MB127MB
256MB 244MB~256MB 191MB255MB
512MB 488MB~512MB 428MB511MB
1GB 953MB~1000MB 879MB999MB
2GB 1907MB~2000MB 1804MB1999MB
2
3. SYSTEM REQUIREMENTS
System requirement of MP3 player:
(1) Microsoft Windows98SE/2000/ME/XP
(2) CPU series with Pentium 200MHZ or above
(3) USB connector
(4) 120MB hard disc capacity
(5) CD-ROM driver
3
4. FUNCTION OVERVIEW
(1) Support formats such as MP3 WMA WAV SMV JPG BMP
This product supports playback of MP3 files, photo browse and movie play with high
quality.
(2) Folder management
Facilitate your music folder playback.
(3) DRM 9 function
This product supports WMA DRM 9 digital authorized music playback.
(4) Receive and record FM radio
This product can receive FM radio, which can also be recorded in MP3 format and
saved or playback.
(5) Build-in 1.5"CSTN color LCD
There is a build-in 1.5" color screen, which can display photo and movie clearly.
(6) Removable disc
This product can be connected to PC with USB cable and serves as a removable disc.
(7) Build-in rechargeable Li battery
Charging is convenient and no need to buy extra batteries.
(8) Convenient firmware upgrade
The firmware can be upgraded with software downloaded from Internet or in the attached
disc (if any).
4
5. GET TO KNOW YOUR PLAYER
Button layout
(1) Earphone jack
(2) USB port
(3) Display area
(4) Button lock
(5) Rewind button
(6) Microphone
(7) Volume down button
(8) Playpause button
(9) Volume up button
(10) Reset hole
(11) Fast forward button
(12) Power button
(13) A-B repeatrecord button
5
6. CHARGING
This product uses a built-in rechargeable Li-ion battery.
This icon will be displayed at the upper left corner of the screen. The following pictures indicate the
charging status of the battery:
(1) When the battery is charging, the icon will be changing from an empty battery to a full
one to indicate the process. Æ
(2) The following icon will replace the charging one when it is full but the power supply is not being
cut off.
(3) The player will automatically shut off when the power is used up. In this case, all setting will be
saved.
(4) Energy saving mode: User can define the power off mode, such as idle off, sleep off,
screen off to save energy. Please refer to the setting instruction in function section for
details.
6
7. USING THE USB CONNECTION
USB driver installation
USB driver needs to be installed only when Windows98SE operating system is used.
(1) When connecting the MP3 player to the USB port of PCPC will display “new hardware
found”. Select “search for the latest driver of device”, and load the driver CD (if any) to
the CD-ROM, and then click next. If there is no attached CD, please download the
program from the website of the company.
(2) Select “designated position” to orientate the installation directory to “Drivers” files
in the CD and select confirm. PC will complete the installation of Win98SE driver.
Connection and download
Connection to PC
Plug the attached USB cable to PCand connect the other end to the MP3 player. If
the connection is successful, the screen of player will display the following picture.
MP3 music download
When the connection is done, select the desired files and click the right key of the
mouse and select copy. Double click to open the disc icon of player (i.e. H, the
name of disc may differ) and then click the right key of the mouse and select paste.
During the process of writing, the player may display the following picture. If you
want to download authorized MP3 files from Internet, please refer to the DRM
music switch function.
7
Remove from USB port
(1) Double click the icon of safely remove hardware on the task column, and the relevant
dialog box will be displayed.
(2) On the picture of safely remove hardware dialog box, select the item of “USB mass
storage deviceand click “stop” button. The screen will display “stop to Hardware Device” as
below.
8
(3) Click “OK” button.
(4) When the screen displays “Safe to Remove Hardware”, the player can be safely
removed from PC.
9
Special reminder:
Do not disconnect the USB cable when data is being transmitted between PC and the player,
which may cause data loss or damage to the player. Disconnection should be done only when
device can now be safely removed from the system is displayed; When USB is in operation,
other buttons are locked and do not operate. If the player fails to power on due to data loss or
incorrect disconnection of the USB cable, please refer to the troubleshooting section for a
solution.
LCD display
10
11
8. MENUS
Main menu
(1) MusicSelect music in the main menu, the device will enter music sub-menu.
(2) PhotoSelect photo in the main menu, the device will enter photo sub-menu.
(3) MovieSelect movie in the main menu, the device will enter movie function.
(4) VoiceSelect voice in the main menu, the device will enter voice play function.
(5) FM RadioSelect FM radio in the main menu, the device will enter FM radio function.
(6) Mic. RecordSelect record in the main menu, the device will enter microphone record
function.
(7) DeleteSelect delete in the main menu, the device will enter delete sub-menu.
(8) SettingsSelect setting in the main menu, the device will enter setting sub-menu.
(9) AboutSelect about in the main menu to check the memory status and software version
of the device.
(10) ExitExit the main menu and return to the music playback function.
Selection and exit
(1) Long press play button or press power button to exit and return to the upper level
menu. The uppermost menu is main menu, which includes: music mode, photo mode,
movie mode, voice mode, FM radio mode, record mode, delete mode, setting mode,
about and exit.
(2) Select next or previous item by pressing fast forward button or rewind button . If
the main menu is in music picture, press rewind button to switch to information page;
if the main menu is in information page, press fast forward button to switch to music
picture.
(3) Press play button  to confirm and enter the selected item.
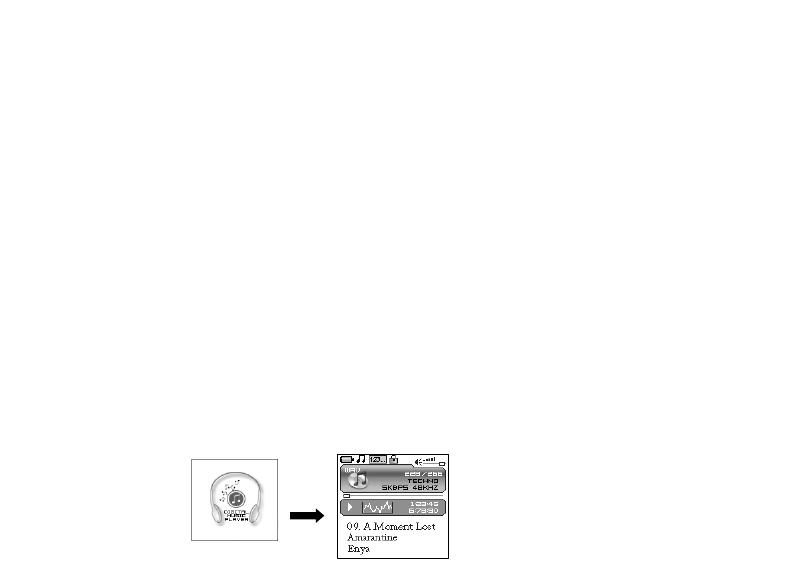
Power on player
When the player is off, press power button to turn it on. Power on display will be shown
before going to the default music play mode, followed by music playback.
This player supports user-defined display during power on. You can save the photo file with
size of 128*128 pixels and named LOGO.BMP under the root directory of this device. The
user-defined photo will display when you switch the player on next time.
12
Power off player
(1) When the player is powered off, the following modes will be saved, which includes:
current mode, music elapse time, user setting. (i.e. volume, EQ, timing off and play
mode etc.)
(2) If the player is powered off normally (i.e. user shut it off or it is shut off according to the
setting), the above-mentioned modes will be saved. If the player is powered off by
pressing reset button, the above-mentioned modes will not be saved.
(3) Expect in record mode, long press power button until the letters of Bye Bye appears
and the screen will turn dark, the player will be powered off.
Bye Bye!
13
14
Music play function
Press rewind button or fast forward button in the main menu to select Music function. Press
play button  to enter the sub-menu of Music Play All or Internal Device.
Operation instruction:
(1) When the music is stopped or played, press rewind button or fast forward button to
select previous or next file.
(2) When playing the music, long press rewind button or fast forward button to move
fast backward or forward within the track.
(3) When playing the music, press play button  to pause and press play button 
again to resume the playing. Press power button to stop the playing.
9. USING THE PLAYER
(4) Press A-B/REC button to set the start point of repeat section A-B, the screen display
AÆ press that button again to set the end of repeat section A-B, the screen will
display AÆB and start repeating section AB. Press A-B/REC button for the third time to
cancel section AB repeat function.
Play all
Press rewind button or fast forward button
to select Play Alland press play button
 to enter and start playing all music in
the player.
15
Internal device
Press rewind button or fast forward button to select internal deviceand press play button
 to enter the function of play list. Press rewind button or fast forward button to select
folder or a single music and press play button  to start playing. Use volume up button+ or
volume down- button to enter or exit a certain folder. The player will play the selected music or all
the music in a certain selected layer of folder (sub folder inclusive).
16
Fol
play
der play
Single music
Playing songs in folders and playing under root directory
Play mode Under root directory In folder and its subdirectory.
Normal Play all the songs under root
directory and in folders one time
and then stop.
Play all the songs in current
folder one time and then stop.
Repeat one Repeat play the current song. Repeat play the current song in
current folder.
Repeat all Repeat play all the songs under
root directory and in folders.
Repeat play all the songs in
current folder except the songs
in folder’s subdirectory.
Random
Repeat play all the songs under
root directory and in folders.
Repeat play all the songs under
root directory and in folders.
Rand.&Rep. Shuffle repeat play all the songs
under root directory and in folders.
Shuffle repeat play all the songs
under root directory and in
folders.
Photo
Press rewind button or fast forward button in the main menu to select Photo function. Press
play button  to enter the sub menu of Photo : ManualSlide Show and Thumbnail. This
player supports pictures in JPG and BMP formats. In order to get a smooth and clear display,
please convert the resolution of pictures to 128x128 on PC and then put them in PHOTO
folderIf there is no PHOTO folder, please create one. Please note that the player cannot
find that photo if it is not put in PHOTO folder of the player.
17
Manual browse
After entering photo function, press rewind button or fast forward button to select manual
browse and press rewind button or fast forward button to browse the photo manually.
Slide show
After entering photo function, press rewind button or fast forward button to select slide show
and press rewind button or fast forward button to browse the photo automatically.
18
  • Page 1 1
  • Page 2 2
  • Page 3 3
  • Page 4 4
  • Page 5 5
  • Page 6 6
  • Page 7 7
  • Page 8 8
  • Page 9 9
  • Page 10 10
  • Page 11 11
  • Page 12 12
  • Page 13 13
  • Page 14 14
  • Page 15 15
  • Page 16 16
  • Page 17 17
  • Page 18 18
  • Page 19 19
  • Page 20 20
  • Page 21 21
  • Page 22 22
  • Page 23 23
  • Page 24 24
  • Page 25 25
  • Page 26 26
  • Page 27 27
  • Page 28 28
  • Page 29 29
  • Page 30 30
  • Page 31 31
  • Page 32 32
  • Page 33 33
  • Page 34 34
  • Page 35 35
  • Page 36 36
  • Page 37 37
  • Page 38 38
  • Page 39 39
  • Page 40 40
  • Page 41 41
  • Page 42 42
  • Page 43 43
  • Page 44 44
  • Page 45 45
  • Page 46 46

Nextar MA715 User manual

Category
MP3/MP4 players
Type
User manual
This manual is also suitable for

Ask a question and I''ll find the answer in the document

Finding information in a document is now easier with AI