Page is loading ...

OPERATING MANUAL
18V CORDLESS
AIR IMPACT NAIL GUN
NG-L0218

2
NORDIC
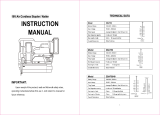
PRODUCT SPECIFICATION
Voltage: 18V
Nailing speed: 60-100pcs/min
Max Nail/Staple Capacity: 100pcs
Staple Size: 40mm 18 Gauge light duty staple
Max Nail Size: 50mm 18 Gauge Brad Nail
A weighted sound pressure level: LpA: 81dB(A) ; KpA=3dB(A)
A weighted sound power level: LwA: 92dB(A) ; KwA=3dB(A)
Typical weighted vibration: ah=6.14m/s2 ;
Uncertainty: k=1,5m/s2
GENERAL POWER TOOL SAFETY WARNINGS
Read all safety warnings and instructions. Failure to heed warnings and
follow instructions may result in electric shock, fire and/or serious injury.
Keep safety warnings and instructions for future reference.
The term “power tool” in the safety warnings refers to your mains
operated (corded) power tool or battery-operated (cordless) power tool.
2.1 WORKING AREA
• Keep working area clean and well lit. Untidy and dark areas can lead to accidents.
• Do not operate power tools in potentially explosive surroundings, for example, in the presence of inflammable liquids,
gases or dust. Power tools create sparks which may ignite the dust or fumes.
• Keep children and bystanders at a distance when operating a power tool. Distractions can cause you to lose control of it.
2.2 ELECTRICAL SAFETY
• Always check that the power supply corresponds to the voltage on the rating plate.
• Power tool plugs must match the outlet. Never modify the plug in any way. Do not use adapter plugs with earthed
power tools. Unmodified plugs and matching outlets will reduce the risk of an electric shock.
• Avoid body contact with earthed surfaces such as pipes, radiators, kitchen ranges and refrigerators. There is an
increased risk of an electric shock if your body is earthed.
• Do not expose power tools to rain or wet conditions. If water gets inside a power tool, it will increase the risk of an
electric shock.
• Do not damage the cord. Never use the cord for carrying, pulling or unplugging the power tool. Keep the cord away
from heat, oil, sharp edges or moving parts. Damaged or entangled cords increase the risk of an electric shock.
• When operating a power tool outdoors, use an extension cable suitable for outdoor use. Using a cord suitable for
outdoor use reduces the risk of an electric shock.

3
NORDIC
• If operating a power tool in a damp location is unavoidable, use a power supply protected by a residual current
device (RCD). Using an RCD reduces the risk of an electric shock.
2.3 PERSONAL SAFETY
• Stay alert, watch what you are doing and use common sense when operating a power tool. Do not use a power tool
when you are tired or under the influence of drugs, alcohol or medication. A moment of inattention when operating
a power tool may result in serious personal injury.
• Use safety equipment. Always wear eye protection. Using safety equipment such as a dust mask, non-skid safety
shoes, a hard hat, or hearing protection whenever it is needed will reduce the risk of personal injury.
• Avoid accidental starts. Ensure the switch is in the off position before inserting the plug. Carrying power tools with
your finger on the switch or plugging in power tools when the switch is in the on position makes accidents
more likely.
• Remove any adjusting keys or spanners before turning on the power tool. A spanner or key left attached to a
rotating part of the power tool may result in personal injury.
• Do not reach out too far. Keep your feet firmly on the ground at all times. This will enable you retain control over the
power tool in unexpected situations.
• Dress properly. Do not wear loose clothing or jewellery. Keep your hair, clothing and gloves away from the power
tool. Loose clothes, jewellery or long hair can become entangled in the moving parts..
• If there are devices for connecting dust extraction and collection facilities, please ensure that they are attached and
used correctly. Using such devices can reduce dust-related hazards.
2.4 POWER TOOL USE AND CARE
• Do not expect the power tool to do more than it can. Use the correct power tool for what you want to do. A power
tool will achieve better results and be safer if used in the context for which it was designed.
• Do not use the power tool if the switch cannot turn it on and off. A power tool with a broken switch is dangerous and
must be repaired.
• Disconnect the plug from the power source before making adjustments, changing accessories, or storing power
tools. Such preventive safety measures reduce the risk of starting the power tool accidentally.
• Store power tools, when not in use, out of the reach of children and do not allow people who are not familiar with
the power tool or these instructions to operate it. Power tools are potentially dangerous in the hands of untrained
users.
• Maintain power tools. Check for misalignment or jammed moving parts, breakages or any other feature that might
affect the operation of the power tool. If it is damaged, the power tool must be repaired. Many accidents are caused
by using poorly maintained power tools.
• Keep cutting tools sharp and clean. Properly maintained cutting tools with sharp cutting edges are less likely to jam
and are easier to control.
• Use the power tool, accessories and cutting tools etc, in accordance with these instructions and in the manner
intended for the particular type of power tool, taking into account the working conditions and the work which needs
to be done. Using a power tool in ways for which it was not intended can lead to potentially hazardous situations.

4
NORDIC
WARNING! Do not fire if the nails/staples are jammed. This will cause damage to the driver blade and
could result in accidents.
DO NOT use on hard surfaces such as rock, concrete, masonry, bricks or steel. Personal injury or
damage to the power tool may occur.
2.5 SERVICE
Your power tool should be serviced by a qualified specialist using only standard spare parts. This will
ensure that it meets the required safety standards.
ADDITIONAL SAFETY INSTRUCTIONS
FOR BATTERIES AND CHARGERS
Use only batteries and chargers applicable for this machine.
4.1 BATTERIES
• Never attempt to open for any reason.
• Do not store in locations where the temperature may exceed 40 °C.
• Charge only at ambient temperatures between 4 °C and 40 °C.
• When disposing of batteries, follow the instructions given in the section “Protecting the environment”.
• Do not cause short circuits. If connection is made between the positive (+) and negative (-) terminal directly or via
accidental contact with metallic objects, the battery is short circuited and an intense current will flow causing heat
generation which may lead to casing rupture or fire.
• Do not heat. If batteries are heated to above 100 °C, sealing and insulating separators and other polymer
components may be damaged resulting in electrolyte leakage and/or internal short circuiting leading to heat
generation causing rupture or file. Moreover do not dispose of the batteries in fire, explosion and/or intense burning
may result.
• Under extreme conditions, battery leakage may occur. When you notice liquid on the battery, proceed as follows:
• Carefully wipe the liquid off using a cloth. Avoid skin contact.
• In case of skin or eye contact, follow the instructions below:
1. Immediately rinse with water. Neutralize with a mild acid such as lemon juice or vinegar.
2. In case of eye contact, rinse abundantly with clean water for at least 10 minutes.
3. Consult a physician.
Fire hazard! Avoid short-circuiting the contacts of a detached battery. Do not incinerate the battery.

5
NORDIC
4.2 CHARGERS
• Never attempt to charge non-rechargeable batteries.
• Have defective cords replaced immediately.
• Do not expose to water.
• Do not open the charger.
• Do not probe the charger.
• The charger is intended for indoor use only.
SYMBOLS
In this manual and/or on the machine the following symbols are used:
Denotes risk of personal injury or damage to the tool.
Read manual before use
Wear eye protection
Wear ear protection
Wear safety gloves
Wear respiratory protection
In accordance with essential requirements of the European directive(s)
Class II - The machine is double insulated; Earthing wire is therefore not necessary (only for
charger)
Ambient temperature 40°C max. (only for battery)

6
NORDIC
Do not expose charger and battery pack to water
Use battery and charger only in closed rooms
Do not incinerate battery pack or charger
6. PRODUCT ACCESSORIES
1. Lever for loading magazine
2. Magazine
3. Tacker head
4. Adjusting knob
5. Switch
6. Battery (not included)
7. Charger (not included)
8. Battery latch button
7. OPERATION
7.1 CHARGING THE LI-ION BATTERY PACK
Battery packs for this tool are shipped in a low charge condition to prevent possible problems.
Insert the power supply into the charger. Plug the charger power supply into a power outlet. Attach a
battery to the charger. The indicator on the charger will be red indicating the battery is charging.
When batteries become fully charged the indicator on the charger will turn green.
NOTE: A battery that is new or has not been used for a longer period does not develop its full capacity
unitl after approx 5 charge/discharge cycles.
Do not recharge the batteries after use if they are not to be use for an extended period of time. Recharge
the batteries as and when they are needed.
Do not charge batteries immediately after extended use. Allow the batteries to cool down otherwise it will
be not charged fully.
7.2 INSERTING & REMOVING THE BATTERY PACK
Insert the battery pack into the base of the grip until it clicks
in place. To remove the battery pack, press the battery release
button and simultaneously pull the battery out of the machine.

7
NORDIC
7.3 LED LIGHTING
LED Lighting in each side can turned on when the machine is working.
7.4 CHECKING THE CONTACT TRIP MECHANISM
Remove all staples or nails from the magazine. Press the safety nose/contact pin and pull the trigger. The
safety nose/contact pin should move freely.
Reload the staples or nails to the magazine.
Do not use the tool if safety nose/contact pin cannot move freely.
Place the contact pin on the workpiece and press the machine without pulling the trigger, the machine
should not fire; remove the mahine from the work surface, the contact pin should spring back automatically.
Pull the trigger, the machine should not fire.
7.5 INSERTING STAPLES OR NAILS INTO THE MAGAZINE
NOTE: The number of staples or nails left in the magazine can be read using the viewing window.
Remove the battery pack.
Press the release button and pull out the magazine cover.
Tilt the tool and place nails/staples into the track of the magazine channel.
Make sure that the fasteners are placed correctly:
Staples are placed against the profiled side of the rail, the crown of the staple is in the uppermost part of
the magazine (legs are facing away from the body of the tool).
Nails are placed against the profiled side of the rail, with the points of the nails facing downwards.
Close the magazine cover until it engages with the release button.
Reattach battery pack to tool.
Warning: Do not place fasteners of different length. Do not place staples and nails mixed together.
Nailing or Stapling
LOADING STAPLES LOADING NAILS

8
NORDIC
8. WORKING INSTRUCTION
INSTRUCTIONS FOR BEFORE USE
Prior to operation make sure your battery pack is fully charged.
Check whether the fasteners are placed in the magazine correctly.
NAILING OR STAPLING
Hold handle firmly with magazine flat to work piece formibg a 90 deg angle
Two modes of firing: Single firing and Contact afiring
8.1. SINGLE FIRING MODE:
Push the drive shaft (sibgle/contact firing knob) to the left side, it isnow on Single firing mode which is
good for precision placement.
Step 1: push the drive shift to the left side
Step 2: Depress the safety contact pin against thw work piece
Step 3 : Squeeze the teigger to fire the stae or nail.
Nailing or Stapling
Nailing or Stapling

9
NORDIC
Step 4: Release the trigger and safety contact pin after firing.
To continue firing next staple/nail repeat steps 2- 4
NOTE: The safety contact pin must be depressed before the trigger is squeezed.
8.2. CONTACT FIRING MODE
Push the drive shift (single/contact firing knob) to right side, it is now on Contact Firing mode.
Contact Firing is good for conveniently and quickly firing.
Step 1: Push the Drive shaft to the right side
Step 2: Squeeze the trigger, keep squeezing and don’t release
Step 3: Depress the safety contact pin against the work piece to fire the nail or staple;

10
NORDIC
Step 4: Keep squeezing the trigger all the time and release safety contact pin after firing.
Step 5: To press it against the next area you want to fire a nail or staple into. When the contact pin is
pressed against the work piece the tool will fire.
Firing next staple or nail, repeat step 4 - 5.
Do not keep the trigger depressed when the tool is not in use, to prevent accidental firing when the
tool is not in use.
8.3 DEPTH ADJUSTMENT WHEEL
Depth adjustment helps protect work surfaces and allows proper setting of nail heads.
Turn the depth adjustment wheel towards the , the nail/staple will be fired into the
surface much deeper.
Turning the wheel towards will reduce the depth the nail or staple is fired into the
surface.
REMOVING A JAMMED NAIL OR STAPLE
NOTE: You must remove any jammed nail/staple before using the tool
any further. Otherwise, it could result in damage to the mechanism.
Remove the battery pack from the tool. Open the magazine, remove
the additional staples or nails in the channel. Then remove any jammed
fasteners.

11
NORDIC
If the fasteners remained jammed after following th e above instructions, slightly loosen the four hex screws
upon the nosepiece with an allen key, take off the nose cover then remove the fammed fastener pieces.
Remove the jammed nails with pliers if necessary. After the firing chamer is clear of jams re-tighten the
nose piece with hex screws securely.
Keep opening the magazine, insert the battery and fire two or three
times while empty.
Then reload the staples/nails, close the magazine and resume nomal
operation.
Warning: TO PREVENT SERIOUS INJURY,
grip the tool firmly in both hands.
• Rougly, the hardness of wood is divided into 3 levels:
- High
- Medium
- Low
• Nails of different length are applicable for different wood hardness
• The tool has a recoil when firing, so two hands operation is. suggested to have a better control of the operation.
9. CLEANING AND MAINTENANCE
Always disconnect the plug from the socket before carrying out any cleaning work.
9.1 CLEANING
• Keep all air gaps and engine housing clean as far as possible.
• Wipe the device with a clean cloth or blow it with compressed air.
• We recommend cleaning the device every time it’s done.

12
NORDIC
• Clean the device regularly with a damp cloth and a small amount of soap. Do not use detergents or solvents that can
damage the plastic parts of the device. Be careful that water does not get inside the device.
9.2 MAINTENANCE
Our machines have been designed to operate over a long period of time with a minimum of maintenance.
Continuous satisfactory operation depends upon proper machine care and regular cleaning. Please charge
the battery regularly, for example, once every 6 months.
10. REPAIR
Only use accessories and spare parts recommended by the manufacturer.
If the device is damaged after a few days, despite our quality control and your maintenance, only an
authorized electrician can repair it.
11. ENVIRONMENT
Should your appliance need replacement after extended use, do not dispose of it
with the household refuse, but in an environmentally safe way.
Waste produced by electrical machine items should not be handled like normal
household rubbish. Please recycle where recycle facilities exist. Check you’re your Local Authority or
retailer for recycling advice.
/