Page is loading ...

ITEM # ACNS18V
18 GAUGE BRAD NAILER/STAPLER
INSTRUCTION MANUAL
READ ALL INSTRUCTIONS AND WARNINGS BEFORE USING THIS
PRODUCT.
This manual provides important information on proper operation & maintenance.
Every effort has been made to ensure the accuracy of this manual. These
instructions are not meant to cover every possible condition and situation that
may occur. We reserve the right to change this product at any time without
prior notice.
IF THERE IS ANY QUESTION ABOUT A CONDITION BEING SAFE
OR UNSAFE, DO NOT OPERATE THIS PRODUCT!
HAVE QUESTIONS? CALL US FIRST FOR ASSISTANCE.
If you experience a problem, have questions or need parts for this product, call
Customer Service at 636-532-9888, Monday-Friday, 8 AM - 4 PM Central
Time. A copy of the
is required.
FOR CONSUMER USE ONLY –
NOT FOR PROFESSIONAL USE.
KEEP THIS MANUAL, SALES RECEIPT & APPLICABLE
WARRANTY FOR FUTURE REFERENCE.

ITEM # ACNS18V BRAD NAILER/STAPLER
1
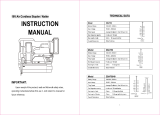
SPECIFICATIONS
Model
ACNS18V
Battery Charge
100-240V, 50/60Hz
Input Voltage
20V DC, 2000mAh
Firing Speed
Average 60 nails/min ; Max 100 nails/ min
Magazine Capacity
Holds up to 100 maximum nails/staples
Length of Brad Nails
Use only 3/4” – 2” 18 Gauge Brad Nails
Length of Staples
Use only 3/4” – 1-1/2” 18 Gauge Light Duty Staples
Overall Dimensions:
10.75” W x 10” H x 3.5” D
PACKAGE CONTENTS
1 - Brad Nailer/Stapler
1 - Pack (18 Ga Staples / 1-1/2” 200 Pieces) (18 Ga Brad Nails / x 2” 200 Pieces)
1 - Battery
1 - Charger
FEATURE DIAGRAM

ITEM # ACNS18V BRAD NAILER/STAPLER
2
READ THESE IMPORTANT SAFETY RULES
a) Keep work area clean and well lit. Cluttered and dark areas invite accidents.
b) Avoid dangerous environments. Do not operate power tools in explosive atmospheres,
such as in the presence of flammable liquids, gases or dust. Power tools create sparks which may
ignite the dust or fumes.
c) Keep children and bystanders away while operating a power tool. Distractions can cause
you to lose control.
d) Keep the tool pointed away from yourself and others and body parts
safety equipment. Always wear eye protection and ear protection. Safety equipment such as
dust mask, non-skid safety shoes, hard hat, or hearing protection used for appropriate conditions.
e) Never modify the plug in any way. Do not use any adapter plugs with earthed
(grounded) power tools. Unmodified plugs and matching outlets will reduce risk of electric
shock.
f) Do not keep the trigger or safety depressed during loading fasteners or the unintentional
firing of a fastener would cause personal injury.
g) Disconnect the tool from the power source before making any adjustments, changing
accessories, or storing power tools. Such preventive safety measures reduce the risk of
starting the power tool accidentally.
h) Do not fire if the nails/staples are jammed. This will cause damage to the driver blade and
could invite accidents.
i) DO NOT use on hard surface such as rock, concrete, masonry, bricks or steel. Person injury
or damage to the power tool could result.
j) Do not drive fasteners close to the edge of the work piece.
k) Do not drive fasteners on top of nailed fastener.
l) Only use parts and accessories recommended by manufacturer.

ITEM # ACNS18V BRAD NAILER/STAPLER
3
BATTERY TOOL USE, CHARGING AND CARE
a) Recharge only with the charger and the battery packs included with this product.
b) Ensure the switch is in the off position before inserting battery pack.
c) Do not open the battery. Danger of short-circuiting.
d) Protect the battery against heat, e.g., also against continuous sun irradiation and fire.
There is danger of explosion.
e) Do not short-circuit the battery. There is danger of explosion.
f) Battery leakage (liquid ejection). Under abusive conditions, liquid may be ejected from the
battery; avoid contact. If contact accidentally occurs, flush with water. If liquid contacts eyes, flush
them with clean water for at least 10 minutes, then seek immediate medical attention. Liquid
ejected from the battery may cause irritation or burns.
g) Care when charging. Make sure cord for the charger is located so that it will not be stepped
on, tripped over, or otherwise subjected to damage or stress. Do not operate charging system
with damaged cord or plug.
h) Battery recycling and disposing. All batteries must be recycled or disposed of properly (see
section on Environment).
INTENDED USE
The tool is intended for tacking of cardboard, insulating material, fabric, foils, leather and similar
materials on surfaces of wood or materials similar to wood. The machine is not suitable for the
attachment of wall.
LED FUNCTION INDICATOR:

ITEM # ACNS18V BRAD NAILER/STAPLER
4
LED Red on=Low battery
LED Red flashing=The nails/staples are jammed.
LED Green on=No nails, power tool in dry fire protection
LED Green flashing=Overheat / power tool in overheat protection mode
(The tool cannot fire in this situation, wait until it has cooled down)
Charger:
Red LED on=Battery charging.
Green LED on=Battery fully charged.
OPERATING INSTRUCTION
Battery Charging: Battery packs for this tool are shipped in a low charge condition to
prevent possible problems.
a) Insert the power outlet into the port on battery pack. Plug the charger power supply into a
power outlet. The indicator light on the charger will be red (battery is charging).
b) When batteries become fully charged (about 1~1.5 hours), the indicator on the charger will
turn green. Unplug the charger from power supply and remove the battery pack.
NOTE: A battery that is new or has not been used for a longer period does not develop its full
capacity until after approx. 5 charge/discharge cycles.
Do not recharge the batteries after use if they are not to be used for an extended period of time.
Recharge the batteries as and when they are required.
Do not recharge the recharge-required batteries after use if they are not cool down. Otherwise it
will be not charged fully.
Inserting and Removing the Battery Pack
a) Insert the battery pack into the grip until it clicks in place.
b) To remove the battery pack, with pressing the lock buttons simultaneously to pull the pack out of
the machine.

ITEM # ACNS18V BRAD NAILER/STAPLER
5
(image a) (image b)
LED Lighting
2 pcs Led lighting in each side can be turned on when the machine is working
Check the contact trip mechanism
Remove all staples or nails from the magazine.
Press the safety nose/contact pin and pull the trigger. The safety nose/contact pin and the trigger
should move freely.
Reload the staples or nails to the magazine.
Do not use the tool if the safety nose/contact pin cannot move freely.
Place the contact pin on the workpiece and press the machine without pulling the trigger, the
machine should not fire; Take the machine from the workpiece, the contact pin should spring back
automatically. Pull the trigger (the machine should not fire).
Inserting Staples or Nails into the magazine
NOTE: The number of staples or nails left in the magazine can be read using the viewing window.
a) Remove battery pack from the tool.
b) Press the release button and pull out the magazine cover.
c) Tilt the tool(approximately 45° Angle) and place nails/staples into the track of the magazine
channel.
Make sure that the fasteners are placed correctly:
! Staples are placed against the profiled side of the rail, the crown of the staple is in the

ITEM # ACNS18V BRAD NAILER/STAPLER
6
topmost part of the magazine(legs are facing away from the body of the tool).
! Nails are placed against the profiled side of the rail, with the points of the nails facing
downwards,the leg of nail is in the downmost of the magazine.
d) Close the magazine cover until it engages with the release button.
e) Reattach battery pack to tool.
Warning: Do not place fasteners of different length. Do not place staples and nails mixed
together.
A. Loading staples: B. Loading nails:
Instructions for use
Prior to operation make sure your battery pack is fully charged.
Check whether the fasteners are placed in the magazine correctly.
Nailing or Stapling
Hold handle firmly with magazine flat to work piece forming a 90° Angle.
Two modes of firing: Single Firing and Contact Firing

ITEM # ACNS18V BRAD NAILER/STAPLER
7
1) Single Firing Mode:
Push the drive shift (single/contact firing knob) to left side, it is on Single Firing mode . Single
Firing is good for precision placement .
Step 1: Push the drive shift to left side
Step 2: Depress the safety contact pin against the work piece
Step 3: Squeeze the trigger to fire the staple or nail ;

ITEM # ACNS18V BRAD NAILER/STAPLER
8
Step 4: Released the trigger and safety contact pin after firing .
Firing next staple or nail, repeat step 2 ~ step 4
The safety contact pin must be depressed before the trigger is squeezed.
2) Contact Firing Mode:
Push the drive shift (single/contact firing knob) to right side, it is on Contact Firing mode.
Contact Firing is good for conveniently and quickly firing.
Step 1: Push the drive shift to right side

ITEM # ACNS18V BRAD NAILER/STAPLER
9
Step 2: Squeeze the trigger , keep squeezing and don’t release
Step 3: Depress the safety contact pin against the work piece to fire the nail or staple;
Step 4: Keep squeezing the trigger all the time but released safety contact pin after firing.

ITEM # ACNS18V BRAD NAILER/STAPLER
10
Step 5: To press it against the next area you want to fire a nail or staple into. When the contact
pin is pressed against the work piece the tool will fire.
Firing next staple or nail , repeat step 4 and step 5
The trigger must be keep squeezing all the time during the safety contact pin is being
depressed time by time
Do not keep the trigger depressed when the tool is not in use, to prevent accidental firing when
the tool is not in use.
A significantly reduced working period after charging indicated that the battery is used and must
be replaced.
Depth Adjustment Wheel
Depth adjustment helps protect work surface and allows proper setting of nail heads

ITEM # ACNS18V BRAD NAILER/STAPLER
11
Turn the depth adjustment wheel towards to , the nail/staple will be fired into wood much
more depth ;
Turn the wheel towards to , the nail/staple will be fired into wood in less depth.
Removing a jammed nail or staple
Note: You must remove any jammed nail/staple before using the tool any further. Otherwise, it
could cause damage to the mechanism.
Remove the battery pack from the tool.
Open the magazine, remove the staples or nails in channel. Then, to remove the jammed
fasteners.

ITEM # ACNS18V BRAD NAILER/STAPLER
12
If the fasteners remain jammed after following the above instructions, slightly loosen the four hex
screws upon the nosepiece with the wrench provided,take off the nose cover then remove the
jammed fasteners pieces
Remove the jammed nail with pliers if necessary. After the jammed nail has been successfully
removed , then re-tighten the nose piece with hex screws securely.
Keep opening the magazine, insert in the battery to shot two or three times . .
Then reload in the staples/nails, close the magazine to shot , will be ok
Do not dispose of power tools into household waste !
Recycle unwanted materials instead of disposing them as waste.

ITEM # ACNS18V BRAD NAILER/STAPLER
13
Battery packs/ batteries Recycling: Li-ion Battery
The battery packs are built to the highest quality standards, they can be re-charged again and
again, ensuring that your tool performs with full efficiency. However, rechargeable batteries
eventually need to be replaced. When this happens, it is important not to discard your old battery
tool or battery pack in a hazardous manner. To preserve natural resources, please recycle or
dispose of batteries properly.
These battery packs should be collected, recycled or disposed of in an environmental-friendly
manner.
Warning: Do not attempt to destroy or disassemble battery pack or remove any of its
components. Also, never touch the battery terminals with metal objects and/or body parts as short
circuit may result. Keep away from children.
201901
/