Page is loading ...

Made in Viet Nam
Craftsman Home Tables
Assembly Instructions
Component And Hardware List
Be sure to check all packing material carefully for small parts, which may have come loose inside the
carton during shipment. Separate, count and check all parts against the Components and Hardware List below.
Leg
email: info@riverside-furniture.com
Page 1 of 1
Shelf
Table Top
1 PC.(A) (B) 4 PCS. (C) 1 PC.
4mm
Allen Wrench
1 PC.
8 PCS.
(F)
Flat Washer
Ø 5/16"x19mm
(E)
Spring Washer
Ø 5/16"
(G)
8 PCS.
Item #2909
END TABLE
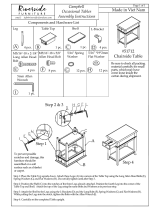
ASSEMBLY PROCEDURE:
1. Place Table Top (A) upside
down on a soft, non-abrasive
surface such as a blanket or carpet,
or its own packaging materials.
2. Attach the Legs (B) to the four
corners of the Table Top (A) by
using the Bolts (D), Spring Washers
(F) & Flat Washers (E), as shown in
STEP 1.
Do not fully tighten Bolts until
Step 2.
3. Assemble Shelf (C) to the Four Legs by usingthe Bolts
(D), Spring Washers (F) & Flat Washers (E), as shown in
STEP 2. Pull the Shelf snug to the Legs and tighten Bolts
using the Allen Wrench (G). Pull the Legs snug to the
Top Assembly and tighten Bolts at the top of the Legs.
4. Carefully set the completed Table
upright.
THANK YOU FOR YOUR PURCHASE.
STEP 2: STEP 3:
(E)
(F)
(G) (D)
STEP 1:
(E)
(F)
(G)
(D)
(D)
Bolt:
Ø5/16 x 50mm
8 PCS.
/


