Page is loading ...

OWNER'S MANUAL
Dec. 15, 11’
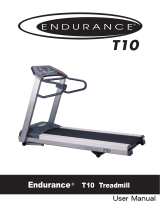
T60 TREADMILL
1600 Landmark Drive • Cottage Grove, WI 53527, USA
www.visionfitness.com
T60

TABLE OF CONTENTS
INSTRUCTION
IMPORTANT SAFETY INSTRUCTIONS
SETUP THE TREADMILL
• Getting Started
• Making A Choice Of Site
• Stabilizing The Treadmill
• Centering The Belt.
• Electrical Power Requirment
• Grounding Instructions
ASSEMBLY
• Unpacking The Treadmill
• Assembly Instructions
• Display Console
• Workout Parameter Prompts
• Workout Overviews
• Workout Tips
• Workout Setup Steps
USING THE WORKOUTS
MANAGER’s CUSTOM MODE
• The List Of Manager's Custom Mode
MAINTENANCE
• Recommended Cleaning Tips
• Centering The Belt
• Tensioning The Belt
• Model T60 Specifications
PRODUCT SPECIFICATIONS
02
03
05
07
16
23
26
28
01
T R E A D M I L L T 6 0

This Owner’s Manual describes the functions of the following product:
Treadmills T60
SAVE THIS OWNER’S MANUAL FOR FUTURE REFERENCE.
INSTRUCTION
0302
T R E A D M I L L T 6 0
See "Product Specifications" (Page 28) in this manual for product specific features, the
T60 is intended for commercial use.
It is recommended that all users of fitness exercise equipment should be informed of
the following information prior to its use.
When using the T60, always follow basic precautions:
•
To ensure your safety and to protect the unit, read all the instructions before assembling
and using the treadmill.
•
To ensure the proper use and safety of the treadmill, make sure that all users read
this manual. Please make this manual a part of your facility’s training program.
Remind the users that before undertaking any fitness programme, they should obtain
complete physical examinations from their physicians. If, at any time while exercising,
the user experiences dizziness, pain, or shortness of breath, nausea or feels faint he
or she must stop immediately.
READ AND SAVE ALL INSTRUCTIONS before assembling or using this treadmill.
It is strongly recommended to take the following safety instructions.
• DANGER: To reduce the risk of electrical shock, always unplug the treadmill before cleaning
or attempting any maintenance activity.
• WARNING: To reduce the risk of burns, fire, electric shock, or injury, it is imperative to
connect each product to a properly grounded electrical outlet.
•
CAUTION: If you experience chest pains, nausea, dizziness or shortness of breath, stop exercising
immediately and consult your physician before continuing.
•
Never operate the treadmill if it has a damaged power cord or electrical plug, if it is not working
properly, or if it has been damaged or immersed in water. Return the treadmill to the
authorized Vision dealers for examination and repair.
• Keep the power cord away from heated surfaces. Do not pull the equipment by the power
cord or use the cord as a handle. Never place the power cord under carpeting or place any
object on top of the power cord.
•
Only use the power cord provided with your treadmill. If the power cord is damaged,
it must be replaced by the manufacturer, an authorized service agent, or a similarly qualified
person to avoid a hazard.
• To disconnect, turn the switch to the off position, then remove the plug from the outlet.
•
Use this treadmill for its intended purpose as described in this manual. Do not use attachments
that have not been recommended by the manufacturer.
• Never drop or insert any object into any opening in the product. If an object should drop
inside, turn off the power, unplug the power cord from the outlet, and carefully retrieve it. If
the item cannot be reached, contact the authorized Vision dealers.
• Do not reach into or underneath the unit, or tip it on its side during operation. And, keep
hands and feet clear at all times from moving parts to avoid injury.
• Do not remove the treadmill motor cover or roller covers. Service should be performed only
by an authorized service technician.
•
Do not use any equipment that is damaged or has worn or broken parts. Use only replacement
parts supplied by Vision Fitness or authorized dealers.
•
Do not use the treadmill outdoors, near swimming pools or in areas of high humidity.
• Do not operate where aerosol (spray) products are being used or when oxygen is being
administered.
• Be sure the emergency stop pull cord is clipped to the user and in a proper placed position
on the user before beginning any workout.
• Use the stationary handrails when mount or dismount the treadmill. Place the feet firmly on
the right and left side platforms before the running belt begins moving (prior to a workout).
Step onto the running belt when the speed is at or below 1.6 km/h (1 mph).
IMPORTANT SAFETY INSTRUCTIONS
T R E A D M I L L T 6 0

SETUP THE TREADMILL
0504
T R E A D M I L L T 6 0 T R E A D M I L L T 6 0
GETTING STARTED
Read the Owner’s Manual before setting up the T60. Place the treadmill where it will be used
before beginning the setup procedure.
MAKING A CHOICE OF SITE
The site that you select for the treadmill should be well-lit and well-ventilated. Locate the
T60 on a structurally solid and flat surface a few meters / feet from the wall or any equipment
(Allow a distance of 305 millimeter or twelve inches, between the treadmill and other
units on either side. Allow a distance of two meters, or six feet, from the rear of the tread-
mill to any object or surface.) If the site has a heavy plush carpet, to protect the carpeting
and machinery, you should place a rigid plastic base under the treadmill.
Please do not place the treadmill in an area of high humidity, such as the vicinity of a
steam room, indoor pool, or sauna. Exposure to intensive water vapor or chlorine could
adversely affect the electronics, as well as other parts of the machine. To make exercise a
desirable daily activity for you, the treadmill should be in an attractive setting.
STABILIZING THE TREADMILL
After positioning the treadmill in its intended location, check its stability by attempting to
rock it side to side. Rocking or wobbling indicates that your treadmill needs to be leveled.
Determine which leveler is not resting completely on the floor. Loosen the nut with a
hand to allow the leveler to rotate. Rotate the left or right leveler, and repeat the adjustment
as necessary until the treadmill is stable. Lock the adjustment by tightening the nut
against the rear foot support.against the rear foot support.
NOTE: It is extremely important that the levelers are correctly adjusted for proper operation. An
unbalanced unit may cause striding belt misalignment. A bubble level is recommended to
ensure proper leveling.
• Never mount or dismount the treadmill while the running belt is moving.
• Handrails may be held to enhance stability as needed, but are not for continuous use.
• Do not wear any clothing that might catch on any moving parts of this treadmill.
• Never walk or jog backwards on the treadmill.
• Do not use this product in bare feet. Do not use shoes with heels, leather soles, cleats or
spikes. Make sure no stones are embedded in the soles.
• Do not turn the belt by hand.
• Close supervision is necessary when used near children, invalids or disabled people.
• When the treadmill is in use, young children and pets should be kept at least 3 meters / 10
feet away.
NOTE:
Orange strip or white strip in the lateral position of
side rail as a criterion to check the belt is in proper
position or not, it is necessary to adjust the belt until
the edge of belt is parallel to orange strip.
WARNING:
“WARNING! Heart rate monitoring systems may be
inaccurate. Over exercising may result in serious
injury or death. If you feel faint stop exercising
immediately”.
CAUTION:
Please leave a 2000 x 1000 mm landing zone
behind the treadmill.
1000 mm
2000 mm
1000 mm
305 mm

Left Motor Cover Right Motor Cover
0706
T R E A D M I L L T 6 0 T R E A D M I L L T 6 0
Supply Voltage (VAC) Rated Current (Amps)
110
220
50/60 Hz
50/60 Hz
15A
8A
Frequency (Hz)
CENTERING THE BELT
After installing and leveling the treadmill, check the belt to ensure that it is tracking properly.
The belt might need to be adjusted after the first two hours of use. If the belt needs to be
adjusted, please see ADJUSTING THE BELT at the section of MAINTENANCE for details.
ELECTRICAL POWER REQUIREMENT
The treadmill requires a dedicated line according to the electrical configurations
listed in the chart
below. It is particularly important that no sensitive electrical equipment, such as a computer or
a TV, shares the same circuit.
GROUNDING INSTRUCTIONS
The treadmill must be properly grounded. If the product malfunctions or breaks down, proper
grounding provides a path of least resistance for the electric current to reduce the risk of elec-
trical shock. This product is equipped with an electrical cord, which includes an equipment
grounding conductor and a grounding plug. The plug must be inserted into an outlet that has
been properly installed and grounded in accordance with all local codes and ordinances.
DANGER: : Improper connection of the equipment-grounding conductor can result in a
risk of electric shock. Check with a qualified electrician or service provider if you are in doubt
as to whether or not the product is properly grounded. DO NOT modify the plug provided with
the product. If it will not fit an electrical outlet, have a proper outlet installed by a qualified
electrician. Any modification to the electrical plug will result in void warranty.
ASSEMBLY
UNPACKING THE TREADMILL
The T60 is carefully inspected before it is packaged. Carefully unpack the unit and
dispose of the box material.
NOTE:
In case these parts are missing from the package,
please contact the local authorized Johnson dealers at once.
CAUTION: This unit weighes 330 lbs / 150 kg. To avoid injury to the user and the unit, be
sure to have proper assistance to remove and move the unit.
Hardware Kit
(D)(A)
(E)
Full Assembled Frame
Console Set
Console Masts
Hardware Kit
Motor Cover L/R
A
B
C
D
E
)
)
)
)
)
(B)
(C)

ASSEMBLY INSTRUCTIONS
0908
T R E A D M I L L T 6 0 T R E A D M I L L T 6 0
Please make sure that the power plug is not plugged into the wall outlet while assembling
the treadmill. Ensure correct assembly of the T60, carefully read and follow these steps:
FASTENERS
ASSEMBLY EXPLODED DIAGRAM
PART NO. DESCRIPTION SKETCH QUANTITY NOTE
Z50
Z51
Z5 3
Z5 4
Z5 5
Z5 6
HEX SOCKET THIN HEAD SCREW(
M8*1.5P*15L
)
HEX SOCKET HEAD SCREW(M10*1.5P*20L)
FLAT WASHER (Ø10.5*Ø18*2.0T)
PHILLIP BUTTON HEAD SCREW (M5*0.8P*12L)
WHITE
WHITE
BLACK/
YELLOW
BLUE
BLUE
BLUE
RED
RED
RED
10
Z05
8mm T-SHAPED WRENCH
1
6
4
12
2
2
1
1
1
ARC WASHER (Ø8.2*Ø18*1.5T)
ARC
SADDLE TYPE TIE MOUNT (HC-4 KSS)
RELEASIBLE CABLE TIE (HV150HB KSS)
PHILLIP ROUND HEAD SCREW (M5*0.8P*20L)
WASHER(Ø10.2*Ø20*1.5T)
Z62
Z63
Z64
A
Q01
Q04
Q05
Z53
Z53*8
Z53
Z50
Z50
Z50
Z51
Z54*2
Z56*2
Z54*4
Z55*4
P23

1110
ASSEMBLY STEPS
STEP 2: Secure The Left And Right Console Mast
T R E A D M I L L T 6 0 T R E A D M I L L T 6 0
ATTENTION: After installation is completed, the treadmill will need to be calibrated by
using the AUTO-CHECK function. If this is not done, the treadmill's speed and incline
values may be incorrect and damage the treadmill. DO NOT stand on the belt when
performing the AUTO-CHECK function.
STEP 1: Remove The Motor Cover
Unscrew the left and right-size screws (Z53) and lift the motor cover off the treadmill
and set it aside.
a.Attach the left console mast by placing it into the console mast support bracket and
aligning the mounting holes.
b.Lift up the plastic piece (Q05) that is attached aside the motor cover. Place 3 screws
(Z50) on the outside and 1 screw (Z50) on the inside and secure the screws, but leave
room for adjustments.
c.Place a wave washer (Z51) on the screw (Z50) and secure the screw in the front of the
console mast.
d.Put the plastic piece (Q05) down. Place 2 screws (Z53) and secure the screws into the
frame.
e.Secure the right console mast to follow the above procedure.
Diagram 1
Z53
Z53

STEP 3: Attach The Console To The Console Mast
a.Route the display cable through the right console mast and pull it out of the hole on the
side of the console mast near the frame. Ask an assistant to hold the console in place while
you route the cable through the console mast.
b.Attach the console to the right and left console mast using six screws (Z54) and washers
(Z55)(Z56) to secure.
c.Plug the cable connector into its receptacle on the lower board near the motor.
1312
T R E A D M I L L T 6 0 T R E A D M I L L T 6 0
Diagram 2
Diagram 3
Z50
Z50
Z50
Z51
Q05
Q04
Z53
Z53
Z54*2
Z56*2
Z54*4
Z55*4

1514
STEP 4: Replace The Motor Cover
T R E A D M I L L T 6 0 T R E A D M I L L T 6 0
a.Replace the motor cover on the treadmill using buttonhead cross screws (Z53) to
secure them.
b.In order to prevent the power cord pressed down by elevation rack when the treadmill
is elevated up or down, it is recommended to tie up the power cord on the motor
cover (Shown as picture)
STEP 5: Calibrate The Treadmill
Enter the Manager’s Custom Mode to execute P16 AUTO CHECK. The treadmill’s INCLINE
will be calibrated automatically. This will take around 1 minute to run. After the completion
of calibration, press EMERGENCY STOP key twice to back to the inital starting screen.
Z53*8
Z62
Z63
Z64

1716
T R E A D M I L L T 6 0 T R E A D M I L L T 6 0
USING THE WORKOUTS
DISPLAY CONSOLE
WORKOUT PROFILE WINDOW: During a workout, intervals, hills and valleys appear in this
window as rows of lights stacked in columns. The number of lit rows within a column
corresponds to an incline percentage.
HEART RATE CENTRE:
This window displays your Actual and Target heart rate during the
workout. The console displays a heart rate within 15 to 20 seconds of contact with the
sensors or the use of a heart rate chest strap. In TARGET HEART RATE program, the inputted
target heart rate will display in the window every 60 seconds.
INSTRUCTION CENTER: This window displays step-by-step instructions for setting up a workout.
During a workout, it displays Time, Pace, Incline, Distance, Speed, Level, Calories and METS
.
1. Without anyone standing on the treadmill, plug the power cord into a dedicated electrical
outlet.
2. The On/Off switch for the treadmill is located next to the power supply plug in. Turn the
switch to the on "I" position to activate the treadmill.
3. Run the treadmill by following the INSTRUCTION CENTRE instructions to press the Quick
Program or Numeric keys for the program setting: Program, Level, Incline, Speed, Time, Weight,
Height, Age and Target Heart Rate.
(1) NUMBER KEYS: Press the numbers to input exercise Time, Weight, Level, Age, Heart
Rate, Speed and Incline.
SELECT / ENTER key: Press this key to confirm an entry of the number.
CLEAR key: Use this key to clear data not yet entered during the workout setup.
(2) SPEED & INCLINE: Use the arrow keys to adjust speed or incline.
(3) GO: Press GO to begin your workout immediately, without having to select a
workout program.
(4) STOP: Press this key once to enter PAUSE mode. And, hold it with 3 seconds
to reset the treadmill and restart the programming sequence.
(5) PROGRAM keys: Press the key to select one of the workouts. The program key with a
symbol of plus “+” represents this key includes additional workout options. Press
this key repeatedly for similar workout options.
(6) READOUT SWITCH keys: Press one of these four keys to change your desired readout.
NOTE: The workout time displays “countdown” according to default time or the maximum time
that the club owner set. When the workout time input as “0”, the time will count from 0 to the
maximum time depending on the fitness club setup. The workout pattern repeats until the
maximum workout time is completed.
PROMPT DEFAULT MINIMUM MAXIMUM UNIT
TIME
LEVEL
HEIGHT
WEIGHT
AGE
HEART RATE
GENDER
SPEED
INCLINE
20
1
160/5’
68/150
30
N/A
MALE
N/A
N/A
10
1
100/3’3”
34/75
10
52
MALE
0.8 / 0.5
0
99
10
230/7’5”
159/350
99
200
FEMALE
20 / 12
15
minute
cm / ft.in.
kg / lbs
year
beat
kph / mph
%
WORKOUT PARAMETER PROMPTS
A.
CONTROL KEYPAD: The Control Keypad allows the user to set up programs and control
workout.
D.
B.
C.
A
C
B
D
(1)(2)(2)(5)
(6)
(3)(4)

18
T R E A D M I L L T 6 0
19
T R E A D M I L L T 6 0
WORKOUT OVERVIEWS
PROGRAM
PROMPT
INPUT
PROGRAM
CONTROL
DEFAULT
TIME
DESCRIPTION
QUICK START
MANUAL
INTERVAL
RANDOM
GOAL+
TIME
GOAL
DISTANCE
GOAL
CALORIES
GOAL
N/A
20 min
N/A
N/A
N/A N/A
20 min Time,
Weight
N/A
20 min Level,
Time,
Weight
Elevation
N/A
N/A
N/A
Elevation
Quick Start is the fastest way to begin
exercising and bypasses the setup
prompts. After pressing the QUICK
START key, a constant-level workout
begins, and the speed and incline do
not change automatically.
Manual is a constant effort workout in
which the user can change incline or
speed at any time.
Interval is periods of intense aerobic
exercise separated by regular periods
of lower-intensity exercise. At any
point during the workout, the user can
change the settings of the current
speed.
This workout sets duration as the workout
goal. Once the duration objective is met,
the workout goes into a cool-down
phase.
This workout is designed to build endurance
in a certain distance. Once the objective
is met, the workout automatically goes
into a cool-down phase, and ends
afterward.
This workout is designed to burn a
certain number of calories in the
selected
time duration. Once the objective
is met,
the workout automatically goes into a
cool-down phase, and ends afterward.
Random creates a random terrain
pattern of hills and valleys that varies
with each workout.
Time, Start
Incline, Start
Speed,
Weight
Distance,
Start Incline,
Start Speed,
Weight
Time,
Weight
20 min
Calories,
Start Incline,
Start Speed,
Weight
PROGRAM
PROMPT
INPUT
PROGRAM
CONTROL
DEFAULT
TIME
DESCRIPTION
HEART
RATE+
TARGET
HR
WEIGHT
LOSS
20 min
20 min
Speed or
Elevation
Speed or
Elevation
Target HR is a higher intensity workout
for more fit users, emphasizing
cardiovascular benefits. The user must
wear a heart rate chest strip, or keep
hands on contact heart rate grips
continuously. The program adjusts the
intensity level, based on the actual heart
rate, to maintain the rate at 80 percent of
the theoretical maximum.
Weight Loss is a low-intensity workout for
burning the body’s fat reserves. The user
must wear a heart rate chest strip, or
keep hands on contact heart rate grips
continuously. The program adjusts the
intensity level, based on the actual heart
rate, to maintain the rate at 65 percent of
the theoretical maximum. And use Body
Mass Index (BMI) to measure your body
composition.
Age, Heart
Rate, HR
Control,
Max. Speed
or Max.
Incline,
Time,
Weight
Age, Heart
Rate, HR
Control,
Max. Speed
or Max.
Incline,
Time,
Weight,
Height
FITNESS TEST
Vision treadmill offers fitness tests-the
Gerkin firefighter protocol, the Gerkin
protocol was developed by Dr. Richard
Gerkin of the Phoenix (Arizona) Fire
Department. It is a sub-maximal graded
treadmill evaluation used by many Fire
Departments across the United States to
assess the physical condition of the
firefighters. The test requires constant
monitoring of the user’s heart rate so the
use of a telemetric chest strap is highly
encouraged.
N/AN/AN/A

2120
T R E A D M I L L T 6 0 T R E A D M I L L T 6 0
WORKOUT TIPS
• Vision Fitness strongly recommends seeing a physician for a complete medical exam
before undertaking an exercise program. If, at any time while exercising, the user experiences
faintness, dizziness, pain, or shortness of breathe, he or she must stop immediately.
• Without anyone standing on the treadmill, plug the power cord into a dedicated
electrical outlet.
• The On/Off switch for the treadmill is located next to the power supply plug in. Turn the
switch to the on "︱" position to activate the treadmill.
• To mount or dismount the treadmill, grasp the stationary side-handrails and place the
feet firmly on the right and left side platforms before the running belt begins moving.
Prior to the workout, please always attach the security clip to your clothing.
• When you are comfortable situated onto the running belt, the computerized display
console on the treadmill instructs you to operate the unit.
• The better position of feet to walk on the treadmill is where feet planted on the belt to
have your arms bent slightly and your hands grasped the heart rate sensors (as below
illustration). At the running speed, the feet stand on the point of the belt where the
hands at a natural swing are not able to touch the front handrail.
• Hold onto the handrail with one hand while you increase SPEED with the other hand.
Once you are comfortable with the walking or running speed, you can remove your
hands from the handrail.
• Do not attempt to grasp the HR sensors at speeds above 7.2 km/h (4.5 mph). For these
speeds, the use of a heart rate chest strap is recommended.
• It is highly recommended that you always incorporate the warm-up and cool-down
period into your workout. Warm-up brings the heart rate into the lower end of the target
zone and increases respiration and blood flow to working muscles. Cool-down takes
time for a user’s heart rate to return to a resting state after vigorous exercise and
reduces the amount of lactic acid in muscle tissue.
WORKOUT SETUP STEPS
Use the PROGRAM PLUS™ KEYS to enter the program, or use SPEED keys to scroll to
desired program. Use the NUMBER keys to enter the values, or use SPEED keys to
scroll to desired values displayed on the INSTRUCTION CENTER. Press the SELECT key to
confirm each selection. Follow the steps to set up each workout.
QUICK START
Press the "GO" key and the WORKOUT PROFILE WINDOW will display "3, 2, 1, GO!” The
workout begins at the lowest incline and speed, and the time counts “0” to the maxi-
mum time.
MANUAL
1) Press the “MANUAL” key to enter the program.
2) “SELECT TIME” using the NUMBER keys or SPEED keys, and then press SELECT.
3) “SELECT WEIGHT” using the NUMBER keys or SPEED keys, and then press SELECT.
4) Press GO to begin the workout.
INTERVAL
1) Press the “INTERVAL” key to enter the program.
2) “SELECT LEVEL” using the NUMBER keys or SPEED keys, and then press SELECT.
3) “SELECT TIME” using the NUMBER keys or SPEED keys, and then press SELECT.
4) “SELECT WEIGHT” using the NUMBER keys or SPEED keys, and then press SELECT.
5) Press GO to begin the workout
GOAL+
A) TIME GOAL
1) Press the “GOAL+” key and use SPEED keys to select “TIME GOAL”.
2) “SELECT TIME” using the NUMBER keys or SPEED keys, and then press SELECT.
3) “SELECT START INCLINE” using the NUMBER keys or SPEED keys, and then press
SELECT.
4) “SELECT START SPEED” using the NUMBER keys or SPEED keys, and then press SELECT
5) “SELECT WEIGHT” using the NUMBER keys or SPEED keys, and then press SELECT.
6) Press GO to begin the workout
B) DISTANCE GOAL
1) Press the “GOAL+” key and use SPEED keys to select “DISTANCE GOAL”.
2) “SELECT DISTANCE” using the NUMBER keys or SPEED keys, and then press SELECT.
3)
“SELECT START INCLINE” using the NUMBER keys or SPEED keys, and then press SELECT.

2322
T R E A D M I L L T 6 0 T R E A D M I L L T 6 0
4) “SELECT START SPEED” using the NUMBER keys or SPEED keys, and then press SELECT.
5) “SELECT WEIGHT” using the NUMBER keys or SPEED keys, and then press SELECT.
6) Press GO to begin the workout
C) CALORIES GOAL
1) Press the “GOAL+” key and use SPEED keys to select “CALORIES GOAL”.
2) “SELECT CALORIES” using the NUMBER keys or SPEED keys, and then press SELECT.
3)
“SELECT START INCLINE” using the NUMBER keys or SPEED keys, and then press SELECT.
4) “SELECT START SPEED” using the NUMBER keys or SPEED keys, and then press SELECT.
5) “SELECT WEIGHT” using the NUMBER keys or SPEED keys, and then press SELECT.
6) Press GO to begin the workout
RANDOM
1) Press the “RANDOM” key to enter the program.
2) “SELECT TIME” using the NUMBER keys or SPEED keys, and then press SELECT.
3) “SELECT WEIGHT” using the NUMBER keys or SPEED keys, and then press SELECT.
4) Press GO to begin the workout
HEARTRATE+
TARGET HR & WEIGHT LOSS
1)
Press the “HEARTRATE+” key and use SPEED keys to select “TARGET HR” or “WEIGHT LOSS”.
2) “SELECT AGE” using the NUMBER keys or SPEED keys, and then press SELECT.
3) “SELECT HR” using the NUMBER keys or SPEED keys, and then press SELECT.
4) “SELECT HR CONTROL” using the SPEED keys, and then press SELECT.
If SPEED is selected, the INSTRUCTION CENTER will display "SET MAX SPEED”. Use the
SPEED keys to set MAX SPEED, and then press SELECT.
If INCLINE is selected, the INSTRUCTION CENTER will display "SET MAX INCLINE”. Use
the SPEED keys to set MAX INCLINE, and then press SELECT.
5) “SELECT TIME” using the NUMBER keys or SPEED keys, and then press SELECT.
6) “SELECT WEIGHT” using the NUMBER keys or SPEED keys, and then press SELECT.
7) “SELECT HEIGHT” using the NUMBER keys or SPEED keys, and then press SELECT.
( Only For WEIGHT LOSS )
8) Press GO to begin the workout.
BMI Categories:
•Underweight = < 18.5
•Overweight = 25-29.9
•Normal Weight = 18.5-24.9
•Obesity = BMI of 30 or greater
MANAGER’s CUSTOM MODE
The Manager’s Custom Mode allow the club owner to customize the treadmill for the
club.
To enter the Manager’s Custom Mode, press and hold down the "INCLINE " and
"SPEED " keys. Continue to hold down these two keys until the INSTRUCTION CENTER
displays “MANAGER MENU”.
1. To scroll through the list of Manager’s Custom Mode use the SPEED / key. The
INSTRUCTION CENTER will display, in turn, each of custom settings.
2. To select a custom setting, press the SELECT key to enter.
3. To change the value of the setting, use the SPEED / key.
4. To confirm and save the value of the setting, press the QUICK START key. “SETTING
SAVED” will appear in the INSTRUCTION CENTER. To exit the setting without saving,
press the RESET key over 5 seconds, or if there is no key pressed, the system will
resume automatically.
FITNESS TEST
To enter into this workout on a T60, use the following guidelines:
1. Choose the Gerkin test by pressing the Fitness Test workout button until Gerkin is
shown in the message window and press ENTER.
2. Enter age using the NUMBER keys or SPEED keys and press ENTER
3. The message window will display your target heart rate based upon your age and the
target heart rate zone of 85%.
4. Select gender using the NUMBER keys or SPEED keys, and press ENTER.
5. Enter user weight (user weight is used to calculate the caloric expenditure value-
providing an accurate weight helps to ensure an accurate caloric expenditure rating
for each user) using the NUMBER keys or SPEED keys and press ENTER.
6. The message window will notify the user that the start speed is 3.0 mph (5.0 kph) and
0% incline during the warm-up.
7. Press GO to begin the workout.
Note: Press "STOP" key during workout, the program will be terminated and console will
display workout data.

THE LIST OF MANAGER’s CUSTOM MODE
P0
P1
P2
P3
P4
P5
P6
P7
P8
99 10 99 minute
CUSTOM
SETTING
2524
DEFAULT MINIMUM MAXIMUM UNIT STEP DESCRIPTION
T R E A D M I L L T 6 0 T R E A D M I L L T 6 0
This option enables fitness club managers
to set the program maximum workout
duration limits during peak and non-peak
hours of club traffic. Active variable
displayed in the TIME display after change.
This is the maximum time during which a
workout can remain in pause mode.
The language of the INSTRUCTION CENTER
display.
Software version is not editable, for display
only.
The function is to calibrate the treadmill’s
incline after the completion of the installation.
The function is only for manufacturer use.
Error log is not editable, for display only.
Holding the INCLINE and SPEED keys
simultaneously to erase the error log.
The function would clear all custom
settings had stored on the unit as a default
value. Holding the INCLINE and SPEED
keys simultaneously to clear all custom
settings as a default value.
The measurement unit type for weight,
distance, and speed.
When the treadmill's accumulated distance
reaches the certain kilometers or miles, the
maintenance reminder will display in the
message center meaning maintenance is
needed.
This option enables fitness club managers
to set the maintenance reminder as
ON/OFF.
This option controls the default program
time.
This option controls the default program
level.
This option controls the default users age
used in the target heart rate calculations.
Controls the maximum speed for all
programs. Displayed in native units (miles
per hour or kilometers per hour). Reverts
to default value on unit change.
This option changes the maximum incline
grade to 4%, 8%, 12%, 15%
Accumulated distance is not editable, for
display only. Displayed in native units
(miles or kilometers). Holding the INCLINE
and SPEED keys simultaneously to
reset the accumulated distance. After the
treadmill reaches the maximum distance, it
will reset to "0" automatically.
Accumulated time is not editable, for
display only. Holding the INCLINE and
SPEED keys simultaneously to reset the
accumulated time. After the treadmill
reaches the maximum time, it will reset to
"0" automatically.
This option controls the default weight
used in the calorie calculations. Sets to
default unit change (kilograms or pounds).
Displayed in native units.
1
20 10 99 minute 1
1 1 10 n/a 1
68 kg /
150 lbs
34 kg /
75 lbs
159 kg /
350 lbs
kg / lbs 1
30 10 99 age 1
20 kph /
12 mph
6.4kph /
4mph
20 kph /
12 mph
kph /
mph
1
15 4 15 % N/A
N/A 0
104,000
km /
65,000
mile
km /
mile
N/A
N/A 0 65,000
hrs
hour N/A
P10
P11
P12
P14
P15
P15-1
P16
60 sec 30 sec 180 sec
PAUSE
TIME
UCB
SOFTWARE
VERSION
UNITS
MAIN-
TENANCE
REMINDER
LANGUAGE
AUTO
CHECK
CUSTOM
SETTING
DEFAULT MINIMUM MAXIMUM UNIT STEP DESCRIPTION
second 1
English N/A N/A N/A N/A
N/A N/A N/A N/A N/A
Software version is not editable, for display
only.
P13
MCB
SOFTWARE
VERSION
N/A N/A N/A N/A N/A
Metric Metric English N/A N/A
ON N/A N/A N/A N/A
N/A N/A N/A N/A N/A
P17
ERROR
LOG
N/A N/A N/A N/A N/A
P18
RESET ALL
N/A N/A N/A N/A N/A
MANUFAC-
TURING
TEST
N/A N/A N/A N/A N/AP19
MAIN-
TENANCE
REMINDER
DISTANCE
2500mls
/ 4000
kms
2500mls
/ 4000
kms
5000mls
/ 8000
kms
km/
miles
10
MAXIMUM
TIME
DEFAULT
TIME
DEFAULT
LEVEL
DEFAULT
WEIGHT
DEFAULT
AGE
MAXIMUM
SPEED
MAXIMUM
INCLINE
ACCUMU-
LATED
DISTANCE
ACCUMU-
LATED
TIME
P9
Controls the starting speed for all
programs (minimum speed not affected).
Displayed in native units (miles per hour or
kilometers per hour). Reverts to default
value on unit change.
0.8 kph /
0.5 mph
0.8 kph /
0.5 mph
3 kph /
1.8 mph
kph /
mph
0.1
START
SPEED

RECOMMENDED CLEANING TIPS
MAINTENANCE
2726
T R E A D M I L L T 6 0 T R E A D M I L L T 6 0
The T60 is built for use in the light commercial environment - 8 hours a day and seven
days a week. However, as a club manager or owner, you are responsible for cleaning and
maintaining the unit’s integrity. If you fail to maintain the treadmill as described below, it
could affect or void the Johnson limited warranty.
DANGER — To reduce the risk of electrical shock, always unplug the treadmill from
its power source before cleaning it or performing any maintenance tasks.
1) Use a soft, clean cotton cloth. DO NOT use paper towels to clean surfaces on the
treadmill. DO NOT use ammonia or acid based cleaners. DO NOT use abrasive
cleaners. DO NOT apply cleaners directly to equipment surfaces.
2) Wipe the console and side rails after every use.
3)
Brush away any wax deposits from the deck and belt area. This is a common occurrence
until the wax is worked into the belt material.
4) Be sure to remove any obstructions from the path of the elevation wheels including
power cords.
5) Monthly, unplug the treadmill and remove the motor cover. Check for debris and
clean with a dry cloth or small vacuum nozzle. DO NOT plug the unit in until the
motor cover has been reinstalled.
4) To Press QUICK START and speed up the SPEED up to 6.4 kph / 4 mph during the belt
adjustment.
5) After the belt adjustment, let the treadmill run for 5 minutes to test. If necessary,
repeat the procedure until the belt is centred.
If the belt moves to the left, turn the left tension bolt a 1/4 turn clockwise, and then
turn the right tension bolt - turn counter-clockwise to start the belt tracking back to
centre of the roller.
If the belt moves to the right, turn the right tension bolt a 1/4 turn clockwise, and
then turn the left tension bolt - turn counter-clockwise to start the belt tracking back to
centre of roller.
Repeat these adjustments until the belt appears centred. Allow the belt to continue
running for several minutes to be sure that the tracking is stabilised.
NOTE: Do not exceed one full turn of the adjusting screws in either direction. If,
after one full turn, the belt does not track properly, contact your Johnson Dealer.
TENSIONING THE BELT
Check the tension of the belt. The belt should be very snug. When a person walks or
runs on the belt it should not hesitate or slip. If this occurs, tighten the belt by turning
both tension bolts a -turn clockwise. Repeat if necessary, but NEVER TURN the tension
bolts over a 1/4 turn at a time. If, after tensioning the belt, the belt still hesitates or
slips, please contact your Johnson Dealer.
CAUTION! Over-tightening the belt will severely shorten the life of the belt and
cause damage to other components.
CENTERING THE BELT
The T60 is built with a crowned roller to ensure proper tracking of the belt in the
centre of the deck. When you run or walk, you may push off harder with one foot
than the other. This uneven deflection can cause the belt to move off centre.
Occasionally, the belt may need further adjustment to keep it centred. To centre
the belt, use the enclosed 8mm Allen wrench to adjust the rear roller position.
CAUTION! Please follow the centring belt procedure tips before you begin.
1) Do not wear loose clothing or loose jewellery while making this adjustment.
2) Never turn the bolts more than 1/4 turn at a time.
3) Tighten one side and loosen the other side to prevent from over-tightening or loosing
the belt. Over-tightening the belt will significantly shorten the life of the belt.
1/4 TURN
NOTE: Safety of the equipment can be maintained only if the equipment is examined
regularly for damage or wear. Keep the equipment out of use until defective parts are
repaired or replaced. Pay special attention to parts that are subject to wear, as outlined
below.

PRODUCT SPECIFICATIONS
Model T60
*Product specifications are subject to change without notice.
28
T R E A D M I L L T 6 0
Console
Display Screen
Display Readout
Programs
On-the-fly Program Change
Telemetric Receiver
Contact HR Sensors
Program Plus™ Keys
Number Keys
One-Touch Quick Start
Pause Time
Safety Stop
Technical Data
Drive Motor
Motor Controller
Speed Range
Elevation Range
Deck
Deck Step Height
Belt Area
Belt Type
Cushion System
Rollers
Side Handrails
Foot Standing Platform
Dimensions (LxWxH)
Product Weight
Max User Weight
Power Requirement
Special Features
Integrated Accessory Tray
Integrated Reading Rack
Workout Profile Window – 10 × 14 green LED dot-matrix display
Instruction Center – 19-character red LED alphanumeric display
Informational Display – 3 numeric 7-segment display (3 sets)
Time, Pace, Incline, Distance, Speed, Level, Calories, METS, Target HR, Actual HR, Profil
e
Manual, Interval, Goal+(Time Goal, Distance Goal, Calories Goal), Random,
Heart Rate+(Target HR, Weight Loss [ includes BMI Test ]), Fitness Test
Yes
Yes
Yes
Yes
Yes
Yes
Yes
Push button with lanyard clip
3.0 hp AC drive system
Club grade AC drive
0.8 – 20 km/h / 0.5 – 12 mph
0 – 15%
1” reversible deck
20 cm / 7.9”
51 cm × 160 cm / 20" × 63"
Multi-ply, prewaxed
Dynamically-controlled cushioning system
7.6 cm / 3” Diameter, precision-crowned steel, front and back
51 cm (20”) long, cantilevered
One piece extrude
214 cm × 82 cm × 144 cm / 84” × 32.5” × 57”
150 kg / 330 lbs
159 kg / 350 lbs
110V – 220V dedicated circuit required
Yes
Yes
/