6
Printer Configuration
Once the present sensor is connected to the printer, it will automatically be
recognized by the printer. Once the present sensor is recognized, the printer
can be operated in dispense mode.
NOTICE !
For operation in dispense mode choose the setting Demand Mode/
Cutter in the Windows Printer Driver
In order to optimize the operation the parameter Presentation Position is
available. The amount of label left adhering to the liner can be altered with this
parameter. The setting 1mm is a good start value.
More information about the Printer Setup is available in the Online Help of the
Gemini Control Panel or in the Printers Operator Manual.
Printer Configuration under Windows 95, Windows 98, Windows ME
1. To start the Gemini Control Panel application, (double)-click on the Gemini
program group, then (double)-click on the icon .
2. Click on the Setup button and in the next window on the Options
button.
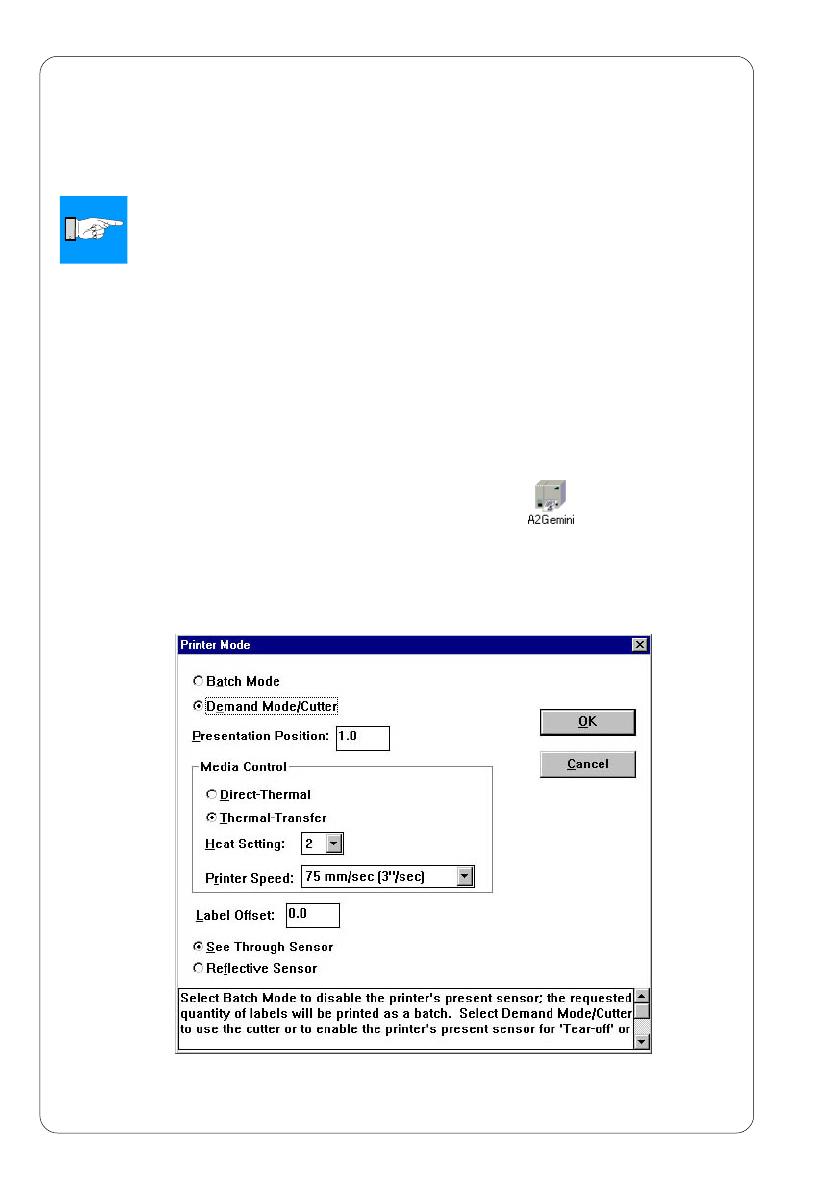
3. In the Printer Mode window choose the setting Demand Mode/Cutter.
4. Adjust the Presentation Position as necessary.
Fig. 5 Printer Setup - Printer Mode Windows
under Windows 95, Windows 98 und Windows ME


