22060

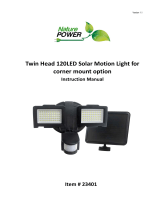
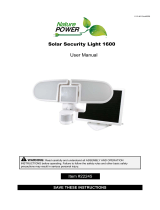
Nature Power 22060 Owner's manual

  • Hello! I am an AI chatbot trained to assist you with the Nature Power 22060 Owner's manual. I’ve already reviewed the document and can help you find the information you need or explain it in simple terms. Just ask your questions, and providing more details will help me assist you more effectively!
SINGLE COLOR
(Used for background colors other than Black or White)
White
(Used for black or dark grey background color)
Version 1.5
FRANÇAIS PG. 07
ENGLISH PG. 01
ESPAÑOL PG. 13
Solar Security Light 600
Version 1.6
Page 2
Page of 6
2
ThankyouverymuchforchoosingaNaturePowerProduct!Forfuturereference,pleasecompletethe
owner’srecordbelow:
Model:_______________ PurchaseDate:_______________
Save the receipt and these instructions. It is important that you read the entire manual to become
familiarwiththisproductbeforeyoubeginusingit.
Thismachineisdesignedforcertainapplicationsonly.Thedistributorcannotberesponsibleforissues
arisingfrom modification.We stronglyrecommendthismachinenotbemodifiedand/orused forany
applicationotherthanthatforwhichitwasdesigned.Ifyouhaveanyquestionsrelativetoaparticular
application,DONOTusethemachineuntilyouhavefirstcontactedthedistributortodetermineifitcan
orshouldbeperformedontheproduct.
Fortechnicalquestionspleasecall18005880590.
GENERALSAFETYRULES
WARNING:
ReadcarefullyandunderstandallASSEMBLYANDOPERATIONINSTRUCTIONSbeforeoperating.Failuretofollow
thesafetyrulesandotherbasicsafetyprecautionsmayresultinseriouspersonalinjury.
CAUTION:DonotallowpersonstooperateorassemblethisSolarLightuntiltheyhavereadthis
manualandhavedevelopedathoroughunderstandingofhowthe
SolarLightworks.
WARNING:Thewarnings,cautions,andinstructionsdiscussedinthisinstructionmanualcannot
coverallpossibleconditionsorsituationsthatcouldoccur.Itmustbeunderstoodbytheoperatorthatcommon
senseandcautionarefactorswhichcannotbebuiltintothisproduct,butmustbesuppliedbytheoperator.
SAVETHESEINSTRUCTIONS
FEATURES
YourCOBSecurityLightistheperfectsystemforthefollowing:
Entrance
Garage
Porch
Eaves
Emergency
Page 3
Page of 6
PARTSLIST
USEANDCARE
DonotmodifytheSolarLightinanyway.Unauthorizedmodificationmayimpairthefunctionand/orsafety
andcouldaffectthelifeoftheequipment.TherearespecificapplicationsforwhichtheSolarLightwas
designed.
AlwayscheckfordamagedorwornoutpartsbeforeusingtheSolarLight.BrokenpartswillaffecttheSolar
Lightoperation.Replaceorrepairdamagedorwornpartsimmediately.
StoreidleSolarLight.WhenSolarLightisnotinuse,storeitinasecureplaceoutofthereachofchildren.
Inspectitforgoodworkingconditionpriortostorageandbeforereuse.
ASSEMBLY
1. LampUnitInstallation
Mountingyourlightrequiresascrewdriver,penciland(insomecircumstances)apowerdrill.
Placethemountingbracketonthesurfaceyouwishtomountto.
Markwithapencilthepositionofthemountingbracketscrewholes.Thiswillenable youtopredrill
yourscrewholes.
Oncethemountingbracketisinstalled,ensuringallscrewsaretight,youarereadytopositionyourCOB
SecurityLight.
Carefullyroutethewirefromthesolarpaneltothelampandplugitintothepowersocket.
Adjustthemotionsensortoyourdesiredposition.YourCOBSecurityLightisnowinstalledandreadyto
charge.
Note:Lampunitshouldbemounted6.5~9.8ftfromthegroundtoensuremotiondetectionisoptimized.
2. SolarPanelWallorRoofMountedInstallation
Chooseanareathatreceivesthemaximumamountofsunlightpossible.
Use the holes located on the solar panel mounting bracket to mark the mounting surface for
installation.
Set the bracket on thesurface you havechosen and secureit in place with the screwsand anchors
provided.
AdjusttheangleoftheSolarPaneltoensureitreceivesoptimumsunlight.
Note:TheSolarPanelisequippedwitha5ft.wire.Themaximumdistancebetweenthelampunitandsolarpanel
canbe5ft.
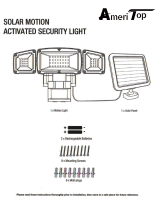
Part# Description Qty.
1 Lamp 1
2 SolarPanel(5mWire) 1
3 ScrewsandAnchors 1
4 MountingBracket 1
5 Manual 1
Page 4
Page of 6
4
ASSEMBLYDIAGRAM
Part
Description
Part
Description
1
Lamp
7
AUTO/OFF/ONSwitch
2
SolarPanel(5ft.wire)
8
SolarPanelMountingBracket
3
Screws&Anchors
9
LUXAdjustingKnob
4
COBLED’s
10
SENSAdjustingKnob
5
BatteryHousing
11
TIMEAdjustingKnob
6
MotionDetectorHead
12
MountingBracket
Page 5
Page of 6
5
OPERATION
1. BeforetheSolarMotionLightcanoperatetoitsfullcapacity,theSolarPanelneedstobeinsunlightfor3days
tofullychargetheincludedbattery.Chargingshouldbedonewiththeunitinthe“OFF”position.
2. LocatedatthebottomoftheBatteryHousing(5)thereisaswitchwiththreepositions:
Turn the switch to “AUTO” position, the light will turn on automatically at night when motion is
detectedbytheMotionDetectorHead(6).
Turntheswitchto“ON”position,thelightcanbeusedasastandardlightforconstantillumination.
Turntheswitchto“OFF”position,thelightwillremainoffandwillnotdetectanymovement.
HOWTOUSECONTROLDIALS
TheSolarMotionLighthas3differentcontroldialswhichcontrolthelight’sduration,
sensitivitytolightandsensitivitytomotion.
LUX(LIGHTLEVEL)
1. The LUX Adjusting dial (9) tells the sensor the level of darkness that must be
reachedbeforethelightturnson.
2. Ifsettothemaximum
level,thelightwillgoonindaylight.
3. Ifsettotheminimumsetting
thesensorwillonlytriggerthelighttoturnonatduskorwhenitisdark
out.Thisistheidealpositionforgeneralusage.
TIME
1. TheTIMEAdjustingdial(11)setsthedurationofilluminationtime.
2. The TIME is adjustable from 8 seconds to 2 minutes. Rotating the dial clockwise will increase the
illuminationtime.
SENS(SENSITIVITY)
Thisdeterminestherangeofmotiondetection:
1. Minimumposition–LowRange.
2. MidPositionNormalsetting.
3. MaximumpositionMaximumrange.
LOCATIONOFSOLARLIGHT
For best results, please locate the Solar Panel from your
COB Solar Light in a position where it can absorb direct
sunlightonthesolarpanel,andgenerallyfreefromcover
andshade.
TROUBLESHOOTING
IftheSolarMotionLightdoesnotilluminatewhenmovementinfrontofthesensorisobvious,pleaseobserve
thefollowing:
Ensurethesolarpanelisinalocationwhereitwillreceivemaximumsunlightduringdaytimehours.
Ensurethelampheadisawayfromotherlightsources.Otherlightsourcesatnightwillpreventthe
Page 6
Page of 6
6
unitfromturningon.
Ensureswitchissetto“AUTO”or“ON’position.
Checkbatteriesareinstalledcorrectly.
Allow the solar panel to charge the batteries in direct sunlight for 3 days with the switch in the
“OFF”position.
ReplaceBatteries.Rechargeablebatteriesmaylastupto600charges.Forbestperformancereplace
batteriesevery12months.
BATTERYREPLACEMENT
1. TheBatteryPackislocatedintheBatteryHousing(5).
2. TurntheSwitch(7)tothe“OFF”position.Remove thefourscrewsfrom theBatteryHousing(5).Separate
theBatteryPackconnector.RemoveoldBatteryPack.ReplaceonlywithidenticalrechargeableBatteryPack.
3. Checkcorrectpolarityofbatteryreplacement.
4. ReplacethecoveroftheBatteryHousing(5).Secureitwiththefourscrews.
MAINTENANCE
MaintainyourSolarLight.ItisrecommendedthatthegeneralconditionofanySolarLightbeexaminedbeforeit
isused.CleanthesolarmodulewithadamptoweltoinsureoptimumperformanceoftheSolarLight.Donotuse
anytypeofsolventforcleaningandbecarefulnottoputtoomuchpressureonthemodulewhilecleaning.
LIMITEDWARRANTY
NaturePowerwarrantsourproductstotheoriginalpurchaserthatthisproductisfreefromdefectsinmaterials
andworkmanshipfortheperiodofoneyearfromdateofpurchase.Inthecaseofproductdefect,contactNature
Powercustomerservicetoreceivetroubleshooting.Ifdefectivepartorunitshouldbereturned,aReturn
AuthorizationNumbermustbeissuedbyNaturePowerandthedefectivepartorunitshouldbereturnedtothe
authorizedlocationatthepurchasers’expense.Adatedproofofpurchaseisrequiredtoreceivewarrantyservice.
Oncereceivedatauthorizedlocationanddefectprovestobetheresultofdefectivematerialandworkmanship,
thedefectivepartorunitwillbereplacedatwarrantors’optionandreturnedtotheoriginalpurchaserat
warrantors’expense.Norefundswillbegrantedbythewarrantor,intheeventofbuyer’sremorsepleasecontact
yourpointofpurchasewithinandinadherencetotheirreturnpolicy.Refundsaregrantedattheretailers’
discretions.
DatedProofofPurchaseisrequired.
PleasecontactNaturePowerProductstoacquiremoreinformation:
18005880590
www.naturepowerproducts.com
Version 1.5
LampesolaireDeSecurites600
Manueld'instructions
Article#22060
français pg. 07
English pg. 01
español pg. 13
SINGLE COLOR
(Used for background colors other than Black or White)
White
(Used for black or dark grey background color)
( )
FRANÇAIS PG. 07
ENGLISH PG. 01
ESPAÑOL PG. 13
SINGLE COLOR
(Used for background colors other than Black or White)
(Used for black or dark grey background color)
Page 1 of 6
Versión 1.5
( )
Version 1.6
LAMPARA SOLAR DE SEGURIDAD
/