Page is loading ...

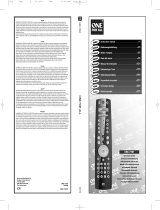
LCD Projector
Remote Control Operating Guide
Model No. PT-AE900U
TQBJ 0187
■ This remote control can be used to carry out simple setting operations for
your home theatre system in addition to operating the projector (PT-AE900U).
■ Be sure to read this Remote Control Operating Guide carefully in order to use
the devices safely.
■ Also be sure to read the instructions for the projector and the home theatre
system carefully when using the remote control.
■ After reading this Operating Guide, keep it in a safe place for later reference.

2
Features
3
Contents
This remote control can be used to operate home theatre system devices with a
single remote control instead of the inconvenience of having to use several
remote controls.
B Up to a maximum of 8 devices can be operated.
Up to a maximum of 8 devices (such as a projector, DVD player/recorder, video
deck, TV and amplifier) can be operated.
The selection buttons can be used to select a device in your home theatre
system, and then you can operate the selected device using the remote control.
At the time of purchase, the remote control is programmed with remote control
signals for Panasonic products, so that such products can be operated with a
single remote control.
B Home theatre systems not manufactured by Panasonic can also be
operated.
Remote control signals for many major home theatre system manufacturers
including Panasonic have been recorded into the remote control.
You can use the remote control to carry out remote control operations for the
other devices simply by selecting the devices’ model and code.
B Remote control signals can be easily learnt
If no codes are available for the devices you are using, or if you would like to
customise the functions that you use most frequently, you can use the remote
control to learn functions.
(The other device’s remote control is required in order to carry out learning
operations.)
B Customised display of frequently-used functions on the LCD is possible
Function corresponding to the function buttons on the recorded devices can be
displayed on the remote control’s LCD.
Up to 3 characters (alphabetical, numeric and symbols) can be entered for each
function button that has been learnt to create your own preferred name to be
displayed for that function.
B You can make a macro to turn the power for selected devices on or off all
at once
You can turn the power on and off simultaneously for up to 8 devices by
pressing down the system power button for 3 seconds or more.
B Backlight function
When you press the LIGHT button, the LCD and buttons illuminate so that you
can operate the remote control comfortably even in dark places.
Note:
Do not use the remote control to operate any other equipment apart from your
home theatre system.
Note:
It may not be possible to operate some devices using this remote control.
Features 2
Contents 3
Names and functions of each part 4
Operation 6
Operating the projector 6
Operating the home theatre system 6
Setting remote control signals for home theatre
systems 7
Selecting and entering device codes 8
Setting home theatre system devices when you do not
know the device code
10
Learning remote control signals directly from home
theatre system devices
12
Deleting home theatre equipment remote
control signals 14
Deleting button functions one by one 14
Deleting all settings for USER 1-3 15
Changing the LCD display contents 16
Turning the power for home theatre system
devices on and off at once 18
Using the macro function 18
Setting the macro function 18
LCD display list 20
Selected device displays 20
Display messages 20
List of display characters 20
Function button guide 21
Remote control function list 22
Equipment code list 24

Function buttons (A/B/C)
These operate the displayed functions for the
selected equipment.
4
Names and functions of each part
5
Liquid crystal display
The top shows the selected device, the bottom shows
the functions of that device that can be operated.
(✱ pp. 20-21)
✱ Buttons shown in this colour are buttons that
can be used for learnt functions.
Projector power button
This turns the projector power on and off.
MUTE button
This mutes the sound.
Channel button
This selects the channel.
Projector button
This switches the remote control functions to
projector mode.
MENU button
This switches to menu mode for the selected
equipment.
FGHI button
This moves the selection up or down or to the left
or right.
NORMAL button
This returns setting values to their factory defaults.
PIC.MODE button
This switches to the image menu.
ASPECT button
This switches the aspect ratio.
MAIN adjustment button
This displays the “PICTURE” menu.
ADVANCED adjustment button
This displays the “Advanced” menu.
System power button
This turns the power supply for equipment other than
the projector on and off.
LIGHT button
Turn the backlight for this remote control on and off.
SETUP button
This switches to setup mode for the selected system
equipment.
SOURCE button (✱ p.6)
This selects the equipment to be operated.
VOLUME button
This adjusts the sound volume.
ENTER button
This button accepts the selected item.
DVD/video playback buttons
These buttons are used for functions related to DVD
and video playback.
RETURN button
When a menu is displayed, this button returns to the
previous menu.
SHUTTER button
This button lets you momentarily hide images.
Input select buttons
These buttons select the input signals from
connected equipment.
MEM.LOAD button
This displays the “Memory Load” menu.
C.C.M. (Cinema Color Management) button
This displays the “Color management” menu.

6
Operation
Setting remote control signals for home theatre systems
■ Operating the projector
■ Operating the home theatre system
7
1
1
Press [SELECT].
2
(Example: When “DVD” is selected)
3
Press the button for the desired operation.
BIf operating home theatre system devices
■ Remote control signal learning methods
The following three remote control signal learning methods can be used.
Selecting and entering device codes
Select from the device code list.
p.8
p.10
p.12
When you press [PROJECTOR], operation will
switch from the home theatre system back to the
projector.
This remote control is programmed with remote control signals for Panasonic products at
the time of purchase. If you would like to operate devices from other manufacturers, or if
your Panasonic products cannot be operated, the following setting operations will be
required.
Select the device to be operated and then
press [ENTER].
Press the button for the desired operation.
Note:
B At the time of purchase, the remote control is programmed with remote
control signals for Panasonic products.
B If the devices you are using cannot be operated by using the default settings,
refer to “Setting remote control signals for home theatre systems” ( p.7)
B The default settings for USER1-3 are for these settings to be empty.
B If you do not press anything for 10 seconds or more during this procedure,
the LCD will switch off.
B If the light is on, it will switch off if no operations are carried out for 10
seconds or more.
B If the LCD switches off while a device is flashing as a result of a device
selection, the last device selected will be the one that can be operated.
Note:
B Do not use the learning function to record remote control signals from other
learning remote controls that have been learnt by those remote controls. If
this is done, operating errors may result.
B If no operations are carried out for 60 seconds or more during the setup
stage, operation will time out and the setting mode will be cancelled.
Setting home theatre system devices when you
do not know the device code
To learn remote control signals from devices that you do not
know the device code for, set using the search function.
Learning remote control signals directly from
home theatre system devices
If operation is not possible using a device code, you can
learn remote control signals directly from the home theatre
system device.
If you would like to cancel a setting
before it is complete··
Tip
(Example: When [PLAY] is selected)
Press [SETUP].

Select the desired device code while referring to the device
code list ( p.24, 25), and then press [ENTER].
✱ If “ERROR” is displayed
The remote control signal that you are trying to learn has
already been registered, so the device code cannot be
selected. To set a device code, clear the remote control signal
that has been learnt. ( p.14)
8
9
■ Selecting and entering device codes
1
2
Press [SETUP] for 3 seconds or more.
Select the device to be set and then press [ENTER].
3
Continue to step 3
B When “TV/TNR” is selected
B When “USER 1-3” is selected
TV
CBL
SAT
DVD
AMP
SCREEN
LIGHTING
SATCBL
HVAC
TV
RCV
VCR
Continue to step 3
Setting remote control signals for home theatre systems
2
-1
Press [ENTER].
2
-2
Select the device to be set.
2
-1
B When “DVD, VCR, AMP” is selected
When “USER 1-3” is selected
Note:
B For device codes that have a power remote control signal, the power remote
control signal for the device will be transmitted when the device code is
selected. Turn the power for the device on as a test.
B Two or more equipment codes cannot be entered for the same device.
B Device codes cannot be entered for “PJ”.
B If the home theatre system device does not support this function, it will not
operate when the buttons are pressed.
Select the device to be set
and then press [ENTER].
Press [SETUP] to finish.
Note:
B If correct operation is not possible
If you find several code numbers when referring to the device code list, try
setting one of the other numbers instead.

10
11
1
2
3
4
5
6
Setting remote control signals for home theatre systems
3
-1
B When “DVD, VCR, AMP” is selected
3
-1
3
-2
■ Setting home theatre system devices when you do
not know the device code
When recording remote control signals for a home theatre system device when you do not
know the device code for that device, you can use the search function to make the settings.
Search function
The search function transmits a power supply OFF signal, and searches for and sets
compatible device codes.
Turn the power on for the home theatre system device that you
would like to set.
Press [SETUP] for 3 seconds or more.
Select the device to be
set and then press
[ENTER].
Select the device to be set and then press [ENTER].
B When “TV/TNR” is selected
Continue to step 4
Continue to step 4
TV
CBL
SAT
B When “USER 1-3” is selected
Press the up or down button to select “SEARCH?”
and then press [ENTER].
Select the device to be set and then press [ENTER].
DVD
AMP
SCREEN
LIGHTING
SATCBL
HVAC
TV
RCV
VCR
Press [NORMAL].
Point the remote control at the home theatre system device
and press the up button once.
✱ Repeat step 5 until the power turns off for the home theatre system
device.
Once the power for the home theatre system device turns off,
press [ENTER].
Continue to step 5
✱ If “ERROR” is displayed
The remote control signal that you are trying to learn has
already been registered, so the device code cannot be
selected. To set a device code, clear the remote control signal
that has been learnt. ( p.14)
To finish, press [SETUP],
and then check operation.
(Example: When “DVD” is selected)

12
13
■ Learning remote control signals directly from home
theatre system devices
If operation is not possible using a device code, you can register other remote control
signals for the USER 1-3 buttons.
2
3
4
5
1
(Example: When “USER1” is selected)
Approx. 5 cm
After 5 seconds
Projector’s remote
control
()
Home theatre system
device’s remote control
()
Setting remote control signals for home theatre systems
Note:
B Remote control signals that are not infrared-type (wave format) signals
cannot be recorded.
B It may not be possible to record some types of signal.
Press [SETUP] for 3 seconds or more.
Select “USER 1-3” and then press [ENTER].
Select “LEARN?” and then press [ENTER].
Place the projector’s remote control next to the emitter of the
home theatre system device’s remote control.
Press the button on the projector’s remote control that you
would like to record, and then after “LEARNING” is displayed,
press the corresponding button on the home theatre system
device’s remote control.
✱ If “ERROR” is displayed
Learning could not be carried out correctly. Return to step 5 and repeat the
learning operation.
✱ To record another button, repeat step 5.
Note:
B If the batteries of the remote control are spent, the signals will not be
recorded correctly.
B Each button must be recorded separately.
B If no operations are carried out for 60 seconds or more during learning, the
setting mode will be cancelled. To carry out learning correctly, repeat the
procedure from step 1.
B When function buttons A/B/C have been learnt, “-A-, -B-, -C-” will be
displayed, and you can edit the characters that are displayed here.
( p.16)
Tips on correct learning
B Do not move the remote control while learning is in progress.
B Place fresh batteries into both the projector’s remote control and the other
remote control before starting.
B Avoid carrying out the procedure in places that are exposed to direct sunlight
or lights. (Interference may occur and cause errors in learning.)
B The position of the emitter will vary depending on the shape of the remote
control. Place the projector’s remote control correctly in front of the emitter,
and at a distance of 5 cm.
To finish, press [SETUP],
and then check operation.
Example: When learning the function of the
playback button
()

14
15
■ Deleting button functions one by one (DELETE)
2
3
4
1
Press [SETUP] for 3 seconds or more.
Select “USER 1-3” and then press [ENTER].
Select “DELETE?” and then press [ENTER].
Press the button to be deleted.
(Example: When “USER1” is selected)
■ Deleting all settings for USER 1-3 (OPS RESET)
2
3
4
1
(Example: When “USER1” is selected)
Deleting home theatre equipment remote control signals
You can use either of two methods to delete remote control signals that have been
recorded (learnt): by deleting button functions one by one (DELETE), or by deleting all
settings for USER 1-3 (OPS RESET).
To finish, press [SETUP].
Press [SETUP] for 3 seconds or more.
Select “USER 1-3” and then press [ENTER].
Select “OPS RESET?” and then press [ENTER].
Press [ENTER].
To finish, press [SETUP].
✱
If “ERROR” is displayed
“ERROR” will be displayed if no function has been learnt.
✱ To delete another button, repeat step 4.
Note:
B If device codes have already been entered for USER 1-3, the device codes
will not be deleted.
Example: When deleting the function of the
playback button
()

16
Changing the LCD display contents
17
2
3
5
1
Example: When
“USER1” is selected
()
4
: Display position
: Character select
When remote control signals for a home theatre system device have been learnt for the
USER 1-3 function buttons, you can change the “-A-, -B-, -C-” displays on the LCD to your
preferred displays.
List of characters that can be displayed
Upper-case letters: A-Z Numerals: 0-9 Symbols: -, +, _, ✱, ?, space
Press [SETUP] for 3 seconds or more.
Select “USER 1-3” and then press [ENTER].
Select “KEY EDIT?” and then press
[ENTER].
Press the button to be changed.
Use the left and right keys to move to the
character to be changed, and use the up
and down keys to select the character.
6
Press [ENTER].
✱ During setting, the space character will be displayed
as “ ”.
✱ To edit another character display, repeat steps 4 and
5.
(Example: When function B has been selected)
To finish, press [SETUP].

18
19
2
3
1
You can use the projector’s remote control to turn the power on and off for home theatre
system devices that have been recorded in the remote control.
Note:
B At the time of purchase, a macro for turning the power on and off for PJ,
DVD, VCR and AMP all at once is set.
Note:
B
If the distance that the projector’s remote control has to operate is too far, or if
the remove control receiver of the home theatre system devices are obstructed,
this operation may not work correctly. Check the locations and directions of the
home theatre system devices to make sure that they can all be operated.
Turning the power for home theatre system devices on and off at once
Press and hold [SYSTEM] for 3 seconds or more.
The power for the registered devices will turn on.
6
4
5
(Example: When “USER1” is selected)
■ Setting the macro function
■ Using the macro function
(Example: When “USER3” is selected)
(Example: When “USER3” is selected)
Press [SYSTEM] once more.
To finish, press [SETUP], and then check operation.
✱ The length of time required for the macro function to finish operating effectively will vary
depending on the number of devices that have been recorded.
✱ The display will show the
devices that have been
recorded by the macro.
Press [SETUP] for 3 seconds or more.
Select “USER 1-3” and then press [ENTER].
Select “MACRO?” and then press [ENTER].
Select the device to be registered.
Press [SYSTEM].
When you have finished selecting
devices, press [ENTER].
✱ If a registered device is selected, the display will flash faster.
✱ If a registered device is selected, the display will flash faster.
✱ To register or delete another device, repeat steps 4 and 5.
✱ The macro function will be cleared and the display will flash more
slowly.
Clearing the macro function

20
LCD display list
21
Corresponding device
Selected
device
Corresponding
device
Function button
display
Description
Selected
device
Corresponding
device
Function button
display
Description
Selected
device
Corresponding
device
Function button
display
Description
Projector (PT-AE900E/U)
HDD Switch to hard disk (*1)
DVD player/DVD recorder
DVD Switch to DVD (*1)
Video deck
LNG Audio select
TV/Cable converter/Satellite receiver
REC Recording
Audio amplifier/Receiver
EPG Program list
EXT Menu screen clear
INP Input select/Broadcast select
EPG Program list
LNG Audio select
DVD Switch input to DVD (*2)
VCR Switch input to VCR (*2)
TV Switch input to TV (*2)
*1: If either the HDD or DVD function button display is blank, operation will be as follows.
HDD
Empty -
LNG Audio select
Empty
-
DVD
LNG Audio select
DVD
Input switches to Input sequence select (+) or select 1
VCR
Input switches to Input sequence select (-) or select 2
TV Input switches to select 3
DVD/DVD-R
VCR
TV/Cable Converter
/Satelite Receiver
Audio Ampliflier
/Receiver
DVD
VCR
TV/CBL/SAT
AMP/RCV
DVD
DVD
AMP/RCV
DVD/DVD-R
DVD/DVD-R
Audio Ampliflier
/tuner
LCD display Description
CODE ? Indicates that the mode for setting device codes is selected.
CODE ? **** Displayed when a device code (4 digits) has been selected and entered.
DELETE ? Indicates that the mode for deleting learnt remote control signals is selected.
DELETED Displayed when a learnt function has been deleted.
END Displayed when code searching of the database is complete.
ERROR Displayed when an error occurs. Redo the operation.
EXIT SETUP Displayed when setup mode has been exited.
KEY EDIT ?
LEARN ? Indicates that the mode for learning remote control signals has been selected.
LEARNING Displayed while remote control signals are being learnt.
MACRO ?
OK Displayed when an operation is completed correctly.
OPS RESET ?
RESET ? Displayed when you are to select whether or not to reset.
RESET ERROR Displayed when an error occurs during a reset operation. Redo the operation.
RESET OK Displayed when the reset operation is successful.
SAVED Displayed when a button guide has been recorded.
SEARCH ?
SEL SOURCE Displayed when selecting a device type.
SOURCE ? Displayed when selecting a device to be operated.
TIMEOUT
SEARCHING Displayed while the search function is operating.
■ Function button guide
■ Selected device displays
■ Display messages
Selected device display
PJ
DVD
VCR
TV/TNR
AMP
USER1/2/3
DVD, VCR, TV/TNR, AMP, other device (✱ may include
devices that cannot be learnt)
Indicates that the mode for editing the function button display characters is selected.
Indicates that the mode for resetting the functions learnt for USER1/2/3 has been selected.
Indicates that the mode for using the remote control signals to set a device code has been selected.
Displayed when no operations have been carried out for 60 seconds, and the
procedure has timed out.
Indicates that the mode for setting the macro function (simultaneous power control) has been selected.
Note:
B The displayed button guide may not match the operation for some devices.
B Remote control signals may vary depending on the device being set, even if
the manufacturer is the same.
■ List of display characters
Display
character
Display
character
Display
character
Display
character
Display
character
Display
character
Display
character
Display
character
Display
character
Display
character
ABCDEFGH I J
KLMNOPQRST
UVWXYZ
1234567890
-+
_
✱ ?
space
Letters
Symbols
Numerals
*2: The DVD, VCR or TV function button displays may operate as follows. (Select 1, 2 and
3 indicates input switches that differ depending on the selected device.)
Switch to DVD and HDD in that order, or switch directly to HDD
Switch to DVD and HDD in that order, or switch directly to DVD

22
Remote control function list
23
PJ DVD VCR TV/CBL/SAT AMP/RCV USER1/2/3
- 0490 1244 1333 (TV) 1308 (*4)
POWER (PROJECTOR)
POWER (SYSTEM)
- Power (*1) Power (*1) Power (*1) Power (*1) ✱
LIGHT Backlight Backlight Backlight
Function A - HDD REC INP DVD ✱ (*5)
Function B - DVD EPG EPG VCR ✱ (*5)
Function C - LNG EXT LNG TV ✱ (*5)
SOURCE Device select Device select Device select Device select Device select Device select
SETUP Setup Setup
UP - Channel + ✱
DOWN - Channel - ✱
MUTE Amp mute Amp mute Amp mute (*2) Mute ✱ (*6)
+ Amp volume + Amp volume + (*2) Volume + ✱ (*6)
- Amp volume -
Amp volume +
Amp volume -
Setup
Channel +
Channel -
Backlight Backlight Backlight
Setup
Channel +
Channel -
Setup Setup
Channel +
Channel -
Amp mute
Amp volume +
Amp volume - Amp volume - (*2) Volume - ✱ (*6)
- Skip down Skip (back) Skip down (*3) - ✱
- Skip up Skip (forward) Skip up (*3) - ✱
- Slow/search Fast-forward Slow/search (*3) - ✱
- Slow/search Rewind Slow/search (*3) - ✱
STOP - Stop Stop Stop (*3) - ✱
PAUSE - Pause Pause Pause (*3) - ✱
PLAY - Play Play Play (*3) - ✱
MENU Menu Menu Menu Menu Menu ✱
PROJECTOR
RETURN Return Clear Return Return Return ✱
Up Up Up Up ✱
Down Down Down Down ✱
Left Left Left Left ✱
Right Right Right Right ✱
ENTER Enter
Up
Down
Left
Right
Enter Enter Enter Enter ✱
NORMAL Normal
SHUTTER Shutter
VIDEO Video
CMPNT Component
HDMI/PC HDMI/PC
ASPECT Aspect
PIC.MODE Picture mode
MEM.LOAD Memory load
MAIN Main
ADVANCED Advanced
C.C.M C.C.M
PROJECTOR POWERPROJECTOR POWER
Switches to projector operationSwitches to projector operation
Projector function only
Projector function only
Projector function only
Projector function only
Projector function only
Projector function only
Projector function only
Projector function only
Projector function only
Projector function only
Projector function only
Projector function only
INPUT
PIC.ADJUST
SLOW/SEARCH
Button display
Selected device
Device code at time of shipment
SKIP/INDEX
VOLUME
LEARN
: No signals are sent in the corresponding mode.
: Remote control signals can be learnt.
(Operation may not be correct for some devices.)
✱
-
Projector function only
Projector function only
Projector function only
Projector function only
Projector function only
Projector function only
Projector function only
Projector function only
Projector function only
Projector function only
Note:
*1: Some devices may not allow you to turn the power back on after it has been turned off.
*2: When “TV” has been selected, these can be used for volume mute, volume + and volume -.
*3: May not work for some devices.
*4: Select the device code to be set. Nothing is recorded at the time of purchase.
*5: When a device code has been set, the button guide is displayed when a remote control signal has
been set for that button. Furthermore, when functions have been learnt, “-A-”, “-B-” and “-C-” are
displayed as the defaults, and these LCD displays can be edited.
*6: If a TV, AMP or RCV has been set using a device code and the mode for the device has been set
to DVD, VCR, CBL or SAT, these can be used for mute, volume + and volume - for the selected
device’s amplifier.
CHANNEL
UP
DOWN
FF
REW

24
Equipment code list
25
Manufacturer name
Equipment code
Manufacturer name
Equipment code
Panasonic 0247, 0500, 0701, 0847,
1104, 1304, 1320, 1404,
1508
GE 0392
HITACHI 0819, 1284
JVC 0775, 1507
Marantz 0200
Pionnier 0329, 0352, 0853, 1308
SAMSUNG 0853, 1017, 1108, 1142,
1243, 1244, 1293, 1458,
1570
SONY 0282, 0500, 0639, 0847,
0853, 1639
Thomson 0392, 0713, 0820, 0847,
0853, 1175, 1291, 1498
TOSHIBA 0819, 1749
Panasonic 0037, 0108, 0208, 0226,
0508, 0548, 0650, 0853,
1333, 1334, 1650
Bang & Olufsen 0565
GE 0093, 0178, 0560, 0625
HITACHI 0037, 0108, 0178, 0480,
0481, 0508, 0548, 0578,
0634, 1037
JVC 0093, 0508, 0606, 0650,
0653
LG 0037, 0108, 0178, 0556,
0714
MITSUBISHI 0037, 0093, 0108, 0178,
0512, 0556, 1037
Philips 0037, 0108, 0178, 0512,
0556
Pioneer 0037, 0170, 0486, 0512,
0760
SAMSUNG 0037, 0093, 0178, 0208,
0226, 0370, 0556, 0587,
0618
SANYO 0108, 0170, 0208, 0370,
0508
SHARP 0093, 0650, 1163, 1193
SONY 0037, 0093, 0170, 0650,
1505, 1651
Thomson 0037, 0335, 0560, 0625
TOSHIBA 0093, 0195, 0508, 0618,
0650, 0714, 1163, 1508
Victor 0650, 0653
Panasonic 0000, 0008, 0107, 0375,
1488
Fujitsu 1497
LG 0144
Motorola 0476, 1376, 1483
NEC 1496
Pioneer 0144, 0533, 1500, 1877
Scientific Atlanta 0008, 0237, 0477, 1877
SONY 1006
TOSHIBA 0000
Panasonic 0226, 0616, 0836, 1244,
1515, 1516, 1562
GE 0048, 0226, 0320
HITACHI 0000, 0037, 0042, 0081
JVC 0045, 0067, 0081
Kenwood 0067
LG 0037, 0042, 0045
MITSUBISHI 0000, 0043, 0048, 0067,
0081, 0642
Philips 0000, 0081, 0226, 0618,
0739
Pioneer 0042, 0067, 0081
SAMSUNG 0045, 0432, 0739
SANYO 0048, 0067, 0104, 0348
SHARP 0037, 0048
SONY 0000, 0032, 0034, 0636,
1972
TOSHIBA 0042, 0043, 0045, 0067,
0081, 0352, 0432, 1503,
1972
Victor 0067
Panasonic 0490, 0503, 0703, 1010,
1011, 1362, 1462, 1490,
1762, 1834, 1905, 1908
DENON 0490, 1634
GE 0522, 0717
HITACHI 0573, 0664, 0695, 0713
JVC 0503, 0539, 0623, 0867,
1164, 1940
LG 0591, 0741, 0790, 0869
Marantz 0539
MITSUBISHI 0521, 0713, 1403
ONKYO 0503, 0627
Philips 0503, 0539, 0646, 0675,
1158, 1818
Pioneer 0490, 0525, 0571, 0631,
1965
SAMSUNG 0490, 0573, 1075, 1928
SANYO 0670, 0695, 0713
SHARP 0630, 0675, 0713, 0752,
1256, 2015, 2024
SONY 0533, 0573, 0864, 1033,
1070, 1431, 1981, 2020
TOSHIBA 0503, 0695, 1045, 2006
YAMAHA 0490, 0539, 0545, 0646
Manufacturer name
Equipment code
Manufacturer name
Equipment code
<SAT> Satellite Receiver
<TV> TV
<CBL> Cable Converter
<VCR> VCR
<DVD> DVD/DVD-R
Panasonic 0309, 1288, 1308, 1316,
1518, 1548, 1633, 1763,
1764, 1765
Aiwa 0121, 1089
Bang & Olufsen 0799
BOSE 1357, 1629
DENON 0121, 1104, 1360
JVC 0074, 1495
KENWOOD 0186, 0712, 1313
Marantz 0891, 1089, 1189, 1269,
1289
ONKYO 0135, 1298, 1320
Philips 0891, 1089, 1189, 1269,
1289, 1673
Pioneer 0186, 1023, 1459, 1623,
1656
SAMSUNG 1424
SANYO 1801
SHARP 0186, 1614
SONY 1112, 1158, 1441, 1622,
1658, 1722, 1759, 1822,
1858
Technics 0309, 1308, 1309, 1518,
1633, 1763, 1765
Victor 0074
YAMAHA 0176, 0186, 0712, 1276,
1331
<AMP>/<RCV> Audio Amplifier/Receiver

Printed in Japan
S0905-0A
Matsushita Electric Industrial Co., Ltd.
Web Site: http://www.panasonic.co.jp/global/
C 2005 Matsushita Electric Industrial Co., Ltd. All Rights Reserved.
/