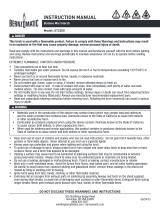
Page is loading ...

F-9295-W
November, 1996
This sheet covers use of PREST-O-LITE tips which
attach directly to the 403 handle. Supplementary in-
structions are supplied with SWIRLJET air-fuel gas (F-
15-132), SWIRLJET air-acetylene tips (F-15-132), and
with leak detectors (F9372).
CONNECTING:
1. Attach a regulator to your acetylene or fuel gas tank,
follow the instructions supplied with the regulator.
2. Connect a 3/16-in. hose assembly with 'A'-size left-
hand-thread fittings to the regulator outlet and to
the handle. Tighten the connection nuts with a
wrench.
3. Then insert the tip into the locking nut at the front of
the handle. Holding tip in position, tighten the lock-
ing nut by hand to lock the tip in place.
TEST FOR LEAKS:
Close the shutoff valve on the 403 handle. Open the
tank valve, set the regulator to deliver 10 psi (see in-
structions supplied with regulator) and check for leaks,
using a thick solution of soap and water, at the points
indicated on the adjoining sketch.
LIGHTING & FLAME ADJUSTMENT:
1. If you have set the regulator to 10 psi delivery pres-
sure for testing, you may wish to reset it before light-
ing the flame, since only a few tips require a pres-
sure that high. Unless you are sure 10 psi is needed,
we suggest the regulator be reset for 5 psi before
you light your torch.
NOTE: When using SWIRLJET tips, be sure to follow
the pressure recommendations given in the
instruction sheets supplied with those tips.
2. Having set or reset your regulator to 5 psi delivery
pressure, open the needle valve on the 403 handle,
and light the gas at the tip with a friction lighter.
3. After lighting the torch, adjust the flame size, if nec-
essary, by changing the setting of the regulator pres-
sure-adjusting screw or partially closing the torch
These INSTRUCTIONS are for experienced operations. If you are not fully familiar with the principles of operation
and safe practices for air-fuel gas equipment, we urge you to read our booklet "Precautions and Safe Practices,"
From 2035. Do NOT permit untrained persons to operate this equipment. Do NOT attempt to operate this equip-
ment until you have read and fully understand these INSTRUCTIONS. If you do not fully understand these INSTRUC-
TIONS, contact your supplier for further information.
403 TORCH HANDLE
Part No. 02X93
needle valve.
SHUTTING OFF:
1. For short intervals, merely close the needle valve
on the torch handle.
2. For longer periods, or if you are going to leave the
outfit unattended, close the tank valve as well as
the torch valve.
MAINTENANCE
1. If the needle valve turns too freely, or there is gas
leakage around the valve stem, tighten the valve
stem packing nut. If leakage persists, replace the
valve stem assembly (P/N 09M24).
2. If the needle valve does not shut off completely, re-
move the valve stem assembly and wipe the seat-
ing surfaces on the stem and in the body with a
Be sure this information reaches the operator.
You can get extra copies through your supplier.
ESAB
ESAB Welding &
Cutting Products
®
REGULATOR
TEST FOR LEAKS
TIP
FITTED HOSE
ASSEMBLY
403
HANDLE
NEEDLE
VALVE
!
CAUTION
INSTRUCTIONS for

clean cloth. If the valve stem is bent, or the seating
surface is nicked or marred, replace it with a new
assembly (09M24).
3. The sealing 'O'-ring located in the front end of the
handle, behind the attaching nut, may require re-
newal periodically. Remove it by catching it with a
scriber, or a stiff wire hook, and pull it out. Squeeze
a new ring (P/N 85W64) into the head, and then
push it evenly into the recess behind the locking nut
with a blunt instrument.
4. Each torch tip is equipped with a filter-screw, which
holds a mixer disk in place. If flow of gas through
the tip appears to be restricted, remove the filter-
screw with a 1/8-in. socket key ('Allen wrench') and
replace both filter-screw and mixer disk.
PRECAUTIONS & SAFE PRACTICES
A. DO NOT let acetylene or LP-Gas escape near
any possible source of ignition. Accumulations
of either in certain proportions may explode if
ignited.
B. NEVER store acetylene or LP-Gas tanks (cylin-
ders) in a closed or confined space, such as a
closet, tool box, or automobile trunk.
C. NEVER solder a container that contains or has
contained flammable liquids or vapors (includ-
ing gasoline, benzene, solvents, and other simi-
lar materials) unless the container has been thor-
oughly purged of all traces of flammable mate-
rial and vapors.
D. Before starting work always test for leaks
around all joints with a soapy water solution.
E. NEVER use a flame to test for leaks of flammable
gases.
F. NEVER use a tank with a leaking valve.
G. DO NOT attempt any repairs to an acetylene or
LP Gas tank, except to tighten the packing-gland
nut on the valve.
H. NO NOT abuse or drop tanks or handle them
roughly.
I. NEVER use a tank as a roller or support.
J. NEVER use a hammer, wrench, or pliers on a
tank valve equipped with a handwheel. On small
acetylene tanks, always use PREST-O-LITE
valve wrench (box type, P/N 505L00).
K. DO NOT open tank valve more than 1-1/2 turns.
(Preferably no more than 3/4 of a turn.)
L. Leave valve wrench on tank valve stem so that
tank valve can be closed quickly in case of emer-
gency.
M. NEVER allow full tank pressure to enter the
hose. Always use a regulator when there is a
needle valve on the torch handle.
N. NEVER lay a torch down unless the gas flow
has been shut off. If you want to maintain a
pilot flame when you stop work for short inter-
vals, provide a rack or stand for the torch, away
from combustible materials. Do not leave it
unattended unless you are sure there is no dan-
ger of it being disturbed by unauthorized per-
sons.
O. Examine your hose for leaks frequently. Dip-
ping it in a bucket of clean water, with the pres-
sure in the hose, is the quickest and easiest way.
P. DO NOT use hose that is worn, or any equip-
ment that is in need of repairs.
Q. Do NOT start fires. Be very careful when work-
ing near combustible material.
R. Fuel gas tanks (cylinders) are equipped with
fusible-metal safety devices. NEVER store tanks
near radiators, furnaces, or other heat sources.
Standard Torch Tips
Replaceable Parts
Tip Mixer Disk Filter Screw
No. Part No. Type Part No. Part No.
1-A 638948 Fine 638783 998311
3 10X23 Light 150Z44 998311
4 10X24 Medium 150Z45 998311
5 10X25 Heavy 150Z46 998311
6 10X26 Extra-Heavy --- •
8 11X18 Soldering Iron 150Z20 998311
(pointed)
8-C 11X17 Soldering Iron 150Z20 998311
(chisel)
9 10X29 Paint Burner 150Z45 998311
'SWIRLJET' Tip Part Numbers
Air-Acetylene Air-Fuel Gas
No. 3 21471 21474
No. 4 21472 21475
No. 5 21473 21476
No. 6 __ 21477
Other Replacement Parts
Soldering Iron Parts: Stem Ass'y................60Y63
Chisel Tip...... 23S20 Flame Shield ............60Y55
Pointed Tip ... 23S32 Locknut ..................136Z17
403 Handle Parts:
Valve Stem Assembly .........................Part No. 09M24
"O" Ring (front end) ........................... Part No. 85W64
• Uses filter screen 82Z52
ESAB
ESAB Welding & Cutting Products
PO Box 100545, Florence SC 29501-0545
F-9295-W 11/96 25M Printed in U.S.A.
Prest-O-Lite and Swirljet are registered trademarks of ESAB Welding & Cutting Products
/