Emos H1019 User manual

Category
Video intercom systems
Type
User manual

This manual is also suitable for

Emos H1019 enables you to communicate with visitors, control the door lock, and monitor your home's surroundings. It features a 7-inch TFT LCD display for clear visuals, hands-free communication for convenience, and the ability to record video and take pictures for added security. With its wall-mountable design, you can easily install it in a suitable location for optimal use.

Emos H1019 enables you to communicate with visitors, control the door lock, and monitor your home's surroundings. It features a 7-inch TFT LCD display for clear visuals, hands-free communication for convenience, and the ability to record video and take pictures for added security. With its wall-mountable design, you can easily install it in a suitable location for optimal use.

Video door phone system
Provides audio and video connection between the residents and visitors.
Enables electric door release and gate control
Important feature of this system is higher safety and comfort for residents.
Basic function and possibility of the system:
- Communication between residents and visitors
- Higher safety
- Missed calls recording on SD card function
- Electric Door release
- Visual check of visitors behind the door
- 7“TFTLCD display
- Hands-free communication
- Wall-mount installation of the monitor
Content of delivery
After delivery, please check the
content of this box according to the
following list:
- monitor 1 pc
- wall-mount frame for video monitor 1 pc
- pack of screws
- power supplier 1 pc
Installation of the video monitor:
Where to install the video monitor
Choose the place for installation with regard to cabling of the system. It is recommended to fix the monitor
at the user-eyes height.
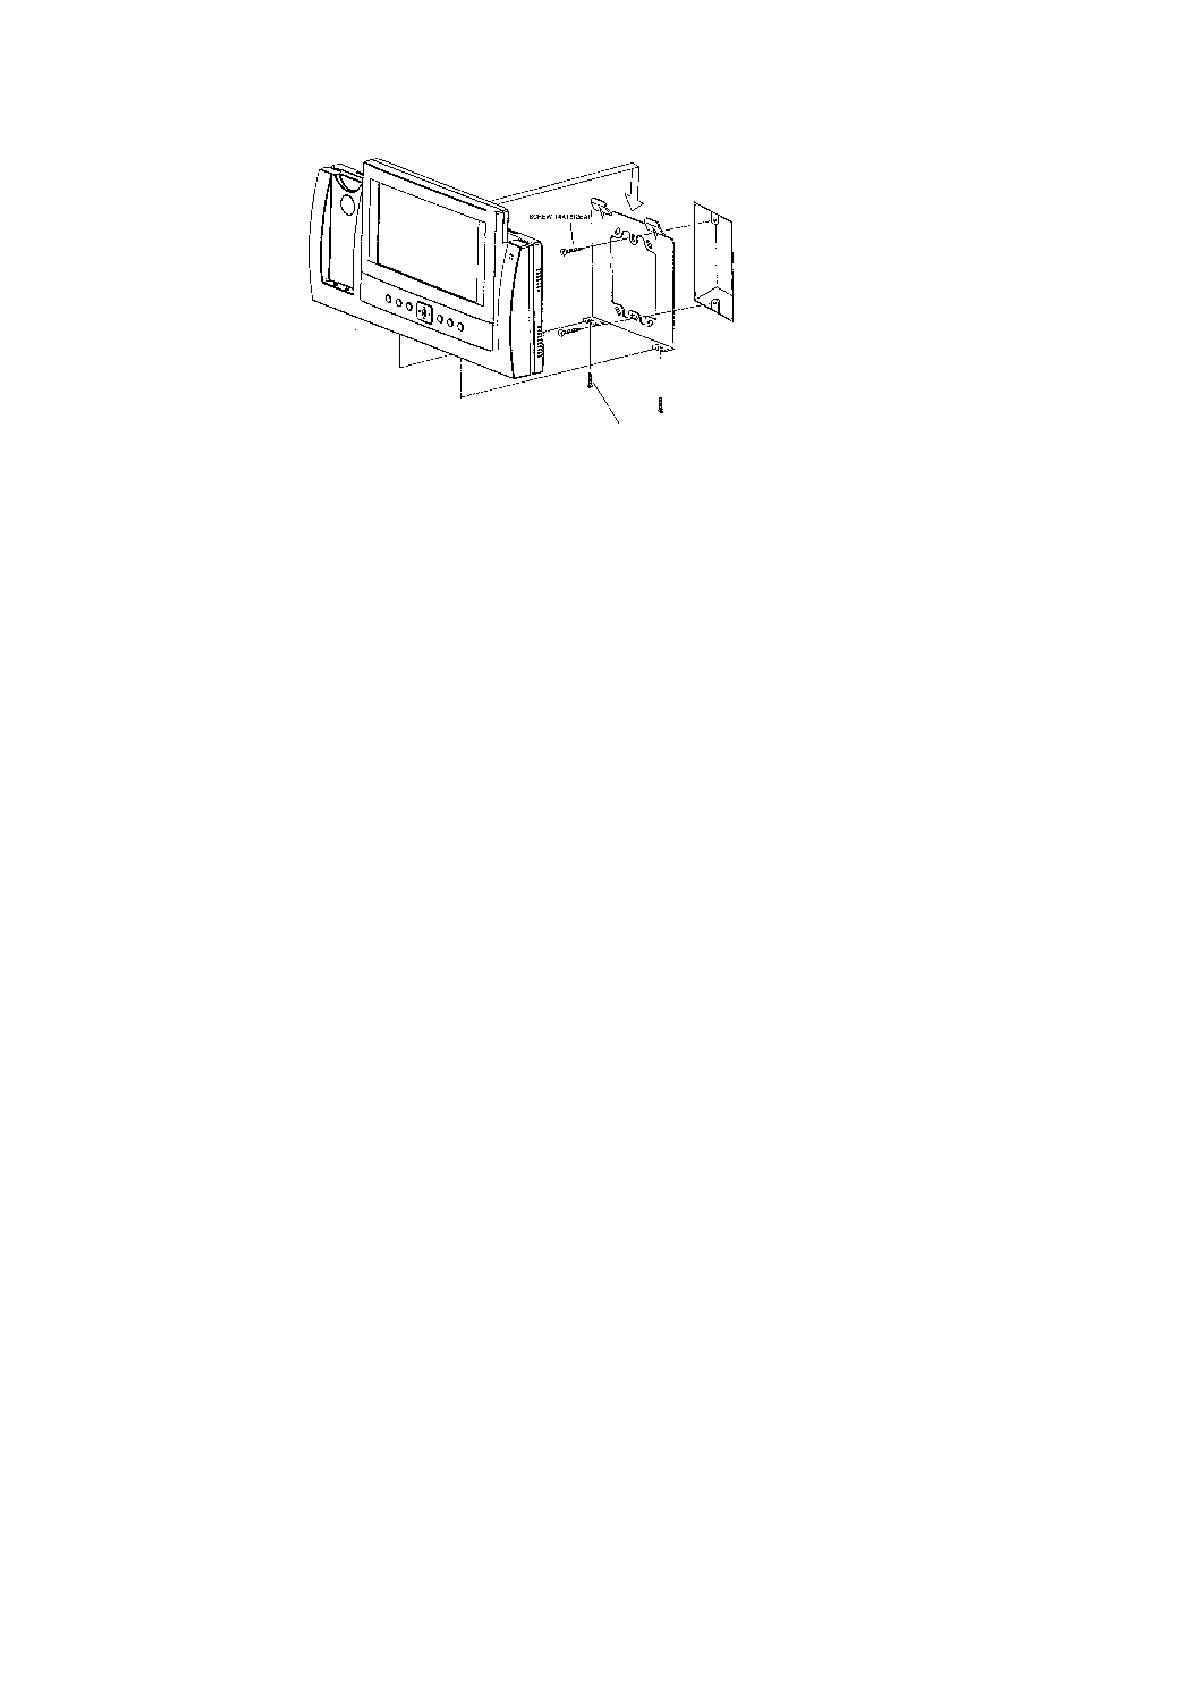
Installation of video monitor wall-mount frame
1. Mark the holes of the frame on the wall and drill the holes.
2. Drill the hole into the wall in the middle of the frame for all cables coming to monitor (camera unit cable
and cable from power supplier, etc.).
3. Fix the frame with wall plugs and screws.
System connection
Wire the outdoor camera unit to the monitor by plugging the cable into descripted connections.
Video monitor fitting
1. Press the monitor to the frame.
2. Push the monitor down.
Connection to the mains power
1. Plug the power supplier to the mains 230V/ 50Hz.
2. Plug the power supplier connector into the descripted connection onto the monitor.
3. When power is present on the video monitor the LED will be lit on the monitor.
Wiring diagram of video phone system
Requirements on cabling of the system
Video door phone system uses 8 core cables. Maximal distances between camera unit and monitor with
regards to the cross sectional area (CRA) of the wires is show in the following table.
In the areas with high possibility of interference it is recommended to use a 75 Ohm coaxial cable for
connection of video signal.
CRA of the wire [mm] 0,5 0,65 0,8 1
Distance [m] 30 50 70 115
Operation of the video monitor
1. Menu
+
-
OK
SETTINGS
- Auto Manual Settings
- Date Time Settings
- Screen Settings
- CAM 2 OFF
- CAM 3 OFF
- CAM 4 OFF
- Answering Machine OFF
+
2. Photo browsing function
3
SEC.
OK
3. Video record function
After accepted call or preview of the picture the video monitor stores an AVI video file on SD card.
Stored files are possible to browse: a) at the video monitor or
b) on the PC with SD card slot
micro
SD card
Maintenance of the video monitor
Video monitor is easy to maintain. It is recommended to clean the video monitor by wet cloth sometimes
to achieve best quality of the displayed picture.
Attention please!
It is strictly recommended that electric device is powered off and unplugged from the mains power
during the maintenance!
Safety warning
- Do not place the monitor near to the TV-set or into environment with high temperature, or
where damp.
- Do not touch the TFT LCD display of the monitor and do not take apart outdoor unit or any parts of the
video system.
- Protect the lens of outdoor camera unit from direct sun light to avoid having picture on the monitor
pale.
- Do not use the equipment where environment with vibrations. Protect the equipment from falls.
  • Page 1 1
  • Page 2 2
  • Page 3 3
  • Page 4 4
  • Page 5 5
  • Page 6 6
  • Page 7 7
  • Page 8 8
  • Page 9 9
  • Page 10 10
  • Page 11 11
  • Page 12 12
  • Page 13 13
  • Page 14 14
  • Page 15 15
  • Page 16 16
  • Page 17 17
  • Page 18 18
  • Page 19 19
  • Page 20 20
  • Page 21 21
  • Page 22 22
  • Page 23 23
  • Page 24 24
  • Page 25 25
  • Page 26 26
  • Page 27 27
  • Page 28 28
  • Page 29 29
  • Page 30 30
  • Page 31 31
  • Page 32 32
  • Page 33 33
  • Page 34 34
  • Page 35 35
  • Page 36 36
  • Page 37 37
  • Page 38 38
  • Page 39 39
  • Page 40 40
  • Page 41 41
  • Page 42 42
  • Page 43 43
  • Page 44 44
  • Page 45 45
  • Page 46 46
  • Page 47 47
  • Page 48 48
  • Page 49 49
  • Page 50 50
  • Page 51 51
  • Page 52 52
  • Page 53 53
  • Page 54 54
  • Page 55 55
  • Page 56 56
  • Page 57 57
  • Page 58 58
  • Page 59 59
  • Page 60 60
  • Page 61 61
  • Page 62 62
  • Page 63 63
  • Page 64 64
  • Page 65 65
  • Page 66 66
  • Page 67 67
  • Page 68 68
  • Page 69 69
  • Page 70 70
  • Page 71 71
  • Page 72 72
  • Page 73 73

Emos H1019 User manual

Category
Video intercom systems
Type
User manual
This manual is also suitable for

Emos H1019 enables you to communicate with visitors, control the door lock, and monitor your home's surroundings. It features a 7-inch TFT LCD display for clear visuals, hands-free communication for convenience, and the ability to record video and take pictures for added security. With its wall-mountable design, you can easily install it in a suitable location for optimal use.

Ask a question and I''ll find the answer in the document

Finding information in a document is now easier with AI