Bosch GCN 45-15 Professional Product information

Category
Pneumatic nailers
Type
Product information
Robert Bosch GmbH
Power Tools Division
70745 Leinfelden-Echterdingen
Germany
www.bosch-pt.com
1 609 929 X29 (2011.03) PS / 219 UNI
GCN 45-15 Professional
de Originalbetriebsanleitung
en Original instructions
fr Notice originale
es Manual original
pt Manual original
it Istruzioni originali
nl Oorspronkelijke gebruiksaanwijzing
da Original brugsanvisning
sv Bruksanvisning i original
no Original driftsinstruks
fi Alkuperäiset ohjeet
el Ðñùôüôõðï ïäçãéþí ÷ñÞóçò
tr Orijinal işletme talimat
pl Instrukcja oryginalna
cs Původní návod k používání
sk Pôvodný návod na použitie
hu Eredeti használati utasítás
ru Îðèãèíàëüíîå ðóêîâîäñòâî ïî ýêñïëóàòàöèè
uk Îðèã³íàëüíà ³íñòðóêö³ÿ ç åêñïëóàòàö³¿
ro Instrucţiuni originale
bg Îðèãèíàëíà èíñòðóêöèÿ
sr Originalno uputstvo za rad
sl Izvirna navodila
hr Originalne upute za rad
et Algupärane kasutusjuhend
lv Instrukcijas oriģinālvalodā
lt Originali instrukcija
ar
fa
ΕΎϤϴϠόΗϞϴϐθΘϟ΍ΔϴϠλϷ΍
̶Ϡλ΍ έΎ̯ ίήσ ̵ΎϤϨϫ΍έ
OBJ_BUCH-1303-001.book Page 1 Friday, March 25, 2011 11:07 AM
1 609 929 X29 | (25.3.11) Bosch Power Tools
2 |
Deutsch. . . . . . . . . . . . . . . . . . . . . . . . . . . . . . . . . . . . . . . . . . . Seite 7
English. . . . . . . . . . . . . . . . . . . . . . . . . . . . . . . . . . . . . . . . . . . . Page 14
Français. . . . . . . . . . . . . . . . . . . . . . . . . . . . . . . . . . . . . . . . . . . Page 22
Español . . . . . . . . . . . . . . . . . . . . . . . . . . . . . . . . . . . . . . . . . Página 30
Português . . . . . . . . . . . . . . . . . . . . . . . . . . . . . . . . . . . . . . . Página 37
Italiano. . . . . . . . . . . . . . . . . . . . . . . . . . . . . . . . . . . . . . . . . . Pagina 45
Nederlands . . . . . . . . . . . . . . . . . . . . . . . . . . . . . . . . . . . . . . Pagina 53
Dansk . . . . . . . . . . . . . . . . . . . . . . . . . . . . . . . . . . . . . . . . . . . . Side 61
Svenska. . . . . . . . . . . . . . . . . . . . . . . . . . . . . . . . . . . . . . . . . . . Sida 67
Norsk. . . . . . . . . . . . . . . . . . . . . . . . . . . . . . . . . . . . . . . . . . . . . Side 74
Suomi . . . . . . . . . . . . . . . . . . . . . . . . . . . . . . . . . . . . . . . . . . . . Sivu 80
ÅëëçíéêÜ . . . . . . . . . . . . . . . . . . . . . . . . . . . . . . . . . . . . . . . . . Óåëßäá 87
Türkçe . . . . . . . . . . . . . . . . . . . . . . . . . . . . . . . . . . . . . . . . . . . Sayfa 95
Polski. . . . . . . . . . . . . . . . . . . . . . . . . . . . . . . . . . . . . . . . . . . Strona 101
Česky. . . . . . . . . . . . . . . . . . . . . . . . . . . . . . . . . . . . . . . . . . . Strana 109
Slovensky . . . . . . . . . . . . . . . . . . . . . . . . . . . . . . . . . . . . . . . Strana 116
Magyar. . . . . . . . . . . . . . . . . . . . . . . . . . . . . . . . . . . . . . . . . . . . Oldal 124
Ðóññêèé. . . . . . . . . . . . . . . . . . . . . . . . . . . . . . . . . . . . . . . Ñòðàíèöà 132
Óêðà¿íñüêà . . . . . . . . . . . . . . . . . . . . . . . . . . . . . . . . . . . . Ñòîð³íêà 140
Română . . . . . . . . . . . . . . . . . . . . . . . . . . . . . . . . . . . . . . . . . Pagina 148
Áúëãàðñêè. . . . . . . . . . . . . . . . . . . . . . . . . . . . . . . . . . . . . Ñòðàíèöà 155
Srpski . . . . . . . . . . . . . . . . . . . . . . . . . . . . . . . . . . . . . . . . . . Strana 163
Slovensko . . . . . . . . . . . . . . . . . . . . . . . . . . . . . . . . . . . . . . . . Stran 171
Hrvatski. . . . . . . . . . . . . . . . . . . . . . . . . . . . . . . . . . . . . . . . Stranica 177
Eesti. . . . . . . . . . . . . . . . . . . . . . . . . . . . . . . . . . . . . . . . . . Lehekülg 184
Latviešu. . . . . . . . . . . . . . . . . . . . . . . . . . . . . . . . . . . . . . . . Lappuse 190
Lietuviškai. . . . . . . . . . . . . . . . . . . . . . . . . . . . . . . . . . . . . . Puslapis 198
. . . . . . . . . . . . . . . . . . . . . . . . . . . . . . . . . . . . . . . . 211
. . . . . . . . . . . . . . . . . . . . . . . . . . . . . . . . . . . . . . 218
vv
vv

cc
cc
ΔΤϔ
λ
vÝ—U
ϪΤϔλ
OBJ_BUCH-1303-001.book Page 2 Friday, March 25, 2011 11:07 AM
| 3
Bosch Power Tools 1 609 929 X30 | (25.3.11)
A
1
4
10
11
9
12 13
3
2
3
8 7 6
5
GCN 45-15
Professional
OBJ_BUCH-1303-001.book Page 3 Friday, March 25, 2011 11:07 AM
1 609 929 X30 | (25.3.11) Bosch Power Tools
4 |
C3C2
C1
B2B1
6
19
7
3
18
16
16
5
4
17
15
14
22 20
2321
OBJ_BUCH-1303-001.book Page 4 Friday, March 25, 2011 11:07 AM
| 5
Bosch Power Tools 1 609 929 X30 | (25.3.11)
F
E
D
5
11 11
8
OBJ_BUCH-1303-001.book Page 5 Friday, March 25, 2011 11:07 AM
1 609 929 X30 | (25.3.11) Bosch Power Tools
6 |
G H
I
25
3
26
24
OBJ_BUCH-1303-001.book Page 6 Friday, March 25, 2011 11:07 AM
1 609 929 X29 | (25.3.11) Bosch Power Tools
14 | English
Zubehör
Über das komplette Qualitätszubehörprogramm können Sie sich im Inter-
net unter www.bosch-pt.com oder bei Ihrem Fachhändler informieren.
Kundendienst und Kundenberatung
Der Kundendienst beantwortet Ihre Fragen zu Reparatur und Wartung Ih-
res Produkts sowie zu Ersatzteilen. Explosionszeichnungen und Informa-
tionen zu Ersatzteilen finden Sie auch unter:
www.bosch-pt.com
Das Bosch-Kundenberater-Team hilft Ihnen gerne bei Fragen zu Kauf, An-
wendung und Einstellung von Produkten und Zubehören.
www.powertool-portal.de, das Internetportal für Handwerker und
Heimwerker.
www.ewbc.de, der Informations-Pool für Handwerk und Ausbildung.
Deutschland
Robert Bosch GmbH
Servicezentrum Elektrowerkzeuge
Zur Luhne 2
37589 Kalefeld – Willershausen
Tel. Kundendienst: +49 (1805) 70 74 10*
Fax: +49 (1805) 70 74 11*
(*Festnetzpreis 14 ct/min, höchstens 42 ct/min aus Mobilfunknetzen)
E-Mail: Servicezentrum[email protected]sch.com
Tel. Kundenberatung: +49 (1803) 33 57 99
(Festnetzpreis 9 ct/min, höchstens 42 ct/min aus Mobilfunknetzen)
Fax: +49 (711) 7 58 19 30
E-Mail: kundenberatung.e[email protected]
Österreich
Tel.: +43 (01) 7 97 22 20 10
Fax: +43 (01) 7 97 22 20 11
E-Mail: service.elektrow[email protected]
Schweiz
Tel.: +41 (044) 8 47 15 11
Fax: +41 (044) 8 47 15 51
Luxemburg
Tel.: +32 (070) 22 55 65
Fax: +32 (070) 22 55 75
E-Mail: outillage.gereedsch[email protected]
Entsorgung
Druckluftwerkzeug, Zubehör und Verpackung sollten einer umweltge-
rechten Wiederverwertung zugeführt werden.
Entsorgen Sie Schmier- und Reinigungsstoffe umweltgerecht. Be-
achten Sie die gesetzlichen Vorschriften.
Wenn Ihr Druckluftwerkzeug nicht mehr gebrauchsfähig ist, geben Sie es
bitte beim Handel ab oder schicken es direkt (bitte ausreichend frankiert)
an:
Recyclingzentrum Elektrowerkzeuge
Osteroder Landstr. 3
37589 Kalefeld
Änderungen vorbehalten.
English
Safety Notes
General Safety Rules for Pneumatic Tools
Read and observe all safety warnings and instruc-
tions. Failure to follow the following safety warnings
and instructions may result in electric shock, fire and/or serious injury.
Save all warnings and instructions for future reference.
Work area safety
fKeep work area clean and well lit. Cluttered or dark areas invite acci-
dents.
fDo not operate the pneumatic tool in explosive atmospheres, such
as in the presence of flammable liquids, gases or dusts. While work-
ing the workpiece, sparks can be created which may ignite the dust or
fumes.
fKeep children and bystanders away from your workplace while op-
erating the pneumatic tool. Distractions from other persons can
cause you to lose control over the pneumatic tool.
Pneumatic tool safety
fUse compressed air of Quality Class 5 in accordance with DIN ISO
8573-1 and a separate maintenance unit close to the pneumatic
tool. The compressed air supplied should be free of foreign material
and moisture to protect the pneumatic tool from damage, contamina-
tion, and the formation of rust.
fCheck the connections and the air supply lines. All maintenance
units, couplers, and hoses should conform to the product specifica-
tions in terms of pressure and air volume. Too low pressure impairs the
function of the pneumatic tool; too high pressure can result in material
damage and personal injury.
fProtect the hoses from kinks, restrictions, solvents, and sharp
edges. Keep the hoses away from heat, oil, and rotating parts. Im-
mediately replace a damaged hose. A defective air supply line may
result in a wild compressed-air hose and can cause personal injury.
Raised dust or chips may cause serious eye injury.
fMake sure that hose clamps are always tightened firmly. Loose or
damaged hose clamps may result in uncontrolled air escape.
Im Gegensatz zum Arbeiten mit
einer normalen Arbeitsge-
schwindigkeit, werden bei einer
schnellen Arbeitsgeschwindig-
keit die Nägel nicht genügend tief
eingeschossen.
Der lichte Durchmesser des Zuluftschlauchs
ist zu gering.
Verwenden Sie einen Zuluftschlauch mit den richtigen Abmes-
sungen.
(siehe „Technische Daten“, Seite 9)
Der Kompressor ist untauglich für schnelle
Arbeitsgeschwindigkeiten.
Verwenden Sie einen Kompressor, der für die Anzahl an ange-
schlossenen Druckluftwerkzeugen und die Arbeitsgeschwindig-
keit ausreichend dimensioniert ist.
Problem Ursache Abhilfe
WARNING
OBJ_BUCH-1303-001.book Page 14 Friday, March 25, 2011 11:07 AM
English | 15
Bosch Power Tools 1 609 929 X29 | (25.3.11)
Personal safety
fStay alert, watch what you are doing, and use common sense when
operating a pneumatic tool. Do not use a pneumatic tool while tired
or under the influence of drugs, alcohol, or medication. A moment
of inattention while operating a pneumatic tool may result in personal
injury.
fUse personal protective equipment. Always wear eye protection.
Protective equipment such as dust mask, non-skid safety shoes, hard
hat, or hearing protection used for appropriate conditions will reduce
personal injuries.
fPrevent unintentional starting. Make sure that the pneumatic tool
is switched off before connecting it to the air supply, picking it up
or carrying it. When your finger is on the On/Off switch while carrying
the pneumatic tool or when connecting the pneumatic tool to the air
supply while it is switched on, accidents can occur.
fRemove any adjustment tools before switching on the pneumatic
tool. A wrench or key left attached to a rotating part of a pneumatic tool
may result in personal injury.
fDo not overreach. Keep proper footing and balance at all times.
This enables better control of the pneumatic tool in unexpected situa-
tions.
fDress properly. Do not wear loose clothing or jewellery. Keep your
hair, clothing and gloves away from moving parts. Loose clothes,
jewellery or long hair can be caught in moving parts.
fIf devices are provided for the connection of dust extraction and
collection facilities, ensure these are connected and properly
used. Use of dust collection can reduce dust-related hazards.
fDo not directly inhale the exhaust air. Avoid exposing the eyes to
exhaust air. The pneumatic tool’s exhaust air can contain water, oil,
metal particles and debris from the compressor. This can cause dam-
age to one‘s health.
Pneumatic tool use and care
fUse the clamping devices or a vice to secure and support the work-
piece. Holding the workpiece by hand or against your body will not al-
low for safe operation of the pneumatic tool.
fDo not overload the pneumatic tool. Use the pneumatic tool intend-
ed for your work. The correct pneumatic tool will do the job better and
safer at the rate for which it is designed.
fDo not use a pneumatic tool that has a defective On/Off switch. A
pneumatic tool that cannot be controlled with the switch is dangerous
and must be repaired.
fDisconnect the air supply before making any adjustments, chang-
ing accessories, or placing the pneumatic tool aside. This safety
measure prevents accidental starting of the pneumatic tool.
fStore idle pneumatic tools out of the reach of children. Do not allow
persons unfamiliar with the pneumatic tool or these instructions to
operate the device. Pneumatic tools are dangerous in the hands of un-
trained users.
fMaintain the pneumatic tool with care. Check for misalignment or
binding of moving parts, breakage of parts and any other condition
that may affect the pneumatic tool’s operation. Have damaged
parts repaired before using the pneumatic tool.
Many accidents are
caused by poorly maintained pneumatic tools.
fUse the pneumatic tool, accessories, application tools, etc. accord-
ing to these instructions. Take into consideration the working con-
ditions and the activities to be carried out. Use of the pneumatic tool
for operations different from those intended could result in hazardous
situations.
Service
fHave your pneumatic tool repaired only through a qualified repair
person and only using original replacement parts. This will ensure
that the safety of the pneumatic tool is maintained.
Safety Warnings for Compressed-air Nailers/Staplers
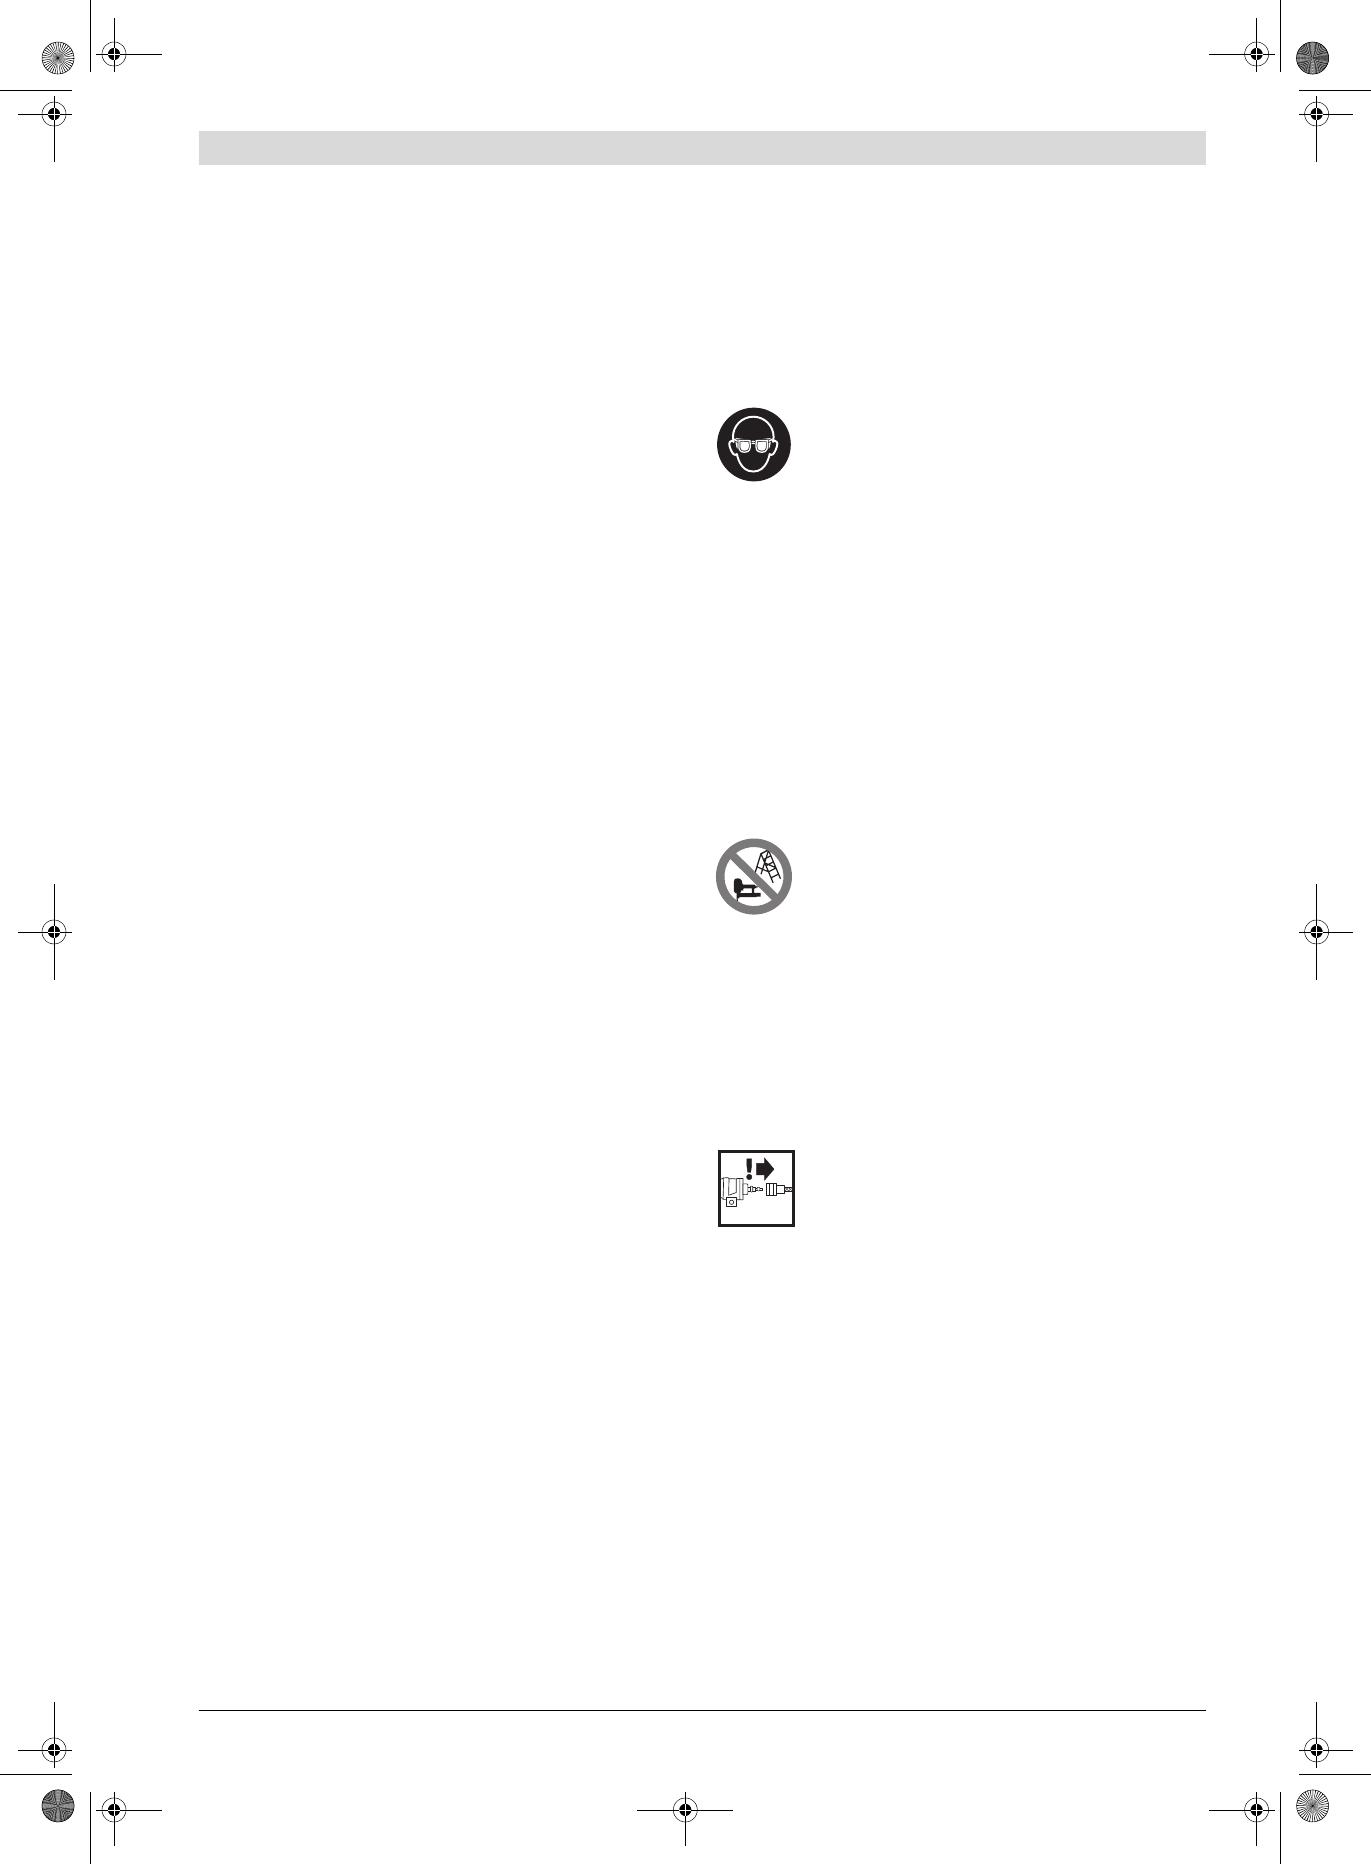
Wear safety goggles.
fAlways assume that the pneumatic tool is loaded with fasteners.
Careless handling of the pneumatic tool can lead to unexpected shot
actuation of fasteners and cause injury.
fWhen working, hold the pneumatic tool in such a manner that your
head and body cannot be injured in case of sudden kickback due to
a malfunction of the energy supply or from hard objects/locations
in the workpiece.
fNever point the pneumatic tool at yourself or at persons close by.
Unexpected actuation will expel a fastener, which can lead to injury.
fDo not actuate the pneumatic tool until firmly placed against the
workpiece. When the pneumatic tool is not in contact with the work-
piece, the fastener can bounce away from the fastening point and over-
load the pneumatic tool.
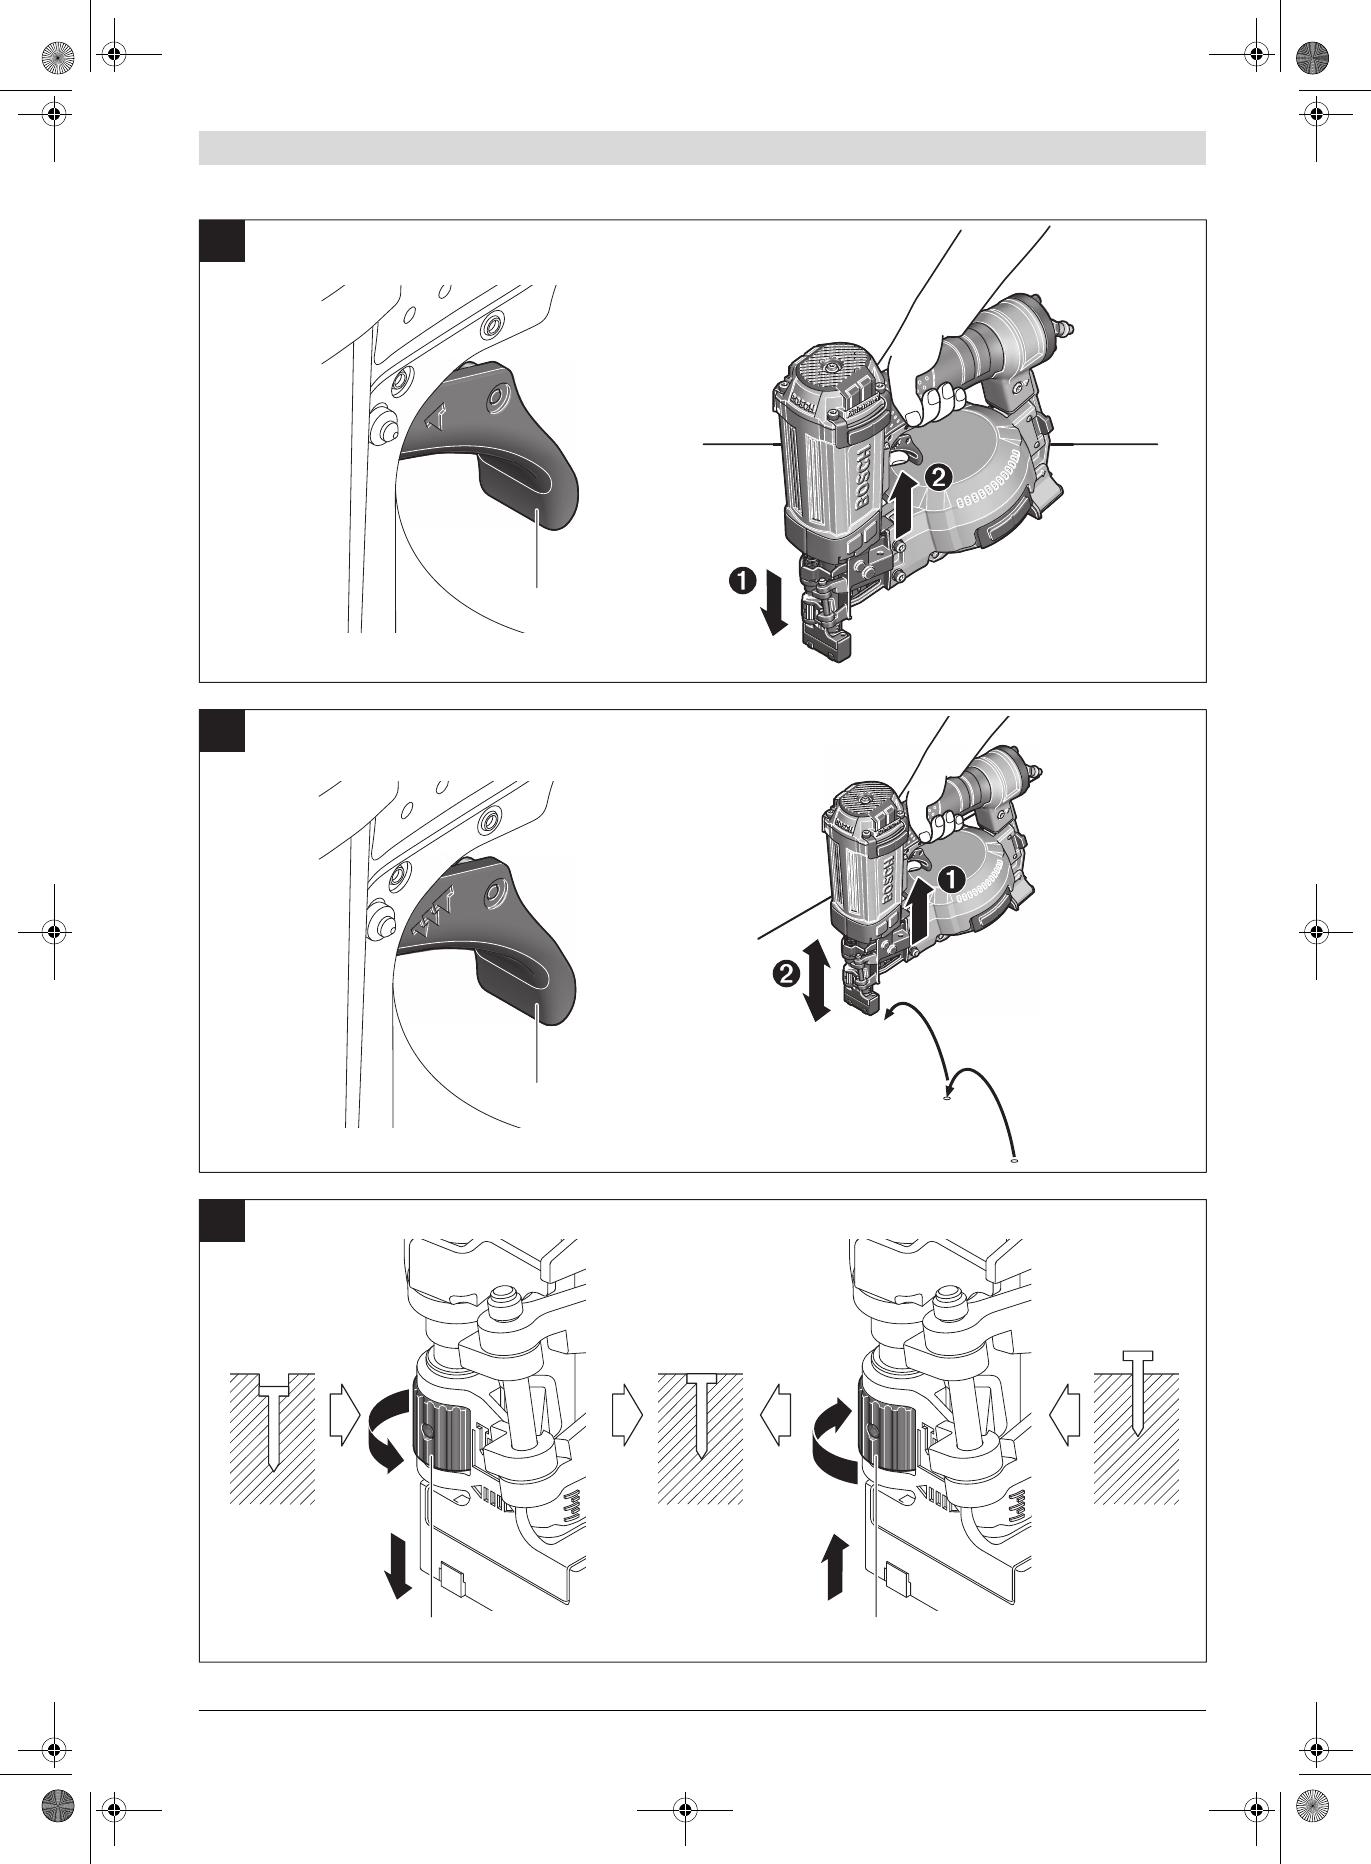
Do not work on ladders or scaffolds when the actuation
system “Contact actuation” is set. In particular, do not
move from one fastening location to another, close
boxes or enclosures, or fasten transport-securing fix-
tures on e.g., vehicles and waggons, via scaffolds, stairs, ladders or
ladder-like constructions, such as roof battens. With this actuation
system, a fastener will be discharged each time when accidentally apply-
ing the pneumatic tool while the discharge lock-off is pressed in. This can
lead to injury.
fObserve the conditions of the job site. It is possible that fasteners
can burst through thin workpieces or be deflected when working in cor-
ners or against edges, and harm persons.
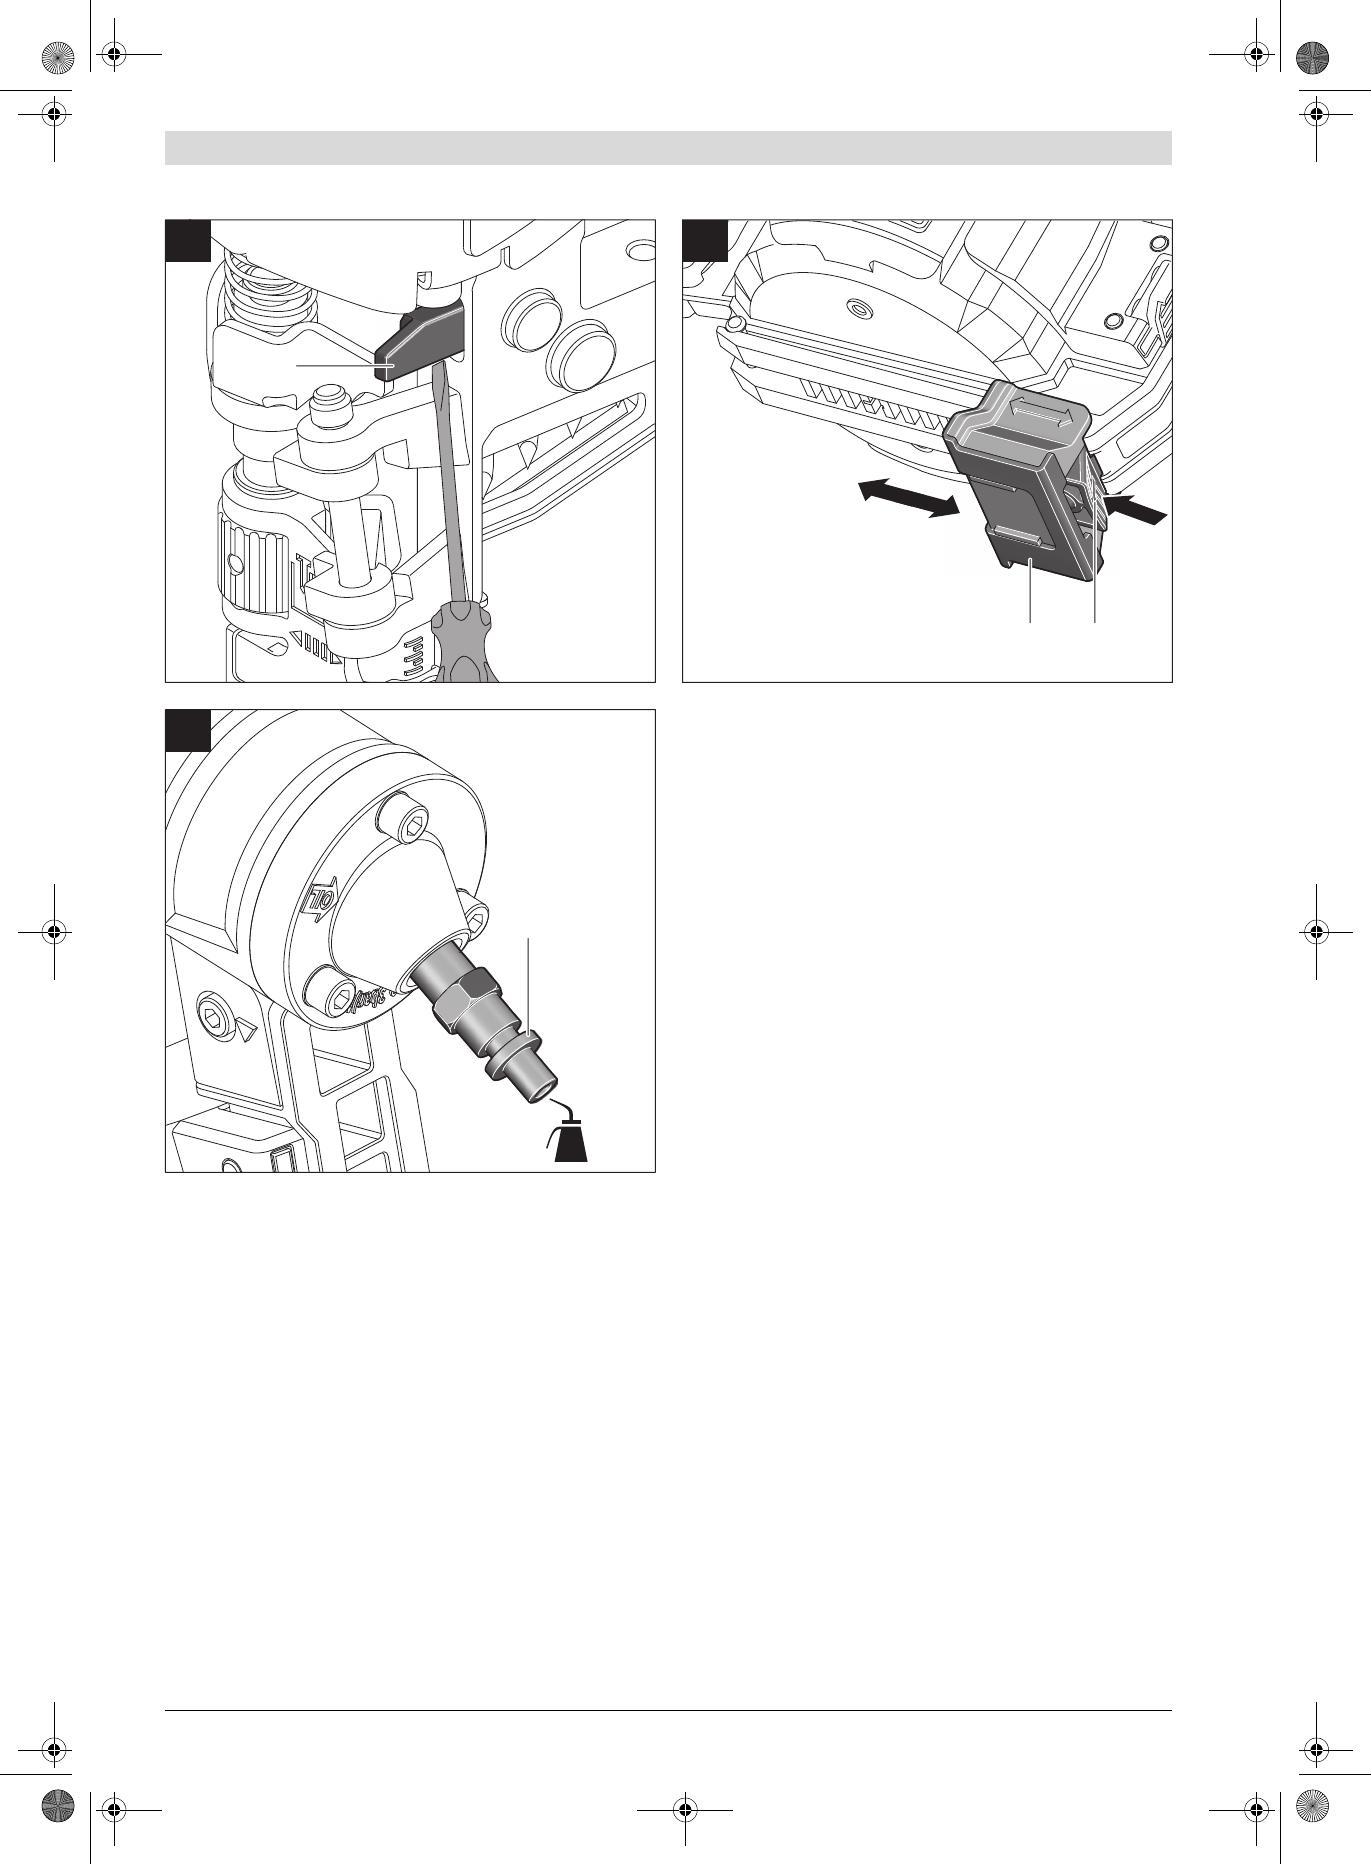
Disconnect the air supply, when the fastener is
jammed in the pneumatic tool. When the pneumatic tool
is still connected to the power supply, it can accidentally
be actuated when removing a jammed fastener.
fUse caution when removing a jammed or stuck fastener. The sys-
tem can be under tension and cause the fastener to be shot or thrust
out, while attempting to clear the jam.
fDo not use this to pneumatic tool to fasten electrical wiring. It is not
suitable for fastening electrical wiring, can damage the insulation of
electric cables and thus lead to electric shock and danger of fire.
fNever use oxygen or flammable gases as the energy source for the
pneumatic tool. Flammable gases are dangerous and can cause the
pneumatic tool to explode.
fUse appropriate detectors to determine if utility lines are hidden in
the work area or call the local utility company for assistance. Con-
tact with electric lines can lead to fire and electric shock. Damaging a
gas line can lead to explosion. Penetrating a water line causes property
damage or may cause an electric shock.
fThe pneumatic tool may only be connected to lines, for which the
maximal permissible pressure of the pneumatic tool cannot be ex-
OBJ_BUCH-1303-001.book Page 15 Friday, March 25, 2011 11:07 AM
1 609 929 X29 | (25.3.11) Bosch Power Tools
16 | English
ceeded by more than 10 %; for higher pressures, a pressure con-
trol valve (pressure reducer) with preceding pressure-limitation
valve in the compressed-air line must be installed. Excessive pres-
sure leads to abnormal operation or breakage of the pneumatic tool,
which can lead to injury.
Product Description and Specifications
Read all safety warnings and all instructions. Failure to
follow the warnings and instructions may result in electric
shock, fire and/or serious injury.
Intended Use
The pneumatic tool is intended for connecting work in roofing, encasing,
battening, manufacturing wall and ceiling elements, wood facades, pal-
lets, wood fences, noise-reduction walls and boxes.
Only the fasteners (nails, staples, etc.) specified in table “Technical Data”
may be used.
Product Features
The numbering of the product features refers to the illustration of the
pneumatic tool on the graphics page.
1 Air outlet
2 Handle
3 Air connector
4 Magazine lock
5 Trigger, when working with single actuation
6 Magazine
7 Magazine cover
8 Trigger, when working with contact actuation
9 Outlet
10 Discharge lock-off
11 Thumbwheel for depth stop adjustment
12 Air-connection coupling
13 Supply-air hose
14 Rubber ring
15 Locking pin
16 Actuation lever
17 Actuation spring
18 Actuation bolt
19 Magazine spindle
20 Nail role*
21 Shot duct
22 Feeder hook
23 Guide groove
24 Driver blade
25 Spacer block
26 Button for spacer block adjustment
*Accessories shown or described are not part of the standard delivery scope of
the product. A complete overview of accessories can be found in our accessories
program.
Noise/Vibration Information
Measured noise values determined according to EN 12549.
Typically the A-weighted noise levels of the pneumatic tool are: Sound
pressure level 92 dB(A); sound power level 105 dB(A). Uncertainty
K=2dB. Wear hearing protection!
Overall vibrational values determined according to EN ISO 20643:
Vibrational emission value a
h
=3.2m/s
2
. Uncertainty K =1.5 m/s
2
.
Technical Data
Declaration of Conformity
We declare under our sole responsibility that the product described un-
der “Technical data” is in conformity with the following standards or
standardization documents: EN 792 according to the provisions of the di-
rectives 2006/42/EC.
Technical file at:
Robert Bosch GmbH, PT/ESC,
D-70745 Leinfelden-Echterdingen
Robert Bosch GmbH, Power Tools Division
D-70745 Leinfelden-Echterdingen
Leinfelden, 25.03.2011
Compressed-air nailer GCN 45-15
Professional
Article number
3601D91C..
Driving force
at 6.3 bar (91 psi)
Nm 37.3
Actuation systems
Single actuation with safety run
Contact actuation
z
z
Fastener
–Type
–Length
–Diameter
mm
mm
Nail role
Roofing nails
1945
3
Magazine angle
°15
Magazine capacity, max.
120
Engine oil
SAE 10, SAE 20
ml 0.250.5
Internal volume
ml 362
Rated pressure
bar 58
Connecting thread
"3/8
Supply-air hose
Max. operating pressure at 20 °C
Inner diameter of hose
–Max. hose length
bar
"
m
10
3/8
30
Air consumption per driving procedure
at 6.8 bar (100 psi)
l1.3
Dimensions
–Height
–Width
–Length
mm
mm
mm
267
133
270
Weight according to EPTA-Procedure
01/2003
kg 2.5
Dr. Egbert Schneider
Senior Vice President
Engineering
Dr. Eckerhard Strötgen
Head of Product
Certification
OBJ_BUCH-1303-001.book Page 16 Friday, March 25, 2011 11:07 AM
English | 17
Bosch Power Tools 1 609 929 X29 | (25.3.11)
Assembly
Connecting the Air Supply
Make sure that the pressure of the compressed-air system is below the
maximum permitted rated pressure of the pneumatic tool. Firstly, set the
air pressure to the lower value of the recommended rated pressure (see
“Technical Data”).
When in doubt, check the pressure at the air inlet with a pressure gauge
with the pneumatic tool switched on.
For maximum performance, the values for the supply-air hose 13 (con-
nection thread, maximum operating pressure, inner hose diameter, max-
imum hose length; see “Technical Data”) must be observed.
The compressed air supplied should be free of foreign material and mois-
ture to protect the tool from damage, contamination, and the formation of
rust.
All fittings, connecting lines and hoses must be dimensioned for the pres-
sure and the required air volume.
Avoid restrictions in the air supply, e.g., from pinching, kinking, or
stretching!
Connecting the Air Supply to the Pneumatic Tool (see figure A)
Empty the magazine 6.
(See “Emptying the Magazine”, page 18)
For the following worksteps, a fastener can be discharged when interi-
or parts of the pneumatic tool are not in the starting position due to re-
pairs, maintenance or transport.
Connect the air connector 3 with a supply-air hose 13 equipped with an
air-connection coupling 12.
Check the proper function by placing the outlet 9 of the pneumatic tool
against a piece of scrap wood or wood material, and discharging once
or twice.
Changing the Trigger (see figures B1B2)
Disconnect the air supply before making any adjust-
ments, changing accessories, or placing the pneumatic
tool aside. This safety measure prevents accidental start-
ing of the pneumatic tool.
The pneumatic tool can be operated with two different actuation systems.
The actuation system is selected by installing the appropriate trigger.
Removing the Trigger
Pull off rubber ring 14 from locking pin 15.
Pull locking pin 15 out of the housing.
Pull the trigger toward the rear bottom out of the housing.
Mounting the Trigger
Select the matching trigger to the desired actuation system.
Note: When mounting the grey trigger 5, pay attention that actuation le-
ver 16 is in the correct position (see figure B2).
Slide the trigger into the housing.
Make sure that actuation spring 17 encloses actuation bolt 18 and ex-
erts force against trigger lever 16.
Align the trigger mounting holes with those of the housing and slide
locking pin 15 through the holes.
Slide rubber ring 14 onto the groove of locking pin 15.
Loading the Magazine (see figures C1C3)
Disconnect the air supply before making any adjust-
ments, changing accessories, or placing the pneumatic
tool aside. This safety measure prevents accidental start-
ing of the pneumatic tool.
fUse only original Bosch accessories (see “Technical Data”). The
precision parts of the pneumatic tool such as the magazine, the outlet
and the shot duct are matched to Bosch staples, nails and brads. Other
manufacturers use other steel qualities and sizes.
Using fasteners not permitted, can damage the pneumatic tool and
cause injuries.
While loading the magazine, hold the pneumatic tool in such a manner
that the outlet 9 is not pointed at your own body or at other persons.
Clean and lubricate shot duct 21 as required and make sure that the
magazine 6 is not dirty/soiled.
–Press magazine lock 4 and open magazine cover 7.
The magazine spindle 19 must be adjusted to the length of the nails so
that the nails can be rolled off easily into the outlet.
Pull the magazine spindle 19 upward and turn the magazine spindle un-
til it engages in the desired position.
Place the nail role 20 over the magazine spindle 19.
Unwind a sufficient amount of nails, so that the first nail can be posi-
tioned in shot duct 21 and the second in feeder hook 22.
Position the nail heads into guide groove 23.
–Shut magazine cover 7 so that magazine lock 4 engages.
fWhen inserting the nail role, pay attention not to damage or de-
form the wire winding of the nails. Because of a damaged wire wind-
ing or an incorrectly inserted nail role, it is possible that the magazine
cover can no longer be correctly shut. This leads to a malfunction of the
pneumatic tool.
Operation
Actuation systems
The pneumatic tool can be operated with two different actuations sys-
tems:
Single actuation with safety run
With this actuation system, the discharge lock-off 10 must first be firm-
ly pressed against the workpiece. A fastener is not discharged until the
trigger is pulled.
Afterwards, further discharging procedures can only be actuated,
when the trigger and the discharge lock-off have first been set back to
the starting position.
Contact actuation
With this actuation system, the trigger must be pulled first. A fastener
is always discharged when the discharge lock-off 10 is firmly pressed
against the workpiece while the trigger is pressed.
This enables a higher working speed to be achieved.
Symbol Trigger Actuation system
Trigger 5 (grey) Single actuation with safety run
Trigger 8 (red) Contact actuation
Nail Length 19 mm32 mm 32 mm44 mm
Magazine labeling
3/411/4 11/413/4
Position of magazine spindle
Top Bottom
Rotation direction
Clockwise Anticlockwise
OBJ_BUCH-1303-001.book Page 17 Friday, March 25, 2011 11:07 AM
1 609 929 X29 | (25.3.11) Bosch Power Tools
18 | English
The actuation system is selected by installing the appropriate trigger. (see
“Changing the Trigger”, page 17)
Starting Operation
Disconnect the air supply before making any adjust-
ments, changing accessories, or placing the pneumatic
tool aside. This safety measure prevents accidental start-
ing of the pneumatic tool.
Working with Single Actuation (see figure D)
Mount the grey trigger 5. (see “Changing the Trigger”, page 17)
Firmly position the outlet 9 against the workpiece until the discharge
lock-off 10 is pressed in completely.
Afterwards, briefly press trigger 5 and release again.
A nail is discharged.
Allow the pneumatic tool to bounce back from the workpiece.
For another driving procedure, completely lift the pneumatic tool from
the workpiece and position it firmly at the next desired location.
Working with Contact Actuation (see figure E)
Mount the red trigger 8. (see “Changing the Trigger”, page 17)
Press and hold the trigger 8.
Firmly position the outlet 9 against the workpiece until the discharge
lock-off 10 is pressed in completely.
A nail is discharged.
Allow the pneumatic tool to bounce back from the workpiece.
For another driving procedure, completely lift the pneumatic tool from
the workpiece and position it firmly at the next desired location.
Move the pneumatic tool uniformly over the workpiece by lifting it off
and applying it again.
Each time when applying the pneumatic tool while the discharge lock-
off is pressed in, a nail will be discharged.
As soon as the desired amount of nails have been driven in, release trig-
ger 8 again.
Working Advice
Disconnect the air supply before making any adjust-
ments, changing accessories, or placing the pneumatic
tool aside. This safety measure prevents accidental start-
ing of the pneumatic tool.
Check the proper function of the safety and actuation devices, and the
tight seating of all screws and nuts each time before using.
Disconnect a defective or not properly operating pneumatic tool immedi-
ately from of the air supply and contact an authorised service agent for
Bosch power tools.
Do not perform any incorrect manipulations on the pneumatic tool. Do not
disassemble or block any components of the pneumatic tool, such as the
discharge lock-off.
Do not carry out “emergency repairs” with unsuitable means. The pneu-
matic tool is to be maintained regularly and properly (see “Maintenance
and Cleaning”, page 19).
Avoid any weakening and damage whatsoever of the pneumatic tool, e.g.,
through:
Imprinting or engraving,
Retrofitting measures not approved by the manufacturer,
Guiding along templates manufactured of hard material, e.g. steel,
Dropping on or sliding over the floor,
Using as a hammer,
Applying any kind of force.
Make sure to check whatever is below or behind your workpiece. Do not
shoot nails into walls, ceilings or floors, when persons are behind them.
The nails can burst through the workpiece and injure someone.
Do not shoot a nail onto an already driven-in one. This could cause the nail
to deform, the nails could become jammed or the pneumatic tool could
move uncontrolled.
When the pneumatic tool is used under cold ambient conditions, the first
nails will be driven in slower than usual. Once the pneumatic tool has
warmed up during working, normal operating speed will be regained.
Avoid blank shots in order to reduce the wear of the impact striker.
For longer work breaks or after finishing work, disconnect the pneumatic
tool from the air supply and empty the magazine.
Emptying the Magazine
–Press magazine lock 4 and open magazine cover 7.
Remove the nail role 20.
–Shut magazine cover 7 so that magazine lock 4 engages.
Adjusting the Depth Stop (see figure F)
The driving depth of the nails can be set with thumbwheel 11.
Empty the magazine 6.
(See “Emptying the Magazine”, page 18)
Nails are driven in too deeply:
To reduce the driving depth, turn thumbwheel 11 in anti-
clockwise direction.
or
Nails are not driven in deep enough:
To increase the driving depth, turn thumbwheel 11 in
clockwise direction.
Refill the magazine.
(See “Loading the Magazine”, page 17)
Test the new driving depth on a test workpiece.
Repeat the worksteps as required.
Clearing Jams (see figure G)
Single nails can become jammed in the shot duct. If this should occur fre-
quently, please contact an authorised service agent for Bosch power
tools.
Empty the magazine 6.
(See “Emptying the Magazine”, page 18)
Remove the jammed nail. For this, us a pair of pliers, if required.
–When driver blade 24 is extended, push it back into the piston using a
lubricated screwdriver or other suitable lubricated object.
Lubricate the shot duct with 2
3 drops of engine oil (SAE 10 or
SAE 20).
Refill the magazine.
(See “Loading the Magazine”, page 17)
Note: When the driver blade does not return after clearing a jam, please
contact an authorised service agent for Bosch power tools.
Adjusting the Spacer Block (seefigure H)
The spacer block 25 enables you to maintain the same clearance, e. g.,
when fastening roofing shingles.
The spacer block engages approx. every 7 mm:
Least adjustable clearance to the outlet: 12 cm,
Largest adjustable clearance to the outlet: 21 cm.
Press button 26 and move the spacer block 25 until the desired clear-
ance is set.
OBJ_BUCH-1303-001.book Page 18 Friday, March 25, 2011 11:07 AM
English | 19
Bosch Power Tools 1 609 929 X29 | (25.3.11)
Transport and Storage
For transport, disconnect the pneumatic tool from the air supply; espe-
cially when using ladders or moving in an unusual stance or posture.
At the workplace, carry the pneumatic tool only by the handle 2 and with
the trigger released.
Always store the pneumatic tool disconnected from the air supply and at
a clean and dry location.
When not using the pneumatic tool for a longer period of time, cover steel
parts with a fine oil coating. This prevents the formation of rust.
Maintenance and Service
Maintenance and Cleaning
Disconnect the air supply before making any adjust-
ments, changing accessories, or placing the pneumatic
tool aside. This safety measure prevents accidental start-
ing of the pneumatic tool.
If the pneumatic tool should fail despite the care taken in manufacture and
testing, repair should be carried out by an authorised customer services
agent for Bosch power tools.
In all correspondence and spare parts orders, please always include the
10-digit article number given on the type plate of the pneumatic tool.
fHave maintenance and repair work carried out only through quali-
fied persons. This will ensure that the safety of the pneumatic tool is
maintained.
An authorized Bosch after-sales service agent will carry out this work
quickly and reliably.
Lubricating the Pneumatic Tool (see figure I)
When the pneumatic tool is not connected to a maintenance unit, it must
be lubricated at regular intervals:
–For light-duty use 1x per day.
–For heavy-duty use 2x per day.
Apply 2
3 drops of lubricant into air connector 3. Do not apply too much
lubricant, which could then accumulate in the pneumatic tool and be emit-
ted via air outlet 1.
Use only the lubricants recommended by Bosch.
SAE 10 mineral engine oil (for use at very cold ambient conditions)
SAE 20 mineral engine oil
Observe all applicable environmental regulations when disposing of
old grease and solvents.
Removing Debris/Contamination from Tar (see figure J)
When fastening roofing felt, the pneumatic tool can become contaminat-
ed from tar.
fFor cleaning, use only flame-retardant solvents and clean the dis-
charge lock-off and the outlet with a clean cloth.
fWear protective gloves.
Maintenance Schedule
Always keep air outlet 1, discharge lock-off 10 and trigger clean and free
of foreign material (dust, chips, sand, etc).
Clean the magazine 6. Remove any plastic or wood chips that may accu-
mulate in the magazine during operation.
Clean the pneumatic tool in regular intervals using compressed air.
Measure Explanation Action
Draining the exhaust filter daily.
Prevents the accumulation of dirt/ debris and
moisture in the pneumatic tool.
Open the drain valve.
Keeping the lubricator filled at all times.
Ensures the lubrication of the pneumatic tool. Fill lubricator with the recommended lubricants.
(See “Lubricating the Pneumatic Tool”, page 19)
Cleaning the magazine 6 and the feeder
hook 22.
Prevents the jamming of nails. Blow out the mechanism of the magazine/feeder
hook daily with compressed air.
Ensuring that the discharge lock-off 10
functions properly.
Promotes your work safety and efficient usage of
the pneumatic tool.
Blow out the mechanism of the discharge lock-off
daily with compressed air.
Lubricating the pneumatic tool.
Reduces the wear of the pneumatic tool. Apply 23 drops of lubricant into air connector 3.
(See “Lubricating the Pneumatic Tool”, page 19)
Draining the compressor.
Prevents the accumulation of dirt/ debris and
moisture in the pneumatic tool.
Open the drain valve of the compressor tank.
OBJ_BUCH-1303-001.book Page 19 Friday, March 25, 2011 11:07 AM
1 609 929 X29 | (25.3.11) Bosch Power Tools
20 | English
Correction of Malfunctions
Problem Cause Corrective Measure
The pneumatic tool is ready for operation
but no nails are discharged.
A nail is jammed in the shot duct. Clear the jam.
(See “Clearing Jams”, page 18)
The infeed of the nails is blocked. Clean and lubricate the feeder hook 22 as re-
quired and make sure that the magazine 6 is not
dirty/soiled.
The spring of the feeder hook is too week or 22 de-
fective.
Contact an authorised service agent for Bosch
power tools.
Have the component replaced there.
The fasteners being used are not permitted. Use only original accessories.
Only the fasteners (nails, staples, etc.) specified
in table “Technical Data” may be used.
The magazine 6 is empty. Refill the magazine.
(See “Loading the Magazine”, page 17)
The nails are discharged very slowly and
with too little pressure.
The rated pressure of the compressed-air supply is
too low.
Increase the compressed-air supply. 8 bar may
not be exceeded.
The driver blade is damaged. Use only the lubricants recommended by Bosch.
(See “Lubricating the Pneumatic Tool”, page 19)
The sealing ring of the piston is worn or damaged. Contact an authorised service agent for Bosch
power tools.
Have the component replaced there.
The buffer is worn. Contact an authorised service agent for Bosch
power tools.
Have the component replaced there.
The length and diameter of supply-air hose 13 do not
correspond with the data of this pneumatic tool.
Use a supply-air hose with the correct dimensions.
(See “Technical Data”, page 16)
The supply-air hose 13 is bent/creased. Correct the bend/crease in the supply-air hose.
The nails are driven in too deep.
The rated pressure of the compressed-air supply is
too high.
Reduce the compressed-air supply. 5 bar may not
be fallen below.
The depth stop is set too deep. Adjust the depth stop to the desired depth.
(See “Adjusting the Depth Stop”, page 18)
The buffer is worn. Contact an authorised service agent for Bosch
power tools.
Have the component replaced there.
The nails are not driven in deep enough.
The rated pressure of the compressed-air supply is
too low.
Increase the compressed-air supply. 8 bar may
not be exceeded.
The depth stop is set too high. Adjust the depth stop to the desired depth.
(See “Adjusting the Depth Stop”, page 18)
The length and diameter of supply-air hose 13 do not
correspond with the data of this pneumatic tool.
Use a supply-air hose with the correct dimensions.
(See “Technical Data”, page 16)
The supply-air hose 13 is bent/creased. Correct the bend/crease in the supply-air hose.
The pneumatic tool skips nails or has a
too large cycle feed.
The fasteners being used are not permitted. Use only original accessories.
Only the fasteners (nails, staples, etc.) specified
in table “Technical Data” may be used.
The magazine 6 is not operating correctly. Clean and lubricate the feeder hook 22 as re-
quired and make sure that the magazine 6 is not
dirty/soiled.
The spring of the feeder hook is too week or 22 de-
fective.
Contact an authorised service agent for Bosch
power tools.
Have the component replaced there.
The sealing ring of the piston is worn or damaged. Contact an authorised service agent for Bosch
power tools.
Have the component replaced there.
OBJ_BUCH-1303-001.book Page 20 Friday, March 25, 2011 11:07 AM
English | 21
Bosch Power Tools 1 609 929 X29 | (25.3.11)
Accessories
For more information on the complete quality accessories program,
please refer to the Internet under www.bosch-pt.com or contact your
specialist shop.
After-sales Service and Customer Assistance
Our after-sales service responds to your questions concerning mainte-
nance and repair of your product as well as spare parts. Exploded views
and information on spare parts can also be found under:
www.bosch-pt.com
Our customer service representatives can answer your questions con-
cerning possible applications and adjustment of products and accesso-
ries.
Great Britain
Robert Bosch Ltd. (B.S.C.)
P.O. Box 98
Broadwater Park
North Orbital Road
Denham
Uxbridge
UB 9 5HJ
Tel. Service: +44 (0844) 736 0109
Fax: +44 (0844) 736 0146
E-Mail: boschs[email protected]
Ireland
Origo Ltd.
Unit 23 Magna Drive
Magna Business Park
City West
Dublin 24
Tel. Service: +353 (01) 4 66 67 00
Fax: +353 (01) 4 66 68 88
Australia, New Zealand and Pacific Islands
Robert Bosch Australia Pty. Ltd.
Power Tools
Locked Bag 66
Clayton South VIC 3169
Customer Contact Center
Inside Australia:
Phone: +61 (01300) 307 044
Fax: +61 (01300) 307 045
Inside New Zealand:
Phone: +64 (0800) 543 353
Fax: +64 (0800) 428 570
Outside AU and NZ:
Phone: +61 (03) 9541 5555
www.bosch.com.au
Republic of South Africa
Customer service
Hotline: +27 (011) 6 51 96 00
Gauteng – BSC Service Centre
35 Roper Street, New Centre
Johannesburg
Tel.: +27 (011) 4 93 93 75
Fax: +27 (011) 4 93 01 26
E-Mail: bsctools@icon.co.za
KZN – BSC Service Centre
Unit E, Almar Centre
143 Crompton Street
Pinetown
Tel.: +27 (031) 7 01 21 20
Fax: +27 (031) 7 01 24 46
E-Mail: [email protected]h.com
Western Cape – BSC Service Centre
Democracy Way, Prosperity Park
Milnerton
Tel.: +27 (021) 5 51 25 77
Fax: +27 (021) 5 51 32 23
Bosch Headquarters
Midrand, Gauteng
Tel.: +27 (011) 6 51 96 00
Fax: +27 (011) 6 51 98 80
Frequent jamming of nails in the shot
duct.
The fasteners being used are not permitted. Use only original accessories.
Only the fasteners (nails, staples, etc.) specified
in table “Technical Data” may be used.
Contact an authorised service agent for Bosch
power tools.
The driven nails are bent.
The driver blade is damaged. Contact an authorised service agent for Bosch
power tools.
Have the component replaced there.
Contrary to working with normal operat-
ing speed, the nails are not driven in
deep enough at higher operating speed.
The interior diameter of the supply-air hose is too
low.
Use a supply-air hose with the correct dimensions.
(See “Technical Data”, page 16)
The compressor is not suitable for fast operating
speeds.
Use a compressor that is sufficiently dimensioned
for the number of connected pneumatic tools and
the operating speed.
Problem Cause Corrective Measure
OBJ_BUCH-1303-001.book Page 21 Friday, March 25, 2011 11:07 AM
  • Page 1 1
  • Page 2 2
  • Page 3 3
  • Page 4 4
  • Page 5 5
  • Page 6 6
  • Page 7 7
  • Page 8 8
  • Page 9 9
  • Page 10 10
  • Page 11 11
  • Page 12 12
  • Page 13 13
  • Page 14 14
  • Page 15 15
  • Page 16 16
  • Page 17 17
  • Page 18 18
  • Page 19 19
  • Page 20 20
  • Page 21 21
  • Page 22 22
  • Page 23 23
  • Page 24 24
  • Page 25 25
  • Page 26 26
  • Page 27 27
  • Page 28 28
  • Page 29 29
  • Page 30 30
  • Page 31 31
  • Page 32 32
  • Page 33 33
  • Page 34 34
  • Page 35 35
  • Page 36 36
  • Page 37 37
  • Page 38 38
  • Page 39 39
  • Page 40 40
  • Page 41 41
  • Page 42 42
  • Page 43 43
  • Page 44 44
  • Page 45 45
  • Page 46 46
  • Page 47 47
  • Page 48 48
  • Page 49 49
  • Page 50 50
  • Page 51 51
  • Page 52 52
  • Page 53 53
  • Page 54 54
  • Page 55 55
  • Page 56 56
  • Page 57 57
  • Page 58 58
  • Page 59 59
  • Page 60 60
  • Page 61 61
  • Page 62 62
  • Page 63 63
  • Page 64 64
  • Page 65 65
  • Page 66 66
  • Page 67 67
  • Page 68 68
  • Page 69 69
  • Page 70 70
  • Page 71 71
  • Page 72 72
  • Page 73 73
  • Page 74 74
  • Page 75 75
  • Page 76 76
  • Page 77 77
  • Page 78 78
  • Page 79 79
  • Page 80 80
  • Page 81 81
  • Page 82 82
  • Page 83 83
  • Page 84 84
  • Page 85 85
  • Page 86 86
  • Page 87 87
  • Page 88 88
  • Page 89 89
  • Page 90 90
  • Page 91 91
  • Page 92 92
  • Page 93 93
  • Page 94 94
  • Page 95 95
  • Page 96 96
  • Page 97 97
  • Page 98 98
  • Page 99 99
  • Page 100 100
  • Page 101 101
  • Page 102 102
  • Page 103 103
  • Page 104 104
  • Page 105 105
  • Page 106 106
  • Page 107 107
  • Page 108 108
  • Page 109 109
  • Page 110 110
  • Page 111 111
  • Page 112 112
  • Page 113 113
  • Page 114 114
  • Page 115 115
  • Page 116 116
  • Page 117 117
  • Page 118 118
  • Page 119 119
  • Page 120 120
  • Page 121 121
  • Page 122 122
  • Page 123 123
  • Page 124 124
  • Page 125 125
  • Page 126 126
  • Page 127 127
  • Page 128 128
  • Page 129 129
  • Page 130 130
  • Page 131 131
  • Page 132 132
  • Page 133 133
  • Page 134 134
  • Page 135 135
  • Page 136 136
  • Page 137 137
  • Page 138 138
  • Page 139 139
  • Page 140 140
  • Page 141 141
  • Page 142 142
  • Page 143 143
  • Page 144 144
  • Page 145 145
  • Page 146 146
  • Page 147 147
  • Page 148 148
  • Page 149 149
  • Page 150 150
  • Page 151 151
  • Page 152 152
  • Page 153 153
  • Page 154 154
  • Page 155 155
  • Page 156 156
  • Page 157 157
  • Page 158 158
  • Page 159 159
  • Page 160 160
  • Page 161 161
  • Page 162 162
  • Page 163 163
  • Page 164 164
  • Page 165 165
  • Page 166 166
  • Page 167 167
  • Page 168 168
  • Page 169 169
  • Page 170 170
  • Page 171 171
  • Page 172 172
  • Page 173 173
  • Page 174 174
  • Page 175 175
  • Page 176 176
  • Page 177 177
  • Page 178 178
  • Page 179 179
  • Page 180 180
  • Page 181 181
  • Page 182 182
  • Page 183 183
  • Page 184 184
  • Page 185 185
  • Page 186 186
  • Page 187 187
  • Page 188 188
  • Page 189 189
  • Page 190 190
  • Page 191 191
  • Page 192 192
  • Page 193 193
  • Page 194 194
  • Page 195 195
  • Page 196 196
  • Page 197 197
  • Page 198 198
  • Page 199 199
  • Page 200 200
  • Page 201 201
  • Page 202 202
  • Page 203 203
  • Page 204 204
  • Page 205 205
  • Page 206 206
  • Page 207 207
  • Page 208 208
  • Page 209 209
  • Page 210 210
  • Page 211 211
  • Page 212 212
  • Page 213 213
  • Page 214 214
  • Page 215 215
  • Page 216 216
  • Page 217 217
  • Page 218 218

Bosch GCN 45-15 Professional Product information

Category
Pneumatic nailers
Type
Product information

Ask a question and I''ll find the answer in the document

Finding information in a document is now easier with AI