Page is loading ...

Page 1 of 3
Install Instructions
PRP Seats
Can-Am Seat Base Installation
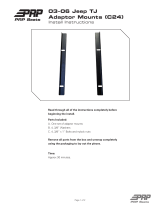
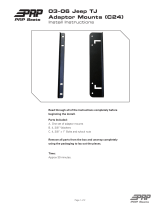
Read through all of the instructions completely before
beginning the install.
Parts Included:
A. Seat Adapter Brackets
2 x Can-Am Seat Bases
B. Hardware
8 x 1/4”-20 X 1”L Hex Bolts
8 1.25 x 20mm Flanged Head Bolts
8 1/4” Split Lock Washers
8 1/4” Flat Washers
Remove all parts from the box and unwrap completely using
the packaging to lay out the pieces.
Tools Needed: (not included)
13mm Socket & Wrench
18mm Deep Socket
7/16” Socket
Ratchet Extension
Time:
Approx 1 Hour

Install Instructions for PRP Seats Can-Am X3 Lowered Seat Base
Page 2 of 3
1. Remove the Stock Seat.
Pull up the bottom cushion to expose the
4 bolts. Use a 13mm socket remove the 4
bolts holding the seat to the sliders. Pull the
rubber cap off the front of the slider handle.
This will allow the handle to slip out of the
slot in the seat.
Once this is done, you can remove the seat
from the vehicle.
3. Choose Your Seat Height
Can-Am allows you to change the seat
height with their slider rails. In the front you
can choose either the low or high bolt holes,
and in the rear with a bolt and alluminum
spacer that can be rearranged to lower the
seat.
Our lowered mounting plate can be flipped
up or down to either lower or raise your seat
height by approx 1”.
Feel free to move these around as you see
fit to best fit your riding height.
**PRP Height Recommendation - have
the mount plate in the lowered position
on the seat. Then on the sliders, have the
rear in the high postion with the alluminum
spacer. In the front have the slider in the low
postion on that bottom bolt.
**Be aware that having the mount, front &
rear sliders all in the low postion will cause
the mount to not slide all the way back.
Limiting your legroom.
2. Loosen the slider rails, but do not fully
remove them yet.
Use a 18mm deep socket with extension to
remove the (2) nuts in the back.
Use a 13mm end wrench and 13mm socket
to remove the (2) front bolts/nuts.

Install Instructions for PRP Seats Can-Am X3 Lowered Seat Base
Page 3 of 3
5. Remove the sliders and plate from the
vehicle.
**Be sure to keep track of the direction of the
rails so you install them properly in step 6.
6. Install the Plate & Sliders on the Seat
Flip your PRP seat upside down and line up the
lowered seat mount to the (4) bolt holes on the
bottom of your seat. Use the supplied (4) 1/4”
x 20 x 1” bolts, (4) flat washers, and (4) lock
washers. Tightnen down with a 7/16” socket
or wrench.
7. Place the Seat & Slider Rails back into the
vehicle.
Make any final ride height adjustments that you
need.
Slide the seat forward, then tighten down
the rear bolt using a 18mm deep socket with
extension.
Then slide the seat back, and tighten down
4. Bolt the PRP Lowered Mount to the Slider
Rails.
Once you have figured out what height you
want the seat. Bolt the Mounting Plate to the
Seat Sliders using the supplied 1.25x20mm
Flanged Head Bolts and a 13mm socket. *Its
easier to do this while the rails are installed in
8. Repeat steps 1-7 on the other seat.
And you’re all set!
If you have any questions or experience
issues, please contact your retail outlet first for
assistance. However, the staff at PRP is always
happy to help at 1-800-317-6253, or email
customerservice@prpseats.com
Thank you! Ride Safe!
/