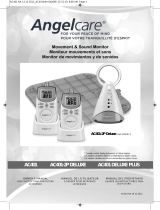
AC517

Angelcare AC517 Owner's manual

  • Hello! I am an AI chatbot trained to assist you with the Angelcare AC517 Owner's manual. I’ve already reviewed the document and can help you find the information you need or explain it in simple terms. Just ask your questions, and providing more details will help me assist you more effectively!
OWNER’S MANUAL
Additional Camera Unit for Angelcare Monitors AC-CAM
Compatible with models:
AC517 - AC510 – AC417 – AC315 – AC310
TABLE OF CONTENTS
WARNINGS ..................................................................................................................................................2
SETUP REQUIREMENTS ...................................................................................................................................3
Setting up the Camera ......................................................................................................................................3
Instructions for Model AC417, AC510 & AC517 ......................................................................................... 4
Instructions for Model AC310 & 315 ..............................................................................................................5
Troubleshooting ..................................................................................................................................................6
Limited warranty .................................................................................................................................................7
Technical specifications .................................................................................................................................... 7
01m3A_Manuel_AC-CAM_ROW_12699.indd 1 18-01-31 12:13
WARNINGS
1. When an adapter is plugged into an electrical outlet, DO NOT touch
the exposed end.
2. ALWAYS be sure that both the transmitter and receiver are working
properly and are within range of each other. Test the monitor before first
use, periodically and when changing location of the Camera.
3. DO NOT use monitor near water (such as bath tub, sink, etc.).
CAUTION
RISK OF ELECTRIC SHOCK
DO NOT OPEN
DO NOT EXPOSE TO RAIN OR MOISTURE
4. Keep monitor AWAY from heat sources (such as stoves, radiators, etc.).
5. ALWAYS place both the Camera and the Parent Unit on a flat surface
in an upright position and allow for proper ventilation. DO NOT place on
sofas, cushions, beds, etc. which may block ventilation.
6. This monitor uses public airwaves to transmit signals. The Parent Unit may
pick up signals or interference from other nursery monitors in your area.
Your monitor may even be picked up by other households. To protect your
privacy, make sure both units are turned OFF when not in use.
7. This product contains small parts. Adult assembly required. Exercise
care when unpacking and assembling the product and keep small parts
away from children.
8. When using the monitor, the room temperature should be between
10°C and 4C.
9. IMPORTANT SAFETY INSTRUCTIONS
9.1 Heed all warnings – All warnings on the product and in the operating
instructions should be adhered to.
9.2 Follow all instructions – All operating and use instructions should
be followed.
9.3 Water and moisture - DO NOT use this apparatus near water. For
example, near a bath tub, wash bowl, kitchen sink, laundry tub, in a wet
environment or near a swimming pool and the like. Care should be taken
so that objects DO NOT fall onto units and that liquids are not spilled into
either unit or Sensor Pad through its openings.
9.4 Cleaning - Disconnect all units before cleaning. DO NOT immerse in
water any part of the monitor. Clean only with dry cloth.
9.5 Ventilation - DO NOT block any ventilation openings. Allow for proper
ventilation when units are in use. DO NOT cover the Camera or the Parent
Unit with any object such as a blanket. DO NOT place it in a drawer or in
any location which would muffle the sound or interfere with the normal
flow of air.
9.6 Heat sources - DO NOT install near any heat sources such as radiators,
heat registers, stoves, TVs or other apparatus (including amplifiers) that
produce heat. Heat can damage the case or electrical parts.
9.7 Power supply cord should be routed so that they are not
likely to be walked on or pinched by items upon or against them,
paying particular attention to cords and plugs, convenience
receptacle, and the point where they exit from the product.
To disconnect from mains, unplug the adapter.
9.8 Accessories - Only use attachments/
accessories specified by the manufacturer.
DO NOT place this product on an unstable cart, stand, tripod, bracket or
table. The product may fall, causing serious injury to a child or adult and
serious damage to the product. Use ONLY with a cart, stand, tripod, bracket
or table recommended by the manufacturer or sold with the product. Any
mounting of the product should follow the manufacturer’s instructions.
9.9 Unplug this appliance during lightning storms or when not used for
long periods of time.
9.10 Servicing - DO NOT attempt to service this product yourself as opening
or removing covers (except battery door) may expose you to dangerous
voltage or other hazards.
9.11 Replacement parts - When replacement parts are required, be sure
the replacement parts specified by the manufacturer have the same
characteristic as the original part. Unauthorized substitution may result
in fire, electric shock or other hazards.
9.12 Overloading - DO NOT overload wall outlets, extension cords or integral
convenience receptacles as this can result in a risk of fire or electric shock.
9.13 Object and Liquid Entry - NEVER push objects of any kind into this
product through casing slots as they may touch dangerous voltage points
or short out parts that could result in a risk of fire or electric shock. NEVER
spill liquid of any kind on the product.
9.14 Power Lines - An outside antenna system should NOT be located
in the vicinity of overhead power lines or other electric light or power
circuit, or where it can fall into such power lines or circuits as contact
with them may be fatal.
10. IMPORTANT SAFETY INSTRUCTIONS
RELATED TO USE OF BATTERIES
10.1 DO NOT use these adapters with any other equipment.
10.2 When unplugging the adapter from the Camera, be sure it is switched
to the OFF position.
OWNER’S MANUAL
KEEP YOUR OWNER’S MANUAL FOR FUTURE REFERENCE.
PLEASE READ THE WARNINGS AND INSTRUCTIONS CAREFULLY BEFORE ASSEMBLING & USING THE PRODUCT.
FAILURE TO FOLLOW THE WARNINGS AND THE INSTRUCTIONS COULD RESULT IN SERIOUS INJURY OR DEATH OR DAMAGES
TO THE PRODUCT.
WARNING
Adult assembly required.
Keep small parts away from children when assembling.
We, at Angelcare
®
, stand behind all of our products.
If you are not completely satisfied or have any questions,
United States and Canada: Please contact us at: angelcar[email protected]
Other countries: Please contact your local distributor: international.angelcarebaby.com.
WARNING
- Strangulation Hazard –
Children have STRANGLED in cords.
KEEP the Camera Unit and adapter cords OUT of the reach of children
more than 3 feet or 1 meter away.
NEVER use extension cords with adaptors. ONLY use adaptors provided.
This product is NOT a Toy. NEVER allow children to play with it.
2
01m3A_Manuel_AC-CAM_ROW_12699.indd 2 18-01-31 12:13
Model AC-CAM
Additional Camera Unit
for Angelcare Monitors
SETUP REQUIREMENTS
INCLUDED:
Camera
Tabletop stand with
removable wall
mount magnet
(for Camera)
Hardware
(Screwdriver required
for wall mounting)
AC adapter
STEP 1 - SETTING UP THE CAMERA
1.1 - SELECT A LOCATION FOR THE CAMERA
Place the
Camera at least
1 metre from the
cot
WARNING
- Strangulation Hazard –
Children have STRANGLED in cords.
KEEP the Camera Unit and adapter cords OUT of the reach of children
more than 3 feet or 1 meter away.
NEVER use extension cords with adaptors. ONLY use adaptors provided.
This product is NOT a Toy. NEVER allow children to play with it.
2
1) Place the Camera at a minimum of
1 metre away from the cot.
2) Connect the adapter to the Camera
and into an electrical outlet.
3
E
N
01m3A_Manuel_AC-CAM_ROW_12699.indd 3 18-01-31 12:13
Note: Each time you power ON your Camera, the internal thermometer will need to
calibrate to ensure accuracy. This automatic process will take approximately 30 minutes.
The colour changing temperature display, by default, will be turned “OFF”. You may turn
this feature “ON” in the settings mode on your Parent Unit.
CAMERA
Front Side
Speaker
Microphone
Camera
Room
temperature
display
Micro USB
charging port
Rear Side
Magnet for
tabletop stand
and wall mount
POWER ON/OFF
Pause Sensor Pad/
Pairing button
1.2 TURNING ON YOUR CAMERA
1
ON
OFF
1) Slide the Camera ON/OFF switch to the ON position.
FOR MODEL AC417, AC510 & AC517
2.1 PAIR THE CAMERA WITH THE PARENT UNIT
18°C
3
2
1) Tap the Settings icon in the video display view.
2) Tap the Pairing icon to enter the device
pairing menu.
3) Tap the icon to select/highlight CAMERA 2
(icon will be grayed out).
The Parent Unit Power Indicator
will flash to indicate it’s in
linking mode.
4) Plug in and turn your Camera ON.
5) Press and hold the Pause / Pairing button
on the top right of the Camera for 2-3 seconds.
6) When the Trash can icon appears, the
Camera is paired.
4
01m3A_Manuel_AC-CAM_ROW_12699.indd 4 18-01-31 12:13
2.2 VIEWING MULTIPLE CAMERAS
With more than one camera you can view each camera individually or use the split screen
mode to view up-to four cameras connected simultaneously.
IMPORTANT
If you have a Sensor Pad connected to your Angelcare Monitor, it can
ONLY be paired with Camera 1.
You will only be able to hear audio from one camera at a time.
When in split screen, the sound transmitted from the Parent Unit will
be from the Camera number highlighted in the info bar.
18°C
1
1) Tap the camera selection icon .
The Camera Select
Menu will pop up and
active cameras will
have an icon with
a camera number
(inactive cameras will
be grayed out).
18°C
2
2) Tap on the Camera icon number you
would like to view (the icon turns blue).
The CAM # icon will appear in the
left hand side of the info bar.
18°C
3
3) To view the split screen option, tap the
Camera icon .
4) To return to single video display/
settings press any Camera image on
screen.
FOR MODEL AC310 & 315
3.1 PAIR THE CAMERA WITH THE PARENT UNIT
18°C
2
1
1) Press the Menu button to access the
main menu.
2) Use the down arrow to select the
pairing settings menu and then to
access it.
5
E
N
01m3A_Manuel_AC-CAM_ROW_12699.indd 5 18-01-31 12:13
18°C
3
6
3) Press the down arrow and press to
select/highlight CAMERA 2 (icon will be
grayed out).
The Parent Unit Power Indicator
will flash to indicate it’s in
linking mode.
4) Plug in and turn your Camera ON.
5) Press and hold the Pause / Pairing button
on the top right of the Camera for 2-3
seconds.
6) When the Trash Can icon shows up, the
Camera is now paired.
3.2 VIEWING MULTIPLE CAMERAS
With more than one camera you can view each camera individually or use the split screen
mode to view up-to four cameras connected simultaneously.
IMPORTANT
If you have a Sensor Pad connected to your Angelcare Monitor, it can
ONLY be paired with Camera 1. The alarm on the Parent Unit will only
sound if Camera 1 is selected or in split view. If another Camera is
selected only the Camera 1 will sound the alarm.
You will only be able to hear audio from one camera at a time.
When in split screen, the sound transmitted from the Parent Unit will
be from the Camera number highlighted in the info bar.
02:04 18°C
1
2
1) Press the key on your Parent Unit.
2) Use the down arrow to select the
Camera icon number and press .
The Camera Select Menu will popup and
active cameras will have an icon with a camera
number (inactive cameras will be grayed out).
02:04 18°C
3
4
3) To select an individual Camera to view, use
the down arrow to highlight the desired
Camera and press .
The CAM # icon will appear in the
left hand side of the info bar.
4) To view the split screen option, from the
Camera Select Menu, use the down arrow
to highlight the last Camera icon and
press .
5) To return to single video display, from the
Camera Select Menu, use the down arrow
to highlight the prefred Camera and press
.
6
01m3A_Manuel_AC-CAM_ROW_12699.indd 6 18-01-31 12:13
TECHNICAL SPECIFICATIONS
Number of Channels:
USA/Canada: 24 channels.
Europe: 24 channels.
Power Supply:
100 - 240 VAC / 5 VDC adapter for the Camera
Caution: To reduce the risk of electric shock, do not expose this product to
rain or moisture.
Transmission:
Transmission between the Parent Unit and the Camera is made on 2.4 GHz
frequency for Europe/Asia/Africa/Australia.
Maximum RF Power Transmitted:
• 20dBm (100mW) between Camera and Parent Unit
Hereby, Angelcare Monitors Inc., declares that this Baby Monitor is in
compliance with Directive 2014/53/EU The full text of the EU declaration of
conformity is available at the following internet address:
www.angelcarebaby.com/declaration-of-conformity
LIMITED WARRANTY
Angelcare
®
warrants to the original owner of this product that Angelcare
®
monitor is free from any material and workmanship defects for the term of the
warranty period (see warranty table below to determine the warranty for your
country). If this monitoring system fails to function properly when used as
directed under normal conditions and during the warranty period, Angelcare
®
will either repair or replace the product, at our discretion, free of charge. Please
contact your local distributor to validate warranty and warranty period.
The product must be accompanied by a proof of purchase, either a bill of
sale or other proof that the monitoring system is within the warranty period.
Angelcare
®
will bear the cost of repairing or replacing the product and
shipping it back to you.
This warranty does not apply to a product which has been damaged as a
result of improper maintenance, an accident, improper voltage supply or
any other form of misuse. The warranty is also void if the owner repairs or
modifies the product in any way. Angelcare
®
is not liable for any incidental
or consequential damages with regard to this product. The warranty also
excludes any liability other than what is stated above. No other warranty
is given.
This warranty does not cover products and accessories which are not
Angelcare-branded, or any problems that result from usage that is not
in accordance with product instructions, failure to follow the product
instructions, or problems caused by using accessories, parts or components
not supplied by Angelcare.
LEGAL RIGHTS VARY FROM COUNTRY TO COUNTRY. SOME COUNTRIES
DO NOT ALLOW THE EXCLUSION OR LIMITATION OF INCIDENTAL OR
CONSEQUENTIAL DAMAGES, SO THE ABOVE LIMITATIONS MAY NOT
APPLY TO YOU.
WE ARE NOT IN ANY WAY RESPONSIBLE FOR ANY OUTCOME RESULTING
FROM THE USE OF THIS PRODUCT.
IMPORTANT! This Angelcare
®
monitor is a personal care product. Please
do not return this product to the store. If you have questions or need help,
please call your distributor before returning this product:
international.angelcarebaby.com
WARRANTY TERM PER COUNTRY
North America 1 year
UK, South Africa, Russia 1 year
Other countries 2 years
PROTECT THE ENVIRONMENT
The wheelie bin symbols mean that according to local laws and
regulations your product and/or its battery shall be disposed of
separately from household waste. When the product/battery reaches its
end of life take it to a collection point designated by local authorities.
The seperate disposal and recycling will help conserve natural resources
and protect human health and the environment. Refer to User’s Guide for
removal of batteries
TROUBLESHOOTING
This product is an addition to your Angelcare Monitor, to obtain the full instructions on how
to operate the camera, refer to your Angelcare Monitor Instruction Guide.
7
E
N
01m3A_Manuel_AC-CAM_ROW_12699.indd 7 18-01-31 12:13
IMCAM-ROW21012018
www.angelcarebaby.com
01m3A_Manuel_AC-CAM_ROW_12699.indd 8 18-01-31 12:13
/