Page is loading ...

Serial Numbers ____________________
Handcrafted by:
_________________________________
_________________________________
_________________________________
_________________________________
This product is certified to meet the requirements of the European
Union (EU) Electromagnetic Compatibility (EMC) Directive
(89/336/EEC). Because the permanent magnets attached to the
loudspeaker drivers produce magnetic fields, it is recommended
that the product not be positioned in very close proximity to
computer monitors or television sets.
Musical Masterpieces


Table of Contents
1 Introduction...................................................................................................................5
Overview ..................................................................................................5
1.1 Low Noise Floor ..............................................................................................6
1.2 Coherent Energy Transfer...............................................................................7
1.3 The Active Reference System ........................................................................8
2 Unpacking Instructions .................................................................................................9
Introduction ..............................................................................................9
Contents...................................................................................................9
2.1 Room Preparation and Verification...............................................................10
2.2 Crate and Box Placement for Unpacking......................................................11
2.3 Opening the Crates .......................................................................................12
2.3 Opening the Sub Amplifier Crates .................................................................14
3 System Set-up ...............................................................................................................15
Preparation...............................................................................................15
Removing Apex
‘
Couplers from Set-up Blocks .......................................15
Left / Right Channel Matching.................................................................16
3.1 Lower Speaker Cabinet Set-up......................................................................17
3.2 Upper Speaker Cabinet Set-up......................................................................18
3.3 Crossover Cabinet Set-up..............................................................................21
3.4 The Felt Anti-Diffraction Mask.........................................................................22
Orientation of the upper Felt Mask...........................................................22
3.5 Sub Amplifier Set-up.......................................................................................23
4 Wiring Instructions .........................................................................................................24
Introduction ..............................................................................................24
4.1 Wiring and Field Interactions..........................................................................25
Inductive field effects...............................................................................25
4.2 Connecting Upper Speaker Cabinet to Crossover........................................26
4.3 Connecting Speaker Cable to the Crossover................................................27
4.4 Connect Speaker Cable to your Amplifier ....................................................28
4.4 Connecting Subwoofer to the Sub Amplifier .................................................29
4.5 Connecting Preamplifier to the Amplifiers .....................................................30
1. Interconnect Y-cable at the preamplifier............................................30
2. Two outputs at the preamplifier...........................................................30
3. Loop-Out from the Subwoofer Amplifier..............................................30
5 Break-in Period .............................................................................................................31
6 Maximizing Performance.............................................................................................32
Break-in.....................................................................................................34
Separate Left / Right Amplifiers ................................................................34
Felt Anti-diffraction Masks.........................................................................34
Room Treatment and System / Listener Position.......................................35
Toe-In ........................................................................................................35
Apex
‘
Couplers.......................................................................................35
First Reflection Points.................................................................................36
Corner Treatment .....................................................................................36
7 Care of Your Avalon Loudspeakers..............................................................................37
Cabinet ....................................................................................................37
Crossover Cabinet....................................................................................37
Felt Anti-diffraction Masks.........................................................................37
Drivers .......................................................................................................37
8 Warranty .......................................................................................................................38
In the Event of a Problem .........................................................................38
Warranty Statement .................................................................................39

9 Room Acoustics and Speaker Position .........................................................................41
Introduction ..............................................................................................41
An Optical Analogy..................................................................................42
Basic Room Acoustics...............................................................................42
9.1 Standing Waves .............................................................................................43
9.2 Flutter Echo ....................................................................................................44
9.3 Early Reflections .............................................................................................45
Avoiding Early Reflections ........................................................................46
Low Frequency Reflections.......................................................................48
9.4 Bass reinforcement.........................................................................................49
9.5 Summary of Recommendations ....................................................................52
Flutter Echo and Standing Waves ............................................................52
Early Reflections........................................................................................53
Speaker Placement..................................................................................53
9.6 A Listening Room Example.............................................................................54
10 Listening Position .........................................................................................................55
Path Length Symmetry .............................................................................55
Time Alignment.........................................................................................55
Summary...................................................................................................56
11 Accuracy of Bass Reproduction .................................................................................57
Introduction ..............................................................................................57
11.1 Sensitivity to Time-Related Information.........................................................58
"Fast Bass"..................................................................................................58
11.2 Measurements of Audio Equipment.............................................................59
A Correlation with Amplifier Measurements.............................................59
Loudspeaker Measurements ....................................................................60
Designing for Accurate Bass Reproduction..............................................61
11.3 Listening Qualities.........................................................................................62
Frequency Response Effects.....................................................................62
Listening for Size Distortions.......................................................................62
Transient Response Effects........................................................................63
11.4 Active Subwoofer System.............................................................................64
Anechoic Frequency Response vs. In-Room Frequency
Response ..................................................................................................64
Active Control of Bass Energy...................................................................64
12 Features ......................................................................................................................65
13 Specifications..............................................................................................................66
Loudspeaker.............................................................................................66
Subwoofer Amplifier .................................................................................66
14 Notes...........................................................................................................................67

5
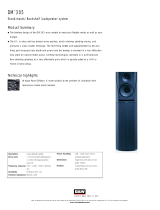
1 Introduction
Overview
The Avalon Acoustics Sentinel Active Reference System represents the
application of edge-of-the-art loudspeaker technology in every area of high
accuracy transducer development. New research in diaphragm materials,
magnetics, low-noise circuitry, resonance control, and temporal coherence,
never before employed in high energy transducers, redefines the boundaries
of music reproduction. The intent has been to create a full range transducer
capable of high-energy transfer that behaves like a small array with point-
source accuracy.
The Sentinel
accomplishes this goal by lowering the noise floor and eliminating
stray energy, thereby preserving timing detail, transient accuracy, natural
instrumental timbre, and stage presentation while providing transparency,
clarity, and detailed focus up and down the frequency spectrum. Powered
by a dedicated high-energy subwoofer amplifier, Sentinel actively controls
and realistically renders low frequencies, down to 16 Hz, while maintaining
transient accuracy and harmonic integrity. Truly an Active Reference System,
the Sentinel re-creates musical events in a manner that is uncompromised
and sonically neutral.
Your Sentinel is designed and built to the highest standards of workmanship
and performance. These standards are preserved through the test of time by
careful attention to component quality and meticulous testing of each unit
before leaving the factory. As a new owner of this Avalon Acoustics product,
you can be assured that you possess one of the few great loudspeakers the
audio industry has to offer.

6
1.1 Low Noise Floor
A key element in achieving the sonic goals mentioned in the previous section
is significantly reducing the noise floor. The term "noise floor," in this discussion,
refers to the stray uncorrelated energy that is produced as an artifact by the
loudspeaker. This manifests itself in latent energy below the musical signal
and in deleterious phase noise. Both must be reduced to an absolute
minimum.
Through new proprietary technologies in the elements of the crossover
circuitry, the noise floor has been lowered by more than 25 dB over any
existing design. The low noise principle has also been applied to cabinet
design and construction, where new techniques in resonance control and
careful attention to diffraction and driver coupling effects further reduce stray
acoustic energy.
The overall sonic result is a three dimensional spatial presentation of the
instruments recorded within the context of their original environment. The
background seems black and devoid of contaminating energy, while each
individual instrument breathes into the space in which it was recorded. Truly
low level details, such as wall reflections from the original recording site, are
clearly and concretely apparent. The entire recording environment, whether
natural or artificial, can now be transposed in toto to your listening room.

7
1.2 Coherent Energy Transfer
Coherent energy is both an aspect of the absolute quantity of energy, and
also the speed with which that energy begins and ends. Entirely new
technologies in current transfer and in magnetic field energy storage within
the crossover maximizes the transient speed of the transducer, while
eliminating the ringing that can give recorded music a fatiguing and etched
quality.
Dynamic measurement techniques provide prediction of circuit behavior
under actual musical conditions. Through these techniques, current
saturation effects throughout the system are greatly reduced. Proper phasing
of elements within the crossover circuitry is now achievable. With these new
technical developments, the level of inter-driver jitter (mis-timing between
drivers) can be virtually eliminated.
The sonic results of this technology are stable, tightly focused images that
retain their position and harmonic structure, regardless of input intensity
(provided, of course, that the chain of amplification is able to deliver the
quantity of energy required with great speed). The most apparent benefit of
coherent energy transfer is in the rendering of bass information. Low
frequencies are delivered with a clarity that reveals the subtle harmonic
structure of pipe organ and bass guitar passages, while precise timing
provides a coherent temporal structure throughout the frequency spectrum.

8
1.3 The Active Reference System
A definitive transducer project of this magnitude demands the holistic
integration of diverse design goals, including perfect phase response, critical
damping, and point source accuracy. In addition, horizontal dispersion must
be uniform across the frequency spectrum in order to generate a coherently
focused wavefront and minimize room interaction artifacts. The difficulty of
integrating all of these elements increases exponentially as the size of the
array grows larger. It is only through complex computer modeling, meticulous
physical and electrical alignment, and scores of hours of dedicated listening
that correct phase response, without restricting the frequency response, has
been achieved. The result is a transducer that is extremely revealing of
microphone placement and phasing techniques from the recording site. The
most subtle ambient information is clearly apparent. There is no exaggeration
of details over fundamental elements of the recording; context is always
clearly maintained.
These qualities are most apparent when using the Sentinel Active Reference
System as an evaluation tool. Amplifiers, for example, that were previously
thought to have similar sonic characteristics are now definitively separated by
their individual signatures. The system's smooth non-reactive impedance
response insures that the sound of an amplifier is not due to an interactive
effect, but is a true representation of its sonic fingerprint. By ameliorating
many of the technical shortcomings of all previous transducers, the music
lover moves closer to the performance and the intent of the artist. Similarly,
the critical evaluator now has a transparent window through which the
differences between the elements under test (e.g. amplifiers, cartridges, etc.)
can be clearly discerned.

9
2 Unpacking Instructions
Introduction
Your Avalon Acoustics loudspeakers and sub amplifiers were shipped in seven
heavy-duty crates to ensure their safe arrival. It is recommended to save
these crates and boxes for possible future use. Due to the weight of the
system, the listening room floor structure must be extremely robust and
reliable.
WARNING: The Sentinel Active Reference System weighs over 1,100 pounds
(approximately 520 kg). You MUST evaluate and verify the integrity of the
intended listening room floor structure before bringing the crates into the
home.
In addition, it will require three persons to un-crate them and position them for
listening. Please arrange for your dealer and/or other friends to assist in this
project.
CAUTION: Three people are required for unpacking and set-up. To avoid
injury, do NOT attempt to unpack or set-up by oneself.
Contents
There are six Sentinel loudspeaker cabinets and two subwoofer amplifiers
packaged as follows:
Two upper loudspeaker cabinets in two crates
Two lower loudspeaker cabinets two crates
Two crossover cabinets in one crate
Two subwoofer amplifiers in two crates
One of the crates also contains twenty threaded Apex
‘
Couplers, two set-up
blocks, one 7/16" - 1/2" open end wrench, one 5/32" hex wrench, and this
owner's manual.

10
2.1 Room Preparation and Verification
The Sentinel Active Reference System weighs over 1,100 pounds (about 520
kg). It is therefore crucial to verify the soundness of the intended listening
room floor structure and to insure that the structure can safely support the
device. If the listening room is not located on the ground floor, and/or if the
floor structure is suspended, it is recommended that you consult a structural
engineer for assistance.
WARNING: The Sentinel Active Reference System weighs over 1,100 pounds
(approximately 520 kg). You MUST evaluate and verify the integrity of the
intended listening room floor structure before bringing the crates into the
home.
The Sentinel is a full-range frequency device capable of accurately
reproducing the deep bass of a pipe organ or large bass drum. Any loose
items within the listening room (such as picture frames, light fixtures, drapery
controls, etc.) can easily become excited and resonate when the transducer
reproduces these very low frequencies. In order to avoid these vibration
effects, care should be taken to secure loose items or remove them from the
listening environment.

11
2.2 Crate and Box Placement for Unpacking
Because of the weight and size of the Sentinel Active Reference System, it is
important to plan the layout of your room and carefully place the crated
devices within the listening environment BEFORE unpacking. Should you
require assistance with planning your listening room, please refer to the
in-depth discussion in Chapter 9, Room Acoustics and Speaker Position
(beginning on page 41). If you require additional assistance, contact your
dealer or phone the factory.
CAUTION: Three people are required for unpacking. To avoid injury, do NOT
attempt to unpack by oneself.
Once the room placement plan has been established, bring the crated
system into the listening room and place them according to the following
guidelines (see Figure 2.1):
•
Sub Speaker crates at the back wall, behind the final speaker position.
•
Sub Amplifier crates at the back wall, inboard of the sub speaker
crates.
•
Top Speaker crates near the listening position.
•
Crossover crate at the back wall between amplifier crates.
IMPORTANT: Place the crates of one channel with matching serial numbers on
one side of the room, opposite the crates of other channel.
Figure 2.1 - Room set-up for unpacking.
Listening
Position
Final Speaker
Position
Final Speaker
Position
Sub
Speaker
Crate
Sub
Speaker
Crate
Top
Speaker
Crate
Top
Speaker
Crate
X-over
Crate
Sub
Amp
Container
Sub
Amp
Container
Final
Sub Amplifiers
Positioning

12
2.3 Opening the Crates
All of the crates features a one-piece top assembly which is fastened to the
crate bottom with screws around the lower perimeter.
To unpack the crossovers, remove the screws and lift the upper portion of the
crate straight up (this will require two people). Carefully lift the cabinets by
the small overhang at the base. See Figure 2.2.
CAUTION: Three people are required for unpacking. To avoid injury, do NOT
attempt to unpack by oneself.
Figure 2.2 – To unpack the crossover cabinets..

13
To unpack the upper speaker cabinets, remove the screws and lift the upper
portion of the crate straight up (this will require two people). Carefully lift the
cabinets by the small overhang at the base. See Figure 2.3.
CAUTION: Three people are required for unpacking. To avoid injury, do NOT
attempt to unpack by oneself.
To unpack the lower speaker cabinets, first remove the top of the crate. Then
slide the speaker part way off of the crate base so that the plastic bag can
be unfastened from the enclosure bottom. Stand the speaker up and the bag
can be slid off the top. Please refer to Figure 2.4.
Figure 2.3 – To unpack the upper speaker cabinets..
1. Remove screws.
2. Lift case.
1. Remove screws.
3. Slide speaker,
then undo bag.
4. Stand speaker up,
then remove bag.
2. Lift case.

14
2.3 Opening the Sub Amplifier Crates
The Subwoofer Amplifiers are also packed in heavy-duty crates. To unpack,
remove the screws and lift the upper portion of the crate straight up (this will
require two people). Carefully lift the amplifiers off of the crate base. Take it
out of the plastic bag and check to ensure the following has also been
included:
•
One (1) detachable AC linecord
•
Nut driver for output connectors

15
3 System Set-up
WARNING: Failure to follow the set-up and wiring instructions explicitly may
cause damage to your loudspeakers and void your warranty.
Preparation
In order to begin system set-up, it is important that all materials are unpacked
and all cabinets are removed from the crates in accordance with Chapter 2,
Unpacking Instructions, beginning on page 9. Then remove all the empty
crates from the listening room to provide for additional assembly space.
Removing Apex
‘
Couplers from Set-up Blocks
Remove all twenty Apex
‘
couplers from the two set-up blocks (see Figure
3.1). Three couplers will get installed in each of the six cabinets. Use the 1/2"
open end wrench on the wrenching flats to loosen as required.
Figure 2.4 – To unpack the lower speaker cabinets..
Figure 3.1 – Removal of Apex
‘
Couplers.

16
Left / Right Channel Matching
The two system channels (left and right) are consecutively serialized at the
factory. The elements of each channel are matched as a set for both their
electrical and aesthetic characteristics. Therefore, it is important to keep the
three cabinets of one channel (upper speaker, lower speaker, crossover)
which are labeled with the same serial number together on one side of the
room, separate from the three cabinets of the other channel.
IMPORTANT: Set-up the three cabinets of one channel with matching serial
numbers together on one side of the room, opposite the three cabinets of other
channel.
The serial number on the crossover cabinet is printed on the nameplate on
the bottom of the cabinet. The lower speaker cabinet has a serial number
label located on the top, near the back of the cabinet, and the upper
speaker cabinet has a serial number label located on the bottom, near the
back of the cabinet.

17
3.1 Lower Speaker Cabinet Set-up
CAUTION: Three people are required for the set-up procedure. To avoid injury,
do NOT attempt to set-up by oneself.
1. Carefully lift and place each lower speaker cabinet in its measured final
location, as it becomes more difficult to move once the Apex
‘
couplers are
attached. Carefully route the sub's integral wiring between the legs of the
cabinet base, thereby protecting the wiring harnesses from becoming
pinched.
WARNING: The wiring harnesses are fragile and can be easily damaged by
pinching them beneath the cabinet base.
2. Lay the speaker on its side, using a blanket or other soft material to avoid
scratching the finish.
3. Install three Apex
‘
couplers on the bottom of the cabinet by fastening the
threaded ends of the couplers into the cabinet inserts (see Figure 3.2). Lightly
tighten the couplers and insure that the base of the coupler contacts the
bottom of the recess.
4. Stand up the cabinet, again carefully routing the wiring harness to prevent
it from becoming pinched.
5. Measure and adjust the location of the cabinet within the listening room.
The cabinet should be set in place with a minimum of toe-in (no more than
two or three degrees).
Coupler seated
on bottom of
recess
Figure 3.2 – Installation of Apex
‘
couplers.

18
3.2 Upper Speaker Cabinet Set-up
CAUTION: Three people are required for the set-up procedure. To avoid injury,
do NOT attempt to set-up by oneself.
1. Lay the upper speaker on one side, using a blanket or other soft material to
avoid scratching the finish.
2. Install three Apex
‘
couplers on the bottom of the cabinet by fastening the
threaded ends of the couplers into the cabinet inserts (see Figure 3.2). Lightly
tighten the couplers and insure that the base of the coupler contacts the
bottom of the recess.
3. Stand up the cabinet. Carefully route the integral wiring between the legs
of the cabinet base, thereby protecting the wiring harness from becoming
pinched.
WARNING: The wiring harnesses are fragile and can be easily damaged by
pinching them beneath the cabinet base.
4. Place the two supplied set-up blocks on top of the lower speaker cabinet,
taking care NOT to cover the sockets or wiring guide tubes, as shown in Figure
3.3. The set-up blocks prevent scratching of the lower speaker cabinet
during positioning and alignment.
Figure 3.3 – Placement of set-up blocks atop lower speaker cabinet. Do
NOT cover the receiving sockets or wiring tubes with the set-up blocks.

19
5. Carefully lift each upper speaker cabinet by the small overhang at the
base, and place it directly on top of the lower speaker cabinet, with the set-
up blocks between them. Then gently slide the upper cabinet slightly forward
to expose the wiring tubes in the lower cabinet (See Figure 3.4).
6. Route the upper speaker cabinet wiring through the wiring tubes and out
the bottom rear of the lower speaker cabinets, as shown in Figure 3.4.
6. Once the wiring is routed through the wiring tubes, slide the upper speakers
cabinets back, so that the couplers on the upper speaker cabinet are directly
above the sockets on the lower speaker cabinet (see Figure 3.5). If
necessary, gently adjust the upper speaker cabinet on the set-up blocks.
7. Remove the set-up blocks (refer to Figure 3.5): Lift the back side of the
upper speaker cabinet slightly, freeing the rear set-up block. Remove the
rear set-up block, and carefully lower the two rear Apex
‘
Couplers into their
respective receiving sockets. Then lift the front side of the upper speaker
Figure 3.4 – Placement of upper speaker cabinet atop lower speaker cabinet.
The upper speaker cabinet is slid forward to allow for routing of the upper
speaker cabinet wiring through the wiring tubes.

20
cabinet slightly, remove the front set-up block, and lower the single front Apex
‘
Coupler into its receiving socket.
Figure 3.5 – Removal of the set-up blocks between upper and lower speaker
cabinets.
/