Page is loading ...


Important Safety Precautions and Explanation of Symbols
The exclamation point within an equilateral triangle is intended to alert the user to the presence of
important installation, operation, and service instructions in this manual.
The lightning ash with arrowhead symbol within an equilateral triangle is intended to alert the user to the
presence of uninsulated dangerous voltages within the enclosure that may be of sucient magnitude to
constitute a risk of electrical shock to the user.
Please read this manual thoroughly before attempting to install, congure, or operate the Emotiva BasX
Subwoofer. After successful installation and conguration of the BasX Subwoofer, be sure to retain this
manual in a safe place for future reference.
Safety is a key component to a long lasting and trouble free installation. Please read and follow all
instructions and heed all warnings on the BasX Subwoofer and in this manual. The vast majority of the
subsequent safety precautions are common sense. If you are not comfortable with the installation of audio/
video entertainment equipment, you should seek the services of a qualied installation professional or call
us for help.
WARNING: TO REDUCE THE RISK OF FIRE OR ELECTRIC SHOCK, DO NOT USE THE BASX SUBWOOFER
NEAR WATER OR IN WET LOCATIONS, DO NOT EXPOSE IT TO RAIN OR MOISTURE, DO NOT EXPOSE IT
TO DRIPPING OR SPLASHING FROM OTHER SOURCES, AND ENSURE THAT NO OBJECTS FILLED WITH
LIQUIDS SUCH AS VASES ARE PLACED ON IT. DOING SO MAY RESULT IN DAMAGE TO THE UNIT AND
THE RISK OF ELECTRIC SHOCK, WHICH MAY RESULT IN BODILY INJURY OR DEATH.
WARNING: TO REDUCE THE RISK OF ELECTRIC SHOCK, DO NOT REMOVE THE AMPLIFIER PLATE OR
DRIVERS FROM THE BASX SUBWOOFER. THERE ARE NO USERSERVICEABLE PARTS INSIDE THE UNIT.
REFER ALL SERVICE TO QUALIFIED SERVICE PERSONNEL.
Do not install the BasX Subwoofer near or above any heat sources such as radiators, heating vents, or other
apparatus’ that produce heat. Do not block any ventilation openings or heat sinks. Avoid installing the
unit directly above other heat-producing equipment unless sucient ventilation or forced-air cooling is
provided.
Do not install the BasX Subwoofer in locations without proper ventilation. The BasX Subwoofer should not
be operated on a bed, sofa, rug, or similar surface that may block vents. The unit should not be installed
in an enclosed location such as a bookcase, cabinet, or closed equipment rack unless sucient forced-air
ventilation is provided, and clearance should be maintained between the rear-mounted heat sinks and
objects like drapes that may reduce ventilation.
Always install your BasX Subwoofer according to the manufacturer’s instructions and only use attachments
or accessories specied by the manufacturer.
Do not install the BasX Subwoofer on any stand, shelf, or other piece of furniture that is unable to support
its weight. If a cart is used to move the unit, use caution to avoid injury from tip-over.
Connect the BasX Subwoofer only to power sources of the correct voltage (as shown in this manual and on
the BasX Subwoofer unit).
Protect power supply cables from being pinched, walked on, or otherwise damaged. Be especially careful
where the power cable enters the power outlet and the unit.
Only connect the BasX Subwoofer to an electrical outlet or extension cord of appropriate type and rating.
!
!

DO NOT defeat the safety purpose of a grounding or polarized plug by removing ground pins or using
unsafe adapters. A polarized plug has two blades - one wider than the other. A grounding plug has a
third ground prong in addition to the two main conductors. The wide blade or third groundling prong is
provided for your safety. If the provided plug does not t your outlet, consult an electrician to replace your
obsolete outlet. If you replace the power cord, only use one of similar type and equal or greater current
rating.
The power cable for the BasX Subwoofer should be unplugged from the outlet during severe electrical
storms, or when unused for a long period of time.
Only replace the fuse(s) in the BasX Subwoofer with fuse(s) of proper value and voltage rating.
The BasX Subwoofer should only be cleaned as directed in the manual. Avoid spraying liquids directly onto
the unit or drivers.
You should seek service for your BasX Subwoofer by qualied service personnel if any of the following
occur:
1. The power-supply cord or the plug has been damaged.
2. Objects or liquid have fallen or spilled into the vents.
3. The unit has been exposed to rain.
4. The unit exhibits a marked change in performance.
5. The unit has been dropped, or its enclosure or chassis is damaged.
NOTE: TO COMPLETELY DISCONNECT THE BASX SUBWOOFER FROM THE AC POWER MAINS, DISCONNECT
THE AC POWER CORD FROM THE AC RECEPTACLE.
NOTE: THE POWER CORD ON THE BASX SUBWOOFER MUST REMAIN READILY ACCESSIBLE AT ALL TIMES.
!
CAUTION
CAUTION: TO REDUCE THE RISK
OF ELECTRICAL SHOCK, DO
NOT REMOVE COVER. NO USER
SERVICEABLE PARTS INSIDE.
REFER SERVICING TO QUALIFIED
SERVICE PERSONNEL.

Page 1
BasX Subwoofers
Contents
Important Safety Precautions and Explanation of Symbols
Emotiva BasX Subwoofers ............................................................................................1
Introduction ......................................................................................................................3
About This Manual .......................................................................................................... 4
Features ..............................................................................................................................5
Unpacking ..........................................................................................................................6
Quick Start .........................................................................................................................7
Setting The AC Line Voltage on Your BasX Subwoofer ......................................7
BasX Subwoofer Controls ............................................................................................8
BasX S12........................................................................................................................... 11
BasX S10........................................................................................................................... 12
BasX S8 ............................................................................................................................ 13
Subwoofer Placement and Conguration ........................................................... 14
Connections ................................................................................................................... 16
Care and Maintenance ............................................................................................... 17
Emotiva Audio Corporation Three-Year Limited Warranty ............................ 18
Accessories ..................................................................................................................... 21
Notes ................................................................................................................................. 22
Emotiva BasX Subwoofers

Page 2
BasX Subwoofers

Page 3
BasX Subwoofers
Introduction
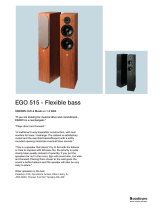
Thank you for purchasing one of our new Emotiva BasX™ Subwoofers.
Our Emotiva BasX™ Subwoofers were designed to reproduce the lowest frequencies in the audio
spectrum accurately and with exceptionally low distortion - even at high listening levels. This means
that our BasX Subwoofers can deliver the dynamics and raw power you need to make a modern
movie sound-track sound truly monumental, but still oer the precision and musicality you need to
get the most from well recorded music. With our BasX Subwoofers, you don’t have to compromise;
you really can have it all.
Our BasX Subwoofers come in three models: the S8, the S10, and the S12. Each model includes a
heavy duty high excursion bass driver, powered by a high-eciency Class D amplier, and oers
controls that allow you to congure it to work perfectly in conjunction with your main speakers. The
various models oer identical controls and similar features; the main dierence is that the larger
models can produce higher output levels, and their frequency response extends slightly lower.
The cabinets, which are quite compact for the performance they deliver, are built of heavy,
acoustically inert MDF, and are covered in attractive yet practical textured vinyl. Sculpted removable
grill cloths perfectly match the outline of the cabinets, and heavy duty integral feet provide support
and minimize vibration. All controls and connections are conveniently located on the rear panel,
which also provides cooling for the internal ampliers.
We’re very proud of our new BasX Subwoofers, and we hope you’ll enjoy listening to them as much
as we enjoyed designing and manufacturing them.
Happy listening!
The Emotiva Team

Page 4
BasX Subwoofers
About This Manual
This manual will provide you with all the information you need to enable you to get great
performance, accurate sound, and many years of reliable service from your BasX Subwoofer.
We suggest that you read through the entire manual; we kept things as short and direct as
possible. Even if you’re an expert user, you will probably nd some interesting information and
useful suggestions.
If you’re really in a hurry to get started, please read the Quick Start section (on page 7); you may
then read the remainder of the manual at your leisure.
You may wish to record serial numbers or other purchase information on the Notes page at the
back of this manual.

Page 5
BasX Subwoofers
Features
Our Emotiva BasX™ Subwoofers were designed to oer excellent performance and great sound
quality; and they’re also priced to t perfectly into your budget. Their design and performance
features were carefully chosen to appeal to both home theater bus and audiophiles, with a
choice of input options and operating modes well suited to a wide variety of applications, and the
controls needed to perfectly match them to any system or room.
The following are a few of the feature highlights of our BasX Subwoofers:
• High performance, compact size, and great sound - all of our BasX Subwoofers oer
excellent sound quality, low distortion, and high output in a relatively compact form factor.
• 8 inch, 10 inch, and 12 inch models to t a wide variety of needs - While all of our BasX
Subwoofers oer the same combination of high output, low distortion, and precise sound
delivery, not everyone has room for a full-sized subwoofer. That’s why our BasX subs are
available in three dierent models - 8 inch, 10 inch, and 12 inch - so you can choose the
perfect t for your room and your system.
• Advanced long throw bass drivers - with mineral lled injection molded polypropylene
cones, large rubber roll surrounds, forced air cooling, and all copper voice coils with solid
aluminum formers for excellent performance.
• Carefully tunes ported cabinets - allow our drivers to deliver plenty of output, while
providing the precise control necessary to minimize distortion and deliver low frequencies
with power and authority.
• Heavy, acoustically inert MDF cabinets - minimize vibration and ensure that you hear only
the music and sound eects you’re supposed to hear - with no contribution from the cabinet.
• Tough yet attractive exterior - our tough yet attractive vinyl covering protects the cabinets
on our BasX subs from damage and ngerprints, and blends easily with your decor.
• Removable grilles (on the S10 and S12) - provide a convenient way to keep your
technology under wraps, and are easily removed for cleaning - or for showing your BasX sub
o to your audiophile friends.
• Ecient Class D ampliers - oer the ideal combination of excellent sound quality, great
long-term reliability, and high eciency.
• Useful Controls and Features- The BasX subwoofers all include Volume, Phase, and Crossover
controls so you can adjust them to integrate perfectly with your main speakers. They can
be turned on manually, or set to turn on automatically when the music starts playing, and
include advanced protection circuitry to prevent damage if you accidentally overdrive them.
• Full three year warranty - ensures that you’ll be able to enjoy your BasX subs for years to
come.
You can nd more information about the Emotiva BasX subwoofers on our website at
www.emotiva.com.

Page 6
BasX Subwoofers
Unpacking
Your BasX subwoofer was carefully packed and should reach you in perfect condition. If you
notice any shipping damage or other issues when you unpack it, please contact Emotiva
immediately.
Gently remove your BasX subwoofer from the packing carton and remove all wrappings and
shipping material. Avoid pressing directly on the front of the drivers or dropping any bits of
packing material into the port opening.
It is important to save the box and all packing materials in case your BasX subwoofer ever needs
to be moved or shipped back to the factory for service.
Please keep your sales receipt in a safe place. It is the easiest way to verify your purchase date for
warranty purposes, and may also be required if you ever have to le an insurance claim.
We truly value customer feedback and would like to hear from you.

Page 7
BasX Subwoofers
Quick Start
To get the most from your BasX subwoofer, we urge you to read the entire manual. If you just can’t
wait to hear how great your BasX sub sounds, this section will cover the basics you need to get
started.
• Find a secure location for your BasX subwoofer.
• Make sure your BasX sub is set for the proper line voltage for your area.
• Connect your BasX sub to the LFE or subwoofer output on your AVR or pre/pro.
• Congure your AVR or pre/pro to expect a subwoofer.
• Find some music you really like to listen to.
• Enjoy!
While you’re enjoying your BasX sub, it would be a great time to read the rest of the manual to
learn more about them.
Setting The AC Line Voltage on Your BasX Subwoofer
If you ordered your BasX subwoofer directly from Emotiva, it should already be set for the correct
line voltage for your area. However, we always recommend conrming the correct setting before
plugging in your BasX sub. If you move to a dierent country, or a dierent region, with a dierent
line voltage, you MUST change the Line Voltage setting on your BasX sub to the correct line
voltage.
Note: Attempting to operate your BasX subwoofer with the Line Voltage Selector Switch set to
the wrong voltage for your area may result in damage to your BasX subwoofer.
In order to change the line voltage on your BasX sub, there are two changes which must be made.
1) Change the setting on the Line Voltage Selector Switch on the rear of the unit to the
correct voltage for your area.
2) Change the fuse to the appropriate value for that line voltage
Note:
See pages 9 and 10 for the location of the Line Voltage Selector Switch and Fuse Holder.
See pages 11 through 13 for the correct fuse value for the model of BasX subwoofer you have.

Page 8
BasX Subwoofers
CROSSOVER PHASE VOLUME
IN
OUT
-LFE
50 LFE 0 180 MIN MAX
100
OFF
ON
AUTO
100-120V~ 220-240V~
POWER
1 2 3 4 5
6
8
9
7
10
11
BasX Subwoofer Controls
All of the controls and input connections on the BasX S8, S10, and S12 are on the rear panel.
All three models oer the same input and control options.
1. Crossover Control
BasX subwoofers include a built-in 12 dB/octave crossover (low pass lter). This control allows you
to adjust the crossover frequency for the best match with your main speakers. If you’re using your
BasX sub with a home theater pre/pro or AVR that has its own bass management, you should set
this control to the LFE setting. If not, then the proper setting will depend on your main speakers,
but 80 Hz is a good starting point - and is often considered to be a standard setting for home
theater equipment.
2. Phase Control
The phase control is used to adjust the phase on your sub to match the phase of your main
speakers. The best setting here will depend on your main speakers and where your sub is located
in relation to them. This control is usually set to the point where you hear the most bass in the
range of frequencies where the sub overlaps with your main speakers.

Page 9
BasX Subwoofers
3. Volume Control
This control sets the relative gain of your BasX sub. Use this control to set the amount of bass
delivered by your BasX sub to be a good match for the output of your main speakers.
4. Power Mode Switch
Note: Your BasX sub will only operate if the AC POWER Switch is turned ON. If the AC POWER
Switch is OFF, your BasX sub will NOT operate, and the Power Mode Switch will have no eect.
When the Power Mode Switch if set to O, the BasX sub will NOT operate.
When the Power Mode Switch is set to On, the BasX sub will remain On continuously.
When the Power Mode Switch is set to Auto, the BasX sub will turn On automatically when
incoming audio is detected. Once the BasX sub is On, it will remain On for several minutes; if no
audio is detected after several minutes, the BasX sub will return to Standby Mode.
5. Power Indicator
The Power Indicator will be illuminated blue when the BasX sub is On, and will be illuminated red
when the BasX sub is in Standby Mode.
6. Inputs (unbalanced)
The BasX subwoofer has two unbalanced line level audio inputs. If your source provides a mono
full range or subwoofer output, it should be connected to the white input - labelled LFE. If your
source provides a stereo subwoofer or full range output, the two channels should be connected
to the red and white unbalanced inputs (the two inputs are summed - and it doesn’t matter which
is which).
7. Outputs (passthrough)
The passthrough outputs on the BasX sub are provided to allow you to connect a second
subwoofer, or a set of full range speakers in a second zone. The passthrough outputs are stereo,
unbuered, and remain active even when the BasX sub is O. The red output is connected directly
to the red input jack, and the white output is connected directly to the white input jack.
8. Line Voltage Selector
This switch is used to select the appropriate line voltage for your area.
Note: Be sure to set this switch to the correct line voltage for your area. If you fail to do so,
damage to your BasX sub may result.
Note: If you change the Line Voltage setting, you should also change the FUSE in the BasX to the
appropriate value (one fuse in each value is provided with your BasX subwoofer).

Page 10
BasX Subwoofers
9. AC Power Switch
Use this switch to turn the main AC Power to your BasX subwoofer On and O.
Note: Your BasX sub will only operate if the AC POWER Switch is turned ON. If the AC POWER
Switch is OFF, your BasX sub will NOT operate, and the Power Mode Switch will have no eect.
10. IEC Power Cable Receptacle
The IEC Power Cable receptacle accepts any standard IEC power cable. A high quality commercial
power cable is provided with your BasX subwoofer.
11. Fuse Holder
To change the fuse in your BasX subwoofer, remove the power cable, then gently pry the fuse
compartment open. (The fuse holder opens like a drawer.) Replace the fuse with one of the
correct value, replace the fuse drawer, and reinsert the power cable.
Note: If the fuse in your BasX subwoofer blows repeatedly without apparent reason, then you
might have an electrical fault in your BasX subwoofer, and you should call Emotiva Technical
Support for assistance.

Page 11
BasX Subwoofers
BasX S12
The BasX S12 subwoofer is an ideal way to add the
last few octaves of authoritative bass response to any
audiophile stereo system or home theater surround
sound system. The BasX S12 can be matched with any
combination of full range and satellite speakers, and
is the perfect complement to our Emotiva BasX LCR
and BasX SAT speakers.
Driver
One 12 inch long throw low-frequency bass driver,
with an injection molded mineral lled polypropylene
cone, a large rubber roll surround, a 2 inch copper
voice coil on a solid aluminum former, and forced air
cooling.
Enclosure Loading
Tuned cabinet with slot-loaded rear port.
Cabinet
Heavy, acoustically inert, MDF cabinet with integral
rubber feet, removable black fabric grill cloth, and
tough attractive black vinyl exterior nish.
Electrical Specications
Amplier type: High eciency Class D.
Amplier power: 300 Watts RMS
Frequency response: 25 Hz - 200 Hz (+0/-3 dB).
Inputs: LFE or summed left and right; unbalanced.
Controls: Crossover, Phase, Volume
AC Power: 100-120V/60 Hz (4A fuse);
220-240VAC/50 Hz (2A fuse).
Mechanical
Dimensions: 17.25 inches high (feet add 0.5 inches)
x 16.75 inches wide x 18.25 inches deep.
Weight: 48.5 pounds.
CROSSOVER PHASE VOLUME
IN
OUT
-LFE
50 LFE 0 180 MIN MAX
100
OFF
ON
AUTO
100-120V~ 220-240V~
POWER

Page 12
BasX Subwoofers
BasX S10
The BasX S10 subwoofer is an ideal way to add the
last few octaves of authoritative bass response to any
audiophile stereo system or home theater surround
sound system. The BasX S10 can be matched with any
combination of full range and satellite speakers, and
is the perfect complement to our Emotiva BasX LCR
and BasX SAT speakers.
Driver
One 10 inch long throw low-frequency bass driver,
with an injection molded mineral lled polypropylene
cone, a large rubber roll surround, a 1.5 inch copper
voice coil on a solid aluminum former, and forced air
cooling.
Enclosure Loading
Tuned cabinet with slot-loaded rear port.
Cabinet
Heavy, acoustically inert, MDF cabinet with integral
rubber feet, removable black fabric grill cloth, and
tough attractive black vinyl exterior nish .
Electrical Specications
Amplier type: High eciency Class D.
Amplier power: 200 Watts RMS
Frequency response: 27 Hz - 200 Hz (+0/-3 dB).
Inputs: LFE or summed left and right; unbalanced.
Controls: Crossover, Phase, Volume
AC Power: 100-120V/60 Hz (2.5A fuse);
220-240VAC/50 Hz (1.25A fuse).
Mechanical
Dimensions: 15.25 inches high (feet add 0.5 inches)
x 14.38 inches wide x 15.88 inches deep.
Weight: 34.35 pounds.
CROSSOVER PHASE VOLUME
IN
OUT
-LFE
50 LFE 0 180 MIN MAX
100
OFF
ON
AUTO
100-120V~ 220-240V~
POWER

Page 13
BasX Subwoofers
BasX S8
The BasX S8 subwoofer is an ideal way to add the last
few octaves of authoritative bass response to any
audiophile stereo system or home theater surround
sound system. The BasX S8 can be matched with any
combination of full range and satellite speakers, and is
the perfect complement to our Emotiva BasX LCR and
BasX SAT speakers.
Driver
One 8 inch long throw low-frequency bass driver, with
an injection molded mineral lled polypropylene cone,
a large rubber roll surround, a 1.5 inch copper voice
coil on a solid aluminum former, and forced air cooling.
Enclosure Loading
Tuned cabinet with ared rear port.
Cabinet
Heavy, acoustically inert, MDF cabinet with integral
rubber feet and tough attractive black vinyl exterior
nish .
Electrical Specications
Amplier type: High eciency Class D.
Amplier power: 150 Watts RMS
Frequency response: 28 Hz - 200 Hz (+0/-3 dB).
Inputs: LFE or summed left and right; unbalanced.
Controls: Crossover, Phase, Volume
AC Power: 100-120V/60 Hz (3.15A fuse);
220-240VAC/50 Hz (1.6A fuse).
Mechanical
Dimensions: 16.63 inches high (feet add 1.625 inches)
x 10.63 inches wide x 12.63 inches deep.
Weight: 21.2 pounds.
CROSSOVER PHASE VOLUME
IN
OUT
-LFE
50 LFE 0 180 MIN MAX
100
OFF
ON
AUTO
100-120V~ 220-240V~
POWER

Page 14
BasX Subwoofers
Subwoofer Placement and Conguration
The best location for your subwoofer will depend on a lot of things - including the acoustics of
your room, the characteristics of your main speakers, and practical considerations like where you
have room for it. (Whole books have been written about the subject - and even experts often
disagree.) The important thing is to nd a location that delivers the sound you want, and ts with
your room decor.
Some frequently chosen locations include: in the front between your main front speakers,
in a front or rear corner, or in the center of a side wall or rear wall. Each has advantages and
disadvantages, and each may or may not work well in your particular system.
One way of choosing a good location is sometimes humorously referred to as the “subwoofer
crawl”. To use this method, you connect your subwoofer temporarily to your audio system, place
the sub in your normal listening position, where you would normally sit, and play music through
it with plenty of bass. You then crawl around on the oor, stopping and listening at each location
where you’re considering putting your sub. Once you nd the spot where the bass sounds the
best and cleanest, you switch places with the subwoofer, placing it in the location where the bass
sounded the best. This often turns out to be a good location for your sub.
How you congure your BasX subwoofer will depend on the type of system you have.
Conguring your BasX Sub to Work with an AVR or Surround Sound Pre/Pro
Setting your BasX sub to work with an AVR or pre/pro that has its own bass management is quite
simple (this will work for most systems that have a subwoofer output).
- Connect the subwoofer or LFE output on your pre/pro or receiver to the LFE input on
your BasX sub.
- Set the Crossover Control on the BasX sub to LFE, which is fully clockwise.
- Set the Volume Control on the BasX sub to a setting where the level of the low bass seems about
right by ear.
- Adjust the Phase Control to the setting where you hear the MOST bass in the frequency range
where the sub overlaps with your main speakers.
- Use the adjustments on your receiver or pre/pro to dial your settings in perfectly, or run the
automatic room correction and let it do all the work for you. The procedure will be slightly
dierent on each system because each piece of equipment oers dierent manual controls and
dierent automatic options.

Page 15
BasX Subwoofers
If your AVR or pre/pro has a full range subwoofer output (but not bass management), then
there’s one additional step.
- AFTER you’ve set the Phase Control for the most bass, go back and adjust the Volume
and Crossover Controls for the best sound. The Crossover Control controls the overlap
between your subwoofer and your main speakers; you want to set it so that your sub blends
smoothly with your main speakers, without a bump or dip where they overlap, and without
a sharp transition from one to the other. The Volume Control is used to set the relative level
between your sub and main speakers. A good rule of thumb is that the bass should sound
solid, but you should not hear the sub as a distinct separate sound source; try turning the
Volume Control up until you barely notice the sub, then back down a tiny bit.
Note: The way your main speakers and sub blend together will sound slightly dierent at
dierent locations in the room. These adjustments should be made by listening at your
normal listening location... If your equipment is located across the room, walk back to
your favorite chair and listen to the results from there each time you make an adjustment.
Note: After you’ve congured everything on your pre/pro, or used your automatic room
correction to do so, you should AVOID changing the Crossover and Phase Control settings
on your BasX sub as this will change the way it sounds. However, you may use the Volume
Control to increase or reduce the amount of bass to suit your taste.
Conguring your BasX Sub Manually
If you’re connecting your BasX sub to a stereo system that doesn’t have a subwoofer output,
you’ll be using the controls on the BasX sub to make it t perfectly with your main speakers.
- First you’ll need to take a set of main outputs and connect them to BOTH inputs on your
BasX subwoofer. It doesn’t matter which channel you connect to the red input and which
to the white input since they’re summed together. If you only have one set of main outputs,
you can use a pair of splitter cables to send a copy of those signals to your BasX sub.
- Start with the Volume Control all the way down; with the Phase Control set to 0 degrees,
and with the Crossover Control set to the far right - to LFE.
- Now, play some music with plenty of bass, and that you are familiar with.
- Turn the Volume Control up until the amount of bass sounds more or less correct.
- Use the Phase Control to adjust for the MOST bass in the frequency range where your sub
and main speakers overlap.
- Fine tune the setting on the Volume Control so that the amount of low bass and middle
frequencies seem about right in proportion to each other. At this point you’ll probably have
a bump in the frequency response where the sub and your main speakers overlap.
- Finally, turn the Crossover Control to the left to reduce the overlap between your sub and
main speakers until everything sounds best. (You’re lowering the crossover frequency to
eliminate the overlap between the sub and your main speakers.)
- If necessary, you can adjust the Volume Control one nal time to get things just right.

Page 16
BasX Subwoofers
Connections
Although the BasX subwoofers have no special connection requirements, the following
suggestions may be helpful:
• Always use high-quality interconnects between your subwoofer and your source equipment.
• Keep interconnects as short as possible, and avoid running interconnects next to power
cables whenever possible.
• Emotiva oers high quality interconnect cables at reasonable prices
(you will nd them on our website at www.emotiva.com)
/