Page is loading ...

( L-Series )
Our most powerful and precise True Time® sonar engine now comes with
the lightest, longest lasting, and fastest charging power source. Reduction
in weight along with increased run times and faster recharge rates means
you’ll spend more time fishing and less time re-powering. The L-Series
comes equipped with a 12-volt 10-amp LiFePO4 battery weighing less
than 3 pounds. *Estimated run times: 50 hours (M3L), and 36 hours
(M5L).
( Li-Series )
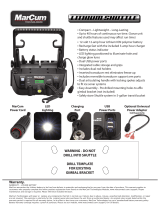
Add the long-life power of Lithium ION to your sonar units. Compact,
lightweight and long-lasting, the Lithium Shuttle, powered by a 12-volt
12-amp hour Lithium ION polymer battery, can extend your unit’s continu-
ous run time. Equipped with a LED light, battery status indicator, dual USB
power ports, dual rod holders, and four 1/4 - 20 Ports for Additional Acces-
sories. *Estimated run times: 60 hours (M3Li), and 43 hours (M5Li).
Warranty
MarCum warranties this product to be free from defects in materials and
workmanship for two years from the date of purchase. The warranty of the
battery may differ from the system warranty, see website for details. This
warranty applies to customers who properly complete the Online product
registration form found on the MarCum Technologies Website:
www.MarCumTech.com
M-Series
3-Color Ice-Sonar
Quick Start Guide
www.MarCumTech.com
Lead Acid ( M1 )
Your MarCum Flasher comes equipped with a 12-volt 7-amp Lead Acid
battery. Average run times will be between 12 and 15 hours. Weight of the
battery is around 6 pounds. All you need to do is hook up the positive and
negative leads from the power cord to the battery.
*Estimated run time: 30 hours (M1).
Battery Options
Service
If your unit is malfunctioning, check the support section of our website.
You may find that the solution to your problem is something you can
resolve yourself. If you need to send it in, there is no need to contact our
office. Getting repairs made is as simple as going to our website, Www.-
MarCumTech.com clicking the support tab and then filling out the MarCum
Warranty claim.
MarCum User Manuals are available for download from www.MarCumTech.com
Les manuals d'utilisation de MarCum sont disponibles en téléchargement sur www.MarCumTech.com
*Actual run times may vary depending on conditions.
22-1012-80030 2020-0501

Connect Power
Your MarCum Flasher comes virtually ready to fish. All you need to do is
hook up the positive and negative leads from the power cord to the
battery. To access the battery, open the battery access door at the rear of
the unit. Connect the red wire to the red terminal and the black wire to the
black terminal on the battery.
Deploy the Transducer
When used in conjunction with the retractable pivoting transducer arm
and rubber stopper, the transducer will automatically level itself in your ice
hole. To begin operation, take the transducer out of the recessed holder,
and rotate the adjustable ice arm out from inside the shuttle. Extend the
transducer arm, (the cable should already be threaded through it with
stopper in place) and deploy the transducer into the water.
Power up the system
The Range select knob is used for turning the unit on or off, as well as
choosing the correct depth range. The Flasher offers four depth ranges to
choose from that can be selected by rotating the knob clockwise. The
depth ranges are 20, 40, 80, or 160 feet. The depth-range setting is
determined by turning the unit on and turning the Gain knob looking for a
solid return (band of light) indicating bottom on the display.
Adjust the Gain
The best Gain setting is achieved by turning up your Gain from 0 until you
receive a clear and steady bottom reading. If you’re looking for your lure
or bait, turn up the gain until you just begin to display your bait without it
fading or flickering on the screen. The lower the sensitivity, the narrower
the display segments, the easier it is to distinguish targets.
Bottom Return
Hard-bottom readings (rock or gravel) will be displayed by a wide band of
RED light indicating a strong signal. Conversely, a soft bottom (mud or silt)
will return a weaker signal and will result in a narrower RED band or even
a combined RED and GREEN band. A soft bottom with weed growth will
often appear as a narrow RED or GREEN band combined with both solid
and broken YELLOW segments indicating weeds.
Jig Return
The Flasher will pick up and display small objects like jigs, split shot, or
swivels. When tuning the unit to display your lure or bait, lower the object
to the desired depth and turn up the GAIN until you see the jig on the
display. It is important that the GAIN be set so it displays the jig as you
raise or lower it.
SFL Button ( M5L Systems Only )
This feature allows the user to improve target separation to 3/4 of an inch
and still utilize the full screen display. When the SFL key is depressed, a
RED LED will light to indicate that the SFL feature has been activated.
Utilizing Superfine Line changes the transmit pulse, narrows the display
segments, and improves the target separation to 3/4 of an inch.
Charging
To charge, simply couple the end of the charger with the end of the wiring
harness. It is also normal for the light on the charger to be green if it is just
plugged into the wall. When it is plugged into the wall and battery, you will
see a red LED light appear on the charger. If the light is red, the battery is
being charged. When your battery is fully charged, this red light will
change to green.
Zoom Function
When the ZM key is depressed, the circular display is divided in half. The
right half of the display (12 to 6 o’clock on the dial) will become the entire
depth range you chose when turning the depth range knob. The left side
of the display is the Zoom window portion. If the unit will not go into zoom
mode, turn the GAIN up to 10. Once Zoom is active, turn the GAIN back
down to a normal operating level. The M1 has bottom lock Zoom Only.
Up/Down Buttons ( M3L & M5L Systems Only )
When you first depress the ZM button and then the Up/Down Button, you
will see two blinking yellow lights that are 5 feet apart on the yellow scale
on the flasher dial. You can move the zoom window up or down to your
desired depth range. You can select a 10-foot zoom window by pressing
the zoom button a second time and depressing the down button. You will
now see a 10 foot zoom window and can move it to your desired depth.
IR Button
When other sonar units are causing interference to the display, activate
the IR feature by depressing the IR key. When you press the key, a beep
will be heard. There are 12 levels of Interference Rejection, and each
press of the key will change the level of Interference Rejection. The
correct level of IR will be achieved when the display is clear of display
clutter.
NBT Button ( M5L Systems Only )
This feature allows you to change your transducer cone angle from 20° to
8°. The 8° cone angle should be used in deep water, shallow water with
heavy weeds, or when fishing in close proximity to other anglers with
heavy interference.
/


