Huawei Mate 20 lite Owner's manual
- Category
- Smartphones
- Type
- Owner's manual
This manual is also suitable for

User Guide

Contents
Exciting Features
Featured Usage Tips 1
Camera Tips 1
Manage Your Phone 3
New Device
New Device
Conguration 7
Home Screen
Navigation Bar
9
Notication Panel and Status Bar 10
Set a Lock Screen Password to Protect Your Privacy 10
Home Screen Management 11
Contacts
Managing Business Cards
15
Merging Third-party App Contacts 16
Dialling
Basic Calling Functions
18
VoLTE: Make Calls and Use Data at the Same Time 19
Message
Manage Messages
20
Camera
Basic Camera Functions
21
Use Wide Aperture Mode to Highlight Your Shooting Subjects 23
Use Panorama Mode to Take Panoramic Photos 23
Use 3D Panorama to Take 360-degree Photos 24
Light Painting Mode 25
More Capture Modes 28
Gallery
Customise Highlights Albums
30
Organise Photo Albums 31
Phone Manager
Email
Manage Email Accounts
34
Import Important Events to Calendar 34
Set Auto Response for Exchange Email 34
i

Calendar
Navigate the Calendar 35
HUAWEI ID and Multiple Users
Set and Use Multiple Users 37
Device Connection
Huawei Share 39
Security and Privacy
Fingerprint
42
Enable or Disable Location Services 44
PrivateSpace 45
Enable App Lock 47
Password Vault 47
Backup and Restoration
Reset Your Phone
49
Wi-Fi and Network
Wi-Fi
50
Share Your Mobile Network with Other Devices 51
Apps and Notications
App Twin: Log in to Two Social Media Accounts at Once
53
Sound and Display
Congure
Do Not Disturb Mode 54
Congure Your Sound Settings 54
Use Shortcuts to Access Frequently Used Features 55
Storage
Enable Storage cleaner
56
Smart Assistance
Access Phone Functions from Anywhere with Navigation Dock
57
System
Change the Input Method
58
Accessibility 58
General Settings 58
Legal Notice
Legal Notice
62
Personal Information and Data Security 64
Obtaining help 64
Contents
ii

Exciting Features
Featured Usage Tips
Access Phone Functions from Anywhere with Navigation Dock
In order to close an app or return to the home screen, you must use the navigation bar at the bottom
of your Phone. You can enable the Navigation dock feature on your Phone to avoid using navigation
buttons and to comfortably operate your device with one hand.
Open Settings. Go to System > System navigation > Navigation dock and enable
Navigation dock. The Navigation dock will appear on the screen. You can then drag it to your
preferred location. The Navigation dock can perform the following actions:
l Back: Touch the Navigation dock once to go back one step, or touch it twice to go back two steps.
l Home: Touch and hold the Navigation dock and then release it to go to the home screen.
l View background apps: Touch and hold the Navigation dock and then swipe left or right to view
any apps that are running in the background.
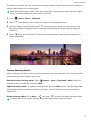
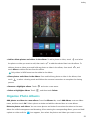
Camera Tips
Use 3D Panorama to Take 360-degree Photos
Try the 3D panorama function to capture a 360-degree view of a scene or person.
There are two shooting modes for the 3D panorama function:
l Shooting objects: Go to Camera > More > 3D panorama. Touch and hold , then follow
the onscreen prompts to slowly move your Phone around your subject in one direction. Release
to stop shooting. After shooting, touch the camera thumbnail, and then touch
3D
above the
photo to generate a 3D panoramic photo.
l Shooting scenery: Go to Camera > More > 3D panorama. Touch and hold , then follow
the onscreen prompts to slowly move your Phone around your subject in one direction. Release
to stop shooting. After shooting, touch the camera thumbnail, and then touch
3D
above the
photo to generate a 3D panoramic photo.
After a 3D panorama has been generated, you can tilt your Phone or drag the photo to view the 3D
effect.
Use Panorama Mode to Take Panoramic Photos
Panoramas provide a wider viewing angle than ordinary photos, letting you take sweeping landscape
shots.
1

To capture a panorama shot, the camera takes multiple photos of objects within our visual eld and
stitches them together into a single photo.
When taking a panorama, nd a wide, open space that is some distance away from the subject
and try to avoid backgrounds that are all in one colour.
1 Go to Camera > More > Panorama.
2 Touch at the bottom of the screen to congure the shooting direction.
3 Hold your Phone steady, and then touch to start shooting. Slowly move the Phone in the
direction indicated, holding the device steady and ensuring that the arrow stays level with the
centre line.
4 Touch when you are nished. The camera will automatically stitch the photos together to
create a panorama.
Custom Shooting Modes
Want to discover new ways of using your camera besides the preset functions? You can download or
delete shooting modes based on your needs.
Download more shooting modes: Open Camera > More > Download > More. Select the
shooting modes to download, and touch ADD.
Update shooting modes: To update shooting modes, go to the More screen. The shooting modes
with available updates will have red dots next to them. You can follow the onscreen prompts to
update them.
Delete shooting modes: Go to More > , and touch to delete unneeded shooting modes.
To ensure that Camera works normally, preset shooting modes cannot be deleted.
Exciting Features
2

Manage Your Phone
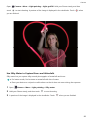
Enable Password Vault
Forget your password when logging in to an app? Password vault saves and automatically lls in your
passwords, allowing you to log in to apps on your Phone more conveniently and securely.
Enable or disable Password vault: Password vault is enabled by default. After you update your
Phone, you can enable Password vault by performing the following operations:
1 You need to enter the lock screen password to log in to Password vault. Open Settings, and
go to Security & privacy > Password vault.
2 Enter the screen lock password to access the Password vault screen.
3 Enable Password vault. When you log in to the app for the rst time and select SAVE, the login
account and password are automatically saved. When you log in to the app again, the password is
associated with one of the encryption methods such as your facial image by default, which is
convenient and secure.
4 Enable or disable
Autoll settings for a single app. If the automatic lling function is enabled for
an app, you can use a facial image or ngerprint to automatically ll in the password when you
log in to the app, which is convenient and secure. If the automatic lling function is disabled for an
app, you must enter the account and password to log in to the app.
Enable App Lock
App lock allows you to set a password for your WeChat, Alipay, and other important apps. Once you
restart your Phone or unlock the screen, you will be asked to enter your App lock password when
opening the apps for the rst time. App lock enhances the protection of your private information and
prevents unauthorised access to important apps on your device.
Enable App lock: Open Settings. Go to Security & privacy > App lock. When you access the
app for the rst time, follow the onscreen instructions to set the password and enter the app lock. In
subsequent access, you can directly enter the app lock password. On the App lock screen, enable App
lock for the apps you want to protect. When accessing a locked app for the rst time, you need to
enter the password in the password text box. If you forget the password, touch Forgot password,
enter the answer in the password protection question box, and reset the password. If you have not
set the password protection, the Forgot password option is not available.
If you have set up a
ngerprint and facial recognition to unlock your Phone and are opening App
lock for the rst time, you can follow the onscreen instructions to associate your ngerprint and
facial recognition with App lock for easier app unlocking.
Modify your App lock password and password protection: Touch on the App lock screen,
and then touch Change password or Change password protection to modify your App lock
password or password protection.
Exciting Features
3

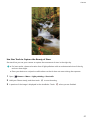
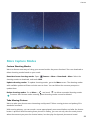
Set Your Home Screen Wallpaper
Tired of default wallpapers? Set a photo you like as your home screen wallpaper to personalise your
home screen.
Open Settings, and then go to Home screen & wallpaper > Wallpaper. You can:
Set a picture as your home screen wallpaper: Touch Gallery or select a preset wallpaper in your
device, and follow the onscreen instructions to select Lock screen, Home screen or Both.
Set a photo as your wallpaper from Gallery: Have a great photo you want to set as your
wallpaper? In Gallery, open the photo that you like, go to > Set as > Wallpaper, and
follow the onscreen instructions to set the photo as your home screen wallpaper.
Manage Your Home Screen Widgets
Want to quickly manage widgets on your home screen? You can add, move or delete home screen
widgets to tidy up your home screen and make it easier to use.
Add widgets: Touch and hold an empty area on the home screen to enter home screen editing
mode. Touch Widgets, touch and hold a widget and drag it to an empty area on the home screen, or
touch the widget you want.
Exciting Features
4

Check that there are enough empty spaces on the home screen for the widget. If there is not
enough space, add an empty screen page or free up some space on the current home screen
page.
Delete widgets: Touch and hold a widget on the home screen until your Phone vibrates, and then
select Remove.
Move widgets: Touch and hold a widget on the home screen until your Phone vibrates. Drag the
widget to any position on the screen.
Use App Drawer to Store Apps
Want to store your apps in one location on your home screen to make your home screen look
cleaner? You can enable app drawer on your home screen to store all your apps and free up space on
your home screen.
Open Settings, go to Home screen & wallpaper > Home screen style, and select Drawer. If
you want to switch back to a standard home screen, select Standard.
Add an app icon from app drawer to the home screen: After you enable app drawer, touch
on the home screen to enter the app list. From the app list, touch and hold the app icon that
you want to add until your Phone vibrates, and then drag it to the desired position on the home
screen.
Enable TalkBack to Have Onscreen Content Read Aloud
TalkBack reads aloud content on the screen that you touch, select, or activate. It is a useful tool that
helps visually impaired users interact with their Phone.
1 Open Settings and go to Smart assistance > Accessibility > TalkBack > to open the
TalkBack settings screen.
2 Enable TalkBack and touch OK. Your device will launch a tutorial when you enable TalkBack for
the
rst time. If you need to listen to the tutorial again, touch , open the TalkBack settings
screen, and then launch the tutorial.
3 Touch and enable Explore by touch. When Explore by touch is enabled, your device will
read out content that you touch.
Why does my Phone suddenly start reading out content on the screen? How do I disable this
feature? You may have enabled TalkBack by accident. To disable TalkBack, press and hold the Power
button until your device vibrates, and then touch the screen with two ngers for at least three
seconds.
Enable Storage cleaner
Your Phone may slow down over time as your storage space gets smaller. You can use memory
cleanup to free up storage space, improve system performance, and keep your Phone running
smoothly.
Exciting Features
5

Open Phone Manager, touch Cleanup, and clean up memory and cache based on the scan
results to speed up your device's performance. If your storage space is still low, you can perform a
deep clean to free up more storage space based on the scan results and cleanup recommendations.
Exciting Features
6

New Device
New Device Conguration
Enrol a Fingerprint
You can enrol a ngerprint on your Phone and then use your ngerprint to unlock your screen or
access your Safe or App Lock without a password.
l Fingerprint unlocking is only available when your unlock method is set to Pattern, PIN or
Password. You will be required to unlock your Phone using the screen unlock password after
the device is restarted or if your
ngerprint is not recognised.
l Before enrolling a ngerprint, make sure your nger is clean and dry.
1 Open Settings.
2 Go to Security & privacy > Fingerprint ID > Fingerprint management > Change unlock
method, select Pattern, 4-digit PIN, Custom PIN or Password, and then follow the onscreen
instructions to set an unlock password.
3 Once you have set an unlock password, touch New ngerprint to enrol a ngerprint.
4 Place your ngertip on the ngerprint sensor. Press down lightly on the sensor until your device
vibrates. Repeat this step using different parts of your ngertip.
5 After enrolment is complete, touch OK.
To unlock the screen, simply place your
ngertip on the ngerprint sensor.
Connect to Wi-Fi
By connecting your device to a Wi-Fi network, you can effectively save mobile data.
To avoid potential security risks (such as unauthorised access to your personal data and
nancial
information), please exercise caution when connecting to a public Wi-Fi network.
7

Connect to a Wi-Fi Network: Open Settings, go to Wireless & networks > Wi-Fi, and enable
Wi-Fi. Touch a Wi-Fi network to access it, and enter the network password or complete the
authentication if required. Alternatively, you can scroll to the bottom of the menu, touch Add
network, and follow the onscreen instructions to add a network hotspot by entering its name and
password.
New Device
8

Home Screen
Navigation Bar
Congure Your Navigation Bar Layout
Using the navigation bar, you can conveniently access the home screen, return to the previous page,
exit an app, or view recent apps used.
To congure your navigation bar layout, go to Settings, then go to System > System
navigation > Three-key navigation > Settings, and select the navigation key combination and
enable or disable Hide navigation keys based on your usage habits.
l Back key: Touch to return to the previous page or exit an app. Touch to close the onscreen
keyboard when inputting text.
l Home key: Touch to return to the home screen. Touch and hold to display the HiVoice icon
and swipe upwards on the icon to enable HiVoice features.
l Recent key: Touch to open a list of recently used apps. Touch and hold to enable split screen
mode.
l
Downward swipe notication key: Touch to open the notication panel.
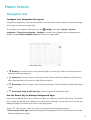
Use the Recent Key to Manage Background Apps
If you want to quickly switch to a recently used app, you might try using the Recent key. The Recent
key can help you quickly switch between several recently used apps. You can also use it to close your
background apps to increase your Phone's operating speed.
Touch
. You can view, switch to, close, or lock recently used background apps:
l View recently used apps: Recently used apps will be displayed on the screen and you can check
them by swiping left or right.
9

l Switch to a recently used app: Swipe left or right on the screen to nd the app you want to use,
and touch the app tab.
l Close an app: Swipe up on an app tab to close the corresponding app.
l Close all apps: Touch to close all apps.
Notication Panel and Status Bar
Disable Disruptive App Notications
Find it annoying to receive so many different types of app notications? You can set and disable app
notications to prevent this from happening.
Open Settings, and go to Notications. You can:
l Prevent all apps from pushing notications: Touch Batch management, and then turn off All.
Customise Notications
Not a fan of the default notication reminders? You can customise your notication reminders so that
you get your notications the way you want them.
Open Settings, then go to Notications > More notication settings. From here you can:
l Enable Notications turn on screen: Enable Notications turn on screen. When your Phone
screen is off, it will turn on when a notication is received.
l Set Pulse notications light: Turn on Pulse notication light, and the notication light will ash
whenever you receive new notications.
l Set notication method: Touch Notication method. Depending on your preferences, you can
select Icons, Numbers, or None.
Set a Lock Screen Password to Protect Your Privacy
Your Phone stores a lot of sensitive information, such as personal photos, contact information,
banking apps (for example, Alipay). Set a lock screen password so that a password is required each
time you unlock your Phone. A lock screen password helps to protect your private information if your
Phone is lost or accessed by an unauthorised user.
Set a lock screen password: Open Settings, go to Security & privacy > Lock screen
password, and set the type of lock screen password you prefer.
l Set a PIN: A PIN number is a sequence of digits. Entering a PIN to unlock your Phone is quick and
simple. For better security, use a long sequence of random numbers as your PIN. Go to Set lock
screen password, follow the prompts to set up a PIN. Alternatively, touch Change unlock
method, and set 4-digit PIN or Custom PIN.
l Set a pattern: Unlock your Phone by drawing a preset pattern on the screen. For better security,
use a pattern that includes overlapping line segments. Go to Set lock screen password > Change
Home Screen
10

unlock method > Pattern and draw the same pattern twice. The pattern must connect at least 4
dots.
l Set a password: A password made up of numbers, letters, and special characters is more secure
than a PIN or pattern. For better security, use a password with 8 or more characters that includes
numbers, letters, and special characters. Be sure to memorize the password so that you don't get
locked out of your Phone if you forget it. Go to Set lock screen password > Change unlock
method > Password, follow the prompts to set up a password.
l Unlock your device using a smart band: If your device supports unlocking with a smart band,
the screen will automatically light up when the band comes within 80 cm of your device. Swiping
on the screen of your Phone will instantly unlock the device. Touch Smart unlock, and follow the
onscreen prompts to complete the setup.
l Unlock your device using a
ngerprint: If your device supports ngerprint unlock, this is the
recommended unlock method. Using a ngerprint is a secure and quick way to unlock the
device. After setting a lock screen password, touch Enrol in the dialog box that pops up and
follow the onscreen prompts to enrol your ngerprints.
l For security reasons, please do not disable the lock screen password: A lock screen
password prevents unauthorised access to your device. For the security of your device, do not
select Disable lock screen password as the screen lock method.
l Regular password prompts help you to remember your password: If you have not
entered your screen lock password for 3 days, the system will require that you enter the
password to unlock your device.
Home Screen Management
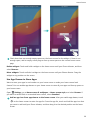
Manage Home Screen Icons
Is your home screen cluttered with app icons? You can move or delete icons from the home screen or
sort and move them to folders for more convenient use.
Move a home screen icon: From the home screen, touch and hold an app icon until your Phone
vibrates, then drag it to any position on the home screen.
Delete an app: From the home screen, touch and hold the icon of the app you want to uninstall until
your Phone vibrates, and then touch Uninstall. Follow the onscreen prompts to delete the app.
To ensure that the system runs normally, some preinstalled system apps cannot be uninstalled.
Create a folder: From the home screen, touch and hold an app icon until your Phone vibrates, then
drag it on top of another icon. The two icons will now be placed in a new folder.
Home Screen
11

Delete a folder: Open the folder, touch , deselect all the apps, then touch OK. The folder will be
deleted automatically and all the app icons in the folder will be moved to your home screen.
Rename a folder: Open the folder, touch the folder name and enter a new name.
Add or remove app icons from a folder: Open the folder, touch , select or deselect apps and
then touch OK. The selected app icons will be automatically added to the folder while the deselected
apps will be removed from the folder.
Another way to remove an app icon from a folder is to touch and hold the icon in the folder until
your Phone vibrates, and then drag it to the home screen.
Manage Your Home Screen
Too many icons on your home screen? You can add a new page to your home screen and customise it
to your liking.
Touch and hold an empty area on the home screen to enter home screen editing mode. You can do
the following:
l Add a new screen page: Touch
at the left or right side of the screen to add a new screen
page.
l Delete an empty screen page: Touch to delete the page.
Screen pages with app icons or widgets on them cannot be deleted.
Home Screen
12

l Modify screen page order: Touch and hold the screen page you want to move, then drag it to the
desired position.
l Set a default home screen page: Touch in the upper part of the home screen to set the
selected screen page as your default home screen page.
Set Your Home Screen Wallpaper
Tired of default wallpapers? Set a photo you like as your home screen wallpaper to personalise your
home screen.
Open Settings, and then go to Home screen & wallpaper > Wallpaper. You can:
Set a picture as your home screen wallpaper: Touch Gallery or select a preset wallpaper in your
device, and follow the onscreen instructions to select Lock screen, Home screen or Both.
Set a photo as your wallpaper from Gallery: Have a great photo you want to set as your
wallpaper? In Gallery, open the photo that you like, go to > Set as > Wallpaper, and
follow the onscreen instructions to set the photo as your home screen wallpaper.
Manage Your Home Screen Widgets
Want to quickly manage widgets on your home screen? You can add, move or delete home screen
widgets to tidy up your home screen and make it easier to use.
Add widgets: Touch and hold an empty area on the home screen to enter home screen editing
mode. Touch Widgets, touch and hold a widget and drag it to an empty area on the home screen, or
touch the widget you want.
Home Screen
13

Check that there are enough empty spaces on the home screen for the widget. If there is not
enough space, add an empty screen page or free up some space on the current home screen
page.
Delete widgets: Touch and hold a widget on the home screen until your Phone vibrates, and then
select Remove.
Move widgets: Touch and hold a widget on the home screen until your Phone vibrates. Drag the
widget to any position on the screen.
Use App Drawer to Store Apps
Want to store your apps in one location on your home screen to make your home screen look
cleaner? You can enable app drawer on your home screen to store all your apps and free up space on
your home screen.
Open Settings, go to Home screen & wallpaper > Home screen style, and select Drawer. If
you want to switch back to a standard home screen, select Standard.
Add an app icon from app drawer to the home screen
: After you enable app drawer, touch
on the home screen to enter the app list. From the app list, touch and hold the app icon that
you want to add until your Phone vibrates, and then drag it to the desired position on the home
screen.
Home Screen
14

Contacts
Managing Business Cards
Scan Business Cards to Add Them to Contacts
Open Contacts, go to Business cards > Scan, and you can:
l Scan a single business card: Place the business card on a at surface and adjust the camera's
focus frame so that the contents on the business card are clearly displayed in the viewnder, then
touch .
l Scan multiple business cards: Switch to Multiple mode and follow the onscreen instructions to
capture multiple business cards.
The information on the business cards will be automatically converted into contact information and
saved in Business cards in your Phone.
To view a business card you have saved, open Contacts, select scanned contacts, then go to
Details.
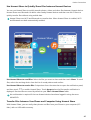
Share Contacts Using Electronic Business Cards
15

Share your business card: Open Contacts and touch My card to set your prole picture and
enter your name, work address, telephone number, and other information. Then touch and your
device will automatically generate your QR code business card. You can share your business card
directly using the QR code. Alternatively, touch , select a sharing method, and follow the
onscreen instructions to share.
Share contacts: Open Contacts, select the contact you want to share, and touch the QR code
icon in the upper right corner to share the contact using the QR code. You can also touch Share,
select a sharing method, and follow the onscreen instructions to complete the sharing process.
If the other party's device supports QR code analysis, they can directly take pictures of or scan QR
codes to add contacts.
Merging Third-party App Contacts
Associate Contact Information with Your Social Account
What does each contact in your Phone do? What are their emails? What are their job titles? You can
use third-party social media apps (such as LinkedIn) to
nd out more information about your contacts.
Associate LinkedIn account: Open Contacts, go to > Settings > Associate LinkedIn
account and follow the onscreen instructions to log in to your LinkedIn account. Once logged in,
Contacts
16

your Phone will automatically update your local contacts information. To sync all your LinkedIn
contacts information, from Contacts in LinkedIn settings screen, go to Sync LinkedIn contacts > All
LinkedIn contacts, and select Sync or Auto-update LinkedIn.
View contacts information provided by LinkedIn: Open a LinkedIn contact and touch View
LinkedIn prole online.
Disassociate LinkedIn contacts: Go to Contacts > > Settings > LinkedIn, and select
Disassociate.
View an Sender's Job Description
If you've just started a new job, you'll need to quickly gure out what all of your new colleagues do.
You can associate a social media account (such as LinkedIn) with your email contacts. The job
information of email senders will then be displayed on the email details screen.
From the Email inbox, open an email you have received. Go to email details, then touch the
sender's prole picture and select View LinkedIn prole.
Contacts
17
Page is loading ...
Page is loading ...
Page is loading ...
Page is loading ...
Page is loading ...
Page is loading ...
Page is loading ...
Page is loading ...
Page is loading ...
Page is loading ...
Page is loading ...
Page is loading ...
Page is loading ...
Page is loading ...
Page is loading ...
Page is loading ...
Page is loading ...
Page is loading ...
Page is loading ...
Page is loading ...
Page is loading ...
Page is loading ...
Page is loading ...
Page is loading ...
Page is loading ...
Page is loading ...
Page is loading ...
Page is loading ...
Page is loading ...
Page is loading ...
Page is loading ...
Page is loading ...
Page is loading ...
Page is loading ...
Page is loading ...
Page is loading ...
Page is loading ...
Page is loading ...
Page is loading ...
Page is loading ...
Page is loading ...
Page is loading ...
Page is loading ...
Page is loading ...
Page is loading ...
Page is loading ...
Page is loading ...
Page is loading ...
-
 1
1
-
 2
2
-
 3
3
-
 4
4
-
 5
5
-
 6
6
-
 7
7
-
 8
8
-
 9
9
-
 10
10
-
 11
11
-
 12
12
-
 13
13
-
 14
14
-
 15
15
-
 16
16
-
 17
17
-
 18
18
-
 19
19
-
 20
20
-
 21
21
-
 22
22
-
 23
23
-
 24
24
-
 25
25
-
 26
26
-
 27
27
-
 28
28
-
 29
29
-
 30
30
-
 31
31
-
 32
32
-
 33
33
-
 34
34
-
 35
35
-
 36
36
-
 37
37
-
 38
38
-
 39
39
-
 40
40
-
 41
41
-
 42
42
-
 43
43
-
 44
44
-
 45
45
-
 46
46
-
 47
47
-
 48
48
-
 49
49
-
 50
50
-
 51
51
-
 52
52
-
 53
53
-
 54
54
-
 55
55
-
 56
56
-
 57
57
-
 58
58
-
 59
59
-
 60
60
-
 61
61
-
 62
62
-
 63
63
-
 64
64
-
 65
65
-
 66
66
-
 67
67
-
 68
68


Huawei Mate 20 lite Owner's manual
- Category
- Smartphones
- Type
- Owner's manual
- This manual is also suitable for
Ask a question and I''ll find the answer in the document
Finding information in a document is now easier with AI
Related papers
-
Huawei P smart Pro User guide
-
Huawei Y9 S User guide
-
-
Huawei Y6 2019 User guide
-
-
-
Huawei Y9 Prime 2019 User guide
-
-
-
Huawei nova 5T User manual
Other documents
-
Honor View 20 User manual
-
Honor 8X Operating instructions
-
Honor 10 - COL-L29 Owner's manual
-
Honor Play Operating instructions
-
Honor 20 User manual
-
-
 Go Vault GV1005 User manual
-
 Wiley 978-0-470-94854-5 Datasheet
-
 wilson & bradley kia ora Installation guide
-
Memphis Wood fire grills Operating instructions


