Page is loading ...

Guarde este manual para futuras consultas.
Preguntas, problemas, o piezas faltantes? Antes de regresar a la tienda, llama al
Servicio al Cliente de Husky
de lunes a viernes entre 8 a.m. y 6 p.m.,
(hora del Eete de EE. UU.)
REFIMH300401AV-E/S 09/14.#
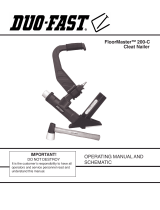
USE AND CARE GUIDE
Question, Problems,missing parts?
Before returning to the store, call
Husky Customer Service
8 a.m - 6 p.m, EST, Monday- Friday
We appreciate the trust and confidence you have placed in Husky through the purchase of this pneumatic nailer .
We strive to continually create quality products designated to enhance your home. Visit us online to see our full line of products available for
your home improvement needs. Thanks you for choosing Husky!
THANKYOU
1-888-43-HUSKY
HUSKYTOOLS.COM
Item# 1001 186 246
Model # HDUFL50
3-IN-1 FLOORING NAILER
FOR STAPLES, T CLEATS AND L CLEATS

WARNING: This product or its power cord may contain
chemicals known to the State of California to cause
cancer and birth defects or other reproductive harm.
Wash hands after handling.
Do not nail on top of another nail. This can cause
deflected and hit someone, or cause the tool to react and
result in a risk of injury to persons.
Alwaysweareyeprotection.Operatorandothersin
theworkareashouldalwayswearANSI-approved
safetygoggleswithsideshields.Eyeprotectionis
usedtoguardagainstflyingfastenersanddebris,
whichmaycausesevereeyeinjury.
Alwayswearhearingprotectionwhenusingthetool.
Prolongedexposuretohighintensitynoisemaycause
hearingloss.
Usesafetyequipment.Adustmask,non-skidsafety
shoesandahardhatmustbeusedfortheapplicable
conditions.Wearafullfaceshieldifyouareproducing
metalfilingsorwoodchips.
Dressproperly.Donotwearlooseclothingorjewelry.
Containlonghair.Keepyourhair,clothing,andgloves
awayfrommovingparts.Looseclothes,jewelry,or
longhaircanbecaughtinmovingparts.
Stayalert,watchwhatyouaredoingandusecommon
sensewhenoperatingapowertool.Donotusetool
whiletiredorundertheinfluenceofdrugs,alcohol,or
medication.Amomentofinattentionwhileoperating
thetoolmaycauseseriousinjury.
Keepproperfootingandbalanceatalltimes Proper
footingandbalanceenablesbettercontrolofthetool
inunexpectedsituations.
Donotuseonaladderorunstablesupports.Stable
footingonasolidsurfaceenablesbettercontrolofthe
toolinunexpectedsituations.
Makesurethehoseisfreeofobstructionsorsnags.
Entangledorsnarledhosescancauselossofbalance
orfootingandmaybecomedamaged,resultingin
possibleinjury.
Do not overreach. Keep proper footing and balance at all
times. Proper footing and balance enables better control
of the tool in unexpected situations.
Do not attach the hose or tool to your body. Attach the
hose to the structure to reduce the risk of loss of balance
if the hose shifts.
.
Table of Contents Safety Information
Readoperator’smanualTo reduce the risk of injury,
user must read and understand operator’s manual
before using this product.
:
EyeprotectionAlwayswearsafetygogglessafety
glasseswithsideshieldsorafullfaceshieldwhen
operatingthisproduct
,
:
,
.
RisktohearingAlwayswearearprotectionwhen
usingthistoolFailuretodosomayresultin
hearingloss
:
.
.
RiskofseriouspersonalinjuryNeverplacehands
oranyotherbodypartsinthefastenerdischarge
areaof thenailerthetoolmightejectafastener
andcouldresultindeathorseriouspersonalinjury
:
,
.
KeeptheworkareacleanandwelllightedCluttered
benchesanddarkareasincreasetherisksofaccidents
Donotoperatethetoolinexplosiveatmospheres,such
asinthepresenceofflammableliquids,gases,ordust
Thetoolcreatesasparkwhichmayigniteflammable
liquids,gasesordust
Keepbystanders,children,andothersawaywhile
operatingthetoolDistractionscouldresultinimproper
useandcauseinjury
Avoidunintentionalmisfires
.
.
.
.
.
.
. Always use caution to avoid
accidentally firing. Do not point towards yourself or
anyone whether it contains fasteners or not.
SYMBOLS
WORKAREASAFETY
1.
2.
3.
4.
WARNING: Instructions pertaining to a risk of fire,
electric shock, or injury to persons.
1.
2.
3.
4.
5.
6.
7.
8.
9.
PERSONAL SAFETY
WARNING: To avoid serious personal injury, do not
attempt to use this product until you read the manual
thoroughly and understand it completely. Save this
manual and review frequently for continuing safe
operation and instructing others who may use this
tool.
WARNING: When using tools, basic precautions
should always be followed, including the following.
HUSKYTOOLS.COM
Please contact 1-888-43-HUSKY for further assistance.
Table of contents-------------------------------------------------2
Safety information------------------------------------------------3
Symbols-------------------------------------------------------3
Work area-----------------------------------------------------3
Personal safety-----------------------------------------------3
Tool use and care---------------------------------------------4
Tool service----------------------------------------------------5
Air source------------------------------------------------------5
Operation------------------------------------------------------5
Air supply and connections----------------------------------6
Loading tool---------------------------------------------------6
Warranty-----------------------------------------------------------6
Unpacking---------------------------------------------------------7
Specification------------------------------------------------------7
Features-----------------------------------------------------------8
Operation ---------------------------------------------------------8
Loading cleat nails--------------------------------------------8
Loading staples-----------------------------------------------8
Unloading cleat nails and staples---------------------------9
Change the foot plate-----------------------------------------9
Adjust the front foot------------------------------------------9
Setting the air pressure-------------------------------------10
Operating the tool-------------------------------------------10
Clearing jams------------------------------------------------11
Maintenance-----------------------------------------------------11
Anti-dust cap------------------------------------------------11
Lubrication---------------------------------------------------11
Cleaning-----------------------------------------------------12
Cold weather operation------------------------------------12
Recommended hookup----------------------------------------13
Troubleshooting-------------------------------------------------14
10.
11.

Safety Information (Continued) Safety Information (Continued)
Always assume that the tool contains fasteners. Do not
point the tool toward yourself or anyone whether it
contains fasteners or not.
Wash hands after handling. This product or its power cord
may contain chemicals known to the State of California to
cause cancer and birth defects or other reproductive
harm.
12.
13.
TOOL USE AND CARE
WARNING: Disconnect the tool from the air source
before making adjustments, doing tool maintenance,
clearing jams, touching the safety yoke, leaving work
area, or unloading the tool. Such precautionary
measures reduce the risk of injury to persons.
Useclampsoranotherpracticalwaytosecureand
supporttheworkpiecetoastableplatform.Holdinga
toolbyhandoragainstthebodyisunstableandmay
leadtolossofcontrol.
Keepthetoolanditshandledry,cleanandfreefrom
oilandgrease.Alwaysuseacleanclothwhen
cleaning.Neverusebrakefluids,gasoline,petroleum-
basedproducts,oranystrongsolventstocleanyour
tool.
Donotusethetoolasahammer.
Neverusethistoolinamannerthatcouldcausea
fastenertobedirectedtowardanythingotherthanthe
workpiece.
Never use gasoline or other flammable liquids to clean
the tool. Never use the tool in the presence of flammable
liquids or gases. Vapors could ignite by a spark and cause
an explosion which will result in death or serious personal
injury.
Always fit the tool with a fitting or hose coupling on or
near the tool in such a manner that all compressed air in
the tool is discharged at the time the fitting or hose
coupling is disconnected. Do not use a check valve or
any other fitting which allows air to remain in the tool.
Death or serious personal injury could occur.
Never place hands or any other body parts in the fastener
discharge area of the tool. The tool might eject a fastener
and could result in death or serious personal injury.
Never carry the tool by the air hose or pull the hose to
move the tool or a compressor. Keep hoses away from
heat, oil and sharp edges. Replace any hose that is
damaged, weak or worn. Personal injury or tool damage
could occur.
Always assume the tool contains fasteners. Respect the
tool as a working implement; no horseplay.
Always keep others at a safe distance from the work area
in case of accidental discharge of fasteners. Do not point
the tool toward yourself or anyone whether it contains
fasteners or not. Accidental triggering of the tool could
result in death or serious personal injury.
Do not drop or throw the tool. Dropping or throwing the
tool can result in damage that will make the tool unusable
or unsafe. If the tool has been dropped or thrown,
examine the tool closely for bent, cracked or broken
parts and air leaks. STOP and repair before using, or
serious injury could occur.
Avoid using the tool when the magazine is empty.
Accelerated wear on the tool may occur.
Clean and check all air supply hoses and fittings before
connecting the tool to an air supply. Replace any
damaged or worn hoses or fittings. Tool performance or
durability may be reduced.
Donotusethetoolifitleaksairordoesnotfunction
properly.
10.
11.
12.
13.
14.
Knowthistool.Readmanualcarefully,learnits
applicationsandlimitations,aswellasthespecific
potentialhazardsrelatedtothistool.
Useonlyfastenersthatarerecommendedforyour
models.Donotusethewrongfastenersorloadthe
fastenersincorrectly.
Use only accessories that are identified by the
manufacturer for the specific tool model.Use of
unauthorized parts or failure to follow maintenance
instructions may create a risk of injury.
Use only those fasteners recommended for use with this
tool. Fasteners not identified for use with this tool by the
tool manufacturer are able to result in a risk of injury to
persons or tool damage when used in this tool.
Checkformisalignmentorbindingofmovingparts
breakageofpartsandanyotherconditionthatmay
affectthetool'soperation.Ifdamaged,havethetool
servicedbeforeusing.Manyaccidentsarecausedby
poorlymaintainedtools.
Maintaintoolswithcare.Keeptoolsclean.Aproperly
maintainedtoolreducestheriskofbindingandis
easiertocontrol.
Storetoolsoutofthereachofchildrenandother
untrainedpeople.Toolsaredangerousinthehandsof
untrainedusers.
Checkoperationofthetoolbeforeuse.
Donotforce thetool.Usethecorrecttoolforyour
application.Thecorrecttoolwilldothejobbetterand
saferattherateforwhichitisdesigned.
,
,
this
1.
2.
3.
4.
5.
6.
15.
16.
17.
TOOL USE AND CARE (CONTINUED)
Donotoperatethetoolifitdoesnotcontainalegible
warninglabel.
Always carry the tool by the handle. Never carry the tool
by the air hose.
18.
19.
20.
21.
23.
25.
22.
24.
TOOL SERVICE
Useonlyaccessoriesthatareidentifiedbythe
manufacturerforthespecifictoolmodel.
When servicing a tool, use of unauthorized parts of failure
of following maintenance instructions may create a risk
of injury.
Useonlythelubricantssuppliedwiththetoolor
specifiedbythemanufacturer.
Toolservicemustbeperformedonlybyqualifiedrepair
personnel.
1.
2.
3.
4.
Respectthetoolasaworkingimplement.
Neverengageinhorseplay.
Keepothersasafedistancefromthetoolwhiletool
isinoperationasaccidentalactuationmayoccur,
possiblycausinginjury.
OPERATION
Donotdrivefastenersnearedgeofmaterial.The
workpiecemaysplitcausingthefastenerricochet,
injuringyouorpeoplearound.
Duringnormalusethetoolwillrecoilimmediatelyafter
drivingafastener.Thisisanormalfunctionofthetool.
Donotattempttopreventtherecoilbyholdingthe
toolagainstthework.Restrictiontotherecoilcan
resultinasecondfastenerbeingdrivenfromthetool.
Gripthehandlefirmlyandletthetooldothework.
Failuretoheedthiswarningcanresultinserious
personalinjury.
Donotdrivefastenersontopofotherfastenersor
withthetoolatanoverlysteepangleasthismay
causedeflectionoffastenerswhichcouldcauseinjury.
Donotactuatethetoolunlessyouintendtodrivea
fastenerintotheworkpiece.
Alwayshandlethetoolwithcare:
to
1.
2.
3.
4.
5.
AIRSOURCE
Neverconnecttoanairsourcethatiscapableof
exceeding200 psi.Over pressurizing the tool can result
in bursting, abnormal operation, breakage of the tool or
serious injury to persons. Use only clean, dry, regulated
compressed air at the rated pressure or within the rated
pressure range as marked on the tool. Always verify prior
to using the tool that the air source has been adjusted to
the rated air pressure or within the rated air-pressure
range.
Never use oxygen, carbon dioxide, combustible gases or
any bottled gas as an air source for the tool. Such gases
are capable of explosion and serious injury to person.
1.
2.
7.
PERSONAL SAFETY (CONTINUED)
HUSKYTOOLS.COM
Please contact 1-888-43-HUSKY for further assistance.
8.
9.
AIR SUPPLY AND CONNECTIONS
Theconnectoronthe tool must not hold pressure when
air supply is disconnected. If an incorrect fitting is used,
the tool can remain charged with air after disconnecting
and thus will be able to drive a fastener even after the air
line is disconnected, possibly causing injury.
Do not use any type of reactive gases, including, but not
limited to, oxygen and combustible gases, as a power
source. Use filtered, lubricated, regulated compressed air
only. Use of a reactive gas instead of compressed air may
cause the tool to explode which will cause death or
serious personal injury.
Use only a pressure-regulated compressed air source to
limit the air pressure supplied to the tool. The regulated
pressure must not exceed 115psi. If the regulator fails,
the pressure delivered to the tool must not exceed 200
psi.
Alwaysdisconnectairsource:
1.
2.
3.
4.
Beforeunloading or makingadjustments.
Whenmaintainingthetool.
Whenclearingajam.
Whentoolisnotinuse.
Whenmovingtoadifferentworkarea.
Such precautionary measures reduce the risk of injury to
persons.

Safety Information (Continued)
Warranty
LOADINGTHETOOL
Do not load the tool with fasteners when any one of the
operating controls is activated.
Never place a hand or any part of body in the fastener
discharge area of the tool.
Never point tool at anyone.
WARNING: Thewarningsandprecautionsdiscussed
abovecannotcoverallpossibleconditionsand
situationsthatmayoccurItmustbeunderstoodby
theuserthatcommonsenseandcautionare
factorswhichcannotbebuiltintothisproductbut
mustbesuppliedbytheuser
.
,
.
HUSKY PNEUMATIC NAILER LIMITED TWO-YEARWARRANTY
ADDITIONAL LIMITATIONS
To the extent permitted by applicable law, all implied warranties, including warranties of merchantability or fitness for a particular
purpose, are disclaimed. Any implied warranties, including warranties of merchantability or fitness for a particular purpose, that
can not be disclaimed under state law are limited to two years from the date of purchase. HUSKY is not responsible for direct,
indirect, incidental, special or consequential damages. If this is used for commercial purposes, the warranty will
apply for ninety (90) days from the date of purchase. Some states do not allow limitations on how long an implied warranty lasts
and/or do not allow the exclusion or limitation of incidental or consequential damages, so the above limitations may not apply to
you. This warranty gives you specific legal rights, and you may also have other rights, which vary from state to state.
pneumatic nailer
1.
4.
2.
3.
5.
Thistoolkithasbeenshippedcompletelyassembled
Carefullyremovethetoolandanyaccessoriesfromthe
box
Inspectthetoolcarefullytomakesurenobreakageor
damageoccurredduringshipping
Donotdiscardthepackingmaterialuntilyouhave
carefullyinspectedandsatisfactorilyoperatedthetool
Ifanypartsaredamagedormissingpleasecall
1-888-43-HUSKY.
.
.
.
.
,
WARNING: If any parts are missing, do not operate the
tool until the missing parts are replaced. Failure to do
so could result in possible serious personal injury.
Unpacking
WARNING: Donotattempttomodifythetoolor
createaccessoriesnotrecommendedforusewith
the tool.Anysuchalterationormodificationis
misuseandcouldresultinhazardouscondition
leadingtopossibleseriouspersonalinjury.
This warranty covers defects in workmanship or materials in this HUSKY pneumatic nailer for the two-year period from the date
of purchase. This warranty is specific to this pneumatic nailer. Warranties for other products may vary.
Thiswarrantyappliesonlytotheoriginalretailpurchaserandmaynotbetransferred. This warranty does not cover normal
wear and tear or any malfunction, failure or defect resulting from misuse, abuse, neglect, alteration, modification or repair by
other than a service center authorized to repair branded air nailer. Expendable materials, such as O-rings, bumpers,
driver blades, seals, etc. are not covered by this warranty. This warranty does not apply toused in industrial
application or for rental purposes. makes no warranties, representations or promises as to the quality or performance of
its other than those specifically stated in this warranty.
HUSKY
HUSKY
pneumatic nailer
HUSKY
pneumatic nailer
Specifications
Air inlet: 1/4 inch NPT
Magazine capacity:
L Cleat &T Cleat: 100pcs,
Staples: 90pcs
Weight: 10.62 lbs
Maximum pressure: 115 psi
Pressure range: 70 psi – 115 psi
Pin size range: 1-1/2 inch to 2 inch
CompatibleWithGeneric Brands 1/2 Crown Staples, T-
Cleats, & L-Cleats.
”
HUSKYTOOLS.COM
Please contact 1-888-43-HUSKY for further assistance.
(15-1/2 Gauge)(16 Gauge)
0075. ” X0.063”
19X16mm
. . ()
T Cleats
38mm1-1/2”
45mm1-3/4”
50mm2”
9/32”(7.2mm)
38mm1-1/2”
45mm1-3/4”
50mm2”
7/32”(5.8mm)
LCleats
1-1/2”
1-3/4”
2”
38mm
45mm
50mm
1/2”(12.7mm)
Staples
(16 Gauge)
1.
2.
3.

Features
Revolutionary 3 in 1 design
For use with Staples, T-Cleats and L-Cleats.
Non-marring design
Provides increased protection from marring when
working with a finished flooring surface.
Durable construction
Light weight and durably constructed of high-strength
aluminum and heat treated steel parts.
Fiberglass mallet with rubber head included
Operation
Loading cleat nails
1
WARNING: The tool may fire when it is first connected
to the air resource. Always connect the tool to the air
source before loading fasteners to prevent injury from
unintended cycling.
Pull the pusher (A) back to the end of magazine. Lock the
pusher in the place by using the Lock button (C). Then
pull the magazine side shelter (B) back.
Place a full clip of desired fasteners into the magazine
from the side. Up to 100 cleat nails can be loaded into the
magazine. Note that, when loading the L cleat nails, the
side with the L head should be in the left of the magazine
side shelter (B). Press the lock button (C), then the pusher
(A) set back to make the magazine side shelter (B) down
back.
Pull the pusher (A) back to the end of magazine. Lock the
pusher in the place by using the lock button (C). Then pull
the magazine side shelter (B) back.
Place a full clip of 1/2 in. crown staples in the magazine
from the top. You can load up the 90 pieces into the tool.
Press the lock button (C), then the pusher (A) sets back to
make the magazine side shelter (B) down back.
Loading staples
2
WARNING: The tool may fire when it is first connected
to the air resource. Always connect the tool to the air
source before loading fasteners to prevent injury from
unintended cycling.
Operation (Continued)
Unloading cleat nails and staples
3
WARNING: Always unload all fasteners before
removing tool from service.
Unloading is the reverse of loading. Always disconnect the
air source before unloading.
WARNING: The tool may fire when it first connected to
the air source. Always connect the tool to the air
source before loading fasteners to prevent injury from
unintended cycling. Always make sure the tool's
magazine is empty at the beginning of each work
session, before connecting to an air source.
WARNING: Use only those fasteners recommended
for use with this tool. Fasteners not identified for use
with this tool by the tool manufacturer are able to
result in a risk of injury to persons or tool damage
when used in this tool.
Changing the foot plate
4
The tool is equipped with a factory pre-installed 3/4 in. foot
plate (D).
And an additional uninstalled 5/8 in. & 1/2 in. foot plate. To
change the plate:
Disconnect the tool from the air source.
Empty the magazine completely.
Fire the tool into a piece of scrap wood to ensure there is
no compressed air or fasteners left in the tool.
Set the tool on its side to expose the four screws (E).
Remove the four screws (E), then, remove the foot plate.
Align the four screw holes in the replacement foot plate
with the four threaded mounting holes.
Using the four screws you removed, secure the
replacement foot plate to the tool.
Ensure the correct foot plate is installed by firing into a
scrap piece of flooring and checking for proper fastener
placement.
WARNING: Disconnect the tool from the air source
whenever changing the foot plate.
Make sure there is no fastener in the magazine before
changing the foot plate.
Screws (E)
Foot plate (D)
Adjusting the front foot
5
The tool is equipped with an adjustable front foot, can be
adjusted for 3/4 in. - 5/8 in. wood floors. This tool is shipped
out set for 3/4 in. wood floor.
To adjust the front foot (F):
Disconnect the tool from the air source.
Empty the magazine completely.
Fire the tool into a piece of scrap wood to ensure. There
is no compressed air or fasteners left in the tool.
Set the tool on its side to expose the two bolts (G) and
two small plates (H).
Loose these two bolts (G) and two small plates (H) to
ensure move the front foot (F) in the range of the adjust
groove (I).
Adjust the proper position of the front foot (F) according
to the actual thickness of wood floors and then tightly
lock these two bolts (G) and two small plates (H).
Ensure the correct front foot set for the wood floor by
firing into a scrap piece of flooring and checking for
proper fastener placement.
HUSKYTOOLS.COM
Please contact 1-888-43-HUSKY for further assistance.
Magazine side
shelter (B)
Lock button (C)
Pusher (A)

Operation (Continued) Operation (Continued)
Front foot (F)
Small plate (H)
Bolts (G)
Adjust
groove (I)
Adjust
groove (I)
Hammer cap (K)
Hand grip (J)
Operating the tool
7
Attach the tool to the air source. Start your compressor
and check the pressure, making sure it is set between 70-
115 psi. Do not exceed the maximum115 psi.
Hold the hand grip (J) securely and press the foot plate
(D) to the work surface. Make sure the plate is over the
fastener target position.
Press down hard so that the foot plate is firmly contacting
the work surface. Then, using the mallet packed with the
tool, strike the hammer cap (K) firmly to drive the fastener
into the work surface. Lift the tool off the work surface.
Repeat this process until the job is completed.
When finished, make sure to store the tool in a clean, dry,
safe location out of reach of children and other
unauthorized people.
HammerCap (DownPosition)
HammerCap (UpPosition)
Clearing jams
8
Disconnect the tool from the air source.
Empty the magazine. Make sure all fasteners are
removed.
Try to fire the tool into a piece of scrap wood or flooring to
make sure that it's incapable of firing any fasteners.
Set the tool on its side to expose the two bolts (G) and
two small plates (H) under the screws.
Nose Bolts (L)
Driver guide (M)
WARNING: Disconnect the tool from the air source
whenever changing the foot plate.
Make sure there is no fastener in the magazine before
changing the foot plate.
WARNING: Extreme caution must be used whenever
this tool is connected to an air source. If the tool is
dropped, or if the hammer cap (K) is accidentally
struck, then the tool will fire a fastener, potentially
causing SERIOUS PERSONAL INJURY.
WARNING: Keep your feet off the tool.
WARNING: Before using the tool on a floor, test the
tool on a scrap piece of wood. Adjust the driving depth
by providing more or less air pressure. Never exceed
115 psi.
WARNING: An improperly functioning tool must not
be used. Do not actuate the tool unless the tool is
placed firmly against the work piece.
WARNING: Make sure there is no fastener in the
magazine before clearing a jam.
WARNING: Any time inspection, maintenance, and
cleaning are done:
Disconnect the tool from the air source.
Empty the magazine completely.
The amount of air pressure required depends on the size
of the fasteners and the workpiece material.
Begin testing the depth of the drive by driving a test nail
into the same type of workpiece material used for the
actual job.
Drive a test fastener with the air pressure set at 90-95 psi.
Raise or lower the air pressure to find the lowest setting
that will perform the job with consistent results.
Setting the air pressure
6
Occasionally, fasteners may become jammed in the firing
mechanism of the tool, making the tool inoperable. To
remove a jammed fastener, follow the steps below:
Removed these nose bolts (G) and two small plate (H).
Three nose bolts (L) can be seen after removing the front
foot (F).
Remove three nose bolts (L), and slide the driver guide
(M) out to expose the jammed fastener.
Remove jammed fastener, using plier or a screwdriver if
required.
Replace the driver guide (M) and nose bolts (L)
Replace the front foot (F), plate (H) and bolts (G).
Reload the tool with fasteners, then reconnect the air
source to the tool.
Press the drive guide (M) against a piece of wood, and
test fire the fasteners several times to check for proper
operation. If the tool is properly firing, you may continue
using the tool. If the tool fails to perform properly,
immediately discontinue use and have the tool repaired
by a qualified service technician.
Maintenance
Each tool is packed with an anti-dust cap on the air
connector, check it after unpacking.
Keep the anti-dust cap to cover the air connector when the
tool is not in use.
Frequent, but not excessive, lubrication is required for best
performance. Oil for the tool added through the air line
connection add will lubricate the internal parts. Do not
detergent oil or additives as these lubricants will cause
accelerated wear to the seals and bumpers in the tool,
resulting in poor tool performance and frequent tool
maintenance.
HUSKYTOOLS.COM
Please contact 1-888-43-HUSKY for further assistance.
Anti-dust cap
Lubrication
NOTE: Make sure the hammer cap on the flooring nailer
is in the up position before adding the air hose, if not, the
nailer may cycle (See below):

Maintenance (Continued)
Recommended hookup
CAUTION: Lubricate the tool only with specified
lubricants.
CAUTION: The work surface can become damaged by
excessive lubrication. Proper lubrication is the owner’s
responsibility. Failure to lubricate the tool properly will
dramatically shorten the life of the tool and void your
warranty.
CAUTION: Do not store tools in a cold weather
environment to prevent frost or ice formation on the
tools’ operating valves and mechanisms that could
cause tool failure.
CAUTION: The air compressor must be able to
maintain a minimum of 70 psi when the tool is being
used. An inadequate air supply can cause a loss of
power and inconsistent driving.
WARNING:Do not connect with an air compressor
which can potentially exceed 200 psi. The tool may
burst, possibly causing injury.
Disconnect the air supply from the tool to add lubricant.
Turn the tool so the air inlet is facing up. Place 2-3 drops
of pneumatic fastening tool oil into the air inlet. Do not
use detergent oils, oil additives, or air -tool oils. Do not
use detergent oil or additives as these lubricants will
cause accelerated wear to the seals and bumpers in the
tool, resulting in poor tool performance and frequent tool
maintenance.
After adding oil, run the tool briefly. Wipe off any excess
oil from the cap exhaust.
Avoid using solvents when cleaning plastic parts. Most
plastics are susceptible to damage from various types of
commercial solvents and maybe damaged by their use. Use
clean cloths to remove dirt, dust , oil, grease, etc.
CAUTION: Do not at any time let brake fluids, gasoline,
petroleum-based products, penetration oils ect. come
in contact with plastic parts. Chemicals can damage,
weaken or destroy plastic which may result in serious
personal injury.
For cold weather operation, near and below freezing, the
moisture in the air line may freeze and prevent tool
operation. We recommend the use of air tool lubricant or
permanent antifreeze (ethylene glycol) as a cold weather
lubricant.
The air compressor must be able to maintain a minimum
of 70 psi when the tool is being used. An inadequate air
supply can cause a loss of power and inconsistent
driving.
An oiler can be used to provide oil circulation through the
tool. A filter can be used to remove liquid and solid
impurities which can rust or gum up internal parts of the
tool.
Always use air supply hoses with a minimum working
pressure rating equal to or greater than the pressure from
the power source if a regulator fails, or 150 psi, whichever
is greater. Use 3/8 in. air hose for runs up to 50 ft. and use
a 3/8 in. quick coupler on the air hose.
Use a pressure regulator on the compressor, with an
operating pressure of 0-125 psi. A pressure regulator is
required to control the operating pressure of the tool
between 70 psi and 115 psi.
HUSKYTOOLS.COM
Please contact 1-888-43-HUSKY for further assistance.
Cleaning
Cold weather operation
Quick
Coupler
Air hose
Quick
Coupler
Quick
connector
Quick
connector
Oiler
Filter
Regulator
Compressor

Troubleshooting
Air leaking in head cap.
Loose screw.
Worn or damaged o-rings or seals.
Tighten screws.
Install overhaul kit.
Lack of power.
Slow to cycle.
Tool is too dry.
Air pressure too low.
Exhaust blocked.
Add about 2-3 drops of lubrication
into the air connector.
Make sure the air compressor is set
between 70 psi and 115 psi.
.Clean exhaust channel
Drive channel is worn.
Piston is broken or worn.
Bent fasteners.
Dirty magazine.
Loose magazine.
Wrong fasteners.
Fasteners are jammed
in the tool frequently.
Possible cause(s) Corrective action
Fix the drive channel.
Replace the piston.
Remove the bent fasteners,
Clean magazine.
Tighten screws.
Verify that fasteners are the correct
size.
Problems
Question, Problems,missing parts? Before returning to the store,
call Husky Customer Service
8 a.m - 6 p.m, EST, Monday- Friday
Retain this manual for future use.
Damaged pusher spring.
Wrong size of fasteners.
Not shooting fasteners. Replace spring.
Use 1/2 in.
.
crown staples or 1-1/2 in.
to 2 in. L cleat or T cleat nails
/