Page is loading ...

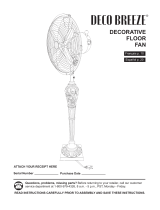
16” Metal Floor Standing Fan
Instruction Manual
READ AND SAVE THESE INSTRUCTION

1
16” Adjustable Floor Fan - Instruction Manual
Overview of Functions
Please read the following instructions carefully and retain a copy of this
information for future reference. When using this or any electrical
appliance, the following safety precautions should be strictly followed:
Safety & Warnings
1. Use the fan only for the specific purpose outlined in this
instruction information.
2. Do not operate fan until fully assembled.
3. Ensure the correct voltage is being used prior to plugging in
your fan (120V AC Electrical Outlet).
4. Unplug fan from outlet when not in use, when changing
locations, before assembly or disassembly, or prior to cleaning.
5. Do not immerse fan or expose fan to any form of liquid.
6. Avoid contact with all moving parts. Never insert your fingers,
pencils or other objects through the fan grill during operation.
7. Place your fan on a stable and level surface to avoid tipping or
being knocked over accidentally.
8. Do not operate the fan directly adjacent to curtains, plants,
window coverings, etc. to avoid accidental entanglement.
9. For indoor household use only. Do not use outdoors or for
industrial or commercial purposes.
10. To avoid potential fire hazards, never place your fan or its
electrical cord under rugs, or carpeting.
11. Place the electrical cord away from busy areas to avoid
accidental tripping and contact.
12. Always insert or remove plug from the outlet by grabbing the
plug by hand. Do not pull on the electrical cord.
13. Never operate your fan near an open flame or in the presence of
explosive or combustible gases or fumes.
14. Should your fan (including the electrical cord) ever become
damaged or a malfunction occurs, discontinue operation at once
until a certified repair has been made.
15. Do not expose your fan to excessive heat or humidity, as this can
cause damage to the electrical components.
16. Keep your fan out of the reach of children and pets.
17. Do not expose infants or seniors to prolonged periods of direct
cold air.

2
Fan Assembly
1. Carefully unpack the fan base, motor head, fan grill (front and
back) and fan blades from the Styrofoam packing cradle.
2. Attach the round fan base to the fan base pole by inserting pole
through round fan base and securing together using the black
center weight, washer and L shape screw – as shown in the
diagram.}
3. Remove the center lag bolt and
black plastic locking screw, the
small set screw and the black tilt
adjustment screw from the fan
motor attachment base. (see
Picture A)
4. Attach the fan motor to the
upright fan base by sliding down
and aligning the screw holes.
5. Then insert the lag bolt and secure
with the black plastic locking nut.
6. Re-insert the set screw and black
plastic tilt adjustment screw and
tighten securely.
7. Remove the black plastic locking nut
screw from the fan motor pin. (see
Picture A)
8. Remove the cap screws from the fan
motor face plate.
9. Fit the rear grill assembly onto the
motor pin by lining up the screw holes.
Make sure the fan grill handle is at the
top center of the alignment and re-
insert and tighten the screws in place.
(see Picture B)

3
10. Reattach the black plastic locking nut
by screwing clockwise until firmly
tightened.
11. Loosen the set screw on the fan blade assembly. (see Picture C)
12. Remove and discard the black protective covering from the fan
motor pin.
13. Slide the fan blade assembly onto the motor pin until flush with
the end of the pin and tighten the set screw securely. (see Picture
C)
14. On the outside edge of the front fan grill, open the 4 fan grill
clamps so they are positioned perpendicular to the grill.
15. Attach the front grill assembly to the rear grill assembly by
locking the top “fork” edge, then swing down and affix with the
metal clamps.
16. You are now ready to enjoy your fan!
Fan Use
1. The speed selector switch is located on the back of the motor
housing. To operate, simply twist the knob to the desired setting.
Your fan features 3 speed settings (I – Lowest Speed, II –
Medium Speed, III – Highest Speed). 0 – Fan is turned off.
2. The fan can operate in a stationary or an oscillating mode. To
shift between modes, simply pull up or depress the Oscillation
Button located next to the speed switch on the fan motor.
3. You can adjust the angle of your fan by adjusting the tilt
adjustment screw underneath the fan motor at the base. Be sure
to firmly tighten the screw when the desired angle is achieved.
Care & Cleaning
1. Always turn your fan to the off position prior to cleaning.
2. Clean parts with a duster or damp cloth. Prior to resuming use,
make sure all moisture is dry.
3. Do not immerse in any type of liquid or use abrasive cleaning
solutions.
4. Use care around the motor housing as no excessive moisture or
liquid should come in contact with the motor housing or its parts.
5. When storing your fan, make sure to place in a dry environment.
To reduce dust and particle exposure, it is best to cover your fan
– especially in the off-season period.

4
Warranty Information
One (1) Year Limited Warranty
Service instructions: DO NOT attempt to repair or modify any mechanical or
electrical parts of this fan. Doing so will void this warranty.
1. This Warranty applies ONLY to the original owner of this product.
2. This Warranty applies ONLY to the repair or replacement of any
manufactured parts of this fan unit. Global Product Resources, Inc. reserves
the right to determine if repair or replacement is warranted.
3. Operating the fan under conditions or usage not specified in the warnings,
instructions, or care directions, or attempts to repair or modify the fan in
anyway will render this Warranty void.
4. Unless otherwise prescribed by law, Global Product Resources, Inc. will not
be liable for any personal injury, property or any incidental or consequential
damage of any kind (including water damage) resulting from misuse, defects,
malfunctions, improper installation or alterations of this product.
5. All parts of this product are guaranteed for a period of one (1) year from the
date of purchase as follows.
6. If you experience any other problem or claim with this product, please
contact our customer service department at (800) 979-4FAN.
Return Instructions
Please follow the directions below when initiating a Warranty Return:
1. Please pack your fan in its original carton or other carton and packing
materials to insure no additional damage occurs in shipping.
2. Please include your full name, address with zip code and telephone
number.
3. Additionally, please include a copy of your original sales receipt or
Proof of Purchase.
4. Please also include a summary of the defect or problem that is
occurring with the unit.
5. All shipping charges to be paid by the sender.
6. Call (800) 979-4326 for return authorization.
This warranty gives you specific legal rights, and you may have other rights
which vary from state to state. The provisions of this Warranty are in addition
to, and not a modification of, or subtraction from, the statutory warranties and
other rights and remedies contained in any applicable legislation. To the
extent that any provision of this Warranty is consistent with any applicable law,
such provision shall be deemed voided or amended, as necessary, to comply
with such law.
Deco Breeze is a trademark of Global Product Resources, Inc.
/


