Page is loading ...

1.8
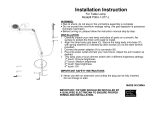
Installation Instructions for
Torpedo Pendant
700FJTRPN_
1
920FJTRPD
PENDANTS-LOW VOLTAGE
Adjust The Fixture Height
#6-32 SET SCREW
Back out (do not remove) the #6-32 set screw on tip of
the connector with the provided 1/16 Allen wrench.
1/16 ALLEN WRENCH
#6-32 OVAL HEAD
SET SCREW
Back out (do not remove) the #6-32 oval head set screw
on the conical connector with the provided 1/16 Allen
wrench.
Pull the coaxial cable out.
1/16 ALLEN WRENCH
Cut the coaxial cable to the desired length.
Gently twist the end of the coaxial cable between thumb
and forefinger.
Feed and push the coaxial cable into the conical
connector. The coaxial cable will come to a stop point
after being inserted 3/4" into the conical connector.
CONICAL CONNECTOR
OUTER WRAPPED
WIRE STOPS HERE
1A
1
1
1B
2
3
2
3
1C
4
5
5
1D
6
6
GENERAL PRODUCT INFORMATION:
This product is ETL listed and suitable only for indoor dry
locations and approved for use at any height above the
finished floor.
This product is patented (U.S. PAT. 6,183,297).

2
Keep pushing the coaxial cable into the connector while
rotating the connector to ease feeding the inner wire
into the tip of the connector. The outer wrapped wire
will start wrinkling while being inserted another 1/2" into
the connector.
WRINKLE ON OUTER
WRAPPED WIRE
INNER WIRE STOPS HERE
Look into the sight hole on the top of the connector to
make sure that the inner wire is contacting the end of
the connector.
Hold the coaxial cable in place and tighten the #6-32 set
screw on tip of the connector with the provided 1/16
Allen wrench. Make sure that this set screw
connection is tight.
SIGHT HOLE
INNER WIRE
1/16 ALLEN WRENCH
Tighten the #6-32 oval head set screw on the conical
connector firmly.
Pull the coaxial cable toward the fixture to smooth the
wrinkles.
1F
1E
7
8
9
7
8
9
1G
10
10
1H
11
11

3
Replacing the Lamp
CAUTION: To reduce the risk of a burn or electric
shock during relamping, disconnect the power to
the fixture.
NOTE: Use only your fingers and a soft cloth to
replace the lamp.
GROOVED
SHADE HOLDER
NEEDLENOSE
PLIERS
GROOVED SHADE
HOLDER TAB
If the accessory shade fits tight or loose onto the
Torpedo pendant, then carefully bend the grooved shade
holder tabs in or out slightly with needlenose pliers.
MR16 LAMP
GROOVED
SHADE HOLDER
ACCESSORY
Use MAX 50 Watt, MR16 Front Cover Halogen
Lamp.
Push the lamp pins into the socket and simultaneously
the accessory onto the grooved shade holder completely.
Round, Cone, Dichroic, Martini, Firebird, or Prism
Glass Shield; Belladonna; Bell; Tinkerbell; Lil Egypt;
Meteorite; Moonlet; or Droplet accessory are the
compatible accessories for the Torpedo pendant.
Put the MR16 lamp into the accessory.
Align the MR16 lamp pins with the Torpedo socket.
2A
2C
1
2
3
1
2
3
2B
4
4

4
SAVE THESE INSTRUCTIONS!
IMPORTANT SAFETY INSTRUCTIONS
To reduce the risk of fire, electrical shock, exposure to
excessive UV radiation, or injury to person:
– Use this fixture indoors only.
– Do not look directly at the lighted lamp.
– Do not remain in light if skin feels warm.
– Risk of fire: Use only the type of lamp and maximum
wattage indicated in this instruction manual.
– Never cover the halogen lamp with anything other than a
Tech Lighting lamp shield and never place flammable
material close to your fixture.
– Never turn the fixture on and off by connecting and
disconnecting the halogen lamp.
– Do not touch the fixture shades or lamp shield while the
fixture is on. These surfaces may be HOT.
– To avoid glare in child's eyes, hang the fixture 18" above
the table.
Halogen Lamp General Information
– A new halogen lamp may smoke slightly when it is used for
the first time. This is perfectly normal; the protective
coating is simply being vaporized.
Two Tips For Prolonging Halogen
Lamp Life
– First avoid touching the lamp with bare hands during
installation. Any contaminant, even the oil from your
hands can deteriorate the lamp. Rubbing alcohol can be
used to remove any contaminant.
– Second, do not run the lamps at full power when you do
not need to. However, if dimming the fixture for an
extended period of time, occasionally bring the light up to
full brightness for a few minutes to complete the halogen
cycle.
7400 Linder Ave, Skokie, IL 60077
847.410.4400
www.techlighting.com
© 2008 Tech Lighting, L.L.C. All rights reserved. The "Tech Lighting" graphic is
a registered trademark of Tech Lighting, L.L.C. Tech Lighting reserves the right
to change specifications for product improvements without notification.
A Generation Brands Company
/