Page is loading ...

Studio Version 8
Professional Quality Movie-Making

ii Studio 8
Special thanks to Mike Iampietro, William Chien, Richard Edgley,
Ivan Maltz, Jon McGowan, Keith Thomson, Jörg Weselmann, and
Chris Zamara.
Documentation: Nick Sullivan
Studio, Studio AV, Studio DC10plus, Studio Deluxe, Studio DV,
SmartCapture, SmartSeek, Pinnacle Systems, and the Pinnacle
Systems logo are registered trademarks of Pinnacle Systems, Inc.
The RealProducer is included under license from RealNetworks, Inc.
Copyright 1995-2002, RealNetworks Inc. “RealProducer,”
“RealVideo,” “RealServer,” and “Real” logo are trademarks or
registered trademarks of RealNetworks, Inc. All Rights Reserved.
QDesign MPEG-2 Layer II Fast Encoder/Decoder © 1996-2002 by
QDesign Corporation. Windows Media is a trademark of Microsoft
Corporation. All other trademarks are the property of their respective
owners. You agree not to remove any product identification or
notices of the property restrictions from Pinnacle Systems’ products
or manuals.
All products mentioned in this manual are trademarks of their
respective owners.
Studio Version 8 User Guide © 2002 by Pinnacle Systems, Inc. All
rights reserved.
No part of this manual may be copied of distributed, transmitted,
transcribed, stored in a retrieval system, or translated into any human
or computer language, in any form by any means, electronic,
mechanical, magnetic, manual, or otherwise, without the express
written permission of Pinnacle Systems, Inc.
Pinnacle Systems, Inc.
280 North Bernardo Avenue
Mountain View, CA 94943
Printed in the USA.

Table of Contents i
Table of Contents
GETTING STARTED VII
On-line help vii
Equipment requirements vii
Abbreviations and conventions ix
CHAPTER 1: THE STUDIO INTERFACE 1
Capture mode 3
The Diskometer 5
The Camcorder Controller 6
Edit mode 6
The Album 7
The Player 8
The Movie Window 12
The toolboxes 17
The Video toolbox 18
The Audio Toolbox 22
Make Movie mode 24
CHAPTER 2: CAPTURING VIDEO 27
Capture hardware 27
The capture process 28
Automatic scene detection 31
DV, MicroMV and analog captures 32
DV capture 32
SmartCapture: Preview-quality capture 33
Full-quality capture 35
Audio and video levels 36
Analog capture 37
Capture quality options 38
Audio and video levels 38

ii Studio 8
CHAPTER 3: THE ALBUM 41
The Video Scenes section 43
Opening a captured video file 44
Viewing captured video 46
Displaying scene start and length 47
Selecting scenes 47
Combining and subdividing scenes 48
Redetecting scenes 49
Scene comments 50
The Transitions section 51
The Titles section 53
The Still Images section 54
The Sound Effects section 54
The Disc Menus section 55
CHAPTER 4: VIDEO CLIPS 57
Video clip basics 58
Trimming video clips 60
Trimming on the Timeline using handles 60
Clip-trimming tips 63
Trimming video clips with the Clip properties tool 63
Resetting trimmed clips 66
Splitting and combining clips 66
Advanced Timeline editing 68
Insert Editing 69
Split edits 71
Video clip effects 75
The Adjust colour/Visual effects tool 75
The Vary playback speed tool 77

Table of Contents iii
CHAPTER 5: TRANSITIONS 79
Transition types and their uses 80
Previewing transitions in your movie 83
Audio transitions 84
The Ripple Transitions command 85
Trimming transitions 86
Trimming with the Clip properties tool 86
CHAPTER 6: STILL IMAGES 89
Editing still images 91
Trimming with the Clip properties tool 92
The Frame Grabber 93
The Frame grabber tool 94
CHAPTER 7: THE TITLE EDITOR 97
Launching the Title Editor 98
The Title Editor controls 99
Title-type buttons 99
Object toolbox 100
Editing-mode selection buttons 103
Object layout buttons 104
Clipboard and delete buttons 106
Text-styling controls 107
The Title Editor Album 108
The Looks Browser 108
The Backgrounds section 110
The Pictures section 111
The Buttons section 111
CHAPTER 8: SOUND EFFECTS AND MUSIC 115
The Timeline audio tracks 116
The CD audio tool 117
The SmartSound tool 119
The Voice-over tool 121

iv Studio 8
Trimming audio clips 124
Trimming with the Clip properties tool 124
Audio volume and mixing 126
Anatomy of an audio clip 127
Adjusting audio volume on the Timeline 127
Adjusting levels with the Volume tool 129
CHAPTER 9: DISC MENUS 131
Understanding menus 131
Disc authoring in Studio 133
Using menus from the Album 134
The DVD Player Control 136
Editing menus on the Timeline 138
Editing with the Clip properties tool 140
The Disc menu tool 144
CHAPTER 10: MAKING YOUR MOVIE 145
Outputting to a camera or video recorder... 146
Output your movie to videotape 147
Save your movie as an AVI file 149
Save your movie as an MPEG file 151
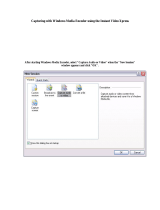
Save as RealVideo or Windows Media 153
Share your movie via the Internet 155
Output your movie to DVD, VCD or S-VCD 156
APPENDIX A: SETUP OPTIONS 161
Capture source settings 162
Capture format settings 165
Edit settings 170
CD and Voice-over settings 172
Make tape settings 174
Make AVI file settings 175
Make MPEG file settings 178
Make RealVideo file settings 180
Make Windows Media file settings 183
Make disc settings 184

Table of Contents v
APPENDIX B: TIPS AND TRICKS 187
Hardware 187
Software 189
Increasing the frame rate 191
Studio and computer animation 192
Smart Capture Tips (DV only) 192
APPENDIX C: TROUBLESHOOTING 195
Installation 196
Operation 201
APPENDIX D: USEFUL HINTS 207
Video Editing and Capturing 207
Creating a Shooting Plan 207
Editing 208
Rules of Thumb for Video Editing 212
Soundtrack Production 214
Title 215
APPENDIX E: GLOSSARY 217
APPENDIX F: LICENSE AGREEMENT 233
APPENDIX G: KEYBOARD SHORTCUTS 237
INDEX 241

vi Studio 8

Getting Started vii
Getting Started
On-line help
On-line help is always available while you’re working
in Studio.
• On-line help: Click the help button in the Studio
main menu bar, or press F1 to display the table of
contents page of the standard help topics. Click the
Help > Help Topic > Index menu if you want to
search for a specific topic or command.
• Tool tips: To find out what a button or other Studio
control does, pause your mouse pointer over it and a
“tool tip” appears explaining its function.
Equipment requirements
In addition to your Studio software, here is what you
need to make a Studio editing system.
Computer
• Intel Pentium or AMD Athlon 500 MHz or higher.
• Microsoft Windows 98 Second Edition, Windows
Millennium, Windows 2000 or Windows XP
• DirectX-compatible graphics card
• DirectX-compatible sound card
• 128 MB of RAM (256 MB recommended)
• CD-ROM drive
• Speakers

viii Studio 8
• Mouse
• A microphone, if you want to record voice-overs
• 300 MB of free hard disk space to install software.
Your hard drive must be capable of a sustained
reading and writing at 4 MB/sec. All SCSI and most
UDMA drives are capable of this. The first time you
capture at full quality, Studio will test your drive to
make sure it is fast enough. DV-format video
occupies 3.6 MB of hard disk space for every second
of video, so four minutes of DV video will require
almost 900 MB of hard disk space. If disk space is a
concern with DV captures, use SmartCapture to
capture your video at Preview-quality (see Chapter 2:
Capturing Video). This feature uses much less disk
space. An entire tape can fit in as little as 360
megabytes.
• We recommend using a separate hard drive dedicated
to video capture to avoid competition for the drive
with Windows and other software during capture.
Video capture hardware
Studio can capture video from a variety of digital and
analogue sources. Please see “Capture hardware” on
page 27.
Video equipment
Studio can output video to:
• Any DV or Digital8 camcorder or VCR. This
requires Pinnacle Studio DV or other OHCI-
compliant 1394 port. The camcorder must be enabled
to record from DV Input.
• Any analogue (8mm, Hi8, VHS, SVHS, VHS-C or
SVHS-C) camcorder or VCR. This requires Pinnacle

Getting Started ix
Studio DC10plus, Studio AV or another Pinnacle
card with analogue outputs. Output to analogue
camcorders or VCRs is also possible using a
Pinnacle Studio DV or other OHCI-compliant 1394
(FireWire) port if your DV or Digital8 camcorder or
VCR can pass a DV signal through to its analogue
outputs (see your camcorder manual and Chapter 10:
Making Your Movie, for more information).
Abbreviations and conventions
This guide uses the following conventions to help
organise the material.
Terminology
Studio: Studio refers to the editing software.
DV: The term DV refers to DV and Digital8
camcorders, VCRs, and tapes.
1394: The term 1394 refers to OHCI-compliant IEEE-
1394, FireWire, DV or iLink interfaces, ports and
cables.
Analogue: The term analogue refers to 8mm, Hi8,
VHS, SVHS, VHS-C or SVHS-C camcorders VCRs
and tapes, and to Composite/RCA and S-Video cables
and connectors.
Buttons, menus, dialog boxes and windows
Names of buttons, menus and related items are written
in italics to distinguish them from the surrounding text,
whereas window and dialog names are written with
initial capital letters. For example:
Click the Edit Menu button to open your menu
in the Title Editor.

x Studio 8
Choosing menu commands
The right angle-bracket symbol (>) denotes the path for
hierarchical menu items. For example:
Select Toolbox > Generate Background Music.
Keyboard conventions
Key names are spelled with an initial capital and are
underlined. A plus sign denotes a key combination. For
example:
Press Ctrl+A to select all the clips on the Timeline.
Brackets denote keys that do not have names printed on
them:
Press [Spacebar] to display the tool.
Mouse clicks
When a mouse click is required, the default is always a
left-click unless specified:
Right-click and select Go to Title/Menu Editor.

Chapter 1: The Studio Interface 1
Chapter 1:
The Studio Interface
Creating movies with Studio is a three-step process:
1. Capture: Import source video material to your PC
hard drive.
2. Edit: Arrange the material as desired by reordering
scenes and discarding unwanted footage. Add visuals,
such as transitions, titles and graphics, and
supplementary audio, such as sound effects and
background music. For DVD and VCD authoring,
create interactive menus that give your audience a
customised viewing experience.
3. Make movie: Generate the finished movie in your
choice of format and storage medium.
Set which step of the movie-making process you want
to work on with the three mode buttons at the top left of
the Studio window:
Undo, Redo and Help
To the right of the mode buttons are
the Undo, Redo and Help buttons.
Undo allows you to back out of any changes you have
made to your project during the current session, one
step at time. Redo reinstates the changes one by one if
you undo too far. The Help button launches Studio’s
on-line help system.

2 Studio 8
All other controls on the Studio screen are dedicated
to tasks within the current mode.
Starting with “Capture mode” on page 3, this chapter
introduces the Studio user interface in each mode.
Setting options
Most options in Studio are set using two tabbed dialog
boxes.
The first lets you control options related to Capture
mode and Edit mode. It has four tabs: Capture source,
Capture format, Edit and CD and Voice-over.
The other one is concerned with options relating to
Make Movie mode. It has six tabs, one for each of the
six movie output types:
Each panel of both dialog boxes can be accessed
individually with a corresponding command on the
Setup menu (e.g. Setup > Capture Source). Once a
dialog box is open, however, all its panels are available
through the tabs.
For simplicity, this manual generally refers to the
different option panels independently, as in “the
Capture source options panel”.
Detailed explanations of the options in both dialog
boxes are contained in Appendix A: Setup Options.

Chapter 1: The Studio Interface 3
CAPTURE MODE
Capture is the process of recording from a video
source to your PC’s hard drive.
The tools and controls you see in Capture mode are
different depending on whether you are capturing from
a DV or MicroMV source or from an analogue source.
If your video source is analogue, you will connect to
your computer hardware with either a composite or an
S-Video cable. Your Capture mode screen will look
like this:

4 Studio 8
If you are capturing from DV or MicroMV equipment
connected to a 1394 port, the capture screen looks like
this:
These set-ups have two major differences in capability:
• The analogue set-up lets you modify audio and video
levels dynamically during capture.
• The DV set-up lets you control the tape transport of
the camcorder or VCR using an on-screen control –
the Camcorder Controller.
As the capture process proceeds, Studio fills the Album
(top left of screen) with the captured video scenes,
while the Player (top right of screen) shows the
incoming video and the Diskometer monitors the free
space on your hard drive. Readouts on the Player tell
you the exact length of the captured video, and the
number of dropped frames during the capture (normally
zero).

Chapter 1: The Studio Interface 5
The Diskometer
The Diskometer displays, both numerically and
graphically, the amount of space available on your
capture drive. It also indicates the approximate duration
of video that can be accommodated, which depends on
both the available space and the configured capture
quality. Capture quality settings are selected using the
preset buttons displayed on the Diskometer for some
capture devices, or by entering custom settings. See
Chapter 2: Capturing Video and Appendix A: Setup
Options for information on capture settings.
The Start Capture/Stop Capture button on the
Diskometer begins and ends the capture process. The
default location for captured video is:
C:\My Documents\Pinnacle Studio\Captured Video
To save newly captured videos to a different location,
click the file folder button to display the Browse for
Folder window. The folder you assign will be used to
store captured video during the current and future
sessions.

6 Studio 8
The Camcorder Controller
Use these on-screen transport controls to view your
tape and to seek to the location on the tape at which
capture is to begin. The counter window displays the
current position of the camcorder tape, along with the
current transport mode of the camcorder.
From left to right, the transport
control buttons are: Stop, Rewind /
Review, Play, Fast forward / Cue
and Pause. The Frame reverse and
Frame forward buttons (second row) let you locate the
exact frame you want.
Reminder: The Camcorder Controller is available only
for a DV or MicroMV device connected to a 1394 port.
EDIT MODE
Studio opens in Edit mode each time it is launched,
because that is the mode you use most often. The Edit
mode display includes three main areas: the Album, the
Player, and the Movie Window.

Chapter 1: The Studio Interface 7
The Album
The Album contains the source materials for your
video production. It is divided into six sections,
selected by tabs as follows:
Video Scenes: Your captured video footage. To
use a given scene in your movie, simply drag it
into place in the Movie Window. See Chapter 4: Video
Clips.
Transitions: Use fades, dissolves, and other
transitions by dragging them into place between
video clips and graphics in the Movie Window. See
Chapter 5: Transitions.
Titles: Editable titles to use as overlays or as full-
screen graphics. Studio supports scrolls, crawls,
and many typographical effects. See Chapter 6: Still
Images.

8 Studio 8
Frame Grabs: Your collection of bitmapped
images and grabbed video frames. These can be
used as overlays or as full-screen images. See Chapter
6: Still Images.
Sound Effects: Windows wav and mp3 files can
be added to your production. A full range of
supplied sound effects gets you started. See Chapter 8:
Sound Effects and Music.
Disc Menus: A collection of chapter menus to use
in DVD, VCD and S-VCD authoring. See Chapter
9: Disc Menus.
The Video Scenes section of the Album. Click the tabs
down the left side of the Album to access the materials
in the other sections.
The Player
The Player displays a preview of your edited movie, or
shows what is selected in the Album. It consists of two
main areas: a preview window and playback controls.
The preview window displays video images. The
playback controls allow you to play the video, or go to
an exact position within it. These controls come in two
formats: standard and DVD.
/