Masterbuilt 20250918 User manual

Type
User manual
Masterbuilt Manufacturing, LLC
1 Masterbuilt Ct.
Columbus, GA 31907
Customer Service 1-800-489-1581
Service à la clientèle 1-800-489-1581
Servicio de atención al cliente 1-800-489-1581
support. masterbuilt.com
www.masterbuilt.com
1
Manual Code: 9807160054 170706-GSB
Actual product may differ from picture shown - Le produit réel peut différer de l’illustration - El producto real puede ser distinto de la imagen mostrada
XL PELLET SMOKER
FUMOIR À GRANULES XL
AHUMADOR GRANULADO XL
IMPORTANT! / ¡IMPORTANTE!
Please record this information immediately and keep in a
safe place for future use.
S’il vous plaît noter cette information immédiatement et
conserver dans un endroit sûr pour une utilisation future .
Por favor, registrar esta información inmediatamente y
guardar en un lugar seguro para su uso futuro.
________________________________________
Model number / Numéro de modèle / Número de modelo
________________________________________
Mfg. Date - Serial Number / Date de fabrication - Numéro de
série / Fecha Fabricado - Número de serie
These numbers are located on the rating label of the appliance.
Le numéro de série se trouve sur la plaque signalétique de l’appareil.
El número de serie se encuentra en la etiqueta de la unidad.
A MAJOR CAUSE OF FIRES IS FAILURE TO MAINTAIN REQUIRED CLEARANCES (AIR
SPACES) TO COMBUSTIBLES MATERIALS. IT IS OF UTMOST IMPORTANCE THAT THIS
PRODUCT BE INSTALLED ONLY IN ACCORDANCE WITH THESE INSTRUCTIONS.
L’OMISSION DE MAINTENIR LES DISTANCES REQUISES (ESPACES AÉRIENS) DES MATÉRIAUX
COMBUSTIBLES EST UNE DES PRINCIPALES CAUSES D’INCENDIE. IL EST ESSENTIEL QUE CE
PRODUIT SOIT INSTALLÉ CONFORMÉMENT AUX PRÉSENTES INSTRUCTIONS.
UNA CAUSA PRINCIPAL DE INCENDIOS ES EL NO MANTENER UN ESPACIO DESPEJADO
(ESPACIOS AÉREOS) FRENTE A LOS MATERIALES COMBUSTIBLES. ES MUY IMPORTANTE QUE
ESTE PRODUCTO SEA INSTALADO SOLAMENTE DE ACUERDO CON ESTAS INSTRUCCIONES.
THIS PRODUCT IS FOR OUTDOOR HOUSEHOLD USE ONLY.
ASSEMBLY, CARE & USE MANUAL WARNING & SAFETY INFORMATION
CE PRODUIT EST DESTINÉ UNIQUEMENT À UNE UTILISATION À
L’EXTÉRIEUR DOMESTIQUE.
MANUEL D’ASSEMBLAGE, D’ENTRETIEN ET D’UTILISATION, AVERTISSEMENTS ET
INFORMATIONS RELATIVES À LA SÉCURITÉ
ESTE PRODUCTO ES SOLAMENTE DE USO DOMÉSTICO EN EXTERIORES.
INFORMACIÓN DE ADVERTENCIAS Y SEGURIDAD DEL MANUAL DE ENSAMBLAJE, CUIDADO Y USO
Manual applies to the following model number(s)
Le manuel s’applique aux numéros de modèle suivants
El manual se aplica a los siguientes números de modelo
20250918
2
This manual contains important information necessary for the proper assembly and
safe use of the appliance.
Read and follow all warnings and instructions before assembling and using the appliance.
Follow all warnings and instructions when using the appliance.
Keep this manual for future reference.
WARNING
CALIFORNIA PROPOSITION 65
1. Combustion by-products produced when using this product contain chemicals known to the
State of California to cause cancer, birth defects, and other reproductive harm.
2. This product contains chemicals known to the State of California to cause cancer, birth
defects or other reproductive harm.
WARNING
PS44G1D 170622
Failure to follow these instructions could result in re, explosion or burn
hazard, which could cause property damage, personal injury or death.
PLEASE READ THIS ENTIRE MANUAL BEFORE ASSEMBLY, INSTALLATION AND USE OF
THIS PELLET FUEL-BURNING APPLIANCE. FAILURE TO FOLLOW THESE INSTRUCTIONS
COULD RESULT IN PROPERTY DAMAGE, BODILY INJURY OR EVEN DEATH. CONTACT
YOUR LOCAL BUILDING OR FIRE OFFICIAL ABOUT RESTRICTIONS AND INSTALLATION
INSPECTION REQUIREMENTS IN YOUR AREA.
CARBON MONOXIDE HAZARD
Burning pellets gives off carbon monoxide, which has no odor and can cause death. Use only outdoors where it is
well ventilated. Follow these guidelines to prevent this colorless, odorless gas from poisoning you, your family or
others.
Know the symptoms of carbon monoxide poisoning: headache, dizziness, weakness, nausea, vomiting,
sleepiness and confusion. Carbon monoxide reduces the blood’s ability to carry oxygen. Low blood oxygen levels
can result in loss of consciousness and death.
See a doctor if you or others develop cold or fl u-like symptoms while cooking or in the vicinity of this appliance.
Carbon monoxide poisoning, which can easily be mistaken for a cold or fl u, is often detected too late.
Alcohol consumption and drug use increase the eff ects of carbon monoxide poisoning.
Carbon monoxide is especially toxic to mother and child during pregnancy, infants, the elderly, smokers and
people with blood or circulatory system problems, such as asthma or heart disease.
10 Feet
REMINDER:
MAINTAIN A MINIMUM DISTANCE OF 10 FEET FROM
REAR, SIDES AND TOP OF UNIT TO OVERHEAD
CONSTRUCTION, WALLS, RAILS OR OTHER
COMBUSTIBLE CONSTRUCTION. THIS CLEARANCE
PROVIDES ADEQUATE SPACE FOR PROPER
COMBUSTION, AIR CIRCULATION AND VENTING OF
SMOKE FROM THE UNIT. DO NOT BLOCK AIR INTAKE
OPENING.
STRUCTURAL PROXIMITY AND SAFETY USAGE RECOMMENDATIONS
WARNING:
ELECTRIC POWER CORD
IS A TRIP HAZARD
10 Feet
10 Feet
10 Feet
51
50
Masterbuilt garantiza que sus productos no presentan defectos de fabricación, ni de material ni de la mano de obra,
si se los ensambla correctamente, se los utiliza de forma normal y se los cuida según las recomendaciones, durante
un período de 90 días a partir de la fecha de compra original.
La garantía de Masterbuilt no cubre el acabado de la pintura ya que puede salirse durante el uso normal.
La garantía de Masterbuilt no cubre la oxidación de la unidad.
Masterbuilt exige el comprobante razonable de la compra para realizar reclamos de la garantía y sugiere que
conserve su recibo. Después de la fecha de vencimiento de la garantía, finalizarán todas las responsabilidades.
Durante el período de vigencia establecido de la garantía, Masterbuilt, a su criterio, reemplazará o reparará los
componentes defectuosos sin costo alguno, debiendo hacerse responsable el propietario de los gastos de envío.
Si Masterbuilt requiere la devolución del o los componentes en cuestión para su inspección, Masterbuilt será
responsable de todos los cargos de envío para devolver el artículo solicitado.
Esta garantía excluye los daños ocasionados a la propiedad por el mal uso, el uso excesivo, los accidentes,
el transporte o el uso comercial de este producto.
Esta garantía expresa es la única garantía entregada por Masterbuilt y reemplaza a todas las demás garantías,
expresas o implícitas, incluidas las garantías implícitas de comercialización o idoneidad para cualquier fin en
particular.
Ni Masterbuilt ni el establecimiento minorista que ofrece este producto tienen autoridad alguna para otorgar garantías
adicionales o prometer otros recursos que sean inconsistentes con los establecidos previamente.
La responsabilidad máxima de Masterbuilt, en todos los casos, no superará el precio de compra del producto que el
cliente o comprador original pagó. Algunos estados no permiten la exclusión o limitación de daños accidentales o
resultantes. En dicho caso, no se aplicarán las exclusiones o limitaciones anteriores.
Solo para residentes de California: A pesar de esta limitación de garantía, se aplican las siguientes restricciones
específicas; si el mantenimiento, la reparación o el reemplazo del producto no se puede realizar comercialmente, el
establecimiento minorista que ofrece el producto o Masterbuilt devolverá el monto original de la compra del producto,
menos el monto directamente atribuible al uso por parte del comprador original antes de informar su disconformidad.
El propietario puede llevar el producto al establecimiento minorista que lo ofrece a fin de obtener la ejecución de
cualquier obligación en virtud de esta garantía.
Esta garantía expresa le otorga derechos legales específicos, y es posible que también tenga otros derechos que
varían de un estado a otro.
Visítenos en línea, en www.masterbuilt.com
o llene y retorne
A la atención de: Registro de garantía
Masterbuilt Mfg.,LLC
1 Masterbuilt Court - Columbus, GA 31907
Nombre: ________________________ Dirección :_________________________ Ciudad:________________
Estado/Provincia: ________ Código postal: ________________ Teléfono: (_____) - ____________
Dirección de e-mail:_______________________________________
*Número del modelo: ____________________ *Número de serie: ____________________
Fecha de compra: _____- ______-_______ Lugar de compra:: ____________________________________
Número de modelo y número de serie se encuentran en una etiqueta plateada en la parte trasera de la unidad
INFORMACIÓN SOBRE GARANTÍA LIMITADA
3
• Unit is for OUTDOOR HOUSEHOLD USE ONLY.
• CAUTION - Always store wood pellets in a dry location away from heat producing appliances and fuel
containers.
• Never use inside enclosed areas such as patios, garages, buildings or tents.
• Never use inside recreational vehicles or on boats.
• Never use appliance as a heater (READ CARBON MONOXIDE HAZARD).
• Maintain a minimum distance of 10ft (3m) from overhead construction, walls, rails or other structures.
• Keep a minimum 10ft (3m) clearance of all combustible materials such as wood, dry plants, grass, brush,
paper or canvas.
• Use appliance on a level, non-combustible, stable surface such as dirt, concrete, brick or rock.
• Unit MUST be on the ground. Do not place appliance on tables or counters. Do NOT move appliance across
uneven surfaces.
• Do not use appliance on wooden or fl ammable surfaces.
• Do not leave appliance unattended.
• Never operate appliance under overhead construction such as roof coverings, carports, awnings or
overhangs.
• Never use gasoline, lantern fuel, kerosene, charcoal lighter fl uid or similar liquids to start or maintain a fi re
in this appliance. Keep all such liquids well away from the appliance when in use.
• Use only food grade wood pellets. Do not use heating fuel pellets labeled as having additives.
• Never use appliance for anything other than its intended use. This appliance is NOT for commercial use.
• Keep a fi re extinguisher accessible at all times while operating appliance.
• Before each use check all nuts, screws and bolts to make sure they are tight and secure.
• Use of alcohol, prescription or non-prescription drugs may impair users ability to properly assemble or
safely operate appliance.
• Keep children and pets away from appliance at all times. Do NOT allow children to use appliance. Close
supervision is necessary should children or pets be in area where appliance is being used.
• Do NOT allow anyone to conduct activities around appliance during or following its use until it has cooled.
Avoid bumping or impacting appliance.
• Never move appliance when in use. Allow appliance to cool completely (below 115°F (45°C)) before moving
or storing.
• The appliance is HOT while in use and will remain HOT for a period of time afterwards and during cooling
process. Use CAUTION. Wear protective gloves/mitts.
• Do not touch HOT surfaces.
• Never use glass, plastic or ceramic cookware in appliance. Never place empty cookware in appliance while
in use.
Accesories and accessory attachments not supplied by Masterbuilt Manufacturing, LLC are NOT
recommended and may cause injury.
• Be careful when removing food from appliance. All surfaces are HOT and may cause burns. Use protective
gloves or long, sturdy cooking tools.
Always use appliance in accordance with all applicable local, state and federal fi re codes.
• Disposal of Ashes - Ashes should be placed in a metal container with a tight fi tting lid. The closed container
of ashes should be placed on a noncombustible fl oor or on the ground, well away from all combustible
materials, pending fi nal disposal. If the ashes are dispersed of by burial in soil or otherwise locally
dispersed, they should be retained in the closed container untill all cinders have thoroughly cooled.
• Do not store appliance with HOT ashes inside appliance. Store only when all surfaces are cold.
• When using electrical appliances, basic safety precautions should always be followed including the
following: 1) Do not plug in the appliance until fully assembled and ready for use. 2) Use only approved
grounded electrical outlet. 3) Do not use during an electrical storm. 4) Do not expose appliance to rain or
water at anytime.
GENERAL WARNINGS AND SAFETY INFORMATION
WARNINGS & IMPORTANT SAFEGUARDS
CONTINUED ON PAGE 4
READ ALL INSTRUCTIONS BEFORE INSTALLING
AND USING THE APPLIANCE
4
• To protect against electrical shock do not immerse cord, plug or control panel in water or other liquid.
• Do not operate any appliance with a damaged cord or plug, or after appliance malfunctions or has
been damaged in any manner. Contact Masterbuilt Customer Service for assistance at 1-800-489-1581.
• Extension cords are available and may be used if care is exercised in their use.
• If an extension cord is used: 1. The marked electrical rating of the extension cord should be at least as
great as the electrical rating of the appliance; and 2. The cord should be arranged so that it will not drape
over the counter top or tabletop where it can be pulled by children or tripped over unintentionally.
• The extension cord must be a grounding-type 3-wire cord.
• Outdoor extension cords must be used with outdoor use products and are marked with suffi x “W” and
with the statement “Suitable for Use with Outdoor Appliances.”
• CAUTION - To reduce the risk of electric shock, keep extension cord connection dry and off the ground.
• Do not let cord hang on or touch hot surfaces.
• Do not place cord on or near a hot gas or electric burner, or in a heated oven.
• Fuel, such as charcoal briquettes or heating fuel pellets, are not to be used in the appliance.
• To disconnect, turn controller “OFF” then remove plug from outlet.
• Unplug from outlet when not in use and before cleaning. Allow appliance to cool completely before
adding/removing racks, grease defl ector or fl avor tray.
• Grease defl ector is only for the bottom of the appliance. Do not put grease defl ector on rack. This may
damage the appliance.
• Do not cover racks with metal foil. This will trap heat and cause severe damage to the appliance.
• Do not clean this product with a water sprayer or the like.
WARNINGS & IMPORTANT SAFEGUARDS
CONTINUED FROM PAGE 3
GENERAL WARNINGS AND SAFETY INFORMATION
SAVE THESE INSTRUCTIONS
CREOSOTE
-
FORMATION AND NEED FOR REMOVAL.
When wood pellets are burned slowly, they produce tar and other organic vapors that combine with expelled
moisture to form creosote. The creosote vapors condense in the relatively cool air damper exhaust of a slow
burning fi re. As a result, creosote accumulates on the air damper and smoker lining. When ignited, this creosote
makes an extremely hot fi re.
The grease tray tube should be inspected at least twice a year for signs of grease buildup.
When creosote or grease has accumulated, it should be removed to reduce the risk of fi re.
WARNING!
If at any time, the smoker fails to light or the fi re in the crucible goes out while cooking or smoking, when
suffi cient pellets are still in the pellet hopper, it is important to follow these steps. Failure to do so may cause a hazardous
“over-fi ring” of your smoker due to an excess of unburned pellets in the crucible.
1) DANGER! Press the power button to turn OFF the smoker. Once the fan has stopped, unplug the power cord. If
the smoker is still hot, allow it to thoroughly cool. Open the door and remove all food, all racks, grease defl ector and
the heat diff user.
2) WARNING! Remove all unburned pellets and ash from inside and around the crucible (see instructions for proper
handling and disposal of ash in CLEANING and STORING INSTRUCTIONS).
3) Before replacing the heat diff user, grease defl ector and all racks, plug the power cord into an appropriate,
grounded electrical outlet and restart the smoker. Pellets should fall into the crucible and the element should begin to
heat (it will start to turn red). CAUTION! Do not touch it.
4) If this procedure is successful, you will soon see fl ames come out of the crucible. Then press the power button to
turn OFF the smoker and let the smoker cool down. Position the heat diff user, the grease defl ector and racks in their
proper locations. With the door open, press the power button to turn ON the smoker and set the temperature/timer.
In approximately 2 minutes you will notice whitish-gray smoke coming out of the smoker as the pellets ignite. After
assuring the pellets have ignited, close the door and set the temperature/timer to the cooking setting desired.
49
Masterbuilt garantit ses produits contre toute défectuosité due aux pièces ou à la main-d’œuvre s’ils sont assemblés
correctement,utilisés normalement et entretenus de la façon recommandée pour une durée de 90 jours après la date
d’achat d’origine.
La garantie de Masterbuilt ne couvre pas la finition de peinture, car elle peut brûler au cours d’un usage normal.
La garantie de Masterbuilt ne couvre pas la corrosion de l’appareil.
Masterbuilt exige une preuve d’achat raisonnable lors de réclamations au titre de la garantie et vous suggère de
conserver votre reçu.
Cette garantie prend fin dès la date d’expiration de la garantie.
Durant la période de garantie déclarée, Masterbuilt, à sa discrétion, assurera gratuitement la réparation ou le
remplacement de tout composant défectueux, le propriétaire étant responsable des frais de transport.
Advenant que Masterbuilt demande que le ou les composants lui soient retournés pour inspection, Masterbuilt
assumera les frais de transport pour le retour du composant demandé.
Cette garantie exclut dommages matériels dus au mauvais usage, à l’usage abusif, à un accident, à des dommages
découlant du transport ou dus à l’usage de ce produit à des fins commerciales.
Cette garantie expresse est la seule garantie donnée par Masterbuilt et remplace toute garantie, expresse ou
implicite, y compris une garantie implicite, une garantie de valeur marchande ou d’adaptation à un usage particulier.
Ni Masterbuilt ni le détaillant qui vend ce produit ne sont autorisés à fournir des garanties ou à promettre quoi que ce
soit qui excède ou qui contredise ce qui est énoncé ci-dessus.
La responsabilité maximale de Masterbuilt, dans tous les cas, ne peut dépasser le prix d’achat de l’article payé par le
consommateur/l’acheteur d’origine.
Certains états/certaines provinces ne permettent pas l’exclusion ou les restrictions des dommages fortuits ou
indirects.
Dans de tels cas, les restrictions ou exclusions qui précèdent peuvent ne pas être applicables.
Résidants de la Californie seulement : Nonobstant cette limite de la garantie, des restrictions particulières
s’appliquent : si la révision, la réparation ou le remplacement de l’article n’est pas commercialement faisable, le
détaillant qui a vendu l’article ou Masterbuilt remboursera le prix d’achat payé pour cet article, moins le montant
directement imputable à l’usage qu’en aura fait l’acheteur d’origine avant la découverte de la non-conformité.
Le propriétaire peut rapporter le produit au magasin qui lui a vendu ce produit afin de bénéficier des privilèges de la
présente garantie.
Cette garantie expresse vous confère des droits légaux spécifiques et vous pouvez également avoir d’autres droits
qui varient d’un territoire/d’une province à un(e) autre.
Allez en ligne à www.masterbuilt.com
ou remplissez et retournez
À l’attention de : Emregistrement de la garantie
Masterbuilt Mfg.,LLC
1 Masterbuilt Court - Columbus, GA 31907
Nom : ___________________________ Adresse :_________________________ Ville:________________
État/Province : ________ Code postal : ________________ Numéro de téléphone : (_____) - ____________
Adresse de courriel :_______________________________________
*Numéro de modèle : ____________________ *Numéro de série : ____________________
Date d’achat : _____- ______-_______ Endroit de l’achat : ____________________________________
Le numéro de modèle et le numéro de série se trouvent sur l’étiquette argentée au dos de l’appareil
INFORMATION SUR LA GARANTIE LIMITÉE
48
Masterbuilt warrants its products to be free from defects in material and workmanship under proper assembly, normal
use and recommended care for 90 days from the date of original retail purchase.
Masterbuilt warranty does not cover paint finish as it may burn off during normal use.
Masterbuilt warranty does not cover rust of the unit.
Masterbuilt requires reasonable proof of purchase for warranty claims and suggests that you keep your receipt. Upon
the expiration of such warranty, all such liability shall terminate.
Within the stated warranty period, Masterbuilt, at its discretion, shall repair or replace defective components free of
charge with owner being responsible for shipping. Should Masterbuilt require return of component(s) in question for
inspection Masterbuilt will be responsible for shipping charges to return requested item.
This warranty excludes property damage sustained due to misuse, abuse, accident, damage arising out of
transportation or damage incurred by commercial use of this product.
This expressed warranty is the sole warranty given by Masterbuilt and is in lieu of all other warranties, expressed or
implied including implied warranty, merchantability or fitness for a particular purpose.
Neither Masterbuilt nor the retail establishment selling this product, has authority to make any warranties or to promise
remedies in addition to or inconsistent with those stated above.
Masterbuilt’s maximum liability, in any event, shall not exceed the purchase price of the product paid by the original
consumer/ purchaser. Some states do not allow the exclusion or limitation of incidental or consequential damages. In
such a case, the above limitations or exclusions may not be applicable.
California residents only: Not withstanding this limitation of warranty, the following specific restrictions apply; if
service, repair, or replacement of the product is not commercially practical, the retailer selling the product or Masterbuilt
will refund the purchase price paid for the product, less the amount directly attributable to use by the original buyer prior
to the discovery of the nonconformity. Owner may take the product to the retail establishment selling this product in
order to obtain performance under warranty.
This expressed warranty gives you specific legal rights, and you may also have other rights which vary from
state to state.
Go online www.masterbuilt.com
or complete and return to
Attn: Warranty Registration
Masterbuilt Mfg.,LLC
1 Masterbuilt Court - Columbus, GA 31907
Name: ___________________________ Address :_________________________ City:________________
State/Province: ________ Postal Code: ________________ Phone Number: (_____) - ____________
E-mail Address:_______________________________________
*Model Number: ____________________ *Serial Number: ____________________
Purchase Date: _____- ______-_______ Place of Purchase: ____________________________________
*Model Number and Serial Number are located on silver label on back of unit.
LIMITED WARRANTY INFORMATION
5
Ce manuel contient de l’information importante nécessaire pour un assemblage approprié et
l’utilisation sûre de l’appareil.
Veuillez lire et vous conformer à tous les avertissements et suivre toutes les instructions
avant d’assembler et d’utiliser l’appareil.
Conformez-vous à tous les avertissements et suivez toutes les instructions lorsque vous
servez de l’appareil.
Conservez ce manuel pour référence.
AVERTISSEMENT
PROPOSITION 65 DE L’ÉTAT DE CALIFORNIE
1. Les sous-produits de combustion produits lors de l’utilisation de ce produit contiennent
des substances chimiques reconnues par l’état de californie comme causant le cancer, des
anomalies congénitales et d’autres anomalies de la reproduction.
2. Ce produit contient des substances chimiques reconnues par l’état de californie comme
causant le cancer, des anomalies congénitales et d’autres anomalies de la reproduction.
AVERTISSEMENT
L’omission de vous conformer à ces instructions pourrait entraîner un
incendie, une explosion ou un risque de brûlure, qui pourrait causer
des dommages à la propriété, des blessures corporelles ou la mort.
VEUILLEZ LIRE CE MANUEL EN ENTIER AVANT L’ASSEMBLAGE, L’INSTALLATION ET L’UTILISATION
DE CET APPAREIL CONSOMMANT DU CARBURANT À GRANULES. L’OMISSION DE VOUS
CONFORMER À CES INSTRUCTIONS POURRAIT ENTRAÎNER DES DOMMAGES MATÉRIELS, DES
BLESSURES CORPORELLES OU MÊME LA MORT. COMMUNIQUEZ AVEC LE GÉRANT DE VOTRE
IMMEUBLE OU LES POMPIERS POUR OBTENIR DE L’INFORMATION SUR LES RESTRICTIONS ET
EXIGENCES EN MATIÈRE D’INSPECTION DES INSTALLATIONS DANS VOTRE RÉGION.
RISQUE LIÉ AU MONOXYDE DE CARBONE
Les pellets brûlants émettent du monoxyde de carbone, qui n’a aucune odeur et peut causer la mort. Utilisez
uniquement l’extérieur où il est bien ventilé. Suivez ces directives pour éviter que ce gaz incolore et inodore ne
vous empoisonne, votre famille ou d’autres personnes.
Connaître les symptômes de l’intoxication au monoxyde de carbone: mal de tête, vertiges, faiblesses, nausées,
vomissements, somnolence et confusion. Le monoxyde de carbone réduit la capacité du sang à transporter de
l’oxygène. Les faibles niveaux d’oxygène sanguin peuvent entraîner une perte de conscience et la mort.
Consultez un médecin si vous ou d’autres personnes éprouvent des symptômes froids ou grippaux pendant la
cuisson ou à proximité de cet appareil. L’intoxication au monoxyde de carbone, qui peut facilement être
confondue avec un rhume ou une grippe, est souvent détectée trop tard.
La consommation d’alcool et l’usage de drogues augmentent les eff ets de l’intoxication au monoxyde de carbone.
Le monoxyde de carbone est particulièrement toxique pour la mère et l’enfant pendant la grossesse, les
nourrissons, les personnes âgées, les fumeurs et les personnes souff rant de problèmes de sang ou de système
circulatoire, comme l’asthme ou les maladies cardiaques.
RECOMMANDATIONS CONCERNANT LA PROXIMITÉ STRUCTURELLE
ET L’UTILISATION SÉCURITAIRE
3 m
AVERTISSEMENT :
LE CORDON D’ALIMENTATION
ÉLECTRIQUE PEUT VOUS FAIRE TRÉBUCHER
3 m
3 m
3 m
RAPPEL : MAINTENIR UNE DISTANCE MINIMALE DE 3
MÈTRES DE L’ARRIÈRE, DES CÔTÉS ET DU HAUT DE L’UNITÉ À
LA CONSTRUCTION AÉRIENNE, AUX MURS, AUX RAILS OU À
D’AUTRES CONSTRUCTIONS COMBUSTIBLES. CETTE
DISTANCE FOURNIT UN ESPACE SUFFISANT POUR UNE
COMBUSTION CORRECTE, UNE CIRCULATION AÉRIENNE ET
UNE VENTILATION DE FUMÉ DE L’UNITÉ. NE BLOCEZ PAS
L’OUVERTURE DE L’ENTRÉE D’AIR.
42
1. Éteignez le fumoir et laissez-le refroidir.
2. Débranchez-le de la prise murale.
3. Enlevez les granules de la trémie.
4. Enlevez les quatre vis retenant la trémie à granules au boîtier de
la tarière. Reportez-vous à la Fig. 1 à la page 40.
5. Retirez les quatre vis qui maintiennent le boîtier du contrôleur à
la trémie de granulés. Référence Fig. 2 à la page 40.
6. Retirez les attaches de câble si nécessaire.
7. Débranchez le ventilateur d’admission de l’écran de contrôle -
connecteur violet. Reportez-vous à la Fig. 3 à la page 40.
8. Enlevez les quatre vis qui rattachent le ventilateur d’admission au
boîtier de la tarière.
9. Attachez la fi celle au nouveau ventilateur d’admission et faites
passer la prise au travers du boîtier.
10. Détachez la fi celle et enlevez-la.
11. Branchez la prise du nouveau ventilateur d’admission à l’écran
de contrôle.
12. Installez le nouveau ventilateur d’admission sur le boîtier de la
tarière et serrez les vis de montage.
13. Fixez tout le câblage avec de nouveaux attaches pour éviter
toute interférence avec le ventilateur.
14. Installer le boîtier du contrôleur sur la trémie de granulés.
15. Installez la trémie à granules sur le boîtier de la tarière.
L’installation est terminée.
VÉRIFICATION DE LA TEMPÉRATURE DU THERMOMÈTRE À VIANDE
Test à basse température :
1. Mettez le thermomètre à viande dans de l’eau glacée (la température de l’eau glacée est de 32 °F/0 °C ).
2. Laissez le thermomètre à viande dans l’eau glacée pendant 5 minutes.
3. Mettez l’appareil en marche.
4. Appuyez sur le bouton du thermomètre à viande et gardez-le enfoncé pour lire la température.
5. La température du thermomètre à viande devrait être de 32 °F, ±5 °F. (variation acceptable de 27 °F à
37 °F).
Test à température élevée
1. Mettez le thermomètre à viande dans de l’eau bouillante (la température de l’eau bouillante est de
212 °F/100 °C ).
2. Laissez le thermomètre à viande dans l’eau bouillante pendant 5 minutes.
3. Mettez l’appareil en marche.
4. Appuyez sur le bouton du thermomètre à viande et gardez-le enfoncé pour lire la température.
5. La température du thermomètre à viande devrait être de 212 °F, ±5 °F. (variation acceptable de 207 °F à
217 °F).
VÉRIFICATION DE LA TEMPÉRATURE DE LA SONDE THERMIQUE DE L’APPAREIL
1. Mettez le thermomètre à viande au centre de l’étagère du centre.
2. Mettez l’appareil en marche.
3. Réglez l’écran de contrôle à 275 °F.
4. Laissez l’appareil atteindre une température de 275 °F et la garder stable.
5. Lisez la température réelle affi chée.
6. Appuyez sur le bouton du thermomètre à viande pour lire la température du thermomètre à viande.
7. La température affi chée par le thermomètre à viande ne devrait pas varier de plus de 15 °F par rapport à
celle de l’appareil.
VÉRIFICATION DU VENTILATEUR D’ADMISSION
1. Éteignez le fumoir et laissez-le refroidir.
2. Mettez l’appareil en marche, puis arrêtez-le. Ne débranchez pas l’appareil.
Cela mettra l’appareil en mode arrêt et le ventilateur d’admission fonctionnera pendant environ 5 minutes.
3. Si vous n’entendez pas ou ne voyez pas le ventilateur fonctionner sous la trémie à granules, vérifi ez la
connexion à l’écran de contrôle. Référez-vous aux instructions d’« Accès et remplacement de l’écran de
contrôle ». .
4. Répétez la vérifi cation après avoir fi xé la connexion. Si le ventilateur ne fonctionne toujours pas,
communiquez avec Masterbuilt pour obtenir une pièce de remplacement.
ACCÈS/REMPLACEMENT DU VENTILATEUR D’ADMISSION
11
GETTING STARTED
Before starting the appliance, see ADDING PELLETS.
Prime auger system prior to fi rst use. See AUGER PRIMING INSTRUCTIONS.
Pre-season appliance prior to fi rst use. See PRE-SEASON INSTRUCTIONS.
This smoker is equipped with door stops that will hold the door open during loading and unloading of food.
Food amount or volume and ambient temperature may aff ect smoker temperature. Make adjustments as necessary to
achieve desired cooking temperature.
CAUTION - All surfaces are HOT and may cause burns. Use protective gloves or long, sturdy cooking tools when
loading/unloading food or racks, and when adding pellets or water.
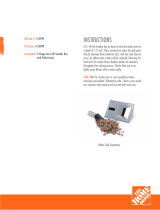
ADDING PELLETS
1. Use food grade pellets only in your smoker.
2. Before starting smoker, place up to 17 lbs. (7.71kg) of food grade pellets in pellet hopper.
3. Place additional pellets in pellet hopper as needed.
AUGER PRIMING INSTRUCTIONS
1. Ensure the smoker and all components are cool to the touch.
2. Remove the grease defl ector and the heat diff user from the unit to allow visibility of the crucible.
3. Press “Power” button.
4. Press and hold the “Smoke (Prime)” button until the letter “P” appears on the screen and then release the button.
5. After approximately 4.5 minutes pellets will begin falling into the crucible.
6. Once pellets are seen falling into the crucible, press the “Smoke (Prime)” button and this will stop the auger from
feeding pellets into the crucible.
PRE
-
SEASON INSTRUCTIONS
Curing will rid the appliance of chemicals and oils left over by the manufacturing process allowing them to burn off .
PRE-SEASON SMOKER PRIOR TO FIRST USE.
1. Using a napkin or cloth, rub a light coat of cooking oil on smoking racks and inside smoker door. Make sure water
bowl is in place with NO WATER.
2. Set temperature to 350°F (176°C) and run appliance for 3 hours.
See START UP/SHUT DOWN INSTRUCTIONS on
page 26.
3. Shut down and allow
appliance to cool COMPLETELY.
• Cure your smoker periodically to prevent excessive rust.
OPERATING INSTRUCTIONS
1. To start smoker see START UP/SHUT DOWN INSTRUCTIONS on page 26.
2. With protective gloves on, place water bowl in position and ll with water, juice or vinegar. This will add fl avor and moisture to
food and prevent it from drying out.
3. DO NOT cover racks with aluminum foil as this will not allow heat to circulate properly.
4. Pre-heat smoker to desired temperature for approximately 20 minutes.
5. Place food in the smoker, position on the center of the smoking rack.
6. DO NOT overload smoker with food. Extra large amounts of food may trap heat, extend cooking time and cause uneven
cooking. Leave space between food on racks and smoker sides to ensure proper heat circulation. If utilizing cooking pans,
be sure pans do not cover more than 75% of the rack space and place pans on center of rack to ensure even cooking.
7. For best results, rotate racks between the top and bottom positions during cooking.
8. Adjust smoker settings, controller and air damper, to desired cooking temperature.
• Close air damper on appliance to retain moisture and heat. If cooking foods such as fi sh or jerky, open air damper to
release moisture.
9. Extreme cold temperatures may extend cooking times.
10. Once cooking is complete turn appliance OFF, see START UP/SHUT DOWN INSTRUCTIONS on page 26 for turning off
appliance, and then follow CLEANING and STORING INSTRUCTIONS. CLEAN AFTER EVERY USE. This will extend
the life of your smoker and prevent mold and mildew.
CLEANING and STORING INSTRUCTIONS
ALWAYS MAKE SURE UNIT IS COOL TO THE TOUCH BEFORE CLEANING AND STORING.
Be sure to clean smoker after each use.
Make sure your smoker is unplugged and completely cool.
For rack supports, racks, water bowl, grease tray and grease defl ector use a mild dish detergent. Rinse and dry thoroughly.
For ash tray clean frequently to remove ash build up, residue and dust.
Disposal of Ashes - Ashes should be placed in a metal container with a tight fi tting lid. The closed container of ashes should
be placed on a noncombustible fl oor or on the ground, well away from all combustible materials, pending fi nal disposal. If the
ashes are dispersed of by burial in soil or otherwise locally dispersed, they should be retained in the closed container untill all
cinders have thoroughly cooled.
To clean the crucible, wait for smoker to cool completely and no embers are evident. Then vacuum or scrape out the ash
from the crucible. This should be done after each use to keep the smoker working properly.
For the interior, exterior and door seal of the appliance simply wipe down with a damp cloth after each use to keep appliance
in proper working condition. Do not use a cleaning agent. Make sure to dry thoroughly.
After cleaning, store smoker in a covered and DRY AREA.
Store only when smoker is unplugged and all surfaces are cold.
When not in frequent use and using a cover, remember to check your smoker periodically to avoid possible rust and
corrosion due to moisture buildup.
CHECK OUT THE MASTERBUILT WEBSITE FOR MORE TIPS AND RECIPE VIDEOS.
PELLET SMOKER OPERATION - READ & FOLLOW ALL INSTRUCTIONS CAREFULLY
38
1. Turn off smoker and allow to cool to touch.
2. Unplug from wall.
3. Remove pellets from hopper.
4. Remove four screws holding pellet hopper to auger
housing. Reference Fig. 1 on page 36.
5. Remove four screws holding controller housing to pellet hopper.
Reference Fig. 2 on page 36.
6. Remove cable ties as necessary.
7. Disconnect intake fan from controller - purple connector.
Reference Fig. 3 on page 36.
8. Remove four screws that mount intake fan to auger housing.
9. Tie string to new intake fan plug and pull plug thru housing.
10. Untie string and discard.
11. Connect new intake fan plug to controller.
12. Install new intake fan on auger housing and tighten mounting
screws.
13. Secure all wiring with new cable ties to avoid interference with fan.
14. Install controller housing on pellet hopper.
15. Install pellet hopper on auger housing.
Installation is complete.
MEAT PROBE TEMPERATURE VERIFICATION
Low Temperature Test:
1. Place meat probe in ice water (Temperature of ice water = 32°F / 0°C ).
2. Let meat probe rest in ice water for 5 minutes.
3. Turn on appliance.
4. Press and hold meat probe button to read meat probe temperature.
5. Meat probe temperature reading should be 32°F, ±5°F. (Acceptable range within 27°F to 37°F).
High Temperature Test:
1. Place meat probe in boiling water (Temperature of boiling water = 212°F / 100°C ).
2. Let meat probe rest in boiling water for 5 minutes.
3. Turn on appliance.
4. Press and hold meat probe button to read meat probe temperature.
5. Meat probe temperature reading should be 212°F, ±5°F. (Acceptable range within 207°F to 217°F).
CABINET TEMPERATURE VERIFICATION
1. Place meat probe in center of center rack.
2. Turn on appliance.
3. Set controller to 275°F.
4. Allow appliance to reach and stabilize at 275°F.
5. Read actual cabinet temperature displayed.
6. Press and hold meat probe button to read meat probe temperature reading.
7. Meat probe temperature reading should be ±15°F of the actual cabinet temperature.
INTAKE FAN CHECK
1. Turn off smoker and allow to cool to touch.
2. Turn unit on and then off . Do not unplug unit.
This will put smoker in shutdown mode which will run intake fan for approx. 5 minutes.
3. If you cannot hear or see fan running underneath pellet hopper, check connection to controller.
Reference “Controller Access / Replacement” instructions.
4. Repeat check after securing connection. If fan still does not work, contact Masterbuilt for
replacement.
INTAKE FAN ACCESS / REPLACEMENT
15
• BEFORE ASSEMBLY READ ALL INSTRUCTIONS CAREFULLY.
ASSEMBLE UNIT ON A CLEAN, FLAT SURFACE.
• TOOLS NEEDED: Adjustable Wrench, Phillips Head Screwdriver
** It is possible that some assembly steps have been completed in the factory. **
AVANT L’ASSEMBLAGE, LIRE ATTENTIVEMENT TOUTES LES INSTRUCTIONS.
ASSEMBLER L’APPAREIL SUR UNE SURFACE PLANE ET PROPRE.
• OUTILS NÉCESSAIRES : TOURNEVIS CRUCIFORME.
**Il est possible que certaines étapes d’assemblage aient été eff ectuées en usine.**
ANTES DEL ENSAMBLAJE LEA TODAS LAS INSTRUCCIONES CUIDADOSAMENTE.
• ENSAMBLE LA UNIDAD EN UNA SUPERFICIE LIMPIA Y PLANA.
• HERRAMIENTA NECESARIA: DESTORNILLADOR EN CRUZ.
**Algunos pasos del ensamblaje pueden ya estar completados debido a un preens amblaje en fábrica.**
PARTS LIST, LISTE DES PIÈCES, LISTA DE PARTES
NO/Nº/
NO
QTY/QTÉ./
CANT.
DESCRIPCIÓN DESCRIPCIÓN DESCRIPCIÓN
1 12 Smoking Rack Support Supports de rack fumeurs Soporte para la rejilla de ahumado
2 1 Large Smoker Door Porte principale du fumoir avec fenêtre Puerta grande del ahumador con ventana
3 1 Body Handle (Rear) Poignée du fumoir (en arrière) Asa del cuerpo (trasera)
4 6 Smoking Rack Étagère du fumoir Rejilla de ahumado
5 1 Large Door Handle Poignée de porte principale Asa de la puerta grande
6 1 Small Door Handle Poignée de porte secondaire Asa de la puerta pequeña
7 1 Small Smoker Door Porte secondaire du fumoir Puerta pequeña del ahumador
8 1 Smoker Body Fumoir Cuerpo del ahumador
9 1 Water Bowl Bracket Support de la cuvette d’eau Abrazadera del tazón de agua
10 1 Water Bowl Cuvette d’eau Tazón de agua
11 1 Air Damper Clapet d’aération Regulador de aire
12 1 Grease Tray Collecteur de graisse Bandeja de grasa
13 1 Grease Tray Bracket Support du collecteur de graisse Abrazadera de la bandeja de grasa
14 1 Heat Diff user Diff useur Difusor de calor
15 2 Front Legs Pied avant Pata frontal
16 2 Cross Leg Brace Support arrière du pied Abrazadera de la pata cruzada
17 2 Side Leg Brace Support latéral du pied Abrazadera de la pata lateral
18 1 Left Rear Leg Pied gauche arrière Pata trasera izquierda
19 1 Right Rear Leg Pied droit arrière Pata trasera derecha
20 1 Ash Tray Cendrier Bandeja de cenizas
21 1 Pellet Hopper Assembly Ensemble de trémie à granules Ensamblaje de la tolva de perlas
22 3 Door Latch Loquet de porte Seguro de la puerta
23 1 Grease Defl ector Défl ecteur de graisse Defl ector de grasa
24 1 Temperature Sensor Sonde de température Sensor de temperatura
25 1 Pellet Hopper Insulator Écran thermique Aislador de la tolva de perlas
26 1 Pellet Hopper Plate Plaque de la trémie Plato de la tolva de perlas
27 2 Meat Probe Thermomètre à viande Sensor de carne
Parts may vary by item number of model. Les pièces peuvent varier selon le numéro de l’article du modèle. Las piezas pueden variar según el número de artículo del modelo.
Tools needed for assembly: Adjustable Wrench and Phillips Head Screwdriver
Approximate assembly time: 45 minutes *Actual product may diff er from picture shown.
Outils nécessaires à l’assemblage. Clé ajustable et tournevis Phillips. Temps approximatif
d’assemblage : 45 minutes *Le produit réel peut être diff érent de l’image.
Herramientas necesarias para el montaje: Llave ajustable y destornillador de cabeza Phillips
Tiempo aproximado de la asamblea: 45 minutos * El producto real puede diferenciar de la imagen demostrada.
16
1
2
ASSEMBLY, ASSEMBLAGE, ENSAMBLAJE
Actual product may differ from picture shown - Le produit réel peut différer de l’illustration
El producto real puede ser distinto de la imagen mostrada
X6
A
8
2
7
8
15 15
A A
8
37
AUGER ACCESS / AUGER TUBE CLEANING
1. Turn off smoker and allow to cool to touch.
2. Unplug from wall.
3. Remove cooking racks, water bowl, grease defl ector, and heat diff user.
4. Cleanout any ash, pellets or debris in crucible.
5. Remove pellets from hopper.
6. Remove four screws holding pellet hopper to auger housing and remove hopper.
Reference Fig. 1 on page 36.
Tip: If connections to controller are limiting space, remove controller housing and disconnect connections
to gain more access. Reference Fig. 2 on page 36. Remove cable ties as necessary.
7. Remove auger motor screw and nut (Fig. 5).
8. Pull auger motor from auger.
9. Remove auger bushing screw and remove auger bushing.
10. Remove auger from auger tube.
11. Using medium grit sand paper, sand outside of auger and inside of auger tube.
12. Using a vacuum clean out auger tube.
13. Insert auger into auger tube.
14. Insert auger tube bushing and assemble screw.
15. Push auger motor onto auger shaft and assemble screw and nut.
Tip: If controller housing was removed, secure all wiring with new cable ties as necessary to avoid
interference with fan, then reassemble.
16. Assemble pellet hopper to auger housing using four screws.
Cleaning is complete.
AUGER CHECK
1. Turn off smoker and allow to cool to touch.
2. Remove cooking racks, water bowl, grease defl ector, and heat diff user.
3. Clean out any ash, pellets or debris in the crucible.
4. Turn unit on and press and hold the Smoke (Prime) button until “P” is displayed on screen.
This will put smoker in “prime mode,” which will rotate auger continuously until the Smoke (Prime) button
is pressed again.
5. If auger does not rotate, check connection to controller. Reference “Controller Access / Replacement”
instructions.
6. Repeat check after securing connection. If auger still does not work, reference “Auger Access/Auger Tube
Cleaning” instructions to ensure the auger is not jammed.
7. Repeat check after cleaning. If auger still does not work, contact Masterbuilt.
Fig. 5
Auger
Motor
Auger
Bushing
Auger
36
Fig. 4
Crucible
Element
Element
Auger Housing
ELEMENT CHECK
1. Turn off smoker and allow to cool to touch.
2. Remove cooking racks, water bowl, grease defl ector and heat diff user.
3. Clean out any ash, pellets or debris in crucible.
4. Turn unit on and set the cook cycle. Check that heating light is on.
If heating light does not come on, contact Masterbuilt for support.
5. Element should begin to turn red. If element does not begin to turn red, check the connection to
controller. Reference “Controller Access / Replacement” instructions.
6. Repeat check after securing connection. If element still does not work, contact Masterbuilt for replacement.
Fig. 1
Pellet
Hopper
Controller
Housing
Controller
String
Fig. 2 Fig. 3
17
3
4
ASSEMBLY, ASSEMBLAGE, ENSAMBLAJE
X6
A
X2
A
18
19
A A
A
13
May come pre-assembled.
Peut venir pré-assemblé.
Puede venir preensamblado.
18
5
6
ASSEMBLY, ASSEMBLAGE, ENSAMBLAJE
X8
A
D
X8
X8
A
D
X8
17
17
D
A
16
16
D
A
35
CONTROLLER ACCESS / REPLACEMENT
CONTROLLER FUSE REPLACEMENT
ELEMENT ACCESS / REPLACEMENT
1. Turn off smoker and allow to cool to touch.
2. Unplug from wall.
3. Remove pellets from hopper.
4. Remove four screws holding pellet hopper to auger housing (Fig. 1).
5. Remove four screws holding controller housing to pellet hopper (Fig. 2).
6. Remove cable ties as necessary.
7. Disconnect element from controller - red connector (Fig. 3).
Tip: Tie a piece of string to old plug at this step. This will make feeding new element plug thru auger
housing easier in future steps.
8. Remove cooking racks, water bowl, grease defl ector, and heat diff user.
9. Cleanout any ash, pellets or debris in crucible.
10. Remove four screws that mount crucible to auger housing (Fig. 4).
11. Remove crucible from auger housing.
Slide crucible to left to clear auger tube.
Rotate crucible counter-clockwise slightly to clear element.
Lift crucible out of auger housing.
12. Loosen element mounting screw.
13. Remove element from crucible and pull plug and string thru auger housing.
14. Tie string to new element plug and pull plug thru auger housing.
15. Untie string and discard.
16. Connect new element plug to controller.
17. Secure all wiring with new cable ties to avoid interference with fan.
18. Install controller housing on pellet hopper.
19. Install pellet hopper on auger housing.
20. Install new element in crucible and tighten mounting screw.
21. Install crucible into auger housing and install four screws.
22. Install the cooking racks, water bowl, grease defl ector, and heat diff user.
Installation is complete.
1. Turn off the smoker and allow to cool to touch.
2. Unplug from wall.
3. Remove four screws from controller faceplate.
4. Remove controller from housing.
5. Disconnect all connections.
Main power connection -
White connector
Auger motor connection - Orange connector
Intake fan connection - Purple connector
Element connection - Red connector
Temp probe connection - Small black connector
6. Connect all connections to new controller.
Main power connection
Auger motor connection
Intake fan connection
Element connection
Temp probe connection
7. Place controller in housing.
8. Install four screws in controller faceplate.
Installation is complete.
1. Turn off smoker and allow to cool to touch.
2. Unplug from wall.
3. Remove four screws from controller faceplate.
4. Remove controller from housing.
5. Locate fuse housing and remove fuse.
Open fuse housing by pressing down and rotating counter-clockwise.
Pull fuse out of housing.
6. Install new fuse in fuse housing.
7. Place controller in controller housing.
8. Install four screws in controller faceplate.
Fuse replacement is complete.
30
Symptom Cause Solution
Cabinet temp is inaccurate
Cabinet probe has residue build up
on it
Clean cabinet probe.
Faulty controller
Reference “Meat Probe Temperature Veri cation” instructions. Meat
probe has a +/- 5°F (2.78°C) tolerance. Clean meat probe before
performing ver cation.
Reference “Cabinet Temperature Veri cation” instructions. Cabinet
temp has a +/- 15°F (8.33°C) tolerance of average cabinet temp.
Call Masterbuilt for replacement. Reference “Controller Access /
Replacement” instructions.
Grease leaking from smoker
Door not closed properly
Close door and adjust latch so door seals completely around
appliance.
Appliance not level Move appliance to level surface.
Grease tray not in proper location Fully seat grease tray in holder.
Grease tray is full Empty grease tray and reinstall under smoker.
Drain tube is clogged Clean drain tube.
No smoke
(Smoke light is on)
During the smoke cycle, the smoker
will cycle smoke on and off as the pel-
lets ignite and then burn out. This is
normal operation for a pellet smoker.
If no smoke is evident at anytime during the smoke cycle see below
solutions.
Smoke setting has not been set on
controller
Set smoke setting per the operation instructions.
Element is not working properly Reference “Element Check” instructions.
Auger is not working properly Reference “Auger Check” instructions.
Intake fan is not working properly Reference “Intake Fan Check” instructions.
Faulty controller
Call Masterbuilt for replacement. Reference “Controller Access /
Replacement” instructions.
Error code: ERR0
Cabinet temperature probe discon-
nected or not fully connected
Reconnect cabinet temperature probe and ensure connection is fully
seated. Reference “Controller Access / Replacement” instructions.
Faulty cabinet temperature probe
Call Masterbuilt for replacement. Reference “Cabinet Probe Access
/ Replacement” instructions.
Auger not feeding
Auger is not working properly Reference “Auger Check” instructions.
Bad connection between controller
and Auger motor
Unplug connection and reconnect. Reference “Cabinet Probe
Access / Replacement” instructions.
Auger jammed Reference “Cleaning Auger Tube” instructions
Flame going out and not reigniting to
maintain the cabinet set temperature
Ash build up in the crucible Reference “Crucible Cleanout” instructions.
Auger not feeding
Reference “Auger not feeding” in the trouble shooting guide and
follow trouble shooting solutions.
Element not reigniting pellets
Reference “Elemet not on” in the trouble shooting guide and follow
trouble shooting solutions.
TROUBLESHOOTING GUIDE
23
16
15
ASSEMBLY, ASSEMBLAGE, ENSAMBLAJE
23
23
23
10
24
18
17
ASSEMBLY, ASSEMBLAGE, ENSAMBLAJE
4
12
20
29
Symptom Cause Solution
No power to controller
(No beep when plugged into outlet)
Not plugged into outlet Plug into power source.
House breaker tripped Reset breaker.
Bad connection at controller
Unplug connection and reconnect. Reference Controller access/
replacement instructions.
Controller fuse blown Reference “Controller Fuse Replacement” instructions.
Faulty controller
Call Masterbuilt for replacement. Reference “Controller Access /
Replacement” instructions.
Power light not on
(Controller beeps when plugged in)
Appliance not powered on Press on/off button.
Controller fuse blown Reference “Controller Fuse Replacement” instructions.
Faulty controller
Call Masterbuilt for replacement. Reference “Controller Access /
Replacement” instructions.
No display on controller
(Power light is on)
Appliance not powered on Press on/off button.
Faulty controller
Call Masterbuilt for replacement. Reference “Controller Access /
Replacement” instructions.
Heating light not on
Smoker in smoke cycle
Smoke light will be on. Once smoker has completed the set smoke
cycle the smoker will change to the cook cycle and the heating light
will turn on for the duration of the cook cycle.
Cook cycle not set. Set Temp and Time per operation instructions.
Faulty controller
Call Masterbuilt for replacement. Reference “Controller Access /
Replacement” instructions.
Smoking light not on
Smoker in cook cycle
Smoker has completed the set smoke cycle and has changed to the
cook cycle and the Heating light is on. Smoke light is only on during
the smoke cycle.
Smoke cycle not set Set Time per operation instructions.
Faulty controller
Call Masterbuilt for replacement. Reference “Controller Access /
Replacement” instructions.
Element not on
The element is only on during the
intial ignition or reignition of the pellets
Reference “Element Check” instructions.
Bad connection to controller
Unplug connection and reconnect. Reference “Controller Access /
Replacement” instructions.
Faulty element
Call Masterbuilt for replacement. Reference “Element Access /
Replace element instructions.
Meat probe does not read on control-
ler / Error code: “ERR1”
Bad connection at “probe 1”
Unplug connection and reconnect to controller at “probe 1.” Press
“PROBE” button to scroll back to “probe 1”, if ERR1 is still displayed
proceed to next solution.
Faulty meat probe
Plug meat probe into “probe 2” and scroll back to “probe 2.” If ERR2
is displayed meat probe is faulty, call Masterbuilt for replacement.
Faulty controller
If meat probe is found to be good from the above 2 solution steps,
call Masterbuilt for replacement.
Meat probe does not read on control-
ler / Error code: “ERR2”
Bad connection at “probe 2”
Unplug connection and reconnect to controller at “probe 2.” Press
“PROBE” button to scroll back to “probe 2”, if ERR2 is still displayed
proceed to next solution.
Faulty meat probe
Plug meat probe into “probe 1” and scroll back to “probe 1.” If ERR1
is displayed the meat probe is faulty, call Masterbuilt for replace-
ment.
Faulty controller
If meat probe is found to be good from the above 2 solution steps,
call Masterbuilt for replacement controller. Reference “Controller
Access / Replacement” instructions.
Meat probe temp is not accurate
Meat probe has residue build up on it Clean meat probe.
Perform meat probe calibration test
Reference “Meat Probe Temperature Veri cation” instructions. Meat
probe has a +/- 5°F (2.78°C) tolerance. Clean meat probe before
performing ver cation.
Faulty meat probe Call Masterbuilt for replacement.
TROUBLESHOOTING GUIDE
26
START UP/SHUT DOWN INSTRUCTIONS
1. Press ON/OFF button.
2. If the auger has not been primed, follow the auger prime steps on page 11.
3. Set cook cycle:
Press set temp
Press up or down arrows to set the desired cook temperature. (180
o
F – 350
o
F)
Press set temp to enter the cook temperature.
Press set time
Press up or down arrows to set the hours
Press set time
Press up or down arrows to set the minutes
Press set time to enter the cook cycle time.
4. Set smoke cycle: (The “smoke cycle” can be added at any time during the “cook cycle.”)
Press smoke button to make the screen display “S”
Press set time
Press up or down arrows to set the hours
Press set time
Press up or down arrows to set the minutes
Press set time to enter the smoke cycle time
The smoke cycle is designed to generate smoke and will allow the cabinet temperature to vary during this cycle. The
smoker will return to the set temperature after the smoke cycle is complete.
The smoker comes with a default “SP” setting and this setting can be changed if the desired smoke is not achieved in the
default smoke setting. The “SP” setting controls how long the auger will feed and stop feeding pellets during the smoke
setting. A higher “SP” setting can be used in hotter climates while a lower “SP” setting will be more desirable in cooler
climates. Masterbuilt recommends the “SP04” setting for most situations.
Changing the “SP” Setting:
• Press smoke button to make the screen display “S”
• Press set temp
• Press up or down arrows to change the “SP” setting
• Press set temp
The smoker will run the “smoke cycle” and then run the “cook cycle.” If no “smoke cycle” is set, then the smoker will only
run the “cook cycle.”
During the “smoke cycle,” the cook time will run. Smoke time does not add time to the cooking cycle.
Example: Set cook time = 4 hours
Set smoke time = 30 minutes
Total run time = 4 hours = 3.5 hours “cook cycle” + 0.5 hours “smoke cycle”
If no “cook cycle” is set, and a “smoke cycle” is set, then controller will run the “smoke cycle” only.
If a “cook cycle” is set during “smoke cycle”, then same process as above example.
5. Once cooking is complete, turn off the smoker by pressing the ON/OFF button.
Do not unplug the smoker at this step.
The controller will turn off but the fan will continue to run for 5 minutes to prevent any burn back in the auger.
6. Once the fan has turned off , unplug the smoker.
7. Press probe button to check temperature of cabinet, probe 1 or probe 2. Indicator light on display will change each
time button is pressed.
27
INSTRUCTIONS DE MARCHE/ARRÊT
1. Appuyez sur la touche ON/OFF.
2. Si la tarière n’a pas été amorcée, suivez les instructions d’amorçage de la tarière à la page 12.
3. Réglez le cycle de cuisson :
Pressez sur set temp.
Pressez sur les fl èches haut ou bas pour régler la température de cuisson. (180oF à 350oF)
Pressez sur set temp pour régler la température de cuisson.
Pressez sur set time.
Pressez sur les fl èches haut ou bas afi n de régler les heures.
Pressez sur set time.
Pressez sur les fl èches haut ou bas pour régler les minutes.
Pressez sur set time pour régler la durée du cycle de cuisson.
4. Réglez le cycle de fumage : (Le «cycle de fumage» peut être ajoité à tout moment pendant le «cycle de cuisson»).
Pressez sur le bouton smoke afi n qu’un « S » s’affi che à l’écran.
Pressez sur set time.
Pressez sur les fl èches haut ou bas afi n de régler les heures.
Pressez sur set time.
Pressez sur les fl èches haut ou bas pour régler les minutes.
Pressez sur set time pour régler la durée du cycle de fumage.
Le cycle de fumée est conçu pour générer de la fumée et permettra à la température de l’armoire de varier pendant ce
cycle. Le fumeur revient à la température réglée une fois le cycle de fumée terminé.
Le fumeur est équipé d’un paramètre “SP” par défaut et ce paramètre peut être modifi é si la fumée souhaitée n’est pas
atteinte dans le paramètre de fumée par défaut. Le réglage “SP” contrôle la durée pendant laquelle la tarière s’alimente
et arrête d’alimenter les pastilles pendant le réglage de la fumée. Un réglage “SP” plus élevé peut être utilisé dans des
climats plus chauds, tandis qu’un réglage “SP” plus bas sera plus souhaitable dans les climats plus frais. Masterbuilt
recommande le réglage “SP04” pour la plupart des situations.
Modifi cation du paramètre “SP”:
Appuyez sur le bouton de fumée pour faire affi cher l’écran “S”
• Pressez sur set temp
Appuyez sur les fl èches vers le haut ou vers le bas pour modifi er le paramètre “SP”
• Pressez sur set temp.
Le fumoir exécutera le «cycle de fumage» et ensuite le «cycle de cuisson». Si aucun «cycle de fumage» n’est réglé, le
fumoir n’exécutera que le «cycle de cuisson».
Pendant le «cycle de fumage», le temps de cuisson fonctionne. Le temps de fumage n’ajoute pas de temps au cycle de
cuisson.
Exemple: Régler le temps de cuisson = 4 heures
Régler le temps de fumage = 30 minutes
Temps d’exécution total = 4 heures = 3,5 heures «cycle de cuisson» + 0,5 heiure «cycle de fumage».
Si aucun «cycle de cuisson» n’est réglé et qu’un «cycle de fumage» est réglé, le contrôleur exécutera uniquement le
«cycle de fumage».
Si un «cycle de cuisson» est réglé pendant «cycle de fumage», le même processus que l’exemple ci-dessus.
5. Une fois la cuisson terminée, éteignez le fumoir en pressant le bouton ON/OFF.
Ne débranchez pas le fumoir à cette étape.
L’écran de contrôle s’éteindra, mais le ventilateur continuera de fonctionner pendant 5 minutes pour éviter tout retour e
amme dans la tarière.
6. Une fois le ventilateur éteint, débranchez le fumoir.
7. Appuyez sur le bouton de la sonde pour vérifi er la température de l’armoire, la sonde 1 ou la sonde 2. La lampe
témoin allumée change chaque fois que vous appuyez sur la touche.
  • Page 1 1
  • Page 2 2
  • Page 3 3
  • Page 4 4
  • Page 5 5
  • Page 6 6
  • Page 7 7
  • Page 8 8
  • Page 9 9
  • Page 10 10
  • Page 11 11
  • Page 12 12
  • Page 13 13
  • Page 14 14
  • Page 15 15
  • Page 16 16
  • Page 17 17
  • Page 18 18
  • Page 19 19
  • Page 20 20
  • Page 21 21
  • Page 22 22
  • Page 23 23
  • Page 24 24
  • Page 25 25
  • Page 26 26

Masterbuilt 20250918 User manual

Type
User manual

Ask a question and I''ll find the answer in the document

Finding information in a document is now easier with AI