Page is loading ...

ATTENTION: PLEASE READ AND UNDERSTAND ALL INSTRUCTIONS AND WARNINGS
BEFORE ASSEMBLING, INSTALLING OR USING THIS PRODUCT.
TRUCK STORAGE SOLUTIONS
SECURING YOUR REPUTATION
WEATHERGUARD.COM
©2019 WERNER CO. WEATHERGUARD.COM
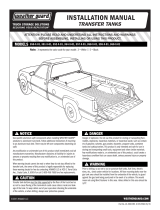
INSTALLATION MANUAL
STEEL & ALUMINUM SIDE BOX WITH
PACK RAT ® DRAWER UNITS
NOTICE
MODELS
DANGER
WEATHER GUARD®
products to aluminum truck beds. Follow additional instructions if mounting
to an aluminum truck bed. There may be left over components depending on
manufacturers warranties. Manufacturer disclaims all liability for injuries to
this product.
transfer tank, the owner of this product is legally responsible for replacing
these warning decals for free by contacting: Werner Co. at 420 E. Terra Cotta
Ave., Crystal Lake, IL 60014 or call 1-800-456-7865 for free replacements.
-
mables, explosives, hazardous materials, or hazardous waste, such as contain-
ers of gasoline, solvents, gun powder, dynamite, propane tanks, acetylene
tanks and cutting torches. This product is only intended and safe for use in
storing and transporting non-flammable liquids. Any modifications made to,
or unintended use of this product, could create a hazardous condition that
can cause death, serious personal injury or property damage.
Part No. 24-00103 REV. A EC0 106017 07/19
WARNING
Prior to drilling, so as not to cut or puncture fuel tanks, fuel lines, electric
gas tank area should be installed from the underside of the vehicle, to guard
against the gas tank being punctured in the event of a collision. This would
mean not using Blind Fastener in this area. Holes drilled in this area should be
9/16".
CAUTION
Transfer tank bottom must be fully supported
-
age of the tank. To keep debris out of your eyes when checking the underside
of the vehicle, or when drilling, always wear protective eye wear.
TRANSFER TANKS
Note: X represents the color code for your model: 3 = White | 5 = Black
350-X-02, 352-X-02, 354-X-02, 358-X-02, 359-X-02, 360-X-02

2
TOOLS REQUIRED
CONTENTS
BOLT KIT CONTENTS
(4) 1/2-13 x 4-1/2
Mounting Stud
(8) 1/2-13
Nylock Nut
(8) 1/2"
Fender Washer
(1) 1/4"
Drain Plug
(4) Floor
Mounting Spacer
(1) Filler Cap(1) Transfer Tank (1) Bolt Kit
ALUMINUM BED UPFIT KIT PARTS LIST - 32-0245 (kit within tank bolt kit)
• Pipe Wrench
• Open or Box End Wrench - (2) 3/4"
• Electric Drill
• Bits: 3/16" & 9/16"
• Pipe Tape
DANGER
resulting in serious bodily injury, death, or property damage.
To avoid such risk:
DO NOT use this transfer tank to transport, transfer or store
DO NOT use this transfer tank as an auxiliary fuel tank by connecting it
to an existing fuel system.
DO NOT use this transfer tank for fueling aircraft.
DO NOT modify this transfer tank in any way or use it for any purpose
other than its intended use.
DO use this transfer tank only for the transport, transfer or storage of
diesel fuel only.
DO use this transfer tank only in fueling land-based motor vehicles and
equipment.
DO vent this transfer tank at all times to allow for fuel expansion and to
Note:
mables, explosives, hazardous materials and hazardous wastes.
• Underwriters’ Laboratories of Canada C142.13 requirements for transpor
These tanks may also be subject to individual state or province regulations, compliance with which is the responsibility of the owner.
Future Tank Removal: Empty all of the combustible liquid and use all lifting hooks for safe and controlled removal of transfer tank from the vehicle.
Danger of explosion. Do not drill, grind, saw, weld or use a torch on this
product. Doing so could result in serious injury, death or property damage.
(1)
Zinc Rich Primer
(4) 9/16" x 1-1/2"
Plastic Washer
(4) Urethane/
Rubber Bushing
©2019 WERNER CO.
A filter must be used when transferring fluid from the tank when using a pump.
T
R
U
C
K
B
E
D
S
I
D
E
Note: Use pipe tape when using a manual or electric transfer pump on the tank.
Transfer tank and pump must be grounded to prevent static charge build-up.

3
STEP 1
STEP 2 STEP 3
Installing the Transfer Tank
Place tank in desired location in bed of pick-up.
Be sure tank is not rubbing edges of the cargo bed.
Mark and Drill the Holes
• If any drilled holes fall between the ribs on
the lower part of the floor, it will be necessary
to use floor spacers between the tank
mounting angle and the floor.
• Make sure the drain plug is accessible
when installing.
Secure the Tank
INSTALLATION INSTRUCTIONS
Note: If your truck bed is constructed of aluminum, use zinc rich primer to coat drilled holes.
Note:
Note:
• When installing model 352 Transfer Tank with a 27" tool
box in a full size short bed pickup, the Tank will need to
to avoid tool box hitting wheel wells. Check the fitment
of the tank with any product being installed along with it.
It may be necessary to place the column of the L tank
toward the rear of the bed.
Use one 7/16 x 1-1/2" plastic washer as a barrier between the
ALUMINUM TRUCK BED INSTALLATION:
• Before installing filler cap neck, wrap threaded end with pipe tape. Do not use liquid or paste plumber’s pipe dope.
Install the filler cap neck, using a pipe wrench to tighten. Install vented fuel cap.
• The filler cap provided with this tank is designed to relieve pressure at 2 to 3.5 psi, and vacuum releases at 2 oz.
Transfer pumps with a flow rate greater than 25 GPM will exceed the cap’s ability to vent.
©2019 WERNER CO.
With the tank in place, use a visible marker to mark the
location of the drill holes. (Remove the tank before
drilling the mounting holes).
Drill 9/16” holes in marked location
From the top, insert Mounting Studs into 9/16” holes in the
truck bed with “TRUCK BED SIDE” markings down.
Secure Mounting Studs by attaching Fender Washer & Nylock
Nut onto bottom of each Mounting Stud underneath truck bed.
Slip tank mounting feet over secured Mounting Studs.
On top of tank mounting feet, attach Bushing, Fender Washer
& Nylock Nut onto Mounting Stud
Do not overtighten Nylock Nut! Compress Bushing 1/8” to
1/4” only.
Nut
Washer
Bushing
Tank
Nut
Mounting Stud
Truck Bed
Washer
CAUTION
Check to ensure the area is free of fuel lines, brake
lines, and wiring.

4
©2019 WERNER CO.
INSTALLATION INSTRUCTIONS - MODEL 359-X-02
If your truck bed is constructed of aluminum, use zinc rich primer to coat drilled holes.
TOOLS REQUIRED
CONTENTS
BOLT KIT CONTENTS
(2) 1/2-13 x 4-1/2
Mounting Stud
(4) 1/2-13
Nylock Nut
(4) 1/2"
Fender Washer
(1) 1/4"
Drain Plug
(2) 5/16-18 x 1"
Bolt
(2) 5/16-18
Blind Fastener
(2) 5/16-18 x 2 1/4"
Bolt
Blind Fastener
Tool
(4) Floor
Mounting Spacer
(1) Transfer Tank (1) Bolt Kit
ALUMINUM BED UPFIT KIT PARTS LIST - 32-0245 (kit within tank bolt kit)
• Pipe Wrench
• Open or Box End Wrench - (1) 9/16", (1) 1/2”, & (2) 3/4”
• Electric Drill
• Bits: 3/16", 1/2”, & 9/16"
• Pipe Tape
(1)
Zinc Rich Primer
(4) 9/16" x 1-1/2"
Plastic Washer
(2) Urethane/
Rubber Bushing
T
R
U
C
K
B
E
D
S
I
D
E
(1) Filler Cap
STEP 1 Installing the Transfer Tank
Place tank in desired location in bed
of pick-up.
Be sure tank is not rubbing edges of
the cargo bed.

STEP 2 STEP 3
Mark and Drill the Holes
• If any drilled holes fall between the ribs on
the lower part of the floor, it will be necessary
to use floor spacers between the tank
mounting angle and the floor.
• Make sure the drain plug is accessible
when installing.
Secure the Mounting Studs
Note:Note:
Use one 7/16 x 1-1/2" plastic washer as a barrier between the
ALUMINUM TRUCK BED INSTALLATION:
• Use pipe tape when using a manual or electric
transfer pump on the tank. Transfer tank and pump
must be grounded to prevent static charge build-up.
Place the tank in the position desire for install and use a
visible marker to mark the location of the drill holes.
(Remove the tank before drilling the mounting holes).
Drill 9/16” holes in marked location.
From the top, insert Mounting Studs into 9/16” holes in the
truck bed with “TRUCK BED SIDE” markings down.
Secure Mounting Studs by attaching Fender Washer & Nylock
Nut onto bottom of each Mounting Stud underneath truck bed.
Slip tank mounting feet over secured Mounting Studs.
On top of tank mounting feet, attach Bushing, Fender Washer
& Nylock Nut onto Mounting Stud
Do not overtighten Nylock Nut! Compress Bushing 1/8” to
1/4” only.
5
©2019 WERNER CO.
INSTALLATION INSTRUCTIONS - MODEL 359-X-02
If your truck bed is constructed of aluminum, use zinc rich primer to coat drilled holes.
Install Mounting Studs
in these locations
Nut
Washer
Bushing
Tank
Nut
Mounting Stud
Truck Bed
Washer
CAUTION
Check to ensure the area is free of fuel lines, brake
lines, and wiring.

-
INSTALLATION INSTRUCTIONS - MODEL 359-X-02
If your truck bed is constructed of aluminum, use zinc rich primer to coat drilled holes.
6
©2019 WERNER CO.
STEP 4 Secure the Blind Fasteners
Before installing blind fasteners, verify the location of wiring,
air-bags, sense wires, etc. so you don’t accidentally damage
something important.
Slip a washer on the 5/16-18 x 2 1/4 in. bolt, and pass them
through the 9/16 wrench and installation tool as show at
right. Place a drop of oil on the 5/16-18 bolt before threading
on the blind fastener.
Place the blind fastener through the hole and use the 1/2 in.
wrench or socket to tighten the bolt until the blind fastener is
fully seated.
As the blind fastener “bulbs-out” it will get easier to turn until
it bottoms out and “sets”. Make sure that the blind fastener
and installation tool do not turn during installation.
1/2 IN. WRENCH/SOCKET
BLACK OXIDE BOLT
FLAT WASHER
9/16 IN. WRENCH/SOCKET
INSTALLATION TOOL
BLIND FASTENER
Install Blind Fasteners
in this location
BACK
Blind Fastener
Washer
Washer
Lock Washer
Bolt

WEATHERGUARD.COM
7
WERNER CO. LIMITED LIFETIME WARRANTY FOR WEATHER GUARD
® PRODUCTS
WEATHER GUARD® Products — Limited Lifetime Warranty
(Purchased on or after 1/1/2009)
WERNER CO. (the “Manufacturer”) warrants to the original purchaser only that WEATHER GUARD® Truck and Van Products (the “WEATHER GUARD®
Product”) will be free from defects in material and workmanship from the date of purchase and continuing for the expected lifetime of the WEATHER
GUARD® Product. A copy of the original sales receipt must be supplied to the Manufacturer at the time a warranty claim is made. This warranty terminates
if the original purchaser transfers the WEATHER GUARD® Product to any other person.
What is Covered
ter January 1, 2009.
What We Will Do To Correct Problems
Subject to the limitations and exclusions described in this limited warranty, the Manufacturer will remedy defects in materials or workmanship by
providing one of the following remedies at its option and without charge to the original purchaser for parts or labor: (a) repairing the defective portion of
the WEATHER GUARD® Product or (b) replacing the entire WEATHER GUARD® Product. In addition, the Manufacturer may elect at its option, not to repair
or replace the WEATHER GUARD® Product, but rather issue to the original purchaser a refund equal to the purchase price paid for the WEATHER GUARD®
Product or a credit to be used toward the purchase of a new WEATHER GUARD® Product.
What is Not Covered
This limited warranty expressly excludes:
•
types or repair of a WEATHER GUARD® Product other than those authorized or provided by the Manufacturer.
• Defects resulting from conditions beyond the Manufacturer’s control including, but not limited to misuse, overloading, or failure to assemble, mount
or use the WEATHER GUARD® Product in accordance with the Manufacturer’s written instructions or guidelines included with the WEATHER GUARD®
Product or made available to the original purchaser.
• Damage to the contents of the box or vehicle.
• TO THE EXTENT PERMITTED BY LAW, IN NO EVENT SHALL THE MANUFACTURER BE LIABLE FOR ANY INCIDENTAL, SPECIAL, INDIRECT, OR CONSEQUENTIAL
DAMAGES, INCLUDING ANY ECONOMIC LOSS, WHETHER RESULTING FROM NONPERFORMANCE, USE, MISUSE OR INABILITY TO USE THE WEATHER
GUARD® PRODUCT OR THE MANUFACTURER’S NEGLIGENCE.
No Other Express Warranty Applies
This Limited Lifetime Warranty is the sole and exclusive warranty for WEATHER GUARD® Products. No employee, agent, dealer, or other person is
authorized to alter this warranty or make any other warranty on behalf of WERNER CO.
If the WEATHER GUARD® Product does not conform with the terms of this limited warranty, the original owner must promptly notify the Manufacturer in
writing upon discovery of the nonconformity. In order to receive the remedies under this limited warranty, the warranty claim must describe the nature of
made to the WEATHER GUARD® Product by other than the Manufacturer or its authorized agent will nullify this limited warranty. Coverage under this
to:
WERNER CO.
ATTN: Warranty Claims
420 E. Terra Cotta Avenue
Crystal Lake, IL 60014
If you have any questions,
please call toll free at 1-800-456-7865
WEATHERGUARD.COM
©2019 WERNER CO.
Part No. 24-00103 REV. A EC0 106017 07/19
/