Page is loading ...

Description
The model F300-1 Studio Joiner has
been designed to economically and
precisely drive V-nails into moulding
corners to securely join them
together. Simple and easy to use,
this complete system produces
strong, tight corners for high quality
professional results. Accepts
mouldings up to 21/2" (64mm).
Producing professional quality pic-
ture frames is now easier than ever.
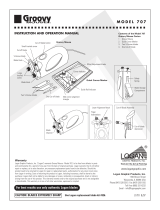
Instruction Manual
Studio
Joiner
P I CT U R E F R A M I N G
www.logangraphic.com
Model F300-1
Reference Part No. L956N rev.1
Rev. 9/14
L956NStudio Joiner manual R1_08.qxd:Studio Joiner 1_4_05.qxd 1/4/10 11:17 AM Page 1

1
Logan Graphic Products Inc., 1100 Brown Street, Wauconda, IL 60084 Toll Free 1 800 331 6232 www.logangraphic.com
Instruction Manual Model F300-1
Studio Joiner
Beam - Adjustable cross bar which contains lever
and V-nail driver.
Magnetic Tip - Spring loaded pin attached to V-nail
driver which V-nails set on.
Depth Gauge - Indicator connected to beam which
adjusts beam to proper height for driving V-nail.
Knobs- allow beam to be moveable for adjustment.
Support Rods - Rods which set into base board and
provide support for beam.
Vise - Used to secure moulding for corner joining.
Handle - Used to tighten or loosen clamp jaw.
Spring Button - Press down and slide handle to quick
adjust clamp jaw into position.
Spacer - Used for irregular shape moulding to pro-
vide solid surface for joining.
V-Nails - V-shaped fasteners used to hold moulding
corners together.
Levelers - Small blocks designed to stabilize lengths
of moulding extending off the board to help with
beam height adjustment.
Identification
Support Rod
Beam
Knob
Lever
Magnetic Tip
Levelers
Depth Guage
Spring
Button
Handle
Vise
Spacer
V-Nails
L956NStudio Joiner manual R1_08.qxd:Studio Joiner 1_4_05.qxd 1/4/10 11:17 AM Page 2

2
Logan Graphic Products Inc., 1100 Brown Street, Wauconda, IL 60084 Toll Free 1 800 331 6232 www.logangraphic.com
Parts List
Parts List
Base board 1
Knobs 2
Levelers 2
Lever assembly 1
Rod Screws 2
Rod Washers 2
Spacer 1
Support rods 2
Vise 1
V-nails 200
Instruction Manual Model F300-1
Studio Joiner
Base Board
V-NailsLever Assembly
Levelers
Knobs
Support Rods
Spacer
Vise Rod Washers
Rod
Screws
Rod
Wrench
L956NStudio Joiner manual R1_08.qxd:Studio Joiner 1_4_05.qxd 1/4/10 11:17 AM Page 3

3
Logan Graphic Products Inc., 1100 Brown Street, Wauconda, IL 60084 Toll Free 1 800 331 6232 www.logangraphic.com
Assembly Procedure
1. Slide support rods into sleeves in board (Fig. 1).
2. Attach support rods with rod screws and
washers using rod wrench (Fig. 2).
3. Slide lever assembly over support rods (Fig. 3).
4. Screw knobs into lever assembly (Fig. 4).
Instruction Manual Model F300-1
Studio Joiner
Fig. 1
Fig. 2
Fig. 3
Fig. 4
L956NStudio Joiner manual R1_08.qxd:Studio Joiner 1_4_05.qxd 1/4/10 11:17 AM Page 4

4
Logan Graphic Products Inc., 1100 Brown Street, Wauconda, IL 60084 Toll Free 1 800 331 6232 www.logangraphic.com
Instruction Manual Model F300-1
Studio Joiner
Preparation
A. Choose V-nail type, size and quality
1. V-nail Type
a. Hard Wood Nails - Used for very hard woods
like oak and maple. Do not use on soft
woods.
b. Soft Wood Nails - Used specifically for soft
woods but can be used on hard woods.
2. V-nail Size
a. Choose a size nail that is at least 1/2 the
moulding thickness.
3. Quality
a. Use at least two V-nails per joint.
1/4" to 1 3/4" wide moulding - 2 nails
2" to 2 1/2" wide moulding - 3 nails
For information on how to purchase additional
V-nails see page 10.
B. Clamp Moulding
• Mark edge of miter to blend any gaps
in corner (Fig. 5) using a stain marker.
Stain markers can be purchased at a
hardware store.
• Glue moulding miter for long lasting
solid corners (Fig. 6).
1. Adjust clamp jaw by pressing spring
button and sliding handle (Fig. 7).
2. Align moulding pieces in vise so top
corner is square (Fig. 8).
3. Do not overtighten. The moulding only
requires enough clamping pressure to
hold it still (Fig. 9).
✔
✔
Fig. 5
Fig. 6
Fig. 7
Fig. 8
Fig. 9
L956NStudio Joiner manual R1_08.qxd:Studio Joiner 1_4_05.qxd 1/4/10 11:17 AM Page 5

5
Logan Graphic Products Inc., 1100 Brown Street, Wauconda, IL 60084 Toll Free 1 800 331 6232 www.logangraphic.com
Instruction Manual Model F300-1
Studio Joiner
Horizontal Plane
Spacer
Needed
Spacer
Needed
No Spacer
Needed
No Spacer
Needed
Fig. 10
Preparation continued
C. Moulding Spacer
1. Moulding must have support for V-nail to drive
into wood. Use the spacer when moulding is
not even with horizontal plane (Fig. 10).
2. With rubber edges facing up, place spacer
between clamped moulding and base board
(Fig. 11).
D. Adjust Beam Height
1. Turn clamped moulding over and lay on base
board spacer (Fig. 12). If using spacer, position
clamped moulding on spacer where V-nail is to
be pressed in.
2. Line up depth gauge with vise post.
3. Loosen knobs and adjust beam so depth gauge
lightly touches vise post (Fig. 13).
4. Tighten knobs.
5. The depth gauge may be pivoted either to
left or right to gain extra clearance.
Fig. 11
Fig. 12
Fig 13
L956NStudio Joiner manual R1_08.qxd:Studio Joiner 1_4_05.qxd 1/4/10 11:17 AM Page 6

6
Logan Graphic Products Inc., 1100 Brown Street, Wauconda, IL 60084 Toll Free 1 800 331 6232 www.logangraphic.com
Instruction Manual Model F300-1
Studio Joiner
Fig. 18
Operation
A. Load V-Nail
1. Align V-nail around magnetic tip with beveled
sharp edge of nail facing down (Fig. 14).
B. Press V-Nail
1. Press V-nail into inside corner first. Slide vise
corner under magnetic tip and V-nail (Fig. 15).
2. Space V-nail 1/4” from inside corner (Fig. 16).
3. Press V-nail flush using lever (Fig. 17).
4. Load second V-nail.
5. Slide vise locating V-nail 1/2 distance between
first V-nail and outer corner (Fig. 16).
6. Press V-nail flush using lever.
7. Repeat on other corners to complete.
• Join sides of frames first. Then join halves
to finish (Fig. 18).
• Always put longer length in vise on right
hand side and shorter length on left hand
side .
8. The Levelers can be deployed to help stabilize
the moulding and or vise that extends past the
edge of the board to allow proper setting of
beam height (Fig. 19).
• The Studio Joiner can easily join poly-
styrene and Emafil plastic mouldings by
slowly but firmly pressing V-nails in. Note;
these will bend if pressed in too fast.
Fig. 16
1/2 Distance First Nail
1/4” (5mm)
Second
Nail
✔
✔
Fig. 14
Beveled
Sharp Edge
Fig. 15
Fig. 17
Fig. 19
✔
L956NStudio Joiner manual R1_08.qxd:Studio Joiner 1_4_05.qxd 1/4/10 11:17 AM Page 7

7
Logan Graphic Products Inc., 1100 Brown Street, Wauconda, IL 60084 Toll Free 1 800 331 6232 www.logangraphic.com
Instruction Manual Model F300-1
Studio Joiner
Fig. 20
Operation Continued
C. To Join Multi Sided Frames
Note; The steps below apply to all five sided, six
sided and eight sided frames.
1. Once the frame has been ‘strap clamped’
(not provided) the Beam must be removed.
2. The clamped frame may now be placed over one
of the Post’s (Fig. 20).
3. The Beam can now be replaced.
4. The Beam must have the correct height set by
using the Vise that is currently not being used.
Simply place the Vise upside down on the board
and set height as described earlier in this manual
(Fig. 21).
5. The V-Nails can now be pressed in, in the normal
fashion (Fig. 22).
6. Once all the frame corners have at least two
V-Nails, simply remove the Beam and remove the
frame.
Fig. 21
Fig. 22
L956NStudio Joiner manual R1_08.qxd:Studio Joiner 1_4_05.qxd 1/4/10 11:17 AM Page 8

8
Logan Graphic Products Inc., 1100 Brown Street, Wauconda, IL 60084 Toll Free 1 800 331 6232 www.logangraphic.com
Instruction Manual Model F300-1
Studio Joiner
Trouble Shooting
Problem Solution
V-nail is not driven in all the way. Re-adjust depth setting. Refer to instructions.
Use correct size V-nail.
Joint opens up when driving V-nail in. Use the spacer provided and position under where the V-nail is to be
driven in.
Make sure the moulding is securely clamped in vise, and is square
against the fence back.
Magnetic V-nail holder sticks in the shaft Remove Beam to gain better access to magnetic V-nail holder and
after insertion of V-nail. clean using solvent to remove glue residue.
Use less glue and have damp cloth on hand to clean up any squeeze
out that occurs.
Frame does not assemble correctly. Join sides of frame first, then join halves to finish. Always put longer
length in vise on right hand side and shorter length on left hand side.
Gaps in joints. Sand Miters smooth.
Make sure the two pairs are equal length.
Reduce the amount of glue in joint.
Check square cutting action of saw.
Use longer V-nails if possible.
Clamped moulding does not fit in between posts. Lift Beam off of support rods, and place vise with moulding in
between support rods and then re-set beam height, to continue to
press V-nail’s in.
Warranty
Logan Graphic Products, Inc. (“Logan”) warrants the Studio Joiner - Model F300-1, to be free from defects in parts
and workmanship for a period of one year from the date of original purchase. Logan warrants that it will either repair
or replace, at it’s sole discretion, any necessary replacement parts found to be defective. Should the product need to
be returned to Logan for repair or replacement parts, authorization for any return must come from Logan in writing.
Costs of returning the product to Logan, including insurances, shall be borne by the purchaser. Logan shall not be
liable for any damages or losses, incidental or consequential, direct or indirect, arising from the use of this product.
This warranty extends only to the original purchaser and is not assignable or transferable. This warranty is in lieu of
all other warranties, expressed or implied.
L956NStudio Joiner manual R1_08.qxd:Studio Joiner 1_4_05.qxd 1/4/10 11:17 AM Page 9

9
Logan Graphic Products Inc., 1100 Brown Street, Wauconda, IL 60084 Toll Free 1 800 331 6232 www.logangraphic.com
Instruction Manual Model F300-1
Studio Joiner
No. Description Qty.
L124N Feet 5
L662 Wrench 1
L869N/ Clamp Screw 1
L932N5
L978 Pin Spring 1
L908N2 Clamp Plate 1
L921N3-BO Handle 1
L922N10 Clamp Base 1
L923N10 Clamp Jaw 1
L925N Plastic Spacer 1
L927N Depth Gauge 1
L929L-BA/ Lever Block 2
L929R-BA
L930N8 Beam 1
L931N4 Drive Rod 1
L936N5 Button Spring 1
L933B4/ Spring Button 1
L933TS
L934N Block Cover 2
L935N Jaw Screw 2
L937 Depth Gauge Screw 1
L939N Block Screw 4
L941N2 Drive Spring 1
L943N3 Magnet 1
L948N2 Handle Pin 1
L949N3 Support Rod 2
L952N Wavy washer 1
L959 Rod Pin 1
L961N T-Knob 2
L1402N-CA Leveler Top 2
L1403 Leveler Rod 2
L1428 Neoprene Pad 1
L1470 Leveler Feet 8
L1471 Leveler Base 2
L1472 Leveler Threaded
Sleeve 2
L1567 Washers 2
L1568 Screws 2
LWS-926N3 Base Board 1
L948N2
L939N
L934N
L941N
L929L-BA
L927N
L937
L124N
L930N8
L961N
L949N3
L959
L921N3-BO
LWS-926N3*
L1567
L1568
L925N
L1428*
L952N
L662
L1402N-CA*
L1403*
L1471*
L1470*
L1472*
L931N4*
L978*
L943N3*
L908N2
L935N
L923N10
L922N10
L933B4/L933TS*
L936N5
L932N8
L929R-BA
L572N6
* Items are only available as preassembled parts.
L956NStudio Joiner manual R1_08.qxd:Studio Joiner 1_4_05.qxd 1/4/10 11:17 AM Page 10

L956NStudio Joiner manual R1_08.qxd:Studio Joiner 1_4_05.qxd 1/4/10 11:17 AM Page 1
10
Logan Graphic Products Inc., 1100 Brown Street, Wauconda, IL 60084 Toll Free 1 800 331 6232 www.logangraphic.com
P r e c i s i o n S a n d e r E L I T E
Model F200-2
Sands miters to perfect 45° angle
for tight, square frames
10 lb wheel
Adjusts 45° left, 90° and 45° right
Micro adjustment for perfect 45°
Aluminum oxide sand paper with life
extending bar
Sand up to 2 1/2“ (64mm) mouldings
Dust removal bar
replacement V-Nails
Find replacement V-nails where you
purchased your tool.
1/4” (7mm), 3/8” (10mm) and 1/2 (12mm)
sizes are available for both soft and hard wood
applications, packaged in quantities of 200.
Instruction Manual Model F300-1
Studio Joiner
Also available From Logan Graphics
Logan Graphics Picture Framing System includes all the tools and accessories you need to produce professional quality
frames including…
Fitting tool Model F400-1
Drives brads or point inserts into wood
frames to hold materials in place
Drives four different inserts
No slipping or bending
Removes inserts
Easy adjust foot
Use on hard or soft woods
Patented rotating insert holder
Proper drive angle assured
No guessing or skill required
P R O J o i n e r Model F300-2
Heavy duty professional-style joiner
for precise corner joints
V-nail alignment pins*
Drives all V-nail sizes
Fits mouldings up to 2
1
/2" (64mm)
Can drive two nails at once
*Patent Pending
For more information, including where to buy Logan Framing
Products, Please visit us at www.logangraphic.com or
call Toll Free (800) 331 6232.
d u a l d r i v e E L I T E
Model F500-2
Spring-loaded action drives both rigid and
flexible points to secure artwork in both
hard and softwood frames
Holds stacks of flexible or rigid points for fast
productive framing
Comfortable handle grip and smooth firing action
Must-have for artists, framers and hobbyists!
For best results, using only authentic Logan points
/