Monitor Audio Apex 40 User manual

Category
Soundbar speakers
Type
User manual

This manual is also suitable for

Apex
Apex
Apex
Apex
Apex
Apex
Apex
Apex
Apex
O w n e r s M a n u a l
Contents 1
Important Safety Instructions 2
Re-cycling 3
RoHS Declaration of Conformity 3
Unpacking 4
Introduction 5
Setting up and Positioning 6
Optimum Positioning 7
Fitting the Apex 10 to a Wall or Ceiling 8
Apex 10 Fixing Configurations 9
Adjusting the Apex 10 Bracket Assembly 13
Fitting the Apex 40 to a Wall or Ceiling 14
Apex 40 Fixing Configurations 15
Grille Badge Fixing 16
Specifications 17
Guarantee and Service 18
Claims under this Guarantee 18
EC Declaration of Conformity 19
Data Protection 20
Owner Information 20
Apex 1
CONTENTS
IMPORTANT SAFETY INSTRUCTIONS
1. Read these instructions.
2. Keep these instructions.
3. Heed all warnings.
4. Follow all instructions.
5. Do not use this apparatus with water.
6. Clean only with a dry cloth. Great care and attention has gone into the materials
chosen to produce the Apex Series. A gentle wipe with a dry, clean cloth is all that is
required to remove any dust. Treat them as you would a fine piece of furniture because
that is how they have been designed.
7. Do not block any ventilation openings. Install in accordance with the manufacturers
instructions.
8. Do not install near any heat source, such as radiators, heat registers, stoves, or
other apparatus (including amplifiers) that produce heat.
9. Only use attachments/ accessories specified by the manufacturer.
10. Use only with the cart, stand, tripod, bracket, or table specified by the manufacturer
or sold with the apparatus. When a cart is used, use caution when moving the cart/
apparatus combination to avoid injury from tip-over.
11. Refer all servicing to qualified service personnel. Servicing is required when
the apparatus has been damaged in any way, such as power supply cord or plug
is damaged, liquid has been spilled or objects have fallen onto the apparatus, the
apparatus has been exposed to rain or moisture, does not operate normally or has
been dropped.
12. This apparatus shall not be exposed to dripping or splashing water and that no
object filled with liquids such as vases shall be placed on the apparatus.
13. This exclamation point within an equilateral triangle is intended to alert the user
to the presence of important maintenance (servicing) instructions in the literature
accompanying the appliance.
monitoraudio.co.uk
2
SAFETY INSTRUCTIONS FOR FIXING YOUR APEX
LOUDSPEAKERS TO A WALL
WARNING: For safety reasons do not attempt to fix these speakers to your wall
if you are unsure of your ability to provide a secure and safe fixing. You will need to
determine where to fit the bracket and the structure of the wall. If unsure, please
obtain the services of a competent qualified trades-person.
WARNING: Ensure that there are no gas/ water pipes, or electricity cables running
behind where the wall bracket is going to be secured. Work from secure steps
and avoid trailing wires.
RE-CYCLING
Correct Disposal of Waste Electrical and Electronic Equipment (WEEE) by
User in Private Households in the EU.
This symbol on the product or accessories indicates that they must not be
disposed of with your household wastes throughout the EU. To prevent
possible harm to the environment or human health from uncontrolled waste
disposal, recycle it responsibly to promote the sustainable reuse of material
resources. Instead it is your responsibility to dispose of your waste equipment by handing
it over to a designated collection point for recycling WEEE. The separate collection and
recycling of your waste equipment will help conserve natural resources and ensure that it is
recycled in a manner that protects human health and the environment.
For more specific information about where you can take your equipment for recycling
please contact your local city/council office, your local waste disposal service or the outlet
where you purchased your Apex product.
ROHS DECLARATION OF CONFORMITY
Directive 2002/95/EC of the European Parliament and of the Council on
the reduction of the use of certain hazardous substances in electrical
and electronic equipment, January 2003.
Background
The RoHS directive restricts the use of Lead (Pb), Cadmium (Cd), Mercury (Hg), hexavalent
Chromium (CrVI), polybrominated biphenyl (PBB) compounds, and polybrominated diphenyl
ether (PBDE) compounds in electrical and electronic equipment sold in the European Union.
Apex 3
UNPACKING
Due to the shape and the polished finish of the product, care must be taken when handling
your new Apex Series Loudspeaker.
Care must be taken when handling the table top stand/ wall plate. This, the
accessories and the grille should be removed from the packaging before
removing and unpacking the loudspeaker.
Great care must be exercised at all times to ensure the driver(s) and tweeter are
not damaged during unpacking and when finally siting in the room. Any physical
damaged caused to the drive unit by not complying with this requirement will not
be covered by warranty.
Within the packaging you will find the following:
Apex 10
• Cabinet
• Table top stand/ wall mounting plate.
• Grille in separate carton.
• Accessory pack. Inc: Short and long bolts, extension pole, adhesive feet and hex key
• Wall fixing template
Apex 40
• Cabinet (with bracket attached)
• Grille in separate carton.
• Accessory pack. Inc: Grub screws, grub screw covers, adhesive feet, badge and hex key.
• Wall fixing template
To remove the Apex products from the carton, place some protective material on the floor/
table top and having removed any loose items (Table top stand, accessory pack, grille)
from the top of the packaging, carefully invert the carton. Also see the icons on the carton.
Gradually pull the carton upwards to expose the underside of your Apex product. Remove
fixing tape from the bag(s) and expose the cabinet.
The Apex 10 will arrive with the clamp arms, pivot and clamp screw in situ. Assemble the
other components in accordance with your requirements following the guides on pages 9-12.
This assembly may need to be flipped over depending on the rotation of the speaker.
The Apex 40 will arrive with the wall bracket attached to the cabinet. To secure the Apex
40 to a wall, please refer to pages 14 & 15.
monitoraudio.co.uk
4
INTRODUCTION
Congratulations and thank you for your purchase of the loudspeaker from the Apex Series.
We are confident they will provide years of enjoyment and pleasure as only high quality
components have been used throughout.
The sophisticated new Apex Series introduces revolutionary new technologies, honed
to produce the highest standards of performance and build quality. A unique blend of
versatility, performance and style, designed to excel in the most demanding audio or home
theatre based systems.
New C-CAM
®
bass drivers have been specially developed for Apex, further enhanced by the
introduction of the high performance RST cone geometry. All bass drivers feature vented,
die-cast aluminium chassis and large diameter, high power voice coils. Using advanced
FEA modelling, the 25mm C-CAM gold dome tweeter has been optimised to eclipse
performance of previous designs with crisp, detailed high frequencies beyond 35kHz.
The rigid die-cast alloy cabinet, baffle and drive units are bolted together using the innovative
through bolt fixing technology adopted in Monitor Audio’s range topping Platinum Series.
The through bolting system provides uniform mechanical pressure, which ties the whole
speaker assembly together and doubles as a rigid bracing system to keep the cabinet stiff
and free from resonance. These features provide enhanced mid-band clarity and resolution
by limiting vibration from the driver and cabinet which could adversely add colouration and
affect sound quality. All component parts are constructed from die-cast or machined metal
alloys, providing extreme rigidity and assured high performance. HiVe
®
port design has
been introduced to Apex, resulting in clean powerful, punchy bass with superior transient
response.
Heavy duty bracket systems have been designed for optimum flexibility and ease of use.
Die-cast or machined from heavy duty aluminium/ zinc alloy, they provide the ultimate in
stability whilst offering greater flexibility with numerous installation options available.
Stylish magnetic grilles have been designed with no visible fixings, providing a simplistic
and sleek appearance.
Apex is a true master-class of engineering excellence, delivering class leading performance
maintaining Monitor Audios’ fine heritage of award winning sound.
Apex 5
SETTING UP AND POSITIONING
Although position and suitability will have been considered prior to purchasing the Apex
speakers, this section will guide you through optimising their positioning and set up. An
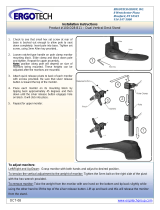
illustration is provided on page 7 to show optimum positions. For instructions on assembling
the brackets and securing them to a wall or ceiling, please refer to pages 8-15.
Positioning - Front Speakers
The tweeter of the centre channel is best pointed towards the listener’s ears to help direct
the sound and should be the first speaker you position in your home theatre room. The
centre channel’s job is to anchor dialogue and other on-screen sounds to the screen.
Typically, As much as 60% of a movie sound track comes through the centre channel .
The centre channel can be placed either above or below, and as close to your TV screen as
possible. If positioned in/ on a cabinet or sitting on top of the TV itself ensure that the front
edge of the speaker is aligned with the front edge of the TV or shelf. Where possible, the
height of the centre channel’s tweeter from the floor, should be close to the height of your
front speakers’ tweeter as possible — ideally, within about 600mm.
When placing the loudspeakers on the wall around a plasma/ LCD TV, the left and right
speakers ideally need to be between 22 & 30° to the left and right of the listening position,
with the tweeters at approximate ear level, or at least aimed towards the listening position.
The Apex 40 can be rotated left/ right (when mounted vertically) or up/ down when mounted
horizontally. The Apex 10 can be adjusted in all directions regardless of mounting position.
Refer to pages 13 & 15.
Positioning - Surround Speakers
Ideally, the primary pair of surround speakers should be placed to the left and right of the
listening position either in line with it, or just behind it (90 - 110°). If it is a 6.1 channel
or 7.1 channel system with more than two surround speakers, or if side placement isn’t
available in a 5.1 channel system, consider placement behind your listening position, facing
the front of the room (135 - 150°).
Surround speakers should be placed high enough so that the drivers do not fire directly at
the listening position one rule of thumb is to place them at ear level while standing. If
the surround speakers fire directly at the listening position, they can overpower your front
speakers.
If the surrounds are mounted on the side walls on brackets, experiment with the direction
they aim in. You may obtain good results from pointing them at the ceiling (Apex 10 only) or
toward the rear corners of the room, for example.
Surround speaker placement ideal for home theatre may not necessarily be perfect for
multichannel music listening, where a precisely focused rear soundstage is optimal. If both
types of listening are important to you, then we recommend positioning your surround
speakers as a compromise between the two.
monitoraudio.co.uk
6
22°
30°
90°
110°
135°
150°
Centre
Left Right
Surround
Right
Surround
Left
Rear
Surround
Left
Rear
Surround
Right
Apex 7
OPTIMUM POSITIONING
FITTING THE APEX 10 TO A WALL/ CEILING
To fix the Apex 10 to a wall or ceiling, follow the step by step instructions below. The Apex
10 can be wall mounted horizontally (for use as a centre channel), the template just needs
to be rotated.
• We do not supply fixing screws or wall plugs with these products so please purchase
these separately choosing appropriate length screws (40mm (1 3/4”) minimum) and
the correct plugs for the wall/ ceiling the loudspeaker will be fixed to.
• After the location for the Apex 10(s) has been decided, use the supplied template to
mark the fixing points and cable hole. Ensure there are no electrical cables or gas/
water pipes behind the proposed location.
• With the holes marked, proceed to drill them using the correct size drill bit for the wall
plugs.
• Assemble the wall plate and components. For ceiling mounting, assemble the
wall plate, bracket extension pole and pivot together using the long bolts. For wall
mounting, the extension pole is not required and the shorter bolts should be used.
Refer to the configurations on pages 9 & 10.
• Depending on the desired angle to aim the Apex 10, it might be necessary to change
the side the clamp screw is located on. In this case, loosen the screw and flip the
clamp arms over so the clamp screw is on the opposite side.
• Fix the wall plate to the wall/ ceiling and press the rubber pad (with through hole) into
place.
• Connect the cables to the terminals on the speaker and align the clamp arms on the
cabinet with the pivot on the assembled wall plate.
• Align the speaker to the direction it will be pointing and tighten the clamp screw.
• Take a step back to ensure it is correctly aligned. If not, loosen the clamp screw slightly
and adjust the angle and repeat the above step.
DO NOT try to adjust the angle of the speaker with the clamp screw tightened.
THIS MAY CAUSE DAMAGE AND INVALIDATE YOUR WARRANTY.
monitoraudio.co.uk
8
Apex 10 Ceiling
Fixing Template
This template shows the
fixing points to secure
the Apex 10 to a ceiling.
C
L
C
L
Fixing Point Centres
FRONT OF WALL PLATE
CABINET (inc grille)
Cable Through
Hole
Fixing Point Centres
Apex 10 Wall
Fixing Template
This template shows the
fixing points to secure
the Apex 10 to a wall.
C
L
C
L
C
L
Cable Through
Hole
Cabinet
Fixing Point Centres
CABINET
TOP OF WALL PLATE
Fixing Point Centres
Pivot
Clamp
Arms
Rubber Pad with
Through Hole
Table Top Stand/
Wall Plate
Cabinet
Clamp
Screw
Short
Screws
APEX 10 FIXING CONFIGURATIONS
Wall Mounting - Exploded
Wall Mounting - Fixed
Apex 9
Ceiling Mounting - Fixed
Table Top Stand/
Wall Plate
Long Screws
Rubber Pad with
Through Hole
Bracket
Extension Pole
Pivot
Clamp Arms
Clamp Screw
Ceiling Mounting - Exploded
monitoraudio.co.uk
10
Table Top Stand/
Wall Plate
Long Screws
Rubber Pad with
Through Hole
Solid Rubber
Pad
Bracket
Extension Pole
Pivot
Clamp Arms
Clamp Screw
Cabinet
Table Mounting - Exploded
Table Mounting - Assembled
Apex 11
Apex 10 Horizontally on a Table/ Shelf - Exploded
If using the Apex 10 horizontally on a table or shelf, attached the self adhesive feet as
shown above to prevent movement. The badge can also be rotated.
Adhesive Feet Fixed
(Cabinet needs to
be rotated for use)
Self Adhesive
Feet
monitoraudio.co.uk
12
ADJUSTING THE APEX 10 BRACKET ASSEMBLY
The clamping mechanism can be adjusted horizontally and vertically. This is achieved by
taking the weight of the cabinet and loosening the clamp screw (Hex Key included). The
cabinet can now be adjusted at both pivot points 1 and 2 (as shown in the illustration
below). When satisfied with the positioning, tighten the screw.
DO NOT try to adjust the angle of the speaker with the clamp screw tightened.
THIS MAY CAUSE DAMAGE AND INVALIDATE YOUR WARRANTY.
Apex 13
FITTING THE APEX 40 TO A WALL
To fix the Apex 40 to a wall (horizontally or vertically), follow the step by step instructions
below:
• We do not supply fixing screws or wall plugs with these products so please purchase
these separately choosing appropriate length screws (40mm (1 3/4”) minimum) and
the correct plugs for the wall/ ceiling your loudspeaker will be fixed to.
• When the location of the Apex 40(s) has been decided, use the supplied template to
mark the fixing points and cable hole. The Apex 40 can be secured using just 2 fixings,
but additional fixing points are incorporated if required. Ensure there are no electrical
cables or gas/ water pipes behind the proposed locations.
• With the holes marked, proceed to drill them using the correct size drill bit for the wall
plugs being used.
• Remove the bracket from the cabinet by loosening the grub screws at each end of the
cabinet.
• Fix the bracket to the wall.
• Connect the cables to the terminals on the speaker and align the ends of the bracket
with the apertures in the rear of the cabinet.
• If the cabinet is to be angled slightly, do not push the cabinet fully onto the bracket.
This allows for some angular adjustment. Tighten the grub screw to take the weight of
the cabinet, and take a step back to check the alignment. If correctly aligned, check
the grub screw is secure and press the rubber grub screw covers into place. If further
adjustment is required, loosen the grub screw slightly, adjust and re-tighten until the
correct position is found. Refer to figures 2 & 3 opposite.
• If the Apex 40 is to be used pointing directly ahead, push the cabinet fully onto the
bracket and tighten the grub screw. Refer to figures 4 & 5 opposite.
• If the Apex 40 is to be used with the grille on, the badge can be added to either of the
locations depending on orientation. An illustration of this can be seen on page 16.
DO NOT try to adjust the angle of the speaker with the grub screw tightened.
THIS MAY CAUSE DAMAGE AND INVALIDATE YOUR WARRANTY.
monitoraudio.co.uk
14
Apex 40 Wall Fixing Template. Horizontally and Vertically
This template shows the
fixing points to secure
the Apex 40 to a wall.
The Apex 40 will be secure using just 2 fixings (one at each end).
Others are provided for added security and alternative configurations.
Fixing Points
Fixing Points
APEX 40 FIXING CONFIGURATIONS
Wall Mounting - Exploded
Cabinet
Fig. 1
Fig. 2
Fig. 4
Fig. 3
Fig. 5
Grub Screw
Angled Fully
Right/ Up
Press the Cabinet
Fully Back...
Angled Fully
Left/ Down
...For Pointing
Straight ahead
Bracket
Apex 15
GRILLE BADGE FIXING
(Apex 40 only)
The Apex grille is not supplied with the badge attached. There are two potenetial positions
for the badge depending on orientation, therefore the decision is left to the end user by
providing the badge loose.
If the cabinet will be positioned vertically, use the badge location on the narrow edge of the
grille (illustrated below). Press the badge through the cloth and attach the rubber grip onto
the back of the spike.
If the cabinet will be positioned horizontally, use the badge location on the broader edge of
the grille (illustrated below). Press the badge through the cloth and attach the rubber grip
onto the back of the spike.
monitoraudio.co.uk
16
Model Apex 10 Apex 40
Frequency
Response
60Hz – 35kHz 50Hz – 35kHz
Sensitivity (1W@1M)
87dB 90dB
Nominal Impedance
8 Ohms 8 Ohms
Power Handling
Single (RMS)
100W 200W
Recommended Amp
Requirements
25-100 W 50-200 W
Maximum SPL (dBA)
110.8 116.8
Bass Alignment
Bass Reflex - Single,
Front Mounted HiVe
Port
Bass reflex – Twin,
Front Mounted HiVe
Port
Drive Unit
Complement
1 x 5 1/2” C-CAM cone
mid-bass driver with
RST Technology.
1 x 25mm C-CAM gold
dome tweeter
2 x 5 1/2” C-CAM
cone mid-bass drivers
with RST Technology.
1 x 25mm C-CAM
gold dome tweeter
Crossover
Frequency
3kHz 600Hz & 3kHz
External
Dimensions. mm
(H x W x D)
250 x 140 x 140 610 x 140 x 100
External
Dimensions. Inch
(H x W x D)
9 13/16 x 5 1/2 x 5 1/2 24 x 5 1/2 x 3 15/16
Weight (each)
Kg ( Ib)
3.95 (8 3/4) 6.85 (15 1/8)
SPECIFICATIONS
Apex 17
GUARANTEE AND SERVICE
To validate your warranty please visit www.monitoraudio.co.uk within 30 days of purchase.
When you register here you’ll gain free entry to our monthly prize draw! What’s more you’ll
be the first to hear about the great things happening at Monitor Audio, including new
products and events!
This equipment has been fully tested prior to dispatch from the factory. Both the craftsmanship
and the performance of this product is guaranteed against manufacturing defects for the
period of three years from the date of purchase (see conditions below), provided that the
product was supplied by an authorised Monitor Audio retailer under the consumer sale
agreement. (The words ‘consumer sale’ shall be construed in accordance with section 15
of the supply of goods act 1973). Monitor Audio accepts no responsibility for defects arising
from accident, misuse, abuse, wear and tear, modification or operation outside of that
specified within this instruction manual. Neither will responsibility be accepted for damage
or loss occurring during transit to or from the parties claiming under this guarantee.
This guarantee covers both labour and parts. The liability of Monitor Audio is limited to the
cost of repair or replacement of the defective parts (at the discretion of Monitor Audio) and
under no circumstances extends to consequential losses or damage.
CLAIMS UNDER THIS GUARANTEE
The equipment should be returned in its original packaging to the original supplier where
possible, or to any other authorised Monitor Audio dealer. If it is not possible to return the
equipment by hand, then it should be sent carriage prepaid via a reputable carrier. If the
original packing is not available replacement packaging can be purchased from Monitor
Audio. If you have any difficulties complying with these requirements please contact us at
the following address:
Customer Service Tel: 44 (0) 1268 740580
Monitor Audio Ltd. Fax: 44 (0) 1268 740589
Unit 2, 24 Brook Road Internet: www.monitoraudio.co.uk
Rayleigh Email: [email protected]
Essex
SS6 7XJ
England
This guarantee does not affect the statutory rights of the consumer under UK law.
monitoraudio.co.uk
18
  • Page 1 1
  • Page 2 2
  • Page 3 3
  • Page 4 4
  • Page 5 5
  • Page 6 6
  • Page 7 7
  • Page 8 8
  • Page 9 9
  • Page 10 10
  • Page 11 11
  • Page 12 12
  • Page 13 13
  • Page 14 14
  • Page 15 15
  • Page 16 16
  • Page 17 17
  • Page 18 18
  • Page 19 19
  • Page 20 20
  • Page 21 21
  • Page 22 22
  • Page 23 23
  • Page 24 24

Monitor Audio Apex 40 User manual

Category
Soundbar speakers
Type
User manual
This manual is also suitable for

Ask a question and I''ll find the answer in the document

Finding information in a document is now easier with AI