Page is loading ...

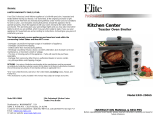
COUNTERTOP OVEN
ROTISSERIE PLUS GRILL & GRIDDLE
Model ERO-2008S
OWNER’S MANUAL & RECIPES
Before operating your new appliance, please read all instructions
carefully and keep for future reference.

1
IMPORTANT SAFETY INSTRUCTIONS
Basic safety precautions should always be followed when using electrical products, especially
when children are present.
WARNING: TO AVOID THE RISK OF ELECTRICAL SHOCK, ALWAYS MAKE SURE THE
PRODUCT IS UNPLUGGED FROM THE ELECTRICAL OUTLET BEFORE ASSEMBLING,
DISASSEMBLING, RELOCATING, SERVICING, OR CLEANING.
When using an electrical appliance, basic safety precautions should always be followed,
including the following:
1. Read all instructions before use.
2. Do not touch hot surfaces. Use handles or knobs and oven mitts.
3. To protect against risk of electrical shock, do not immerse cord, plug, or any non-
removable parts of this oven in water or other liquid.
4. Close supervision is necessary when any appliance is used by or near children.
5. Unplug from outlet when not in use and before cleaning. Allow to cool before putting on or
taking off parts.
6. Do not use outdoors.
7. Do not let cord hang over edge of table or counter, or touch hot surfaces.
8. Extreme caution must be used when moving an appliance containing hot oil or other hot
liquid.
9. Do not place on or near a hot gas or electrical burner, or in a heated oven.
10. Turn all controls to "OFF" before inserting or removing plug from wall outlet.
11. Do not place any flammable materials in the oven: paper, cardboard, plastic, etc.
12. To disconnect, grasp plug and remove from outlet. Do not pull by the cord.
13. Do not use oven for other than intended use.
14. Oversized foods or utensils must not be inserted in this appliance, as they may
create a fire or risk of electric shock.
15. A fire may occur if this appliance is covered by or touches flammable material including
curtains, draperies, walls, etc. when in operation. Do not store any item on top of the
appliance.
16. Do not store any material, other than manufacturer's recommended accessories, in this
oven when not in use.
17. Do not clean with metal scouring pads. Pieces can break off the pad and touch electrical
parts resulting in a risk of electric shock.
18. Extreme caution should be used when using containers constructed of other than metal or
oven safe glass.
19. Do not cover crumb tray or any parts of the oven with metal foil. This will cause overheating
of the oven.
If this product is mounted under a cabinet:
20. To reduce the risk of fire, do not place any heating or cooking appliance beneath the
appliance.
- To reduce the risk of fire, do not mount unit over or near any portion of a heating or
cooking appliance.
- To reduce the risk of electric shock, do not mount over a sink.
21. Do not operate the appliance if the power cord or plug is damaged, it must be replaced by
the manufacturer or its service agent before use.
Some countertop and table surfaces, such as Corian®, wood and/or laminates, are not designed
to withstand prolonged heat generated by certain appliances. It is recommended by countertop
manufacturers that a hot pad or trivet be placed under your appliance to prevent possible
damage to the surface.

2
CAUTION: This appliance is equipped with a polarized plug (one blade is wider than the other
blade) as a safety feature to reduce the risk of electrical shock. This plug is intended to fit into a
polarized outlet only one way. If you are unable to fit the plug into the electrical outlet, try
reversing the plug. If the plug still does not fit, contact a qualified electrician. Never use the plug
with an extension cord unless the plug can be fully inserted into the extension cord. Do not alter
the plug of the product or any extension cord being used with this product. Do not attempt to
defeat the safety purpose of the polarized plug.
NOTE: A short power cord is provided to reduce the risk of personal injury resulting from
becoming entangled in or tripping over a longer cord.
Longer power-supply cords or extension cords are available and may be used if care is
exercised in their use.
If an extension cord is used: (1) the marked electrical rating of the extension cord should be at
least as great as the electrical rating of the product; (2) the extension cord should be arranged
so that it will not drape over the countertop or tabletop where it can unintentionally be pulled on
or tripped over by children or pets.
PLASTICIZER WARNING
CAUTION: To prevent Plasticizers from migrating from the finish of the counter top or table top
or other furniture, place NON-PLASTIC coaster or place mats between the appliance and the
finish of the counter top or table top.
Failure to do so may cause the finish to darken. Permanent blemishes may occur or
stains can appear.
SAVE THESE INTRUCTIONS
THIS APPLIANCE IS FOR HOUSEHOLD USE ONLY

PARTS & IDENTIFICATION
3
A) Housing M) Bake/Roasting Pan
B) Power Cord N) Wire Rack
C) Back Feet O) Tray Handle
D) Front Feet P) Crumb Tray
E) Face Plate Q) Rotisserie Skewer
F) Timer Knob R) Skewer Clamps (2pcs)
G) Function Control Knob S) Thumbscrew (2pcs)
H) ON-Light Indicator T) Griddle
I) Temperature Control Knob U) Griddle Cover
J) Lower Door Frame V) Griddle Cover Handle
K) Glass Door W) Rotisserie Removal Handle
L) Door Handle

BEFORE USING YOUR TOASTER
OVEN
W
ITH ROTISSERIE & GRIDDLE
Before using your appliance for the first time, be sure to:
1) Read all the instructions included in this manual.
2) Remove all packaging materials from the appliance.
3) Make sure that the oven is unplugged and the Timer Knob (F) is in the
“OFF” position.
4) Wash the accessories (N, M, O, P, T, V) in hot, soapy water or in the
dishwasher. Also remove the rotisserie skewer (Q), and the skewer
clamps (R) from the packaging and wash these in hot, soapy water.
5) Thoroughly dry all accessories and re-assemble inside the oven. Plug the
oven into the wall outlet and you are ready to use your new Toaster
Oven with Rotisserie & Griddle.
6) After re-assembling your oven, we recommend that you run it at the
highest temperature (450°F) on the Toast Function for approximately
15-minutes to eliminate any packing residue that may remain after
shipping. This will remove all traces of odor or smoking that is initially
present.
PLEASE NOTE: The initial 15 minutes of use may result in minimal smell and
smoke. This is normal and harmless and comes from the protective substance
applied to the heating elements during manufacturing.
USING YOUR TOASTER OVEN
WITH ROTISSERIE & GRIDDLE
Please familiarize yourself with the following oven functions and accessories
prior to first use:
- Temperature Control Knob (I): Choose the desired temperature from Keep
Warm to 450°F for baking or rotisserie.
- Function Control Knob (G): This oven is equipped with five positions for a
variety of cooking needs.
o Bake/Roast – Cakes, pies, cookies, poultry, beef, pork etc.
o Toast – Bread, Bagels, muffins, frozen waffles, etc.
o Rotisserie – Can cook up to a 5lb. roast or chicken
o Griddle/Broil – For broiling fish, steak, poultry, pork chops, etc
and for making grilled cheese sandwiches, eggs, bacon, etc on
the oven-top.
o Keep Warm – To keep cooked food warm for up to 30-minutes.
- Timer Knob (F): When you turn the Timer Knob to the left (counter-
clockwise), the oven will stay “ON” until it is manually shut “OFF”. To
activate the timer segment of the control, turn to the right (clockwise) to
toast or use as a timer. This function also has a bell that rings at the end of
the programmed time.
4

USING YOUR TOASTER OVEN WITH ROTISSERIE &
GRIDDLE continued…
- ON-Light Indicator (H): It is illuminated whenever the oven is turned on.
- Wire Rack (N): For toasting, baking and general cooking for casserole dishes
and standard pans.
- Bake/Roasting Pan (M): For use in broiling and roasting.
- Tray/Rack Handle (O): Allows you to pick up the wire rack (N), bake tray (M)
when they are hot and remove from the oven.
- Rotisserie Skewer (Q): Roasts a variety of meats and poultry that are very
tender and juicy inside, and browned to perfection outside. (Used with
Rotisserie Clamps & Thumbscrews (R & S) to secure food to the Skewer.)
- Rotisserie Handle (W): Used for removing the rotisserie skewer from the
oven after your food is done.
WARNING:
TO AVOID RISK OF INJURY
OR BURNS, DO NOT TOUCH HOT SURFACES WHEN THE OEVEN IS IN USE.
ALWAYS USE OVEN MITTS.
CAUTION:
ALWAYS USE EXTREME CARE WHEN REMOVING ROTISSERIE, BAKE TRAY,
WIRE RACK, CRUMB TRAY OR ANY HOT CONTAINER FROM THE HOT OVEN.
ALWAYS USE THE TRAY/RACK HANDLE, ROTISSERIE REMOVAL HANDLE
OR AN OVEN MITT WHEN REMOVING THESE ITEMS.
5

ROTISSERIE COOKING
We recommend that you do not cook a roast/chicken weighing more than 4-5lbs.
on the skewer (Q). Chicken should be bound in food ties/string to prevent
chicken legs or wings from unraveling during cooking; and to keep the rotisserie
assembly rotating smoothly. For best results, we recommend that you preheat
the oven for 15-minutes on 450°F.
OPERATION:
- Set the temperature control knob ( I ) to 450°F.
- Turn the function control knob (G) to Rotisserie. Insert the pointed end of
the skewer clamp (R) through the rotisserie skewer (Q), making sure the
points of the skewer clamp (R) faces in the same direction as the pointed
end of the rotisserie skewer. Slide the skewer clamp (R) towards the square
end of the skewer (Q) and secure with a thumbscrew (S).
- Place food to be cooked onto the rotisserie skewer (Q) by inserted the
skewer directly through the center of the food. Push food all the way to the
end until the skewer clamp (R) pierces the food to secure.
- Thread the second skewer clamp (R) through the skewer and pierce the
food to secure and tighten with second thumbscrew (S).
- Check that the food is centered on the rotisserie skewer.
- Insert the pointed end of the rotisserie skewer (Q) into the drive socket
located on the right-hand side of the inside of the oven wall. Make sure the
square end of the rotisserie skewer (Q) rests on the skewer support located
on the left-hand side of the oven wall.
- Slide the Crumb Tray (P) into the lowest position slot right above the
bottom heating element rods to catch food drippings.
- Turn the Timer Control Knob (F) to the “STAY ON” position.
- Use the Rotisserie Guide below for suggested roasting times. Check the
doneness with a reliable meat thermometer. Use an independent timer to
remind you to check the meat temperature periodically.
- When complete, turn the Timer Control Knob (F) to the “OFF” position.
- Remove the skewer by placing the hooks of the Rotisserie Removal Handle
(W) under the grooves on either side of the skewer (Q). Lift the left side of
the rotisserie skewer first by lifting it up and out. Then pull the rotisserie
skewer out of the drive socket and carefully remove the roast from the
oven. Take the meat off of the rotisserie skewer (Q) and place on cutting
board or platter.
ROTISSERIE GUIDE
Cooking results may vary, adjust these times to your individual requirements.
MEAT OVEN TEMP TIME PER LB.
Beef Roast
325 – 450° 30 – 35 min.
Pork Roast
325 – 450° 45 – 50 min.
Ham
325 – 450° 45 – 50 min.
Chicken
350 – 450° 25 – 30 min.
Turkey
350 – 450° 25 – 30 min.
NOTE: All rotisserie times are based on meats at refrigerator temperature. Frozen meats
may take considerably longer and difficult to secure onto skewer. Using a meat
thermometer is highly recommended.
6

ROASTING IN YOUR OVEN
Roast your favorite cut of meat to perfection. The oven can cook up to a 6lb.
chicken, turkey and up to a 6lb. roast. A guide has been provided to assist you
with roasting times. However, we suggest that you periodically check the
cooking progress with a meat thermometer. For best results we recommend
that you preheat the oven for 15-minutes on 450°. We do not recommend the
use of oven roasting bags or glass containers inside the oven unless they are
heat resistant glass. Never
use plastic, cardboard, paper or anything flammable
inside the oven.
OPERATION:
- Place food to be cooked into the Bake/Roasting Pan (M).
- Slide the Grill Rack (N) into the lowest position slot inside the oven.
- Place the Bake/Roasting Pan (M) on top of the grill rack (N).
- Set the Temperature Control Knob ( I ) to the desired temperature.
- Turn the Function Control Knob (G) to Bake/Roast.
- Turn the Timer Control Knob (F) to the “STAY ON” potion.
- To check or remove the roast, use the tray/rack handle (O) provided to help
you slide the pan in and out.
- When cooking is complete, turn the Timer Control Knob (F) to “OFF”
position.
ROASTING GUIDE
Cooking results may vary, adjust these times to your individual requirements.
MEAT OVEN TEMP TIME PER LB.
Beef Roast
325 – 450° 25 – 30 min.
Pork Roast
325 – 450° 40 – 45 min.
Ham
325 – 450° 35 – 40 min.
Chicken
350 – 450° 20 – 25 min.
Turkey
350 – 450° 20 – 25 min.
NOTE: All roasting times are based on meats at refrigerator temperature.
Frozen meats may take considerably longer. Using a meat thermometer is highly
recommended.
7

BROILING IN YOUR OVEN
For best results, we recommend that you preheat the oven for 15-minutes on
450°F.
OPERATION:
- Set Temperature Control Knob ( I ) to 450°F.
- Turn the Function Control Knob (G) to Broil.
- Preheat the oven.
- Place the Wire Rack (N) into the oven in one of the higher top slots.
- Place the Crumb Tray (P) in a slot right under the Wire Rack.
- Place the food onto the Wire Rack (N).
- Food should be placed as close as possible to the Top Heating Elements
without touching it.
- Now adjust the Temperature Control Knob ( I ) to the appropriate
temperature.
- Brush food with any sauces or oil, as desired.
- Turn the Timer Control Knob (F) to “STAY ON”.
- It is advisable to leave the door slightly ajar to ventilate any smoking caused
by the food.
- Turn food over midway through the prescribed cooking time.
- When broiling is complete, turn the Timer Control Knob (F) to “OFF”.
BROILING GUIDE
Cooking results may vary, adjust these times to your individual requirements.
MEAT OVEN TEMP TIME PER LB.
Rib Eye Steak
400° 25 – 30 min.
T-Bone Steak
400° 25 – 30 min.
Hamburger Patty
400° 25 – 28 min.
Pork Chops
400° 40 – 45 min.
Lamb Chops
400° 30 – 40 min.
Chicken Legs
400° 30 – 35 min.
Fish Filets
350° 20 – 25 min.
Salmon Steaks
350° 20 – 25 min.
NOTE: All broiling times are based on meats at refrigerator temperature. Frozen
meats may take considerably longer. Using a meat thermometer is highly
recommended.
8

USING THE OVEN-TOP GRIDDLE
The Griddle (T), located on the top of the oven, is a convenient way to cook a
large variety of foods without having to use additional pots and pans. It is also
perfect for cooking your dinner side dishes while using the Rotisserie or broiling
meat, fish or poultry. Food can be kept warm while cooking items within the
oven itself or while cooking elsewhere. The Griddle (T) is ideal for making
grilled cheese sandwiches, bacon, eggs, French Toast, pancakes, hamburgers,
hot dogs and much more.
PLEASE NOTE:
The initial 15 minutes of use may result in minimal smell and smoke. This is normal and
harmless and comes from the protective substance applied to the heating elements
during manufacturing.
OPERATION:
- Set the Temperature Control Knob ( I ) to the Maximum temperature
setting.
- Turn the Function Control Knob (G) to Broil, this will turn on the top heating
element rods to heat up the Griddle (T).
- Turn the Timer Control Knob (F) to “STAY ON”, preheat for 5-minutes and
begin cooking.
- When finished, turn the Timer Control Knob (F) to the “OFF” position.
- Remove food and serve.
- Always allow the griddle to cool down completely before removing it off
the oven for cleaning. The Griddle (T) is dishwasher safe.
- To remove the Griddle (T), open the Glass Door (K). Grip the front edge of
the Griddle and lift upwards carefully. The back will lift up easily.
- To place the Griddle (T) back onto the oven after cleaning, simply set it
back on top making sure the front edge is facing the front.
USING THE LID/COVER & STEAMING
The Lid/Cover (U) can be used to flash steam vegetables, to warm rolls and to
keep other foods warm before serving.
STEAMING: (Use a Steam Rack [not included])
- Prepare and cut foods into uniform size.
- Place Steam Rack onto the Oven Top Griddle (T).
- Pour ¼ cup of water into the Griddle. Replenish as needed.
- Position food onto the Steam Rack.
- Cover food with the Lid/Cover (U).
- Set the Temperature Control Knob ( I ) to the Maximum temperature setting.
- Turn the Function Control Knob (G) to Broil, this will turn on the top heating element
rods to heat up the Griddle (T).
- Turn the Timer Control Knob (F) to “STAY ON”, preheat for 5-minutes and begin
cooking.
- When finished, turn the Timer Control Knob (F) to the “OFF” position. Remove food
and serve.
9

BAKING IN YOUR OVEN
Bake your favorite cookies, cakes, pies, brownies, etc. The bakeware that will fit
in your oven are up to 9-inches in length. We do not recommend the use of
oven roasting bags or glass containers inside the oven that are not heat resistant.
NEVER use plastic, cardboard, paper or anything flammable in the oven.
NOTE: When using a single wire rack (N), position the Wire Rack (N) in the
lowest support guide.
POSITIONING OF THE RACK WHEN BAKING:
Cookies – Use bottom or middle support guides.
Layer Cakes – Use bottom support guide only. (Bake one at a time).
Pies – Use bottom or middle support guides.
TOASTING IN YOUR OVEN
Large capacity oven allows for toasting 4 to 6 slices of bread, 6 muffins, frozen
waffles or frozen pancakes. When toasting only 1 or 2 items, place food on the
wire rack (N) in the center of the oven.
OPERATION:
- Set the Temperature Control Knob ( I ) to 450°.
- Turn the Function Control Knob (G) to Toast.
- Place food to be toasted on the Wire Rack (N).
- Ensure Crumb Tray (P) is positioned at bottom of oven below the heating
rods.
- Turn the Timer Control Knob (F) to desired darkness. (Light to Dark).
- Bell will ring to signal the end of the Toast cycle.
NOTE:
Wire Rack (N) should be positioned in the middle of the oven with the
indentations pointing down.
10

KEEP WARM
Keep cooked food warm for up to 30-minutes. Longer periods of time are not
recommended as food will become dry or spoiled.
OPERATION:
- Set the Temperature Control Knob ( I ) to Keep Warm.
- Turn the Function Control Knob (G) to Keep Warm.
- Turn the Timer Control Knob (F) to ON.
- Turn the Timer Control Knob (F) to OFF when finished using Keep Warm
function.
CAUTION:
When using the Wire Rack (N) and pulling it out of the oven,
always support the rack. Do not let go until you are sure the rack
is securely supported by the rack handle.
CARE & CLEANING
WARNING:
Be sure to unplug the oven and allow it to cool before cleaning.
If desired, wipe the walls with a damp sponge, cloth or nylon scouring pad and
mild detergent. DO NOT USE STEEL WOOL SCOURING PADS, ABRASIVE
CLEANERS OR SCRAPE THE WALLS WITH A METAL UTENSIL, AS ALL OF THESE
METHODS MAY DAMAGE THE INTERIOR COATING.
All accessories should be washed in hot soapy water or can be cleaned in a
dishwasher. The door can be wiped with a damp sponge and wiped dry with a
paper or cloth towel. Clean the outside with a damp sponge. DO NOT USE AN
ABRASIVE CLEANER AS IT MAY DAMAGE THE EXTERIOR FINISH.
DO NOT USE AN ABRASIVE CLEANER OR STEEL WOOL SCOURING PAD ON THE
DRIP PAN AS IT MAY DAMAGE THE PORCELAIN ENAMEL FINISH.
LET ALL PARTS AND SURFACES DRY THOROUGHLY PRIOR TO PLUGGING THE
OVEN IN AND USING.
11

12
RECIPES Roasts [For Oven Roast or Rotisserie]
These recipes can all be used by cooking the roasting rack OR by using the
Rotisserie Spit & Fork.
CHERRY-GLAZED PORK ROAST
(Can substitute with Beef Roasts)
14 oz. Jar of cherry preserves 3 lb. Boneless pork roast
¼ C Red wine vinegar ½ Tsp. Salt
¼ Tsp. Salt ¼ Tsp. Black pepper
3 Tbsp. Light corn syrup
¼ Tsp. Ground cinnamon
¼ Tsp. Ground cloves
3 Tbsp. Almonds, slivered toasted.
- Combine first 7 ingredients in a small saucepan. Bring to a boil; reduce heat,
and simmer for 2 minutes. Add the almonds and simmer for 1 minute.
- Sprinkle roast with salt and pepper. Place roast into the oven.
- Set Timer for 45min. – 1 hour.
- Set heat selection according to Roasting or Rotisserie.
- After every 15 minutes of roasting, occasionally brush on the Cherry
Mixture.
- When cooking cycle is complete, turn oven off, remove roast carefully and
serve hot.
ROYAL PORK ROAST
1 Boneless pork top loin roast (3 lbs.) 2 cloves garlic, thinly sliced
2 Tbsp. Dijon mustard. 1 Tsp. Red wine vinegar
¾ Tsp. Ground thyme ½ Tsp. Ground sage
1 Cup Reduced-fat beef broth ¾ Cup unsweetened apple juice
½ Cup apricot jam 1 Tbsp. Cornstarch
1 Tbsp. Sour cream
- Cut 8 deep slits in the top of roast, insert garlic into slits.
- Mix mustard, vinegar, thyme, and sage in a bowl. Brush on the mixture onto
the roast entirely.
- Place roast into the oven.
- Set Timer for 1 hour and begin cooking.
- Set heat selection according to Roasting or Rotisserie.
- Warm ¾ cup of broth, apple juice and jam in a small saucepan over medium-
high heat or until jam melts. Brush jam mixture onto roast once. (Save the ¼
cup of broth for later use.)
- Add sour cream and cornstarch to jam mixture and mix until smooth. Add
the rest of beef broth into mixture in a saucepan and cook over medium
heat until bubbly and thickened.
- Serve sauce over thin slices of the pork roast.

13
CAJUN PORK ROAST
(Can substitute with Beef Roasts)
Ingredients:
2 lbs. Boneless Single Loin Pork Roast 2 Tbsp. Paprika
½ Tsp. Cayenne Pepper ½ Tsp. Garlic Powder
2 Tsp. Oregano 1 Tsp. Thyme
½ Tsp. Salt ½ Tsp. White pepper
1 Tsp. Cumin ¼ Tsp. Nutmeg
- Combine all seasonings and rub mixture all over the surface of roast. Place
roast into oven. Set heat selection according to Roasting or Rotisserie.
- Roast for 1- 1 ½ hour. When done, cool down for 10 minutes before serving.
SWEET CHILE CHUTNEY ROAST BEEF
2 ½ lb. Boneless Rib of beef.
Glaze: 3 Tbsp. Honey 1 Tbsp. Dried chilies
Chutney: 1 large thinly sliced apples 2 Tomatoes, chopped
2 Tbsp. Brown Sugar ½ Cup Red Wine
½ Cup Water Pinch of Cayenne pepper
- Place ingredients for Chutney into saucepan. Bring to a boil and simmer for
10 minutes until nice and thick.
- Place roast beef into oven.
- Set heat selection according to Roasting or Rotisserie.
- Cook for ½ hour – 45 minutes.
- Brush Honey onto Roast. Let roast for another 10 minutes and brush some of
Chutney mixture onto Roast.
- Serve with remaining Chutney mixture.

14
RECIPES Chicken [For Oven Roast or Rotisserie]
These recipes can all be used by cooking the roasting rack OR by using the
Rotisserie Spit & Fork.
JAMAICAN CHICKEN
½ Cup Water 5-6 thin slices fresh ginger
2 dried chili peppers, crumbled ½ onion chopped.
¼ cup white-wine vinegar 1 Tbsp. Pepper sauce
1 Tsp. Dried thyme ½ Tsp. Ground allspice
½ Tsp. Ground Black pepper 1 Whole chicken (4 lbs.)
- In blender, combine water, ginger, chili peppers, onions, vinegar, pepper
sauce, thyme, allspice and black pepper. Puree until fairly smooth.
- Truss chicken or tie drumsticks together. Spread mixture onto chicken
thoroughly. Reserve leftover mixture for later use. Cover and refrigerate
overnight.
- Place chicken into oven and set heat selection according to Roasting or
Rotisserie. Roast for 1- 1½ hour.
- Take reserved mixture and place in a saucepan. Bring to a boil and keep
warm over low heat.
- Serve mixture as the sauce with the chicken.
BALSAMIC CHICKEN
1/3 Cup Olive Oil 1/3 Cup Balsamic Vinegar
1 Tbsp. Dried rosemary ½ Tsp. Red pepper flakes
1 clove garlic, minced 1 Whole chicken (4 lbs.)
1 Green bell pepper, sliced 1 Red bell pepper, sliced.
1 Small red onion, quartered 3 Carrots cut into 1” pieces.
1 Small eggplant cut into 1” pieces.
- In small bowl, combine olive oil, balsamic vinegar, rosemary, red pepper
flakes and garlic.
- Truss chicken or tie drumsticks together. Marinate chicken in mixture for a
half hour.
- Reserve the mixture.
- Place chicken into oven.
- Set heat selection according to Roasting or Rotisserie.
- Roast for 1-1½ hour.
- Add the vegetables into reserved mixture and toss to coat evenly. Place
vegetables in roasting basket and roast in Oven when chicken is done and
removed. Cook for 15-20 minutes or until edges brown.
- Serve together hot with chicken.

15
SPICY CUBAN ROTISSERIE CHICKEN
1 large whole chicken (4 lbs.) 2 Tsp. Dried oregano
1 Tsp. Salt & pepper ¼ Cup fresh lime juice
1 Tsp. Ground cumin 3 Tbsp. Olive Oil
1 Shallot, minced ¼ Tsp. Pepper lime slices
2 Large garlic cloves Minced Cilantro sprigs
1 Tsp. Grated Lime peel
- Truss chicken or tie drumsticks together. In large bowl, mix lime juice, olive
oil, shallot, garlic, lime peel, oregano, salt, cumin and pepper together.
- Cover chicken with this mixture, make sure to coat evenly. Cover chicken
and refrigerate overnight.
- At cooking time, take chicken and insert into the oven.
- Set heat selection according to Roasting or Rotisserie.
- Cook about 1- 1½ hours.
- Once Timer is done, let chicken sit for 5-10 minutes. Remove chicken when
it has cooled down.
- Serve with lime slices and cilantro sprigs.
STICKY ROASTED CHICKEN
4 Tsp. Salt 2 Tsp. Paprika
1 Tsp. Cayenne pepper 1 Tsp. Onion Powder
1 Tsp. Thyme 1 Tsp. White Pepper
½ Tsp. Garlic Powder ½ Tsp. Black Pepper
1 Large Whole chicken (4 lbs.) 1 Cup Chopped Onion
- Combine all the spices in a bowl. Remove giblets from chicken. Truss
chicken or tie drumsticks in place. Rub spice mixture into chicken both
inside and out. Place in refrigerator overnight.
- When ready to roast, stuff cavity of chicken with onions. Place chicken into
the oven Set heat selection according to Roasting or Rotisserie.
- Cook for 1-1½ hours.
- Once Timer is done, let chicken sit for 5-10 minutes. Remove chicken when
it has cooled down.
- Carve and serve.

16
RECIPES Hams [For Oven Roast or Rotisserie]
These recipes can all be used by cooking the roasting rack OR by using the
Rotisserie Spit & Fork.
APPLE CIDER GLAZED HAM
1 (3 lb - 5 lb) Boneless shank of Ham 1 Cup Apple Cider
4 Tsp. Cornstarch 2 Tsp. Spicy Mustard
1/8 Tsp. Cloves, ground
- Combine 2 Tbsp. Of apple cider and cornstarch together in small bowl. In a
saucepan, bring cornstarch mixture and rest of apple cider, mustard and
cloves to a boil. Stir until thickened.
- Coat Ham in mixture and refrigerate overnight.
- When ready to cook, place ham into oven.
- Set heat selection according to Roasting or Rotisserie.
- Set Timer to 1 – 1 ½ hour. Occasionally glazing Ham with remaining apple
cider mixture.
- Serve mixture over slices of Ham.
HONEY-APRICOT GLAZED HAM
1 (8-10 lb) Smoked Ham 1 Cup Honey
1 (6oz) Can of Frozen Orange Juice thawed 1/3 Cup Soy Sauce
1/3 Cup Apricot Jam ½ Tsp. Nutmeg
¼ Tsp. Cloves
- Mix all ingredients together except for the Ham. Coat mixture over Ham.
- Place ham into oven.
- Set heat selection according to Roasting or Rotisserie.
- Set Timer for 1 ½ - 2 hours.
- Occasionally brush remaining mixture onto Ham during cooking.
- Once Timer reaches zero, set switch to No Heat Rotation and let cool for 5
minutes.
- Slice and serve with mixture.
SUGARED HAM
1 (8 lbs) half shank of smoked ham 2 Tbsp. Whole cloves
¾ Cup Port Wine 2 Tbsp. Port Wine
1 Cup Packed Brown sugar 3 Tbsp. Dijon Mustard
- Score Ham in diamond pattern and stud with cloves. Marinate Ham in ¾ Cup
of Port over night. Make sure to turn occasionally to coat thoroughly.
- Place Ham into oven
- Set heat selection according to Roasting or Rotisserie..
- Set Timer for 45 – 60 minutes.
- In small bowl, combine sugar, mustard and 2 Tbsp. of port. Mix until smooth
and glazy.
- Once Ham been cooking for 30 – 45 minutes, brush sugar glaze onto Ham
and cook for 15 more minutes. Let stand for 15 minutes before carving and
serve.

17
HONEY BAKED HAM
1 (5 lb) boneless Ham 2 Cups Honey
2 Cups Brown Sugar 5 1/3 Tbsp. Cider Vinegar
2 Tsp. Nutmeg 2 Tsp. Ground cinnamon
2 Tsp. Ground cloves
- Combine all ingredients except for the Ham and the string into a saucepan.
Stir over medium heat until warm. Coat Ham with mixture evenly. Cover
and refrigerate overnight.
- Place ham into oven.
- Set heat selection according to Roasting or Rotisserie.
- Set Timer for 45 – 60 minutes or until heated through.
- Let stand for 10 minutes before carving and serve.
RECIPES Chicken [For Oven Top Grill & Griddle]
Note: Most recipes to be used on the Oven Top GRILL can be incorporated to be
used with grilling INSIDE the oven as well by using the Grilling Rack.
CITRUS GRILLED CHICKEN BREASTS
6 Boneless chicken breasts
½ Cup Frozen orange juice concentrate, thawed
¼ Cup Vegetable oil
¼ Cup Lemon Juice
2 Tbsp Grate orange peel
1 Clove garlic, chopped
½ Tsp Salt
- Mix all the ingredients except the chicken in a bowl. Using a fork, pierce
chicken breasts a few times on both sides. Coat chicken with orange
marinade and store with the marinade in refrigerator for 2-5 hours. Do not
exceed 24 hours.
- Heat up your Oven Top Grill to desired temperature.
- Remove chicken from the marinade. Reserve the remaining marinade for
later use.
- Cover and grill for 15-20 minutes, brushing occasionally with reserved
marinade.
- Heat remaining marinade in saucepan to boiling or until thick. Serve with
chicken.

18
HONEY MUSTARD GRILLED CHICKEN SANDWICHES
4 Chicken breast breasts
¼ Cup Dijon mustard
2 Tbsp Honey
¼ Tbsp Garlic powder
1 Tablespoon Chopped oregano leaves (Fresh or dried)
1/8 Tsp Red cayenne pepper
1 Tsp Water
2 Tbsp Mayonnaise
Thin slices of tomatoes
Lettuce
Whole grain sandwich buns
- Mix mustard, honey, oregano, garlic powder, red pepper and water; brush
onto chicken breasts.
- Heat up your Oven Top Grill to desired temperature.
- Cover and grill chicken 8 to 10 minutes, brushing with mustard mixture and
turning occasionally. Discard any remaining mustard mixture. Serve chicken
on buns with tomato, mayonnaise and lettuce.
CHEDDAR STUFFED GRILLD CHICKEN BREASTS
4 Boneless, skinless chicken breasts
3 oz. Shredded cheddar cheese
¼ Tsp Salt
¼ Tsp Pepper
1 Tbsp Melted butter
- Heat your Oven Top Grill to desired temperature
- Take chicken breasts and flatten to ¼” thick between sheets of plastic wrap.
Sprinkle with salt and pepper.
- Spread shredded cheddar cheese over chicken breasts and roll chicken
tightly, wrapping in the cheese. Brush chicken with melted butter.
- Cover and grill chicken for 15 minutes.
- Serve with salsa, rice and beans.
MAPLE WHISKEY GLAZED CHICKEN BREAST
1 Tbsp Dried Thyme
2 Boneless, skinless chicken breasts
½ Cup Pure maple syrup
3 Tbsp Jack Daniel’s Whiskey
1 Tbsp Vegetable Oil
- Rub chicken breasts with dried thyme.
- Mix the remaining ingredients in a bowl. Using a fork, pierce chicken breasts
a few times on both sides. Coat chicken with marinade and store with the
marinade in refrigerator for 2-5 hours. Do not exceed 24 hours.
- Heat up your Oven Top Grill to desired temperature.

19
- Remove chicken from the marinade. Reserve the remaining marinade for
later use.
- Cover and grill for 15-20 minutes, brushing occasionally with reserved
marinade.
APPLE HONEY GRILLED CHICKEN
4 Boneless, skinless chicken breasts
1/3 Cup Apple jelly
1 Tbsp Honey
1 Tbsp Dijon Mustard
½ Tsp Cinnamon
½ Tsp Salt
- Heat up your Oven Top Grill to desired temperature.
- Mix all ingredients except chicken in a small bowl. Brush chicken with sauce
mixture
- Reserve the remaining glaze for later use.
- Cover and grill for 15-20 minutes, brushing occasionally with reserved glaze.
- Serve chicken drizzled with remaining apply honey glaze.
RECIPES Beef [For Oven Top Grill & Griddle]
Note: Most recipes to be used on the Oven Top GRILL can be incorporated to be
used with grilling INSIDE the oven as well by using the Grilling Rack.
HERB STEAKS
4 Beef boneless top loin steaks, 1” thick. (1 pound)
¼ Cup Dijon Mustard
2 Cloves garlic, chopped finely
2 Tsp Chopped rosemary leaves. (Fresh or dried)
1 Tsp Ground pepper
- Heat up your Oven Top Grill to desired temperature. Mix the mustard,
rosemary, pepper and garlic. Spread mixture onto both sides of the steaks.
- Grill steaks uncovered for 5-10 minutes depending on desired doneness.
COWBOY T-BONE STEAKS
4 Beef T-Bone steaks, ¾” thick
¼ Cup Softened butter
½ Tsp Worcestershire sauce
1 Tbsp Dijon Mustard
2 Cloves garlic, cut in halves
4 Tsp Crushed black peppercorn
¼ Tsp Lime juice
Salt & pepper for taste
- Heat up your Oven Top Grill to desired temperature. Rub garlic onto steaks.
Press crushed peppercorn into the steaks.
/