INSTALLATION ENGLISH
Set up a Mesh Node
1. Plug in your Starlink mesh node to a power outlet.
2. Open the Starlink App. Wait 1-2 minutes for a "PAIR NEW MESH NODE" notification to appear in the app.
3. Click "PAIR". This node will show up as "CONNECTING" on the "Network" screen. Connection will take about 1-2 minutes.
4. Upon connection, the node will appear on the "Network" screen in the app with signal strength.
5. Repeat with additional nodes.
If you don't see the "PAIR NEW MESH NODE" notification in your Starlink App within ~2 minutes of plugging in the new node:
1. You may be too far away from your primary Starlink router.
A. Try finding a closer location to your primary router to complete the pairing process.
2. You may have connected directly to the mesh node's "STARLINK" network instead of staying connected to your
primary Starlink router's network.
A. Try a factory reset to start the process over. Power cycle your mesh node at least 3 times, on roughly
a 2-3 second interval (about as fast as you can probably manage to plug and unplug it), then let it boot.
B. Do not connect directly to your mesh node's new "STARLINK" network after plugging it in.
Stay connected to your original Starlink network and open the app.
C. It may help to rename your original Starlink network something unique to verify that you stay connected to
your original network throughout the process.
3. You may have a non-standard Starlink setup.
A. Starlink mesh nodes are only compatible with the rectangular Starlink model and corresponding WiFi router.
B. The circular Starlink model and corresponding WiFi router are not compatible with Starlink mesh nodes.
C. You cannot add a Starlink mesh router into an existing 3rd party mesh system.
If you are unable to set up your mesh node(s) after following all of the above steps, contact Starlink Customer Support by
logging into your account on Starlink.com.
Solid light: Power connected.
No light: No power connected.
Troubleshooting
LED Light
Starlink
Power
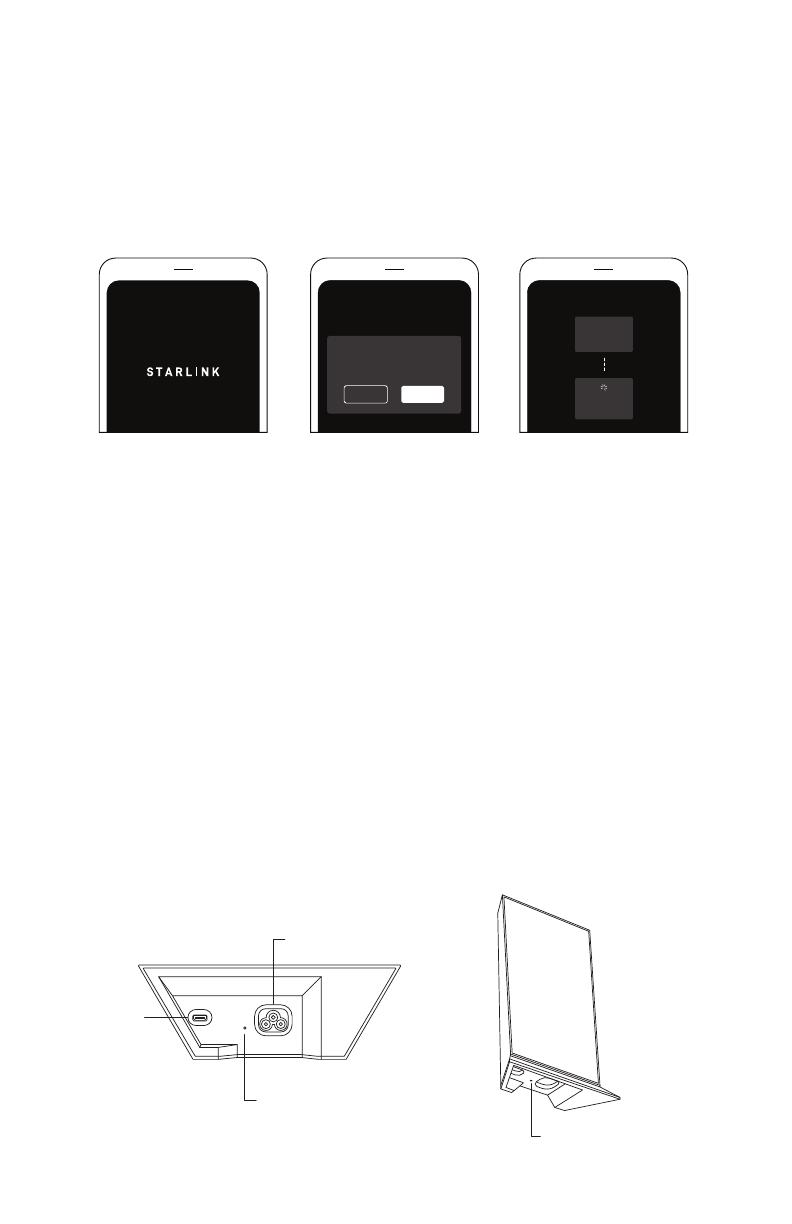
PAIR NEW MESH NODE
DENY PAIR
A new node is attempting to pair with your network.
Do not pair if you are not trying to set up a new node.
MAIN ROUTER
2 DEVICES
MESH 1
CONNECTING


