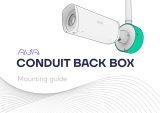
Avigilon Ava Quad Multi Sensor Security Camera Installation guide
- Category
- Security camera accessories
- Type
- Installation guide
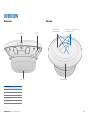
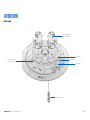
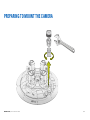
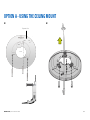
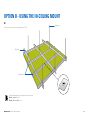
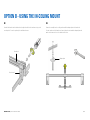
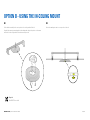
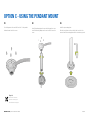
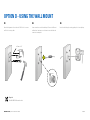
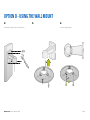
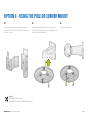
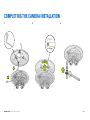
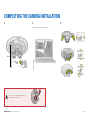
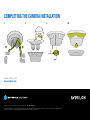
Avigilon Ava Quad Multi Sensor Security Camera provides comprehensive surveillance with its four sensors capturing a 180-degree field of view. Equipped with infrared LEDs, it excels in low-light conditions and delivers crisp images even in complete darkness. The camera's PoE+ connectivity simplifies installation, while the rugged design ensures reliable operation in demanding environments.
Avigilon Ava Quad Multi Sensor Security Camera provides comprehensive surveillance with its four sensors capturing a 180-degree field of view. Equipped with infrared LEDs, it excels in low-light conditions and delivers crisp images even in complete darkness. The camera's PoE+ connectivity simplifies installation, while the rugged design ensures reliable operation in demanding environments.


-
 1
1
-
 2
2
-
 3
3
-
 4
4
-
 5
5
-
 6
6
-
 7
7
-
 8
8
-
 9
9
-
 10
10
-
 11
11
-
 12
12
-
 13
13
-
 14
14
-
 15
15
-
 16
16
-
 17
17


Avigilon Ava Quad Multi Sensor Security Camera Installation guide
- Category
- Security camera accessories
- Type
- Installation guide
Avigilon Ava Quad Multi Sensor Security Camera provides comprehensive surveillance with its four sensors capturing a 180-degree field of view. Equipped with infrared LEDs, it excels in low-light conditions and delivers crisp images even in complete darkness. The camera's PoE+ connectivity simplifies installation, while the rugged design ensures reliable operation in demanding environments.
Ask a question and I''ll find the answer in the document
Finding information in a document is now easier with AI
Related papers
-
Avigilon H5A Installation guide
-
Avigilon H5M-MT-DCIL1 Installation guide
-
Avigilon H6SL Dome Camera Installation guide
-
Motorola Avigilon H5A-DO1-IR Owner's manual
-
-
-
-
Motorola Avigilon H4M-D Installation guide
-
-
Avigilon 9W-H3-3MH-DO1 Installation guide
Other documents
-
Ava Bullet Installation guide
-
Motorola Avigilon 1.3C-H5SL-D1 Installation guide
-
-
-
Motorola aVIGILOn H5A Installation guide
-
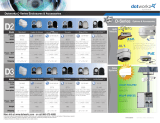 Dotworkz DW-PKG1 Datasheet
-
-
-
 Ava 213C81E443DA User guide
-
Verkada CD51-E User guide

