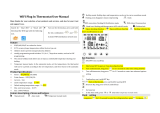
Herschel T-MT User manual

Type
User manual

Herschel T-MT is a mains-powered Wi-Fi thermostat that lets you control your Herschel XLS heaters remotely via the Smartlife app or by voice using Alexa or Google Assistant. It features a 7-day program, 4 periods per day, and an adaptive start function that ensures your room is at the right temperature with minimal energy use. The Open Window Technology detects sudden drops in temperature and turns off the heater to save energy.

Herschel T-MT is a mains-powered Wi-Fi thermostat that lets you control your Herschel XLS heaters remotely via the Smartlife app or by voice using Alexa or Google Assistant. It features a 7-day program, 4 periods per day, and an adaptive start function that ensures your room is at the right temperature with minimal energy use. The Open Window Technology detects sudden drops in temperature and turns off the heater to save energy.

Select XLS
Herschel XLS Heating Controls
T-MT Mains powered Wifi thermostat
Installation and operating instructions
Technical Information
Power Supply: Mains 120-240V
Installation: Wall-mounted using recessed back-box (not supplied)
Setpoint Range: 5-40°C
Protection Class: IPX0
Wireless: 433Mhz (RF) and 2.4GHz (Wifi)
Wireless Range: 35m
Accuracy: +/- 0.5°C
Programming: 7 day program, 4 periods per day
Energy saving: Open Window, Adaptive Start
Smartlife App Control
Works with Alexa and Google Assistant
when paired with the Smartlife App
Warranty: 2 years
Certifications: CE, RoHS, EMC, RED, LOT20
Compliance
Hereby, Herschel Infrared Ltd declares that the radio equipment type T-MT Wireless
Thermostat is in compliance with Directive 2014/53/EU. The full text of the EU declaration of
conformity is available at the following internet address:
https://www.herschel-infrared-technology-center.com/compliance/
Select XLS
Safety
Use in accordance with the EU and national regulations. For indoor use only. Keep
your device completely dry. This product must be installed by a competent person
and in accordance with all the EU and national regulations.
Always isolate the AC mains supply before installing or working on any
components that require 230VAC 50 Hz mains.
This appliance is rated IPX0 and must be installed outside of the splash
zones in bathrooms.
T-MT Mains powered Wifi thermostat
Herschel T-MT is a mains powered compact thermostat control designed to work
exclusively with Herschel XLS heaters with their built-in SMART-R receiver.
T-MT also has Wifi capability to allow you to control your heating remotely via the
Smartlife App or by voice control using Alexa or Google Assistant.
T-MT features a manual temperature mode, a 7x1 day program mode and a holiday
(or Away) mode. All modes will operate your Herschel heater(s) by turning them ON
if the room temperature is lower than the desired temperature and will turn them
OFF once the desired temperature is reached or exceeded.
The T-MT is designed to be easy to operate and incorporates the latest energy-
saving features including Herschel’s open window technology and an adaptive start
function ensuring your room is always at the right temperature with the least
energy use.
The T-MT can be paired to more than one heater meaning multiple heaters within
the room can be controlled with the same T-MT thermostat.
Please read these instructions in conjunction with the Herschel XLS panel
instructions.
T-MT Mains powered
wifi thermostat
Wall Mounting onto
Back box & mains power
1. Gently open the T-MT case using a flat-
headed screw driver.
2. The T-MT is a Class II electrical appliance
and does not require an Earth connection.
Please ensure when connecting the unit
to the mains, that any Earth wire is either
removed or insulated to prevent it
accidentally touching the live or neutral
terminals since this will damage the unit
and invalidate your warranty.
Ensure wiring clamps are fully opened
(unscrew anti-clockwise) before inserting
mains wires.
Place Brown Live mains wire into the
clamp marked “L” and the Blue Neutral
wire into the clamp marked “N” and
tighten both clamps securely.
IMPORTANT: Ensure mains power
is switched off before connecting
Installation
T-MT must be wall-mounted using mains power.
If possible, position the T-MT at least 2m away from the Herschel XLS heater.
3. Screw the rear casing of the T-MT onto the back box using bolts provided. When
positioning the rear of the casing on the wall, be sure to position the vents at
the bottom.
4. Place the front face of the T-MT over the rear casing and snap shut.
T-MT Mains powered
wifi thermostat
Display & Buttons 1. Day of week
2. Time
3. Temperature
4. Heating on symbol
5. Adaptive Start function enabled
6. Window Open function enabled
7. Operating Modes
8. Holiday (Away) Days remaining
9. Program number being run
10. Power On / Off
11. SET button
12. PRG Program button
13. Minus ‘-’ button
14. Plus ‘+’ button
15. Holiday Mode
Operating Instructions
Pairing the T-MT with the Heater
1. Double press the Pairing button on the SMART-R box of the heater. The green
pairing status LED will start to flash and the heater is ready for pairing.
2. Ensure power is available to the T-MT, but that the power button on the unit is
switched off. “OF” is shown on the display.
3. Long-press the SET button on the T-MT and the word “PAIR” will flash on the
display.
4. When pairing has completed successfully, the green pairing status LED on the
SMART-R box will become a steady green and the word “PAIR” on the T-MT will
disappear.
5. You should not experience any difficulty in pairing, but in case you do, please
ensure the T-MT and Heater are within range of each other and try the above
process again.
6. Press the Power button on the T-MT to start using it to control the heater.
T-MT Mains powered
wifi thermostat
Managing your heating using your T-MT Controller
All the following steps can be performed using either the Smartlife App or the
controller keypad. However the Smartlife App makes the controller very simple and
convenient to operate. We recommend using the App to program the T-MT.If you
do not intend using the App, please jump ahead to the section “Controlling the T-MT
with its keypad”.
About the Smartlife App
The Smartlife App is constantly evolving and future versions may have some
differences to these printed instructions which were correct at time of printing. You
can always find the most up to date version of the instructions by checking the T-MT
controller product page on the Herschel website, where there is a link to the most
up to date instructions.
Scan the QR code below to download the Smartlife App from the App Store or
Google Play.
Alternatively, search “Smart Life” on Google Play or the App Store & look for this
icon.
Downloading & Installing the Smartlife App
After installing and opening the Smartlife App, you must register an account using an
email address and password and accept the terms of use.
T-MT Mains powered
wifi thermostat
To add your T-MT controller
Turn the T-MT off using the power button. Long-press PRG until the Wifi symbol
flashes.
Tap ‘+’ top right of App Select “Small Home Appliances”
and then “Thermostats”
If this is your first
thermostat you are adding
you will be asked to enter
your Wifi password.
You will not have to do
this when you add
subsequent thermostats
to the App.
Operations available on the App
From the main screen of the Smartlife app, you can
access management features also available from the
keypad of your T-MT:
- Power On / Off (turns off the T-MT and the
heater)
- Temperature override (Orange circle with + and
buttons)
- Manual Operation
-“Smart” Operation (Program Mode)
- Holiday Mode
- Settings
- Controller Keypad lock
Give your T-MT a name
and access the main
screen.
T-MT Mains powered
wifi thermostat
Explanation of operating modes
Smart / PRG mode
Your Herschel Select XLS heater works most efficiently when it is set up to run
against a program controlled by the T-MT thermostat. This program will always
ensure your room reaches the temperature you want at the time you want it, each
day of the week. This is represented by the “Smart” function on the App, and by
the PRG function on the T-MT keypad. So usually you will want to set up and run
the unit in Smart / PRG mode. To enable Smart mode on the T-MT, touch the
“Smart” icon on the App main screen and alter the program settings in “Settings”.
Manual / MAN mode
Selecting Manual (MAN) mode allows you to set and maintain a constant
temperature that does not vary with the time of day. Once you set a temperature
using Manual mode, the T-MT will maintain this temperature until you give the T-
MT another command. Select Manual mode by touching the “Manual” icon on the
App main screen and alter the temperature up or down using the + and buttons.
Override
You can always override the Programmed or Manual set temperatures to be
higher or lower by using the +or keys on the App main screen or T-MT keypad to
change the temperature. When operating on Smart / PRG mode, the T-MT will
maintain the override temperature until the next programmed period (when the
next programmed temperature will be set). Under Manual mode, the override
temperature will remain set until you change it again manually.
Holiday Mode
There is also a Holiday (HOL) mode which allows you to save energy by setting a
lower temperature while you are away. The HOL mode has a day-counter feature
allowing you to set the number of days you are away and return the heating to
normal operation ahead of your return.
Select Holiday mode by touching the “Holiday” icon on the App main screen. Select
Days away using the slider and set your holiday temperature using the +or
buttons. We recommend ending holiday mode at least one day before your return
to allow your house to warm back up again.
T-MT Mains powered
wifi thermostat
Other App functions
Settings
“Settings” on the App allow you to change:
- The Smart / PRG mode program schedules and temperatures;
- Temperature units (Centigrade or Fahrenheit);
- Calibration (Calibration is explained later in this manual);
- Adaptive start On or Off (Adaptive Start is explained later in this manual);
- Open Window Technology On or Off (Open Window is explained later in this
manual);
Keypad Lock
The “Lock” function on the App main screen locks the keypad of the T-MT so no one
can operate the controller from the device itself, until keypad lock is removed.
Device Details
You can alter other details about your T-MT including enabling Alexa or Google
Assistant or sharing control of your device with other members of your family by
tapping the pencil icon at the top right of the App main screen.
If you begin to use Smartlife to control other Home Automation devices, then you
can also integrate your T-MT control into other home automation tasks that you set
up in Smartlife from the Device Details screen.
Setting Time & Calibration
1. Press the SET button on the T-MT for 5
seconds to enter the settings mode. Day 1
of the week will begin to flash on the
display.
2. Use the +or - keys on the T-MT to set the
day of the week. (e.g. if 1is Monday and
today is Wednesday, press + until 3 flashes
in the display.)
Controlling the T-MT with its keypad
3. Press SET again to advance to change the minutes and use the + or keys again to
adjust.
4. Press SET again to advance to change the hour and use the +or keys to adjust (it
is a24 hour clock).
T-MT Mains powered
wifi thermostat
3. Press SET again to advance to change the minutes and use the + or keys again to
adjust.
4. Press SET again to advance to change the hour and use the +or keys to adjust (it
is a24 hour clock).
5. Press SET again to Calibrate the temperature of the T-MT to match another
thermostat. Calibration is not usually necessary and we explain its use later. If
you need to Calibrate, perform this step here.
6. The T-MT automatically saves your changes as you enter them.
7. If you use the T-MT with the Smartlife App, your controller and phone will
automatically synchronise time and date settings, making this step unnecessary
using the Smartlife App.
Selecting & Using Operating Modes
To select Manual (MAN) or Programming (PRG) modes, press the PRG button until the
mode you require is shown at the top of the display.
Manual Mode
Select the Manual mode by clicking the PRG button until MAN is shown on the display.
Use the +or buttons to set the temperature you want the T-MT to maintain in the
room.
Note that the T-MT will maintain this temperature 24 x 7 until you switch to another
mode.
Programming the T-MT
To change the program defaults, proceed
as follows.
Mon - Fri Sat - Sun
Period 1 06:30 21°C 08:00 21°C
Period 2 08:00 18°C 10:00 18°C
Period 3 18:00 21°C 18:00 21°C
Period 4 22:30 16°C 23:00 16°C
Program Mode
The T-MT comes with the following
program defaults which you can keep or
change.
T-MT Mains powered
wifi thermostat
Set time & temperature for each day
Long-press PRG and the display will
change to enable input of the time and
temperature of the 4 periods for each day
of the week, starting with the first period
on day 1.
The Time will flash at the top left of the
display.
Holiday Mode
Holiday (Away) mode allows you to set a
cooler fallback temperature to maintain
in the house to save energy but avoid
frozen water pipes. The mode has a
countdown timer in which you can set up
to 99 days away, ensuring your normal
heating settings resume ahead of your
return, allowing you to come back to a
warm property.
Use + or buttons to change the time. Press PRG to advance to the temperature
setting which will then flash.
Use + or buttons to change the temperature.
Press PRG to advance to the next period.
Repeat the above steps to complete the 4 periods for each day. For 7 days of the
week this means a total of 28 programming steps.
After the final programming entry, the next click of PRG will return the unit to normal
operation.
To set the countdown timer, long press on the Holiday (Palm Tree) button on the key
pad. The “HOLMode is displayed and the days display will begin to flash.
Adjust the number of days you are away using + and keys.
Press the Holiday button again to set the temperature to be maintained while you
are away.
Alter the temperature using the + and keys.
T-MT Mains powered
wifi thermostat
Press the Holiday button again to save and exit. The days number will count down
daily until your entered number of days has elapsed and your thermostat will revert
to its previous mode and settings. We recommend ending holiday mode at least one
day before your return to allow your house to warm back up again.
To quit an active holiday mode, press the “PRG” button and select Manual or
program modes.
Open Window Function
If the T-MT detects a temperature drop of more than 3°C within 15 minutes, the
controller will power-off the heater. “OF” will appear on the screen and the text
“Alarm! Open Window!” will be displayed. Pressing the Power button on the unit will
resume normal operation, or waiting for 30 minutes will also restore normal
operation.
Open Window detection will only work if the feature is activated and shown as an
Open Window icon on the display (see display schematic on page 2). To activate the
Open Window function, press “SET” and ‘+’ together for 3 seconds. To deactivate the
Open Window function, repeat the process.
Adaptive Start
Adaptive start is an intelligent energy-saving feature which will turn on the heating in
advance of the next scheduled time if the current temperature is more than 5°C
below the next target temperature. (This avoids wasteful loads on the heater).
Adaptive Start will only work if the feature is activated and shown as a Timer icon on
the display (see display schematic on page 2). To activate the Adaptive Start feature,
press “SET” and -together for 3 seconds. To deactivate, repeat the process.
Keypad Lock
To activate the keypad lock, press SET and Holiday Mode buttons together for 3
seconds. A shut padlock icon will appear on the screen. Press SET and Holiday Mode
buttons together again for another 3 seconds to deactivate the keypad lock.
Select XLS
Calibration
Calibration is a process to alter the temperature of the T-MT up or down in order to
align the unit with another thermostat.
The T-MT can be calibrated 5°Cup or down from the default of 0 (no calibration).
You can calibrate in steps of 0.5°C.
Calibrating UP (i.e. +1 °C etc) means the T-MT will display a higher temperature than
the present one being shown. Use this when you think the T-MT is under-reading
compared with another thermostat.
Calibrating DOWN (i.e. - 1 °C etc) means the T-MT will display a lower temperature
than the present one being shown. Use this when you think the T-MT is over-reading
compared with another thermostat.
When adjusting the T-MT Time & Temperature settings using the SET button,
calibration is the final setting you can change. The default is 0. Use + or keys to
adjust this figure up or down.
2 Year Warranty
Register your product at the Help & FAQs section of your local Herschel website.
Within two years from date of purchase Herschel will repair or replace the T-MT
where the fault is due to defects in materials or workmanship. This warranty is for
standard domestic use only and excludes commercial uses. In the event of a warranty
claim please visit the Customer Service area of the Herschel Website and follow the
Warranty Claim process. You will need proof of purchase.
Note your serial number here.
  • Page 1 1
  • Page 2 2
  • Page 3 3
  • Page 4 4
  • Page 5 5
  • Page 6 6
  • Page 7 7
  • Page 8 8
  • Page 9 9
  • Page 10 10
  • Page 11 11
  • Page 12 12

Herschel T-MT User manual

Type
User manual

Herschel T-MT is a mains-powered Wi-Fi thermostat that lets you control your Herschel XLS heaters remotely via the Smartlife app or by voice using Alexa or Google Assistant. It features a 7-day program, 4 periods per day, and an adaptive start function that ensures your room is at the right temperature with minimal energy use. The Open Window Technology detects sudden drops in temperature and turns off the heater to save energy.

Ask a question and I''ll find the answer in the document

Finding information in a document is now easier with AI