Page is loading ...

Installation Instructions
Family: Atlantis | Item No. 1518 CD
Start Here
HINKLEY LIGHTING 33000 Pin Oak Parkway Avon Lake, OH 44012 (p)800.442.5539 / (f) 440.653.5555 www.hinkleylighting.com
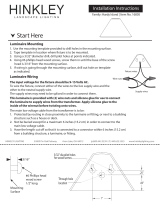
Luminaire Mounting
(For typical ground spike mounting)
1. To prevent electrical shock, disconnect the transformer
from the electrical supply before installation or service.
2. Run wire from luminaire through mounting hole in the top
of the ground spike.
3. Attach luminaire to ground spike by threading to mounting
hole in spike and locking it in place.
4. Place spike in desired position and insert into ground until
the ange of spike is ush with ground.
5. Strip the two wire leads from the luminaire and connect
to the main supply wire using the provided silicone lled
wire nut.
Note: Wire is to be protected by routing in close proximity to
the luminaire or tting or next to a building structure such
as a house or deck. Wiring should be buried a maximum of
6 inches (15.2 cm) in order to connect to main supply wire.
The main supply wire must have its length cut o within
6 inches (15.2 cm) from a building structure, a luminaire
or tting.
Silicone filled
Wire nut
Fixture Wire
Supply Wire
Fixture Body
Cedar Maintenance
Note: A thin clear coat, non-UV inhibiting lacquer was applied
at the factory to minimize naturally occurring color change
prior to installation. You may maintain the wood in any means
typical for a cedar deck.
In order to maintain the cedar, remove the cedar from the
xture.
1. Unscrew the two hex screws from the back of the xture
2. Slide the cedar up and o of the metal xture.
Metal Fixture
Cedar
Hex Screw
/
