Page is loading ...

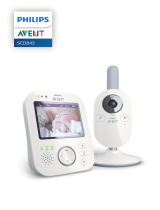
MBP20 - Quick Start Guide
For a full explanation of all features and instructions, please refer to
the User's Guide.
1. Setting up your digital baby monitor
1.1 Baby unit power supply
1. Insert the DC plug of the power adapter with the smaller DC
plug into the DC socket in the side of the baby unit, as shown.
2. Connect the other end of the power adapter to a suitable mains
power socket or power outlet.
MBP20 - Guide de démarrage rapide
Pour une explication plus complète des fonctionnalités et des
consignes, veuillez vous reporter au Guide de l'utilisateur.
1. Réglage du Moniteur de bébé numérique
1.1 Alimentation électrique de l'appareil de bébé
1. Insérez la prise à petite broche de l'adaptateur d'alimentation
dans le côté de l'appareil de bébé, tel que démontré.
2. Connectez l'autre extrémité de l'adaptateur d'alimentation à la
prise secteur.
MBP20 - Guía rápida de inicio
Para obtener una explicación más detallada de todas las funciones
e instrucciones, consulte la Guía de usuario.
1. Configuración de su monitor digital para bebé
1.1 Suministro de energía de la unidad para el bebé
1. Coloque el transformador con el conector más pequeño en el
lateral de la unidad para el bebé, como se muestra.
2. Conecte el otro extremo del transformador al tomacorriente o
enchufe.
DC SOCKET /
PRISE CC /
ENTRADA CC
DC PLUG /
BROCHE CC /
CONECTOR CC
1.2 Parent unit battery installation
A rechargeable battery pack is supplied and MUST be fitted in the
parent unit in order for the parent unit to work. Charge the parent
unit before you use it for the first time or when the parent unit
indicates that the battery is low.
1. Take off the belt clip / stand.
2. Slide off the battery compartment cover.
3. Insert the plug of the battery pack into the socket inside the battery
compartment, and fit the battery pack into the compartment.
4. Replace the battery compartment cover, and reinstall the belt
clip / stand (refer to section 1.3).
5. Insert the DC plug of the power adapter with the larger DC plug
into the DC socket in the side of the parent unit.
6. Connect the other end of the power adapter to a suitable mains
power socket or power outlet.
7. The Charging Indicator comes on.
1.2 Installation de la batterie de l'unité parentale
L'appareil parental vient avec un jeu de batteries. Chargez l'appareil
parental avant de l'utiliser la première fois ou lorsque l'appareil
parental indique que la batterie est faible.
1. Enlevez l'agrafe de ceinture.
2. Faites glisser le couvercle du logement de batteries.
3. Insérez le jeu de batteries fourni, et placez le jeu de batteries
dans le compartiment.
4. Replacez le couvercle du compartiment à batteries, et
réinstallez l'agrafe de ceinture (voir la section 1.3).
5. Insérez la prise à grosse broche dans le côté de l'appareil de
bébé.
6. Connectez l'autre extrémité de l'adaptateur d'alimentation à la
prise d'alimentation principale.
7. L'indicateur de charge s'allume.
1.2 Instalación de la batería en la unidad para los
padres
La unidad para los padres viene con una batería. Cargue la unidad
para los padres antes de utilizarla por primera vez o cuando la
misma indique que el nivel de carga de la batería es bajo.
1. Extraiga la presilla para el cinturón.
2. Retire la tapa del compartimiento de la batería.
3. Coloque la batería que se proporciona dentro del
compartimiento de la misma.
4. Vuelva a colocar la tapa del compartimiento de la batería y a
insertar nuevamente la presilla para el cinturón (consulte la
sección 1.3).
5. Coloque el transformador con el conector más grande en el
lateral de la unidad para los padres.
6. Conecte el otro extremo del transformador al tomacorriente.
7. El Indicador de carga se enciende.
Battery SOCKET /
PRISE de batterie /
ENTRADA para la
batería
Battery PLUG /
BROCHE de batterie /
CONECTOR de la
batería
1.3 Belt clip / stand on the parent unit
1. The belt clip/stand attaches to the back of the parent unit and
clips into the locking slots on each side.
2. The unit comes with the accessory fitted in belt clip mode.
3. You can convert it into stand mode by pulling the clip out slightly
and then rotating it by half a turn, as shown.
1.3 Agrafe de ceinture sur l'appareil parental
1. Attachez l'agrafe de ceinture aux fentes de verrouillage sur le
côté arrière.
2. L'accessoire est livré avec l'unité configurée en mode agrafe de
ceinture.
3. Vous pouvez le convertir en mode support en inclinant l'agrafe
de ceinture et la tournant d'un demi-tour.
1.3 Presilla para cinturón en la unidad para los
padres
1. Coloque la presilla para el cinturón en las ranuras de sujeción
en la parte posterior.
2. El accesorio viene con la unidad en modo presilla para
cinturón.
3. Se puede pasar a modo soporte de pie levantando la presilla
para el cinturón y girándola hasta la mitad.
2. Basic operation of the keys
Parent unit
1
In idle mode: Press to access the main menu.
In menu mode: Press to access the sub-menu, or
confirm the settings.
3
In idle or menu mode: Press and hold to power on/off
the parent unit.
In menu mode: Press to cancel settings or go back to
the previous level.
+
In idle mode: Press to increase the speaker volume.
In menu mode: Press to move up the menu list.
-
In idle mode: Press to decrease the speaker volume.
In menu mode: Press to move down the menu list.
6
Press to deactivate/activate the video feed and turn
on/off the LCD display.
7
Press and hold to talk back through the baby unit.
Release to quit the talk mode.
Baby unit
>
Press to increase the speaker volume.
<
Press to decrease the speaker volume.
2
Press to start playing the selected lullaby.
During lullaby playing, press to select and play the
other lullabies.
0
Press and hold to power on/off the baby unit.
8
Press to start playing the selected lullaby.
9
Press to stop the lullaby playing.
1 2
3 4
/