Page is loading ...

Instruction manual
DRT6454
B - 2023/06
Inotransfer

2
Member of Exel group DRT6454
B - 2023/06
All communication or reproduction of this document, in any form whatsoever and all use or communication of its
contents are forbidden without express written authorisation from Sames.
The descriptions and characteristics mentioned in this document are subject to change without prior notice
© Sames 2020 - Translation of the original instruction manual

3
Member of Exel group DRT6454
B - 2023/06
Services
Certification and referencing
Sames is certified as a training center by the DIRRECTE of the Auvergne Rhône Alpes region under the number 84
38 06768 38.
Our company provides, throughout the year, training courses allowing you to acquire the essential know-how for the
implementation and maintenance of your equipment in order to guarantee its performance in the long term.
A catalog is available on request.
www.sames.com/france/en/services-training.html
Line audits
As part of a technical assistance program for our customers using Sames equipment, the line audits are intended to
help you optimize and control your production tool.
Our network of experts is continuously trained and qualified to provide our customers with technical expertise on the
liquid or powder installations in which our equipment is integrated. The global environment of the production lines is
taken into account during this technical audit.
A brochure is available for download:
www.sames.com/france/en/services-service-contract.html
Maintenance program
An annual maintenance program (including or not the consumables to be replaced during each intervention) can be
considered with the partnership of Sames. It is associated with a preventive maintenance plan established during a
first audit visit which details the control points necessary to guarantee the performance of the installed equipment.
www.sames.com/france/en/services-service-contract.html
Hotline
www.sames.com/france/en/services-service-contract.html

4
Member of Exel group
Inotransfer
1. Health and safety instructions - - - - - - - - - - - - - - - - - - - - - - - - - - - - - - - - - - - - 6
1.1. Marking . . . . . . . . . . . . . . . . . . . . . . . . . . . . . . . . . . . . . . . . . . . . . . . . . . . . . . . . . . . . . . . . . . . . . . . . . . 6
1.2. Meaning of pictograms . . . . . . . . . . . . . . . . . . . . . . . . . . . . . . . . . . . . . . . . . . . . . . . . . . . . . . . . . . . 7
1.3. Precautions for Use . . . . . . . . . . . . . . . . . . . . . . . . . . . . . . . . . . . . . . . . . . . . . . . . . . . . . . . . . . . . . .8
1.4. Warnings . . . . . . . . . . . . . . . . . . . . . . . . . . . . . . . . . . . . . . . . . . . . . . . . . . . . . . . . . . . . . . . . . . . . . . . . .8
1.5. Important recommendations . . . . . . . . . . . . . . . . . . . . . . . . . . . . . . . . . . . . . . . . . . . . . . . . . . . . . 9
1.5.1. Ambient temperature . . . . . . . . . . . . . . . . . . . . . . . . . . . . . . . . . . . . . . . . . . . . . . . . . . . . . . . . . . . . . . . 9
1.5.2. Sound level. . . . . . . . . . . . . . . . . . . . . . . . . . . . . . . . . . . . . . . . . . . . . . . . . . . . . . . . . . . . . . . . . . . . . . . . . . 9
1.6. Guarantee . . . . . . . . . . . . . . . . . . . . . . . . . . . . . . . . . . . . . . . . . . . . . . . . . . . . . . . . . . . . . . . . . . . . . . 10
2. Introduction - - - - - - - - - - - - - - - - - - - - - - - - - - - - - - - - - - - - - - - - - - - - - - - 11
2.1. General . . . . . . . . . . . . . . . . . . . . . . . . . . . . . . . . . . . . . . . . . . . . . . . . . . . . . . . . . . . . . . . . . . . . . . . . . 11
2.2. Description . . . . . . . . . . . . . . . . . . . . . . . . . . . . . . . . . . . . . . . . . . . . . . . . . . . . . . . . . . . . . . . . . . . . . 11
2.3. Description of the box . . . . . . . . . . . . . . . . . . . . . . . . . . . . . . . . . . . . . . . . . . . . . . . . . . . . . . . . . . 12
3. Characteristics - - - - - - - - - - - - - - - - - - - - - - - - - - - - - - - - - - - - - - - - - - - - - 13
3.1. Dimensions (mm) . . . . . . . . . . . . . . . . . . . . . . . . . . . . . . . . . . . . . . . . . . . . . . . . . . . . . . . . . . . . . . . 13
3.2. Operating characteristics . . . . . . . . . . . . . . . . . . . . . . . . . . . . . . . . . . . . . . . . . . . . . . . . . . . . . . 13
3.3. Flow performance . . . . . . . . . . . . . . . . . . . . . . . . . . . . . . . . . . . . . . . . . . . . . . . . . . . . . . . . . . . . . . 14
3.4. Operating principle . . . . . . . . . . . . . . . . . . . . . . . . . . . . . . . . . . . . . . . . . . . . . . . . . . . . . . . . . . . . . 14
4. Diagrams - - - - - - - - - - - - - - - - - - - - - - - - - - - - - - - - - - - - - - - - - - - - - - - - - 15
4.1. Electrical diagrams . . . . . . . . . . . . . . . . . . . . . . . . . . . . . . . . . . . . . . . . . . . . . . . . . . . . . . . . . . . . . 15
4.1.1. General distribution connection . . . . . . . . . . . . . . . . . . . . . . . . . . . . . . . . . . . . . . . . . . . . . . . . . . . 15
4.1.2. Vibrator connection . . . . . . . . . . . . . . . . . . . . . . . . . . . . . . . . . . . . . . . . . . . . . . . . . . . . . . . . . . . . . . . 16
4.1.3. External control and electrical connection. . . . . . . . . . . . . . . . . . . . . . . . . . . . . . . . . . . . . . . . . 17
4.2. Pneumatic diagram . . . . . . . . . . . . . . . . . . . . . . . . . . . . . . . . . . . . . . . . . . . . . . . . . . . . . . . . . . . . . 19
5. Start-up - - - - - - - - - - - - - - - - - - - - - - - - - - - - - - - - - - - - - - - - - - - - - - - - - 20
5.1. Tools . . . . . . . . . . . . . . . . . . . . . . . . . . . . . . . . . . . . . . . . . . . . . . . . . . . . . . . . . . . . . . . . . . . . . . . . . . . 20
5.2. Installation . . . . . . . . . . . . . . . . . . . . . . . . . . . . . . . . . . . . . . . . . . . . . . . . . . . . . . . . . . . . . . . . . . . . . 20
5.2.1. Electrical connections . . . . . . . . . . . . . . . . . . . . . . . . . . . . . . . . . . . . . . . . . . . . . . . . . . . . . . . . . . . . . 20
5.2.2. Ground connection. . . . . . . . . . . . . . . . . . . . . . . . . . . . . . . . . . . . . . . . . . . . . . . . . . . . . . . . . . . . . . . . 20
5.2.3. Connection of the drawing rod and the transfer pump . . . . . . . . . . . . . . . . . . . . . . . . . . . . 21
5.3. Setting the different parameters . . . . . . . . . . . . . . . . . . . . . . . . . . . . . . . . . . . . . . . . . . . . . . . 21
5.3.1. Setting the cycles . . . . . . . . . . . . . . . . . . . . . . . . . . . . . . . . . . . . . . . . . . . . . . . . . . . . . . . . . . . . . . . . . 21
5.3.2. Setting the pressure . . . . . . . . . . . . . . . . . . . . . . . . . . . . . . . . . . . . . . . . . . . . . . . . . . . . . . . . . . . . . . 21
6. Maintenance - - - - - - - - - - - - - - - - - - - - - - - - - - - - - - - - - - - - - - - - - - - - - - 22
6.1. Maintenance summary table . . . . . . . . . . . . . . . . . . . . . . . . . . . . . . . . . . . . . . . . . . . . . . . . . . . 22
6.2. Cleaning . . . . . . . . . . . . . . . . . . . . . . . . . . . . . . . . . . . . . . . . . . . . . . . . . . . . . . . . . . . . . . . . . . . . . . . . 22
6.2.1. Procedure A: Cleaning the cart . . . . . . . . . . . . . . . . . . . . . . . . . . . . . . . . . . . . . . . . . . . . . . . . . . . . 22
6.2.2. Procedure B: Visual check of the protective filters . . . . . . . . . . . . . . . . . . . . . . . . . . . . . . . . 22
6.2.3. Procedure C: Cleaning the transfer pump. . . . . . . . . . . . . . . . . . . . . . . . . . . . . . . . . . . . . . . . . . 23
6.3. Replacement . . . . . . . . . . . . . . . . . . . . . . . . . . . . . . . . . . . . . . . . . . . . . . . . . . . . . . . . . . . . . . . . . . . 23
6.3.1. Procedure D1: Replacement of the transfer pump. . . . . . . . . . . . . . . . . . . . . . . . . . . . . . . . . 23
6.3.2. Procedure D2: Replacement of sleeves and porous tubes of the transfer pump . . 24

5
Member of Exel group
7. Troobleshootings- - - - - - - - - - - - - - - - - - - - - - - - - - - - - - - - - - - - - - - - - - - - 26
8. Spare parts list - - - - - - - - - - - - - - - - - - - - - - - - - - - - - - - - - - - - - - - - - - - - - 27
8.1. Inotransfer . . . . . . . . . . . . . . . . . . . . . . . . . . . . . . . . . . . . . . . . . . . . . . . . . . . . . . . . . . . . . . . . . . . . . 28
8.2. Inotransfer pump . . . . . . . . . . . . . . . . . . . . . . . . . . . . . . . . . . . . . . . . . . . . . . . . . . . . . . . . . . . . . . . 29
8.3. Drawing rod . . . . . . . . . . . . . . . . . . . . . . . . . . . . . . . . . . . . . . . . . . . . . . . . . . . . . . . . . . . . . . . . . . . . 30
9. Revision index History - - - - - - - - - - - - - - - - - - - - - - - - - - - - - - - - - - - - - - - - 31
10. Appendices - - - - - - - - - - - - - - - - - - - - - - - - - - - - - - - - - - - - - - - - - - - - - - 32
10.1. EU and UK Declarations of conformity . . . . . . . . . . . . . . . . . . . . . . . . . . . . . . . . . . . . . . . . 32

6
Member of Exel group DRT6454
B - 2023/06
1. Health and safety instructions
This manual contains links to the following operating instructions:
•see DRT7168 for accessories.
1.1. Marking
The Inotransfer is intended for use out of an explosive atmosphere.
DES08003

7
Member of Exel group DRT6454
B - 2023/06
1.2. Meaning of pictograms
Warning
electricity
Warning
Automatic start-up
Warning
Hot surface
Warning
Explosive material
General warning
sign
Warning
High pressure
Warning
Crushing of hands
Warning for
explosive
atmospheres
Warning
Flammable
material
Warning
Corrosive
subtance
Warning
Toxic material
Warning
Harmful products
No access for
people with active
implanted cardiac
devices
Wear ear
protection
Wear a face
shield
Wear respiratory
protection
Wear safety
footwear
Wear protective
clothing
Wear protective
gloves
Wear head
protection
Opaque eye
protection must
be worn
General mandatory
action sign
Connect an
earth terminal
to the ground
Refer to
Instruction manual

8
Member of Exel group DRT6454
B - 2023/06
1.3. Precautions for Use
This document contains information that all operators should be aware of and understand before using the
Inotransfer. This information highlights situations that could result in serious damage and indicates the precautions
that should be taken to avoid them.
Before any use of the Inobox control module, check that all operators:
• have previously be trained by the compagny Sames, or by their distributors registered by them for
this purpose.
• have read and understood the user manual and all rules for installation and operation, as laid out
below.
It is the responsibility of the operators’ workshop manager to ensure these two points and it
is also his responsibility to make sure that all operators have read and understood the user
manuals for any peripheral electrical equipment present in the powdering area.
1.4. Warnings
It is imperative that anyone wearing a pacemaker does not use the equipment and does not
enter the projection area.
High voltage can cause the pacemaker to malfunction.
This equipment may be hazardous if it is not used, disassembled and reassembled in
accordance with the rules indicated in this manual and in any applicable European Standard or
national safety regulations.
Equipment performance is only guaranteed if original spare parts distributed by Sames
are used.
1 The operator must wear shoes according to standard EN ISO 20344 and the insulation resistance measured
must not exceed 100 MΩ.
2 The protective clothes, including gloves, must conform to standard EN 1149-5 and the insulation resistance
measured must not exceed 100 MΩ.
3 Using individual protection equipment will limit the risks of contact and/or inhalation of toxic product, gas,
vapours, fog or dusts that can be produced while using the equip-ment. The user has to follow the coating
product manufacturer’s recommendations.
4 Appropriate measures must be taken to prevent, during periods of non-use and/or when the equipment is out
of service, that potential energy is present in the equipment.

9
Member of Exel group DRT6454
B - 2023/06
5The Inotransfer equipment must be maintained regularly in accordance with the indications and instructions
given by Sames. Repairs must be carried out in strict accordance with these instructions.
6 It is imperative to ensure that any conductive or semi-conductive parts that are less than 2.5 m away from any
projector are properly grounded. Otherwise, it could accumulate electrical charges capable of causing sparks.
7 Earthing is required of all conductive enclosures of electrical equipment and all conduc-tive components in
potentially explosive atmospheres by conductive connection to the earth terminal.
8 For the same reasons, it will be necessary, in the coating area, to have an antistatic floor such as bare concrete,
metal grating, etc...
9 Ensure that the pneumatic pressure inside is completely exhausted before adjusting or servicing pressurized
systems or parts.
10 Disconnect, lock out and switch off electrical equipment before servicing electrical equipment.
11 Switch off all electrical or electrostatic equipment immediately, even if you are exposed to a slight electric
shock. Do not restart the equipment until the problem has been identified and resolved.
1.5. Important recommendations
1.5.1. Ambient temperature
The Inotransfer equipment is designed to normally operate at an ambient temperature comprised between 0°C and
+ 40°C. The storage temperature must never exceed +60°C.
1.5.2. Sound level
1.5.2.1. Inotransfer during the pumping phase
The sound pressure level generated is equal to 89.7 dBA under the specified operating conditions.
Conditions of measurement: The equipment was put into operation at maximum characteristics, the
measurements were carried out at different positions at 1 m from the cart in the Powder laboratory at the Sames
site in Meylan, France.
Method of measurement: The accoustic pressure level, continuous, equivalent, weighted 89.7 dBA is given in LEQ
value, measured for observation periods of at least 30 seconds.
1.5.2.2. Inotransfer during the cleaning phase
The sound pressure level generated is equal to 72 dBA under the specified operating conditions.
Conditions of measurement: The equipment was put into operation at maximum characteristics, the
measurements were carried out at different positions at 1 m from the cart in the Powder laboratory at the Sames
site in Meylan, France.
Method of measurement: The accoustic pressure level, continuous, equivalent, weighted 72 dBA is given in LEQ
value, measured for observation periods of at least 30 seconds.

10
Member of Exel group DRT6454
B - 2023/06
1.6. Guarantee
Under the guarantee, which applies only to the buyer, Sames agrees to repair operating faults resulting from a
design fault, materials or manufacture, under the conditions set out below.
The guarantee claim must define the exact nature of the fault concerned, in writing.
The Sames guarantee only covers equipment that has been serviced and cleaned according to standard procedures
and our own instructions, that has been fitted with parts approved by Sames or that has not been modified by the
customer.
More precisely, the guarantee does not cover damage resulting from:
• the customer's negligence or inattention,
• incorrect use,
• failure to follow procedures,
• accidents such as: collision with external objects, or similar events,
• flooding, earthquake, fire or similar events,
• use of seals not complying with Sames recommendations,
The Sames Inotransfer equipment is covered by a warranty (refer to the general sales conditions for its application).
The guarantee does not apply to wearing parts.
The guarantee will take effect from the date of the first start-up or of the provisional acceptance report.
Under no circumstances, either in the context of this guarantee or in other contexts, will Sames be held responsible
for physical injury or intangible damage, damage to brand image and loss of production resulting directly from its
products.

11
Member of Exel group DRT6454
B - 2023/06
2. Introduction
2.1. General
The Inotransfer powder transfer pump is designed for the transport of powder paint, ideally for an automatic
powder coating plant, to supply new powder to a fluidized bed tank. It can also be used for the evacuation of recycled
powder, such as hopper bottom, tank bottom, etc...
2.2. Description
Component Function
Powder drawing rod Powder suction cane
Electropneumatic box Box containing electrical and pneumatic equipment
Transfer Pump Sleeve Powder Transfer Pump
Powder drawing
rod
Transfer PumpElectropneumatic box

12
Member of Exel group DRT6454
B - 2023/06
2.3. Description of the box
Component Function
Filters Protective filters
Time relay Cycle management
Power supply Power supply unit 24 V =
Venturi Vacuum pump
Terminal block Electrical terminal block
(A) Solenoid valves 3-2 Solenoid valves for piloting sleeve valves
(B) Solenoid valves 3-2 Solenoid valves for blower / suction switching
Pressure regulator Air pressure setting
Power supply
(A)
Electrovalves
3-2
Filters
(B)
Electrovalves
3-2
Pressure regulator
Terminal block Venturi Time relay

13
Member of Exel group DRT6454
B - 2023/06
3. Characteristics
3.1. Dimensions (mm)
3.2. Operating characteristics
m0
3: Values are given for a temperature of 20 °C (68 °F) at an atmospheric pressure of 1 013 mbar.
Inotransfer
Box dimensions (W x D x H) 400 mm x 210 mm x 510 mm
Weight 39 kg
Electrical data
Supply voltage 100 -240 VAC
Frequency 50 - 60 Hz
Vibrator control voltage 100 - 240 VAC single-phase
Max. vibrator drive power 50 W
Operating temperature 0° C - 40° C
Pneumatical data
Quick-release coupling Diam. 8 mm
Inlet pressure 7 bar +/-1
Air consumption in pump mode 450 Nl/min
Air consumption in cleaning mode 630 Nl/min
Compressed air supply according to the standard NF ISO 8573-1
Maximum dew point at 6 bar (87 psi) Class 4 i.e + 3°C (37°F)
Maximum particle-size of solid pollutants Class 3 i.e 5 μm
Maximum oil concentration Class 1 i.e 0,01 mg / m0
3
Maximum concentration of solid pollutants Class 3 i.e 5 mg / m0
3
DES08004
1107
390
675 475

14
Member of Exel group DRT6454
B - 2023/06
3.3. Flow performance
The powder flow rate measurements are given as an indication because they depend on several parameters, suction
distance, output distance, density of the powder put in motion, height difference, container, etc...
Flow rate (4 m suction, 6 m output, 1m height difference) 5.5 Kg/min.
3.4. Operating principle
Pumping phase
For optimum efficiency, the Inotransfer pump should be installed as close as possible to the powder container. The
container must be either vibrated to facilitate the flow of the powder and avoid any cratering, or fluidized. The pump
must be installed vertically and the circulation of the powder must be from top to bottom (see § 5.2.3 page 21).
After switching on with switch (B), select the operating mode (blowing/pumping) with switch (C). Switch (A) is used
to enable or disable the cycle.
Flow performance Use example 1 Use example 2 Maximum value
Suction hose length 4 6 6
Length of discharge hose (m) 6 25 25
Operating cycle (s) 0.5 0.5 2
Blowing pressure (bar) 0.8 2 3.5
Flow rate (Kg/min) 5.5 5 5.5
Sleeve control pressure (bar) 445
A
B
C

15
Member of Exel group DRT6454
B - 2023/06
4. Diagrams
4.1. Electrical diagrams
4.1.1. General distribution connection
DES09046
N
031.L1 L L
PE
N031.N01
+CUST_C
CUSTOMER CABINET
1
2
3
4
5
6
- 031Q1
16A
036Q1:1
032-2
-X230V_CUST
1
BU
1CUST_C/TPCB
036Q1:3
032-2
2
BN
032-2
PE
GNYE
Put on the face
of the cabinet
230VAC 50Hz
General distribution connection

16
Member of Exel group DRT6454
B - 2023/06
4.1.2. Vibrator connection
DES09047
032.L12
U11
032.L12
032.N01
032.L11
U11
031Q1:2
031-10
031Q1:4
031-10
031-11
+EXT_PL
EXTERIEUR PANEL
M
1
VIBRATOR
VIBRATOR OPTION
45VA
U1 U2
-032M1
-032X1
1
aM
N1
2
-032F1
10x38
32A
1
2
3
4
5
6
-041Q1
041-12
BU
1TPCB/EXT_PL
2
BN
PE
GNYE
Vibrator connection

17
Member of Exel group DRT6454
B - 2023/06
4.1.3. External control and electrical connection
An external command is available for the start of the cycle start.
Dry contact: (Connection in // on the cycle start button) (see electrical diagram below).
The control box has a vibrator control available on the terminal block.
This control can control a 230 V or 110 V vibrator depending on the supply voltage. Max. power 50W.
DES09181
When using an external control to start
the cycle start, it
t is nenecessary
to leave the selector (start cycle)
on the front panel at 0.
RC circui
uit assssembly
on con
ontacts
NO an
and NC
rela
lay 041041KA1
EXEXTERNRNAL
COMM
MMAND
041.03
24V
041.06
041.01
041.02
041.03
0V
041.03
041.03
041.04
041.06
041.03
041.03
041.03
036Q2:2
03036-11
036Q2:4
03036-12
STRAND
ND SWITCH
CH A
1
2
-KKCHAHA
051-12
VAVALVE
VE BUSHING SLEEVE
VE A UPPER
1
2
-K-KKPV1PV1
051-7
STRAND
ND SWITCH
CH B
1
2
-KKCHBHB
051-12
VAVALVE
VE BUSHING SLEEVE
VE A LOWER
1
2
-K-KKPV3PV3
051-7
VAVALVE
VE BUSHING SLEEVEVE B UPPER
1
2
-K-KKPV2PV2
051-7
VAVALVE
VE BUSHING SLEEVE
VE B LOWER
1
2
-K-KKPV4PV4
051-7
0 I
-041S2
NF/041
41-14
NO/041
41-17
BLOWING
041-14
PUMPING
041-14
BLOWING
NG
1
2
-KK9-KK9
051-7
PUMPING
NG
1
2
-KK1-KK1
051-7
CONVE
VEYING AIR
1
2
-KK2-KK2
051-7
LIGHT BLOWER
X1
X2
-041041H1H1
RED
24V
LIGHT PUMPING
NG
X1
X2
-041041H2H2
WHITE
24V
041-8
STAR CYCLE
0 I
-041S3
NO/041-8
-X-X1
6
-X
-X1
1
7
3
98
4
1101
5
12 13
START CYCLE
A1
A2
Y1
-041041KA1KA1
15
16 18
-041KA1
041-8
-2424V
1
-0V
1
1
1-KKKKCHAHA
2
1-KKKKCHAHA
-0V
2
2
-0V
3
A1
A2
-041041Q1
VIBRATOR 230V
F
O
5-230 5-230 5-230
-041X1
1 2
+CUCUST_C
+CU
CUST_C
+CUST_C_C
CUSTOMER CABINET
-041RC1
1
1-KKKKCHBHB
2
1-KKKKCHBHB
1
1-KKPV1KPV1
2
1-KKPV1KPV1
-041RC2
1
1-K-KKPV4PV4
2
1-K-KKPV4PV4
1
1-K-KKPV3PV3
2
1-K-KKPV3PV3
2
1
2CUST_C/TPCBPCB
1
2CUST_C/TPCBPCB
1
1-KKPV2KPV2
2
1-KKPV2KPV2
1
1-KK9-KK9
2
1-KK9-KK9
1
1-KK1-KK1
2
1-KK1-KK1
1
1-KK2-KK2
2
1-KK2-KK2
041-5041-5F
O
See diagram on next page
External control connection

18
Member of Exel group DRT6454
B - 2023/06
External control:
When using an external command to start the start cycle, it is necessary to set the selector switch (start cycle) on
the front panel to 0.
DES08014
EX
EXTE
RN
RNAL
CO
MM
MMAND
041.03
24V
041.03
041-8
0 I
041S3
24
24V
1
041X1
1 2
+CUST
_C
_C
CUSTOMER CABINET
2
1
2CUST_C/T
PCB
PCB
1
2CUST_C/T
PCB
PCB

19
Member of Exel group DRT6454
B - 2023/06
4.2. Pneumatic diagram
DES08005
PINCH VALVE 1
CHAMBER B
CHAMBER A
PINCH VALVE 3
PINCH VALVE 2
PINCH VALVE 4
VENTURI
7 Bar +/- 1 Bar
20A Ø2.7/4
3.2A Ø8/10 3.1A Ø9/12
4.2A Ø8/10 4.1A Ø9/12
Ø8/10
PV4-A Ø6/8
CHB-B Ø8/10
PV2-A Ø6/8
CHA-B Ø8/10
PV3-A Ø6/8
PV1-A Ø6/8
Ø8/10
KH23A Ø8/10
20A Ø6/8
9A Ø8/10
KH24A Ø8/10
2A Ø6/8
20A Ø6/8
1A Ø8/10
KH23-E
PV4-B Ø6/8
KH23-D
PV2-B Ø6/8
KH23-C
PV3-B Ø6/8
KH23-B
PV1-B Ø6/8
Ø8/10
-VP1
-FIPV1
5
64
2
31
-KH23
21
EMERSON
-SPV1 -FIPV3
5
64
2
31
-SPV3 -FIPV2
5
64
2
31
-SPV2 -FIPV4
5
64
2
31
-SPV4
-SVP1
5
64
2
31
-S1 -FIB
5
64
2
31
5
64
2
31
-N92
-KH24
21
EMERSON
-S2 -FIA
5
64
2
31
5
64
2
31
-S9
-EVENT1 -EVENT2
TRANSFER PUMP CONTROL BOX
+TPCB
+CUST_C
CUSTOMER CABINET
-KKPV1
041-5
-KKPV3
041-9
-KKPV2
041-11
-KKPV4
041-7
-KK2
041-18
-KK9
041-15
-KK1
041-17
-KKCHB
041-4
-KKCHA
041-2

20
Member of Exel group DRT6454
B - 2023/06
5. Start-up
5.1. Tools
Necessary tools and accessories:
he tools listed below are recommended for installation and maintenance of the equipment.
• Flat screwdrivers
• Phillips screwdrivers.
• Allen wrenches.
• Flat wrenches.
• Pipe wrenches.
• Multi-grip and cutting pliers.
• Cutting pliers or tube cutter.
5.2. Installation
For optimum efficiency, the Inotransfer transfer pump must be installed as close as possible to the container to be
drawn from and out of the explosive area
5.2.1. Electrical connections
The electrical connection is made by the power cable coming out through a cable gland located at the bottom of the
cabinet.
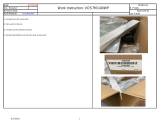
5.2.2. Ground connection
Before starting up the Inotransfer, it is essential to connect it to an earth terminal with the
cable supplied with the cart.
From an earth terminal of the installation, connect the
green/yellow protective earth cable to the brass screw (A)
located on the cart of the Inotransfer.
A
/