Page is loading ...

E
ITM. / ART. 2127229, 2127230, 2127231, 1900675
Model: # UMB-956815
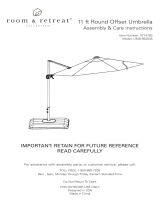
Assembly, Care & Use Manual
3.35 M / 11 FT Solar LED
Cantilever Umbrella
with Base
IMPORTANT, RETAIN FOR FUTURE REFERENCE:
READ CAREFULLY
ATLeisure, LLC
US Toll Free 1-855-880-7205 (English)
Canada Toll Free 1-888-692-1033 (French)
8:00am - 5:00pm, Monday through Friday, Eastern Standard Time
www.atleisure.com · Email: [email protected]
Designed in USA
Made in China
For assistance with use, parts, or customer service, please contact:
For outdoor residential household use only. Not for commercial use.
Please Contact ATLeisure Customer Service Prior to Returning to Store

2
Contents
Preparation ....... . ............................ 2
Tools Required for Assembly (not included) . . . . . . ..... 3
Hardware and Package Contents . . . . ................ 3
Assembly Instructions . . . . ..................... . 4-6
Operation Instructions . . . . . . ................... . 6-8
Lighting Operation & Battery Replacement . . . . . . ..... . 9
Battery Disposal .... . .......................... 10
Care and Maintenance . . . . . . ................... . . 10
Warning and Cautions . . . . . . .................. 10-11
Warranty ....... . ............................. 11
Filing a Claim ................................. . 11
Replacement Parts ... . ......................... 12
E
Preparation
Before beginning product assembly, completely inspect the umbrella and verify all hardware
parts are present. Lay out all hardware contents on a clean, at surface. Compare the parts
with package contents list and diagrams below. If there is damage or any missing parts,
do not (1) assemble umbrella, (2) ll bases with sand/water, or (3) return to place of
purchase. Contact our customer service department toll free at 1-855-880-7205 (English)
or 1-888-692-1033 (French) for replacement parts or further instructions.
Estimated Assembly Time: 40 minutes
Tools Required for Assembly: Open-end wrench or adjustable wrench (not included)
C
GG
F
HH
D
N
EA
B
L
N1
M
G
G1
CAN
E2
E3
JJ K

3
Hardware Contents
E
Part Picture Description Quantity
GG Outer Hex Bolt M10-1.5x20 A2-70 4
HH
Flat Washer M10 A2-70 4
JJ Inner Hex Bolt M8 A2-70 2
KK Inner Hexagon Wrench M8 1
Picture Description Quantity
Adjustable Wrench 1
Tools Required for Assembly (not included)
Part Description Quantity
A Blow Molded Base Outside 2
B Blow Molded Base Inside 2
C Lower Cross Leg 1
CAN Canopy (on the umbrella frame) 1
D Upper Cross Leg 1
E360˚ Crank Handle 1
E2 Canopy Crank Handle 1
E3 Canopy Glide Handle 1
F Holder Pole 1
G Battery 2
G1 Power Supply 1
K Pole Sleeve Collar 1
L Pole Support Cap 1
M Blow Molded Base Cap 4
N Umbrella Frame (with canopy) 1
N1 Solar Panel 1
Package Contents

4
Step 3: Fill each base (A & B) with sand, cover with cap (M). Place pole support cup (L)
onto holder pole (F) and lay on top of blow molded base (B).
Step 1: Place lower cross leg (C) on
ground, line up notches and place upper
cross leg (D) over lower cross leg (C).
Assembly Instructions
Step 2: Attach holder pole (F) to base by
using bolts (GG) and washers (HH) (found
in blister pack). Be careful not to over
tighten. Adjust holder pole (F) to be sure
it is positioned correctly on base. Finally,
tighten with adjustabe wrench or open-
end wrench (not included).
CAUTION: Do not use sharp tools or equipment such as a knife or scissors when
removing the protective material, as it may damage the product. Be careful not to
throw away small parts such as bolts, washers, etc. that may be wrapped in the
protective materials.
E
D
C
F
HH GG
D
C
WARNING: Before opening umbrella, complete assembly as instructed in
manual. Fill each section of base with sand. Add WATER to wet the sand and
continue to fill each section with water up to top. Cover hole with cap. It is
recommended at least 91 kg (200 lbs) of weight be placed on cross legs to
ensure stability. Failure to do so will result in a weight imbalance and cause
umbrella to tip, causing damage and/or personal injury.
M
A
L
B
F
91 kg / 200 lbs
Sand (4 bags)
22.75 kg
50lbs 22.75 kg
50lbs
22.75 kg
50lbs
22.75 kg
50lbs
*Bags not included

5
Assembly Instructions (cont.)
Step 4: Insert plug into socket under solar panel as shown above.
E
N1
Step 5. Put solar panel on top of umbrella and hide the plug and wire inside the
cavity at top. Then turn the solar panel clockwise. Do not over tighten.
Step 6: Remove battery (G) from accessories kit and place into the housing locat-
ed on the arm of the glide handle. Then put the solar umbrella in direct sunlight
outdoors to charge the solar panel for 8 hours before the first use.
MAKE SURE THE LED LIGHTS ARE OFF ON UMBRELLA TO ALLOW SOLAR PANEL
TO FULLY CHARGE BATTERY.
G

6
F
N
Assembly Instructions (cont.)
Step 7: Insert Umbrella Frame with Canopy (N) onto Holder Pole (F). At the same time,
slide holder pole collar onto holder pole. Tighten two Hex Bolts (JJ) into holder pole to
secure the umbrella using the hexagon wrench (KK). Attach canopy crank handle (E2)
onto canopy glide handle (E3) and 360˚ crank handle (E) to pole.
E
CAUTION: An additional person is suggested to assist with inserting the
umbrella into the pole holder.
N
FJJ E2
Operation Instructions
Step 1: Unfasten storage straps around canopy and pole.
Step 2: To open umbrella, squeeze grip on canopy glide handle (E3) and slide up or
down on the pole to achieve desired canopy angle. Release grip to lock umbrella
canopy frame into place. To open canopy, turn crank handle (E2) clockwise until canopy
the center pole.
E
E2
E
E3
Close
Open
Grip
Canopy Open
Canopy Crank Handle
Canopy Glide Handle

7E
Operation Instructions (cont.)
Step 3: The canopy can be rotated 360˚. To rotate umbrella, insert crank handle (E)
onto holder pole (F) and turn the crank handle to the desired position.
E
F
360° E
Example of Canopy
Movement Using
360˚ Rotation

8
Operation Instructions (cont.)
L ever clamp
Step 4: To close umbrella, turn canopy crank handle (E2) counter-clockwise until
canopy is fully closed. Squeeze grip on canopy glide handle (E3) and slide it down
pole; release grip to lock it in place. Canopy frame should be vertically upright. Fasten
storage straps around canopy and pole.
This device complies with Part 15 of the FCC Rules. Operation is subject to the following two
conditions: (1) This device may not cause harmful interference, and (2) this device must accept any
interference received, including interference that may cause undesired operation.
NOTE: This equipment has been tested and found to comply with the limits for Class B
digital device, pursuant to part 15 of the FCC Rules. These limits are designed to provide
reasonable protection against harmful interference in a residential installation. This
equipment generates, uses and can radiate radio frequency energy and, if not installed and
used in accordance with the instructions, may cause harmful interference to radio or
television
reception, which can be determined by turning the equipment off and on, the user is
encouraged to try to correct the interference by one or more of the following measures:
-Reorient or relocate the receiving antenna.
-Increase the separation between the equipment and the receiver.
-Connect the equipment into an outlet on a circuit different from that to which the receiver
is connected.
E
-Consult the dealer or an experienced radio/TV technician for help.
Canopy Crank Handle
Canopy Glide Handle
Close
Open
Grip
Canopy Close

9
Power supply port for battery
Battery power meter
Battery power meter button
LED lights button (hub lights & rib lights)
Lighting Operation & Battery Replacement (cont.)
Step 1: Press light button to turn solar lights on and off. Press once to turn on rib
lights on and off. Press a second time to turn on hub light. Press a third time to turn on
both ribs and hub lights. Press a fourth time to turn off all lights. Umbrella is equipped
with 2 batteries. Remove battery from hub when the battery has drained. Replace bat-
tery once fully charged.
indoors to charge the battery. Charge level can be seen on battery power meter lights.
Power supply included
Input: 100-240V AC
Output: 5v DC
G1
INFORMATION: Battery is meant to be charged indoors. Leaving battery outside in
inclement weather will damage battery and power supply.
Battery charged after 3-4 hours using power supply or 6-8 hours of direct sunlight.
Battery life 6-8 hours when fully charged. Power supply is for indoor use only. Do not use
outdoors.
This device complies with Part 15 of the FCC Rules. Operation is subject to the following two
conditions: (1) This device may not cause harmful interference, and (2) this device must accept any
interference received, including interference that may cause undesired operation.
CAUTION: YOU MUST CHARGE THE BATTERY BEFORE FIRST USE. Please note that battery
can lose charge if left unused or uncharged for a long period of time. Failure to charge the
battery will result in premature dimming of the lights in your new solar umbrella. Make sure
the light switch is in the off position when charging the solar panel. For everyday normal use,
turn light switch on at night when you want to use solar light and turn off switch after use.
MAKE SURE LIGHT SWITCH IS IN OFF POSITION DURING DAYTIME TO ALLOW THE SOLAR
PANEL TO CHARGE BATTERY.
E
RECHARGEABLE BATTERY
LI-ION 26650 3.7V 4500mAh

10 E
Care and Maintenance
See the enclosed Sunbrella® care and cleaning label sewn into interior side of canopy.
Warning and Cautions
INFORMATION: Be sure to secure and/or weight the base of the umbrella.
INFORMATION: Close the umbrella and use the canopy storage straps when umbrella
is not in use. If the umbrella is stored off season in a box, the solar panel and battery pack
must be removed to avoid damage.
INFORMATION: Schematics in this manual are for assembly and operation illustration
only. They may differ from the umbrella’s actual appearance.
DANGER: Keep children out of the assembly area during assembly.
CAUTION:
WARNING: Read all instructions before beginning and follow the steps outlined.
Failure to assemble and install as instructed could result in the umbrella tipping over
causing personal injury and/or property damage.
WARNING: Do not open umbrella in windy conditions, as it could be blown over and
cause personal injury or damage. To secure umbrella properly, either bolt it directly to
your deck or patio, or use a properly weighted umbrella base. Keep umbrella away from
glass tabletops during windy conditions to prevent breakage. Warranty does not cover
damage due to neglect, abuse or poor weather conditions.
CAUTION: Place the base in the desired location for use before filling. Once the base
is full, it will be harder to move
CAUTION: Before opening umbrella, insert the plug into the socket under the solar
panel. Put the solar panel at the top of umbrella and hide the plug and wire inside the
groove at the top of the umbrella. Then turn the solar panel clockwise. Do not over
tighten.
Battery Disposal
• Battery should be recycled or disposed of as per state and local guidelines.
• Do not open battery or try to replace battery by yourself.
• Keep battery (batteries) out of reach of children
INFORMATION: It is suggested that the consumer use a cover to protect umbrella against
the elements.
WARNING: Use only the original power adapter (5V/1A) to charge battery or other power supply
with the same voltage. The use of any other adapter or power supply with higher voltage will
damage the battery. Original power adapter (5V/1A) uses DC barre connector size: 5.5 x 2.5 x 10mm.

11
CAUTION: It is recommended that you bring battery pack(s) inside in sub-zero
temperatures.
E
Warranty
This product is covered under a manufacturer’s 2-year warranty from date of purchase
against defects in materials and workmanship. This warranty does not cover damage
due to neglect, abuse or weather related damage. For full warranty disclosure, email
1-888-692-1033 (French) or send mail to:
Atleisure, LLC
Customer Service Dept.
1040 Boulevard SE Ste. B
Atlanta GA 30312.
NOT COVERED UNDER WARRANTY
damage caused by improper assembly, accident, disaster, misuse, abuse, or negli-
you may also have other rights which may vary from state to state.
AUSTRALIA: Our goods come with guarantees that cannot be excluded under the
Australian Consumer Law. You are entitled to a replacement or refund for a major fail-
ure and compensation for any other reasonably foreseeable loss or damage. You are
also entitled to have the goods repaired or replaced if the goods fail to be of accept-
able quality and the failure does not amount to a major failure.
pictures of your damaged umbrella and send to ATLeisure at:
customerservice@atleisure.com
or by mail to:
ATLeisure, LLC
Customer Service Dept.
1040 Boulevard SE Ste. B
Atlanta GA 30312
Filing a Claim
Made in China

12 E
Replacement Parts
Only the individual replacement parts listed below are available while supplies last.
Refer to part number(s) and contact our customer service department toll free at 1-855-880-7205 (English)
or 1-888-692-1033 (French) 8:00am to 5:00pm EST (Monday - Friday).
U.S. Patent No. 8,104,492, U.S. Patent No. 6,612,713, U.S. Patent No. 7,753,546, U.S. Patent No. 8,069,868,
U.S. Patent No. 8,375,966, U.S. Patent No. 8,727,555, U.S. Patent No. 8,794,781
Part Description Quantity Re-order No.
A Blow Molded Base Outside 2 BSE-ABMP-11-BWN-T-C2
B Blow Molded Base Inside 2 BSE-BBMP-11-BWN-T-C2
C Lower Cross Leg 1 CSL-C78RX-BWN-T-C2
CAN Canopy (Dove, Mushroom, Indigo) 1 CAN-11O8RBS-T-DOVE-C2
CAN-11O8RBS-T-MUSH-C2
CAN-11O8RBS-T-IN2-C2
D Upper Cross Leg 1 CSL-D78RX-BWN-T-C2
E360˚ Crank Handle 1 CRK-E78RHP-BWN-T-C2
E2 Canopy Crank Handle 1 CRK-E78RHP-BWN-T-C2
E3 Canopy Glide Handle 1 CRK-778RG-BWN-T-NS-C2
F Holder Pole 1 HDP-F78RX-BWN-T-C2
GBattery 2
2
SOL-G-RBP-11-T-C2
G1 Power Supply 1 SOL-G1-CC-11-T-C2
KPole Sleeve Collar 1 HDP-SLV-F78RX-BWN-T-C2
L Pole Support Cap 1 PSC-L78R-BWN-T-C2
M Blow Molded Base Cap 4
4
4
BSE-CAP-11-BWN-T-C2
N1
GG
HH
JJ
Solar Panel
Outer Hex Bolt M10-1.5x20 A2-70
1 SOL-P11-T-C2
HDW-GG-11-T
HDW-HH-11-T
HDW-JJ-11-T
D
GG
HH
C
E
L
A
B
L
M
G
G1
CAN
N1
F
JJ
K
E3
E2
Flat Washer M10 A2-70
Inner Hex Bolt M8 A2-70

www.atleisure.com · Email: [email protected]
ATLANTA, GEORGIA, USA
US Toll Free 1-855-880-7205 (English)
Canada Toll Free 1-888-692-1033 (French)
8:00am-5:00pm, Monday to Friday, Eastern Standard Time

F
Manuel d’assemblage, d’entretien et d’utilisation
Parasol en porte-à-faux de
3,35 m (11 pi) avec pan-
neau solaire, éclairage à
DEL, et base
IMPORTANT, À CONSERVER POUR DE FUTURS
BESOINS DE RÉFÉRENCE : À LIRE SOIGNEUSEMENT
ATLeisure, LLC
Numéro sans frais (États-Unis) 1 855 880-7205 (en anglais)
Numéro sans frais (Canada) 1 888 692-1033 (en français)
De 8 h à 17 h (HE), du lundi au vendredi
www.atleisure.com · Courriel: [email protected]
Conçu aux États-Unis
Fabriqué en Chine
Pour obtenir de l’aide concernant l’utilisation et les pièces ou pour joindre le service à la
clientèle :
Pour usage extérieur et domestique seulement.
Non destiné à des ns commerciales.
Prière de communiquer avec le service à la clientèle d’ATLeisure avant de
retourner l’article en magasin
ART. 2127229, 2127230, 2127231, 1900675
No de modèle: # UMB-956815

15
Table des matières
Préparation ....... . ......................... . . 15
Outils requis pour l’assemblage (non fournis) . . . . .... 16
Quincaillerie et contenu de l’emballage . . . . . . ..... . . 16
Instructions d’assemblage . . . . . . ............ . . 17-19
Instructions d’utilisation . . . . . . ............... . 19-21
Utilisation de l’éclairage et remplacement de la batterie. . 22
Mise au rebut de la batterie . . . . .................. 23
Entretien et nettoyage . . . . . . ..................... 23
Mises en garde ...... . . . .................... 23-24
Garantie ...................................... 24
Réclamation ........ . .......................... 24
Pièces de rechange ... . ......................... 25
F
Préparation
Avant de commencer le montage, inspecter entièrement le parasol et vérier
qu’il ne manque aucune pièce. Disposer toutes les pièces sur une surface propre et plane,
puis comparer le contenu de l’emballage avec la liste des pièces et les images ci-dessous.
Si des pièces manquent ou sont endommagées, ne pas 1)assembler le produit, ni
2)remplir la base avec du sable ou de l’eau, ni 3)retourner le produit au magasin. Communiquer
avec le service à la clientèle au numéro sans frais 1855880-7205 (en anglais) ou
1888692-1033 (en français) pour obtenir des pièces de rechange ou de plus amples directives.
C
GG
F
HH
D
N
EA
B
L
N1
M
G
G1
CAN
E2
E3
JJ K

16
Quincaillerie
F
Pièce Image Description Quantité
GG Extérieur vis hexagonale M10, 1,5 x
20 mm, A2-70
4
HH
Rondelle plate M10, A2-70 4
JJ Intérieur vis hexagonale M8, A2-70 2
KK Intérieur clé hexagonale M8 1
Image Description Quantité
Clé à molette 1
Outils requis pour l’assemblage (non fournis)
Pièce Description Quantité
A2
B2
C Partie inférieure du pied en croix 1
CAN Toile (sur le châssis du parasol) 1
D Partie supérieure du pied en croix 1
E Manivelle pour rotation sur 360° 1
E2 Manivelle pour rotation de la toile 1
E3 Poignée coulissante de la toile 1
F Socle 1
G Batterie 2
G1 Bloc d’alimentation 1
K Socle collier 1
L Anneau de soutien 1
M
joint torique
4
N Châssis du parasol (avec toile) 1
N1 Panneau solaire 1
Contenu de l’emballage

17
Étape 3 : Remplir chaque section de la base (A et B) de sable, puis boucher les trous
avec les capuchons (M). Glisser l’anneau de soutien (L) sur le socle (F) de sorte qu’il
repose sur la base (B).
Étape 1 : Placer la partie inférieure du pied
en croix (C) sur le sol, puis placer la partie
supérieure (D) par-dessus en alignant les
encoches.
Instructions d’assemblage
Étape 2 : Fixer le socle (F) à la base avec
les vis (GG) et les rondelles (HH) qui se
trouvent dans l’emballage-coque, mais
sans force excessive. Ajuster la position
du socle, puis serrer les vis avec une clé
à molette ou à fourche (non comprise).
ATTENTION : Pour éviter d’abîmer le produit, ne pas utiliser d’outils ou d’objets
tranchants tels qu’un couteau ou des ciseaux pour retirer le matériel de protection.
De plus, avant de jeter le matériel de protection, s’assurer qu’aucune petite pièce
comme les vis ou les rondelles ne s’y trouvent.
F
D
C
F
HH GG
D
C
AVERTISSEMENT : Avant d’ouvrir le parasol, l’assembler en suivant les
instructions du guide. Remplir chaque section de la base de sable. Y ajouter
de L’EAU pour imbiber le sable, puis pour remplir la base au complet. Fermer
à l’aide des capuchons. La base devrait peser au moins 91 kg (200 lb) pour
assurer la stabilité du parasol. Autrement, il y aura un déséquilibre, ce qui
fera renverser le parasol et pourrait causer des dommages et des blessures.
M
A
L
B
F
91 kg / 200 lbs
Sable (4 des sacs)
22.75 kg
50lbs 22.75 kg
50lbs
22.75 kg
50lbs
22.75 kg
50lbs
*Sacs non inclus

18
Instructions d’assemblage (suite)
Étape 4 :
F
N1
Étape 5 :
Étape 6 : Retirer la batterie (G) de la boîte d’accessoires. Placer la batterie dans
boîtier de batterie situé sur le bras de la poignée coulissante. Charger la batterie
en exposant le panneau solaire à la lumière du soleil pendant huit heures avant
la première utilisation.
ÉTEINDRE LES LUMIÈRES À DEL POUR QUE LE PANNEAU SOLAIRE RECHARGE
COMPLÈTEMENT LA BATTERIE.
G
Étape 4 :

19
Instructions d’assemblage (suite)
Étape 7 : Insérer le châssis du parasol avec toile (N) dans le socle (F) tout en faisant
glisser la bague sur le mât. Avec une clé hexagonale, visser les deux vis hexagonales
la poignée coulissante de la toile (E3) et la manivelle pour rotation sur 360° (E) au mât.
F
MISE EN GARDE : Il est recommandé de demander l’aide d’une autre personne
pour insérer le parasol dans le socle.
Instructions d’utilisation
Étape 1 : Détacher les courroies de rangement entourant la toile.
Étape 2 : Pour ouvrir le parasol, serrer la prise de la poignée coulissante de la toile
(E3), puis la glisser à la hauteur donnant l’angle désiré. Relâcher la prise pour bloquer
la position. Pour déployer la toile, tourner la manivelle pour rotation de la toile (E2) dans
le sens horaire jusqu’à ce que la toile soit complètement ouverte, comme illustré. Les
ampoules intégrées au moyeu, sous la toile, doivent arriver au ras du mât.
Crank
Glide Handle Grip
Fermer
Ouvrir
Poignée coulissante de la toile
Manivelle pour rotation de la toile
Prise
Toile ouverte
F
N
N
FJJ E2
E
E2
E

20 F
Instructions d’utilisation (suite)
Étape 3 : La toile peut pivoter sur 360°. Pour ce faire, insérer la manivelle (E) dans
le socle (F), puis tourner à la position désirée.
E
F
360° E
Exemple de rotation
sur 360° de la toile
/