Page is loading ...


Introduction
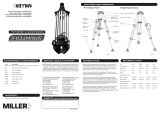
Thank you for purchasing the Miller SOLO VJ tripod.
SOLO VJ is a professional tripod, compatible with most 100mm ball
levelling pan & tilt heads. SOLO VJ is designed to support camcorders
in location and studio production environments.
The telescopic carbon fibre tubing ensures optimum rigidity and rapid
deployment, while the leg angle lock eliminates the need for a tripod
spreader. As a result, SOLO VJ features an operating height range
from a low 22cm (8.7”) up to an impressive 187cm (73”), with maximum
support stability maintained across its operating range.
Magnesium leg top and aluminium diecast components deliver the
ultimate in lightweight durability while the sturdy carry case,
detachable leg strap and rubber/spike complete a truly professional VJ
support package, for all DVCAM and ENG Camcorders.
Operation Manual
Please read this manual carefully prior to
using the SOLO VJ tripod. Do not omit
any steps.
The Manual contains important set-up,
pull-down, adjustment, safety and
maintenance information and should be
read in conjunction with the operating
manuals of the fluid head and camera you have
chosen to complement your SOLO VJ tripod.
Technical Data
Cat# 1505
Tube Configuration 3 Stage telescopic
Tube Material Carbon fibre
Maximum Load kg (lb) 30.0 (66)
Weight kg (lb) 3.1 (6.8) (including shoulder strap)
Max Height mm (in) 1870 (73.6)
Min Height mm (in) 220 (8.7)
Transport Length mm (in) 658 (25.9)
3
819 Solo VJ V2 16/1/04 11:25 AM Page 3

Remove tripod from carry bag, undo clip on leg strap and
stand on a level surface (if possible). Depending on
surface, screw out rubber foot for non-scratch contact
to interior or hard surfaces or in for a spike on exterior
soft surfaces such as dirt or sand.
Note: Leg angle adjusters are spring loaded and self
adjusting. Do not hold leg angle adjuster up while spreading
tripod legs as this may cause leg angle adjusters to operate
improperly and potentially damage the tripod.
Maximum Height:
(Leg angle adjustment is not required)
1 Separate legs slightly so they are
parallel.
2 Working with each leg individually,
grip each concentric lock and
release one turn (see leg lock
direction label on leg).
3 Extend to desired length and
turn each concentric lock to
engage firmly. Repeat
process for remaining legs.
4 Spread tripod legs (Fig. 2)
and adjust leg length to
ensure tripod bowl is
approximately level.
5 Level the fluid head using bubble level and ball
levelling feature of fluid head.
Minimum Height:
Note: It is recommended that
minimum height position is used only
with legs at their shortest length.
1 Pull up leg angle adjuster until it locks into a raised
position (Fig. 3). Repeat for all three locks.
2 Holding one leg on the ground pull the remaining two
outward, spreading the tripod to its lowest position. Leg
angle adjuster will automatically engage the leg to hold
the tripod at its lowest
height position (Fig. 4).

Mid Position:
Note: This refers to the Mid leg
angle position, not necessarily the
height of the tripod.
The SOLO VJ tripod has three leg angle
positions. The middle leg angle position
(Fig.7) is self-engaging after
unspreading leg from fully spread
position (Fig.6). The Mid Position is
chosen for optimum stability in the 60-
140cm tripod height range, but is not
recommended if the tripod is being used
in a crowded situation,
due to the wide
diameter, or footprint
spread, of the extended
tripod.
1 Remove camera from fluid head.
2 Close the tripod legs so all are pointing
straight down and disengage all
concentric locks.
3 Holding the bowl, lower tripod to its
shortest length and re-engage
concentric locks.
4 Fold legs fully together (Fig. 1) fit leg strap and return tripod to
carry bag if finished shooting.
5
Fig 6 Spread Position
Tripod Setup (cont) Tripod Pull Down
Fig 5 Leg angle adjuster
raised
Fig 7 Middle leg
angle position
819 Solo VJ V2 16/1/04 11:25 AM Page 5

Shoulder Strap
SOLO VJ’s Shoulder Carry Strap
can be used looped (both ends
attached to the mounting point on
the bowl), to carry the tripod on
one shoulder.
OR
it can be used attached to the
bowl and the Leg Strap “D” ring,
to carry the tripod across your
back with fluid head towards the
ground.
Leg to Bowl
Adjustment
The leg to bowl pivot joint on the Solo tripod should have no lateral
movement and should swing with a firm, smooth resistance. As this is
a spreader-less tripod, the leg pivot joint requires sufficient resistance
to hold the tripod legs together while being hand carried. Adjustment
is usually not required, however, should it become necessary, the
following procedure must be observed.
1 Lay tripod on a flat surface with legs closed in transport
position.
2 Using 17mm spanner (supplied), gently tighten nut to
achieve firm, smooth movement of the leg while still having
sufficient tension to hold the legs together when tripod is being
hand carried.
3 Check leg resistance by swinging leg fully open (using leg angle
adjuster) and ensure that all legs open with a similar degree of
effort. Tighten or loosen bolts as necessary.
Important: Remember not to over-tighten as this may
cause too much resistance when swinging the legs open.
6


/