Philips BDP7501 User manual

Category
Blu-Ray players
Type
User manual

This manual is also suitable for

Register your product and get support at
www.philips.com/welcome
User Manual
BDP7501
4K Ultra HD
Blu-ray Player
For further assistance, call the customer support
service in your country.
To obtain assistance, contact Philips Customer
Care Center;
In the U.S.A., Canada, Puerto Rico, or the U.S.
Virgin Islands; 1-866-202-5960
EN 2
For fastest support visit us online at www.philips.com/support
for chat and self service solutions.
The lightning ash with arrowhead symbol, within an
equilateral triangle, is intended to alert the user to the
presence of uninsulated “dangerous voltage” within
the product’s enclosure that may be of sucient
magnitude to constitute a risk of electric shock to
persons.
The exclamation point within an equilateral
triangle is intended to alert the user to the
presence of important operating and
maintenance (servicing) instructions in the
literature accompanying the appliance.
Know these
safety symbols
CAUTION
RISK OF ELECTRIC SHOCK
DO NOT OPEN
CAUTION for UHD Blu-ray Disc
Player and AC/DC adapter:
TO REDUCE THE RISK OF ELECTRIC SHOCK, DO
NOT REMOVE COVER (OR BACK). NO USER
SERVICEABLE PARTS INSIDE. REFER SERVICING TO
QUALIFIED SERVICE PERSONNEL.
CAUTION for AC/DC adapter:
FOR INDOOR USE ONLY. DRY LOCATION USE
ONLY. USE WITH THE SPECIFIED AC POWER CORD
ONLY. MAY BECOME HOT DURING USE. THIS IS
NOT A MALFUNCTION. DO NOT USE OR CONNECT
WITH OTHER DEVICES.
* Additional Benets
Registering your product guarantees that you’ll
receive all of the privileges to which you’re
entitled, including special money-saving oers.
* Product Safety Notication
By registering your product, you’ll receive
notication - directly from the manufacturer - in
the rare case of a product recall or safety defect.
Registering your model with Philips makes you eligible for all of the valuable benets
listed below, so don’t miss out. Register online at www.philips.com/welcome to ensure:
Register online at www.philips.com/welcome
today to get the most benets from your purchase.
The symbol for CLASS ll (Double Insulation)
WARNING
:
TO REDUCE THE RISK OF FIRE OR ELECTRIC SHOCK, DO NOT EXPOSE THIS APPARATUS
TO RAIN OR MOISTURE. APPARATUS SHALL NOT BE EXPOSED TO DRIPPING OR SPLASHING AND NO
OBJECTS FILLED WITH LIQUIDS, SUCH AS VASES, SHALL BE PLACED ON THE APPARATUS.
CAUTION: To prevent electric shock, match wide blade of plug to wide slot, fully insert.
ATTENTION:
Pour éviter les chocs électriques, introduire la lame la plus large de la che dans la borne
correspondante de la prise et pousser jusqu’au fond.
The important note and rating are located on the rear or bottom of the cabinet.
For Customer Use
M o d e l N o . _____________________________________________________________________________________________________
Serial No. _____________________________________________________________________________________________________
The Model and Serial Numbers of this Unit may be found on the cabinet. You
should Record and Retain those Letters / Numbers for future reference. Please
refer to the LIMITED WARRANTY for more information.
1. INTRODUCTION
1.1. Safety Instruction
EN 3
IMPORTANT SAFETY INSTRUCTIONS
1. Read these instructions.
2. Keep these instructions.
3. Heed all warnings.
4. Follow all instructions.
5. Do not use this apparatus near water.
6. Clean only with dry cloth.
7. Do not block any ventilation openings. Install in
accordance with the manufacturer’s instructions.
8. Do not install near any heat sources such as radiators,
heat registers, stoves, or other apparatus (including
amplifiers) that produce heat.
9. Do not defeat the safety purpose of the polarized or
grounding-type plug. A polarized plug has two blades
with one wider than the other. A grounding type plug
has two blades and a third grounding prong. The wide
blade or the third prong are provided for your safety. If
the provided plug does not fit into your outlet, consult
an electrician for replacement of the obsolete outlet.
10. Protect the power cord from being walked on or
pinched particularly at plugs, convenience receptacles,
and the point where they exit from the apparatus.
11. Only use attachments/accessories specified by the
manufacturer.
12. Use only with the cart, stand, tripod,
bracket, or table specified by the
manufacturer, or sold with the apparatus.
When a cart is used, use caution when
moving the cart / apparatus combination
to avoid injury from tip-over.
13. Unplug this apparatus during lightning storms or when
unused for long periods of time.
14. Refer all servicing to qualified service personnel.
Servicing is required when the apparatus has been
damaged in any way, such as power-supply cord or
plug is damaged, liquid has been spilled or objects
have fallen into the apparatus, the apparatus has been
exposed to rain or moisture, does not operate normally,
or has been dropped.
Federal Communications Commission Notice
This equipment has been tested and found to comply
with the limits for a Class B digital device, pursuant
to Part 15 of the FCC Rules. These limits are designed
to provide reasonable protection against harmful
interference in a residential installation. This equipment
generates, uses, and can radiate radio frequency energy
and, if not installed and used in accordance with the
instructions, may cause harmful interference to radio
communications. However, there is no guarantee that
interference will not occur in a particular installation. If
this equipment does
cause harmful interference to radio or television
reception, which can be determined by turning the
equipment off and on, the user is encouraged to try to
correct the interference by one or more of the following
measures:
- Reorient or relocate the receiving antenna.
- Increase the separation between the equipment and
receiver.
- Connect the equipment into an outlet on a circuit
different from that to which the receiver is connected.
- Consult the dealer or an experienced radio / TV
technician for help.
This equipment may generate or use radio frequency
energy. Changes or modifications to this equipment
may cause harmful interference unless the
modifications are expressly approved in the manual.
The user could lose the authority to operate this
equipment if an unauthorized change or modification
is made.
Notice for CANADA: CAN ICES-3 (B)/NMB-3(B)
Disconnect the mains (AC) plug to shut the unit Off
when trouble is found or not in use. The mains (AC) plug
shall remain readily available. To completely turn Off
the unit, you must unplug the mains (AC) power cord.
CAUTION:
Danger of explosion if battery is incorrectly
replaced. Replace only with the same or
equivalent type.
WARNING:
Batteries (Battery pack or battery installed)
shall not be exposed to excessive heat
such as sunshine, fire or the like.
LASER SAFETY
This apparatus is classified as a CLASS 1 LASER PRODUCT.
This apparatus employs a laser. Only a qualified service
person should remove the cover or attempt to service this
apparatus, due to possible eye injury.
CAUTION: Use of controls or adjustments or
performance of procedures other than
those specified herein may result in
hazardous radiation exposure.
EN 4
IMPORTANT COPYRIGHT INFORMATION
Unauthorized copying, broadcasting, public
performance and lending of discs are prohibited.
This item incorporates copy protection technology
that is protected by U.S. patents and other intellectual
property rights of Rovi Corporation. Reverse
engineering and disassembly are prohibited.
Do not place the unit on the furniture that is capable
of being tilted by a child and an adult leaning, pulling,
standing or climbing on it. A falling unit can cause
serious injury or even death.
This apparatus should not be placed in a built-in
installation such as a bookcase or rack unless proper
ventilation is provided. Make sure to leave a space of 5.9
inches (15cm) or more around this apparatus.
Never use a gas duster on this unit. The gas trapped
inside of this unit may cause ignition and explosion.
To Avoid the Hazards of Electrical Shock and Fire
Do not handle the AC Power cord with wet hands.
Do not pull on the AC Power cord when disconnecting it
from an AC outlet. Grasp it by the plug.
Do not put your fingers or objects into the unit.
Location and Handling
Do not install the unit in direct sunlight, near strong
magnetic fields, or in a place subject to dust or strong
vibration.
Avoid a place with drastic temperature changes.
Install the unit in a horizontal and stable position.
Do not place anything directly on top or bottom of
the unit. Depending on your external devices, noise
or disturbance in the picture and/or sound may be
generated if the unit is placed too close to them. In
this case, please ensure enough space between the
external devices and the unit.
Depending on the environment, the temperature of this
unit may increase slightly. This is not a malfunction.
Be sure to remove the disc and unplug the AC Power
cord from the outlet before carrying the unit.
Dew Condensation Warning
Dew condensation may form inside the unit in the
following conditions. If so, do not use this unit at least
for a few hours until its inside gets dry.
The unit is moved from a cold place to a warm place.
Under conditions of high humidity.
After heating a cold room.
Notice for Progressive Scan Output
Consumers should note that not all high definition
television sets are fully compatible with this product
and may cause artifacts to be displayed in the picture.
In case of picture problems with 525(480) progressive
scan output, it is recommended that the user switch
the connection to the ‘standard definition’ output. If
there are questions regarding your TV set compatibility
with this 525p(480p) Blu-ray Disc/DVD player, please
contact our customer service center.
1.2. Maintenance
C Servicing
Please refer to relevant topics in “TROUBLESHOOTING”
on page 51 before returning the product.
If you need to call a customer service representative,
please know the model number and serial number
of your product before you call. This information is
displayed on the back of the product. Also, please
take a moment to identify the problem you are having,
and be prepared to explain this to the representative.
If you believe the representative will need to help you
with operations, please stay near the product. Our
representatives will be happy to assist you. For online
reference, please visit our website at
www.philips.com/support
C Cleaning the Cabinet
Wipe the front panel and other exterior surfaces of the
unit with a soft cloth.
Never use a solvent, thinner, benzene or alcohol to clean
the unit. Do not spray insecticide liquid near the unit.
Such chemicals may discolor the surface or damage the
unit.
C Cleaning Discs
When a disc becomes dirty, clean it with a cleaning
cloth. Wipe the disc from the center to outside. Do not
wipe in a circular motion.
Do not use solvents such as benzine, thinner,
commercially available cleaners, detergent, abrasive
cleaning agents or antistatic spray intended for analog
records.
EN 5
C Cleaning the Disc Lens
If this unit still does not perform properly
although you refer to the relevant sections and to
“TROUBLESHOOTING” in this user manual, the laser
optical pickup unit may be dirty. Consult your dealer
or an Authorized Service Center for inspection and
cleaning of the laser optical pickup unit.
C Disc Handling
Handle the discs so that fingerprints and dust do not
adhere to the surfaces of the discs.
Always store the disc in its protective case when it is not
used.
Note that discs with special shapes (heart-shaped discs,
octagonal discs, etc.) cannot be played back on this unit.
Do not attempt to play such discs, as they may damage
the unit.
C Testing the Remote Control
If the remote control is not working properly, you can
use a digital camera (including a cellular phone with
built-in camera) to see if it is sending out an infrared
signal.
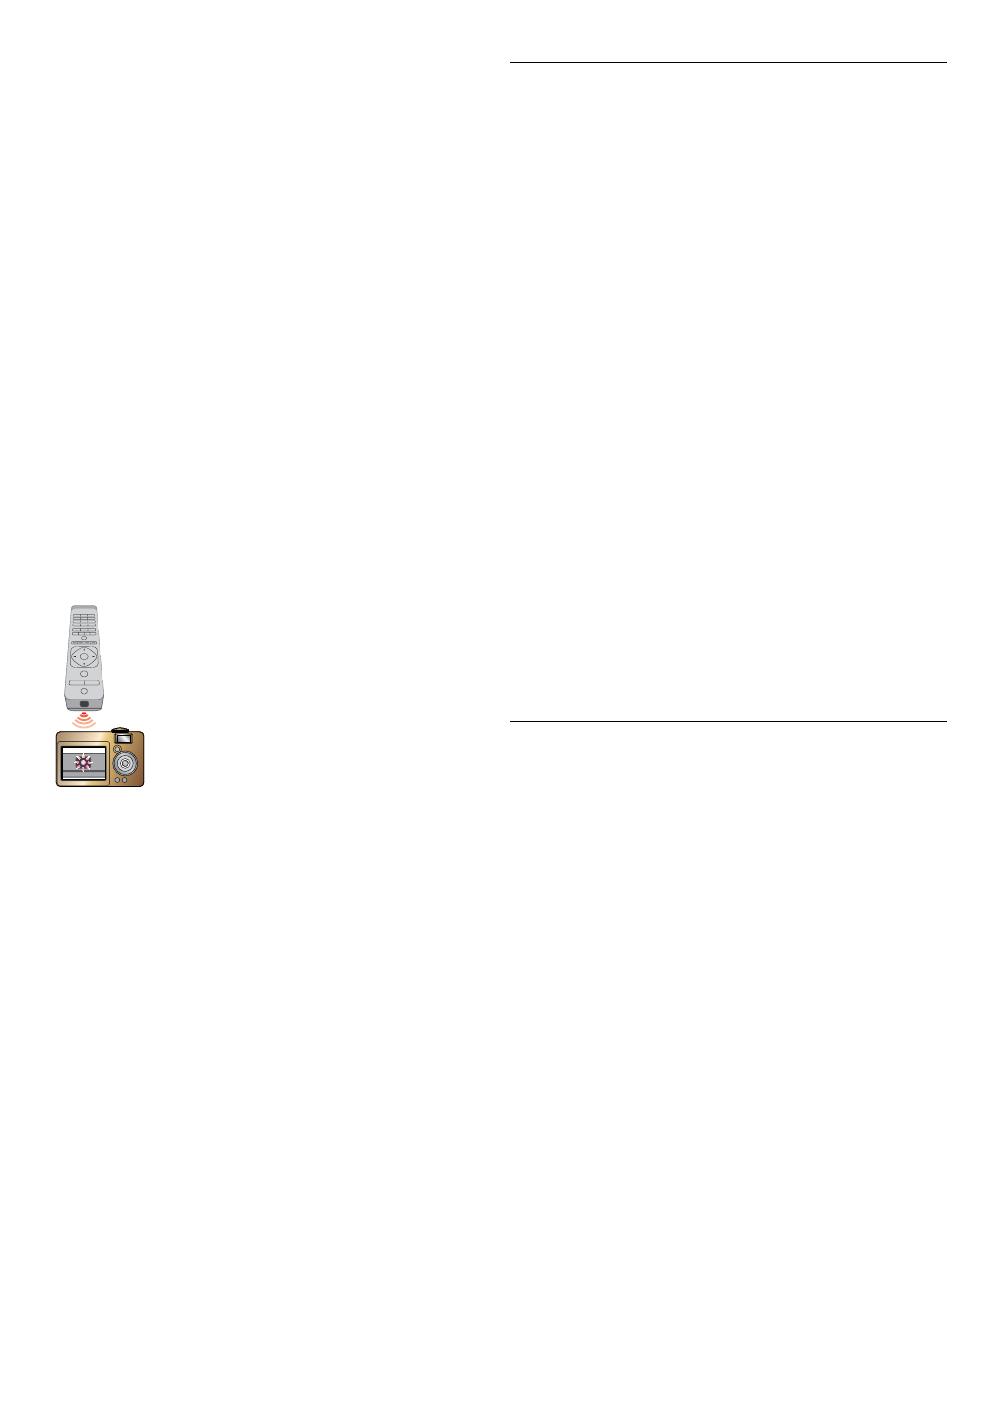
C How to perform the test
1. Point the IR transmitter of the remote
control towards the lens of the digital
camera (or cell phone camera).
2. Turn on the digital camera and look at
the IR transmitter of the remote control
through the LCD display of the digital
camera.
3. While looking at the LCD, press the
buttons on your remote control you
want to test.
a. If your remote control is working
properly, the IR transmitter of
the remote control will create a
noticeable flash on the LCD of the
digital camera.
b. if it does not flash, replace the
batteries in your remote with new
batteries and try again. If it still
does not flash, your remote control
may be damaged or defective.
Please contact customer service for
replacement options.
NoteD
Some modern digital cameras have IR filters, in which
case you will not be able to see the flash in the LCD of
the camera even if the remote is working. For certain
cell phones you can try using the front facing camera
instead of the rear facing camera. You may also verify
the behavior of your camera by comparing results with
another remote which you know is working.
1.3. Notice
Specifications are subject to change without notice.
Trademarks are the property of Koninklijke Philips
Electronics N.V. or their respective owners.
P&F USA/P&F MEXICANA reserves the right to change
products at any time without being obliged to adjust
earlier supplies accordingly.
The material in this manual is believed adequate for the
intended use of the system. If the product, or its individual
modules or procedures, are used for purposes other than
those specified herein, confirmation of their validity and
suitability must be obtained. P&F USA/P&F MEXICANA
warrants that the material itself does not infringe any
United States patents. No further warranty is expressed or
implied.
P&F USA/P&F MEXICANA cannot be held responsible
neither for any errors in the content of this document
nor for any problems as a result of the content in this
document. Errors reported to P&F USA/P&F MEXICANA
will be adapted and published on the P&F USA/P&F
MEXICANA support website as soon as possible.
C Warranty
No components are user serviceable. Do not open or
remove covers to the inside of the product. Repairs may
only be done by Service Centers and official repair shops.
Failure to do so shall void any warranty, stated or implied.
Any operation expressly prohibited in this manual, any
adjustments, or assembly procedures not recommended
or authorized in this manual shall void the warranty.
1.4. Important
Registering your model with Philips makes you eligible
for all of the valuable benefits listed below, so don’t miss
out. Complete and return your Product Registration Card
at once, or register online at www.philips.com/support to
ensure :
Product Safety Notification
By registering your product you receive notification
- directly from the manufacturer - in the rare case of a
product recall or safety defect.
Additional Benefits of Product Ownership
Registering your product guarantees that you receive all of
the privileges to which you’re entitled, including special
money-saving offers.
For further assistance
For further assistance, call the customer support service in
your country.
To obtain assistance in the U.S.A., Canada, Puerto Rico,
or the U.S. Virgin Islands, contact Philips Customer Care
Center at 1-866-202-5960
EN 6
C Environmental Care
The packaging of this product is intended
to be recycled. Contact your local
authorities for information about how to
recycle the packaging.
For Product recycling information, please
visit -
www.recycle.philips.com
C End of life directives
Philips pays a lot of attention to produce
environment-friendly products in green
focal areas. Your new Blu-ray Disc™
Player contains materials which can be
recycled and reused. At the end of its life,
specialized companies can dismantle
the discarded Blu-ray Disc™ Player to
concentrate the reusable materials and
to minimize the amount of materials to be
disposed of. Please ensure you dispose of
your old Blu-ray Disc™ Player according to
local regulations.
C Disposal of used batteries
The batteries supplied do not contain the heavy metals
mercury and cadmium. Nevertheless, in many areas
batteries may not be disposed of with your household
waste. Please ensure you dispose of batteries according
to local regulations.
1.5. Supplied Accessories
Quick Start Guide
Remote Control (NC280UH)
Batteries (AAA, 1.5V x 2)
• HDMI cable
AC/DC Adapter (N1070UH)
1.6. Trademark Information
AUDIO
Manufactured under license from Dolby Laboratories.
Dolby, Dolby Audio and the double-D symbol are
trademarks of Dolby Laboratories.
For DTS patents, see http://patents.dts.com.
Manufactured under license from DTS Licensing Limited.
DTS, DTS-HD, the Symbol, & DTS and the Symbol together
are registered trademarks, and DTSHD Master Audio |
Essential is a trademark of DTS, Inc. © DTS, Inc. All Rights
Reserved.
The terms HDMI and HDMI High-Definition Multimedia
Interface, and the HDMI Logo are trademarks or registered
trademarks of HDMI Licensing LLC in the United States
and other countries.
“x.v.Color” and “x.v.Color” logo are trademarks of Sony
Corporation.
Java and all Java based trademarks and logos are
trademarks or registered trademarks of Oracle and/or its
affiliates.
AVCHD” and the “AVCHD” logo are trademarks of
Panasonic Corporation and Sony Corporation.
EN 7
“BONUSVIEW™” and “BONUSVIEW™” logo are trademarks
of the Blu-ray Disc Association.
“BD-Live” and “BD-Live™” logo are trademarks of the
Blu-ray Disc Association.
Netflix and the Netflix logo are trademarks or registered
trademarks of Netflix, Inc.
YouTube and the YouTube logo are trademarks of Google
Inc.
“Ultra HD Blu-ray™” and “Ultra HD Blu-ray™” logo are
trademarks of the Blu-ray Disc Association.
“Blu-ray 3D™”, “Blu-ray 3D™” logo are trademarks of the
Blu-ray Disc Association.
“Blu-ray Disc™”, “Blu-ray” and “Blu-ray Disc™” logo are
trademarks of the Blu-ray Disc Association.
is a trademark of DVD Format/Logo Licensing
Corporation.
THIS PRODUCT IS LICENSED UNDER THE AVC PATENT
PORTFOLIO LICENSE FOR THE PERSONAL AND NON-
COMMERCIAL USE OF A CONSUMER TO (i) ENCODE
VIDEO IN COMPLIANCE WITH THE AVC STANDARD
AVC VIDEO˝) AND/OR (ii) DECODE AVC VIDEO THAT
WAS ENCODED BY A CONSUMER ENGAGED IN A
PERSONAL AND NON-COMMERCIAL ACTIVITY AND/OR
WAS OBTAINED FROM A VIDEO PROVIDER LICENSED
TO PROVIDE AVC VIDEO. NO LICENSE IS GRANTED OR
SHALL BE IMPLIED FOR ANY OTHER USE. ADDITIONAL
INFORMATION MAY BE OBTAINED FROM MPEG LA, L. L.
C. SEE HTTP://WWW.MPEGLA.COM
THIS PRODUCT IS LICENSED UNDER THE VC-1 PATENT
PORTFOLIO LICENSE FOR THE PERSONAL AND NON-
COMMERCIAL USE OF A CONSUMER TO (i) ENCODE
VIDEO IN COMPLIANCE WITH THE VC-1 STANDARD
(˝VC-1 VIDEO˝) AND/OR (ii) DECODE VC-1 VIDEO THAT
WAS ENCODED BY A CONSUMER ENGAGED IN A
PERSONAL AND NON-COMMERCIAL ACTIVITY AND/OR
WAS OBTAINED FROM A VIDEO PROVIDER LICENSED
TO PROVIDE VC-1 VIDEO. NO LICENSE IS GRANTED OR
SHALL BE IMPLIED FOR ANY OTHER USE. ADDITIONAL
INFORMATION MAY BE OBTAINED FROM MPEG LA,
L.L.C. SEE HTTP://WWW.MPEGLA.COM
Some features may require an always-on broadband
internet connection, firmware update and/or a minimum
bandwidth. Internet services vary by location.
P&F USA Inc./P&F MEXICANA, S.A.de C.V. do not warrant
access to the Portal or to any of the services, content,
software and advertising.
P&F USA Inc./P&F MEXICANA, S.A. de C.V. may, in its sole
discretion, add or remove access to any specific services,
content, software and advertising at any time.
Although P&F USA Inc./P&F MEXICANA, S.A. de C.V. will
strive to provide a good selection of services, content or
software, P&F USA Inc./P&F MEXICANA, S.A. de C.V. do
not warrant continued access to any specific services, and
content or software.
8
CONTENTS
INTRODUCTION ................................................. 2
Safety Instruction ..................................................................2
Maintenance .......................................................................... 4
Notice .........................................................................................5
Impo r t ant ..................................................................................5
Supplied Accessories .......................................................... 6
Trademark Information ...................................................... 6
FEATURES ...........................................................9
Features ................................................................................... 9
Firmware Version Information ...................................... 10
Symbols Used in this User Manual .............................. 10
FUNCTIONAL OVERVIEW ............................... 11
Top and Front Panel ............................................................11
Rear Panel ...............................................................................11
Remote Control .................................................................... 12
Guide to On-Screen Display ...........................................13
Connections .......................................................14
HDMI Video /Audio Connection....................................14
Connection to an Audio System ....................................16
Connection to the Network ............................................. 17
BEFORE YOU START ....................................... 19
Finding the Viewing Channel /Source on Your TV .19
Initial Setup ............................................................................19
INFORMATION ON PLAYBACK .....................20
Information on Playback .................................................20
Guide to File List ................................................................. 23
How to Insert a Disc .......................................................... 24
BASIC PLAYBACK ............................................ 25
Playing Back a Disc ........................................................... 25
Playing Back an Ultra HD Blu-ray™ Disc ..................26
Playing Back a Blu-ray 3D™ Disc ................................. 27
Playing Back Contents on a USB Storage Device .28
Using the Title / Disc / Pop-up Menu ........................28
Playing back from the File list .......................................29
SPECIAL PLAYBACK ........................................30
Fast Forward / Fast Reverse ..........................................30
Slow Forward Playback ...................................................30
Slow Reverse Playback ....................................................30
Frame by frame Playback ...............................................30
Frame Return Playback ...................................................30
Repeat Playback .................................................................31
Slide Show .............................................................................31
PiP (BONUSVIEW™) Setting .......................................... 32
Enjoying BD-Live™ Discs Using the Internet ........... 32
Title / Chapter Search....................................................... 33
Track Search ......................................................................... 33
Switching Subtitles ............................................................ 33
Switching Audio Soundtrack .........................................34
Switching Camera Angles ...............................................34
JPEG Status ..........................................................................35
JPEG Rotation ..................................................................... 35
Playback Information Window ..................................... 35
Reception ..............................................................................36
Closed Caption ....................................................................36
Luminance/Color Adjustment ....................................... 37
Progressive ........................................................................... 37
Reset to Default Picture Settings ................................ 37
Dialogue Enhancer ............................................................ 37
NETWORK SERVICES .....................................38
Before Using Network Services ....................................38
Information on Network Services ................................38
LIST OF SETTINGS ...........................................39
SETUPS .............................................................. 42
HDMI Video .......................................................................... 42
High Dynamic Range Output ......................................... 42
Network Installation..........................................................43
EasyLink Setup.................................................................... 47
BD-Video Ratings ..............................................................48
DVD-Video Ratings ...........................................................48
Software Update ................................................................49
Restore Default Settings .................................................50
License & Digital Rights Mgmt ......................................50
OTHER FUNCTION ...........................................50
Special mode .......................................................................50
TROUBLESHOOTING .......................................51
Downloading an Electronic Copy ................................ 53
Contact Us .............................................................................53
GLOSSARY ......................................................... 5 4
LANGUAGE CODE LIST ...................................56
SPECIFICATIONS .............................................. 57
IMPORTANT HEALTH AND SAFETY
INFORMATION FOR 3D TELEVISIONS ........58
ONE (1) YEAR LIMITED WARRANTY ............59
EN 9
Ultra HD Blu-ray
Compared to the existing Blu-ray Disc
TM
, ULTRA HD Blu-
ray™ has much better in Resolution, Color gamut, and
Luminance. ULTRA HD Blu-ray™ also supports up to triple
layer discs - 50 GB (double layer), 66 GB (double layer),
and 100 GB (triple layer).
Blu-ray Disc™
You can enjoy Blu-ray Disc™ which is capable of storing
five times more data than a conventional DVD. Upscaling
will increase the resolution of a Blu-ray Disc™ to 4K Ultra
HD over an HDMI connection when connected to a 4K
Ultra HD TV.
Playing back Blu-ray 3D™ Disc
This unit can play back Blu-ray 3D™ discs which contain
stereoscopic 3D video. In order to enjoy 3D video, connect
this unit to a 3D capable TV using a 3D compatible HDMI
cable.
BD-J
With some Blu-ray™ discs which contain Java
applications, you can enjoy interactive functions such as
games or interactive menus.
DVD upscaling for enhanced picture quality
Your current DVD will look even better than before thanks
to video upscaling. Upscaling will increase the resolution
of standard definition DVD to high definition up to 4K over
an HDMI connection. The picture will be less jagged and
more realistic for a near high definition experience.
Enjoy your content on different kinds of media
Full backwards compatibility with DVD, CD and USB
storage device ensures that you can continue to enjoy your
current audio-video collection. Additionally, you can enjoy
AVCHD / MP3 / AAC / WAV /FLAC/ MP4 / JPEG files.
Listen to rich multi-channel surround sound
Multi-channel surround sound, which realizes real-to-life
sound and makes you feel that you are really there.
Intuitive user interface and remote control
The Philips logical user interface allows you to easily
navigate through your content and settings, so you can
quickly find what you are looking for.
Easy and simple connection to your HDTV via HDMI
Connect this unit to your HDTV with one single HDMI
(High-Definition Multimedia Interface) cable. Philips
recommends High Speed HDMI cable for better
compatibility. The high definition video output signal will
be transferred to your HDTV without conversion to analog
signals, so you will get excellent picture and sound quality
completely free from noise. Thanks to other multiple
outputs, you can also easily connect to your home theater
system or amplifier.
For 4K/HDR content viewing:
The connected TV must be 4K/HDR compatible.
An 18 Gbps high-speed HDMI cable is required to
connect this unit and the TV.
About EasyLink (HDMI CEC) (Consumer Electronics
Control)
EasyLink allows you to operate the linked functions of this
player with Philips brand TV with EasyLink feature.
Philips does not guarantee 100 % interoperability with
other brands of HDMI CEC compliant devices.
PiP (BONUSVIEW™)
Some BD-videos have the PiP function which enables you
to display the secondary video in the primary video. You
can call up the secondary video by selecting [OPTIONS U]
“Secondary Videowhenever the scene contains it.
BD-Live
BD-Live™ (BD-ROM version 2 Profile 2.0) that allows
interactive functions to be used when this unit is
connected to the Internet in addition to the BONUSVIEW™
function. The various functions differ depending on the
disc.
Pop-up menu
Some BD-videos have a pop-up menu which is a
navigation menu that can be called up and be operated
on the TV screen without interrupting playback. You
can call up the pop-up menu by pressing [TOP MENU].
Contents in the pop-up menu vary depending on the disc.
HDMI Deep Color
Deep Color reduces posterization (color banding) effect of
the playback image. Refer to the setting item “Deep Color
Output” on page 39
4K output with ULTRA HD Blu-ray
24p or 60p output in 4K resolution is available. Refer to
“HDMI Video /Audio Connection” on page 14.
2. FEATURES
2.1. Features
EN 10
Playing back contents on a USB storage device
You can play back MP3 / AAC / MP4 / FLAC / WAV /
MPEG-2 / JPEG files stored in a USB storage device. BD-
ROM Profile 2.0 (BD-Live™) and Profile 1.1 discs sometimes
store picture-in-picture commentary, subtitles or other
extras in the USB storage device for use during playback
with the BD-video.
Playing back AVCHD files
This unit supports playback of AVCHD format files (new
format for high definition video camcorders) recorded on
disc. Your high definition personal archive is playable in
HD quality.
x.v.Color
This unit supports playback of video contents on discs
recorded with “x.v.Color” technology. To watch this video
content with the “x.v.Color” space, a TV or other display
device supporting both video image reproduction using
“x.v.Color” standard and capability of manual switching of
its color space setting is required. Please refer to the user
manual of your display device for further information.
Enjoy contents stored on DLNA certified home
media servers
This unit is a DLNA certified media player that can play
video, music and photo files stored on DLNA certified
home media servers connected to your home network.
(not warranted for wireless environment)
Netflix
With this unit, you can enjoy movies and TV episodes
streamed instantly from Netflix via the Internet. In order to
use this feature, you must visit www.netflix.com/ on your
PC and become a Netflix member.
(This feature is available only in the United States.)
YouTube™
This unit enables you to access YouTube™.
On your TV screen, you can enjoy a large number of video
clips streamed from YouTube™.
Digital Rights Management
This product contains technology subject to certain
intellectual property rights of Microsoft.
Use or distribution of this technology outside of this
product is prohibited without the appropriate license(s)
from Microsoft.
HDR (High Dynamic Range)
HDR is the technology which processes picture colors so
that colors appear close to the natural view of the naked
eye, by controling the difference between the lightest and
the darkest colors.
2.2. Firmware Version Information
“Firmware Version Information” screen provides
information about this unit’s software version.
The current version of software on your unit can be seen
on the “Firmware Version Information” screen.
To access “Firmware Version Information”, follow the
procedure below.
1. Press [ Q (home)].
2. Use [ 0 / 1 ] to select “Setup”, then press [OK].
3. Use
[ K / L ] to select “Player Settings”, then press
[OK].
4. Use
[ K / L ] to select “System”, then press [OK].
5. Use
[ K / L ] to select “System Information”, then
press [OK].
6. Use
[ K / L ] to select “Firmware Version
Information”, then press [OK].
2.3. Symbols Used in this User Manual
To specify which media type each function is applicable
to, we put the following symbols at the beginning of each
item to operate.
Symbol Description
[UHDBD]
UHD
BD
UHD
BD
Description refers to Ultra HD Blu-ray
[BD Video]
BD
VIDEO
BD
VIDEO
Description refers to BD-video
[DVD Video]
DVD
VIDEO
DVD
VIDEO
Description refers to DVD-video
[DVD Video]
DVD
VR
DVD
VR
Description refers to DVD-RW/-R with VR mode
[CD]
CDCD
Description refers to audio CD / DTS-CD
[AVCHD]
AVC H DAVC H D
Description refers to DVD-RW/-R, DVD+RW/+R
with AVCHD files
[JPEG]
JPEGJPEG
Description refers to BD-RE/-R, DVD-RW/-R, CD-
RW/-R and USB storage device with JPEG files
[MP3]
MP3MP3
Description refers to DVD-RW/-R, CD-RW/-R and
USB storage device with MP3 files
[MPEG2]
MPEG2MPEG2
Description refers to DVD-RW/-R, CD-RW/-R and
USB storage device with MPEG-2 files
[MP4]
MP4MP4
Description refers to DVD-RW/-R, CD-RW/-R and
USB storage device with MP4 files
[AAC]
AACAAC
Description refers to DVD-RW/-R, CD-RW/-R and
USB storage device with AAC files
[WAV]
WAVWAV
Description refers to DVD-RW/-R, CD-RW/-R and
USB storage device with WAV files
[FLAC]
FLACFLAC
Description refers to DVD-RW/-R, CD-RW/-R and
USB storage device with FLAC files
[DLNA P]
DLNA
VIDEO
DLNA
VIDEO
Description refers to video files in the DLNA
Media Server
[DLNA M]
DLNA
MUSIC
DLNA
MUSIC
Description refers to music files in the DLNA
Media Server
[DLNA P]
DLNA
PHOTO
DLNA
PHOTO
Description refers to photo files in the DLNA
Media Server
EN 11
3.1. Top and Front Panel
1
2
3
4
1. A (open/close) button
Press to open or close the disc tray.
2. . (standby/on) button / LED
Press to turn on the unit, or to switch the unit into
standby mode. (To completely turn off the unit, you
must unplug the AC/DC Adapter.)
• The . (standby/on) LED lights up when the unit is
On, and goes out when the unit is Off.
3. Disc tray
Place a disc after opening the disc tray.
4. Infrared sensor window
Receives signals from your remote control so that
you can control the unit from a distance.
3.2. Rear Panel
12 3 4 5
1. DC IN jack
Connect to the included AC/DC Adapter to supply
power to this unit.
Unplug the AC Power cord from the AC outlet to
completely turn off the unit.
2. LAN port
Used to connect to network provisioning equipment
such as a router or a modem, using a LAN cable.
3. HDMI OUT (AUDIO) port
Used to connect to an AV receiver/amplifier with an
HDMI compatible port, using an HDMI cable.
Audio output only.
4. HDMI OUT port
Used to connect to a display with an HDMI
compatible port, using an HDMI cable. This HDMI
port will only output images when the HDMI OUT
(AUDIO) port is in use.
5. USB input port
Connect a USB storage device or USB card reader.
CautionC
Do not connect any device other than USB storage
device or USB card reader into USB input. (e.g. PC,
external HDD, MP3 player, digital camera, keyboard,
mouse, etc.)
Do not use an extension cord or USB hub to connect
devices to this unit. Always connect one single USB
storage device or USB card reader into USB input
directly.
3. FUNCTIONAL OVERVIEW
EN 12
3.3. Remote Control
*
1
2
3
4
5
6
7
8
9
10
11
12
13
14
15
16
* The unit can also be turned on by pressing these
buttons.
1. B (standby/on) button
Press to turn on the unit, or to switch the unit into
standby mode. (To completely turn off the unit, you
must unplug the AC Power cord.)
2. NETFLIX button*
Press to launch Netflix.
3. Q (home) button
Press to display the home menu.
4. TOP MENU button*
Ultra HD Blu-ray™, Blu-ray Disc™:
Press to display the top menu or pop-up menu.
DVD:
Press to display the title menu or disc menu.
5. OK button
Press to confirm or select menu items.
6. K / L / 0 / 1 buttons
Press to select items or settings.
When playback is in pause mode, press [ 1 ] to
forward the playback picture by picture.
When playback is in pause mode, press [ 0 ] to
reverse the playback picture by picture.
7. OPTIONS U button
During playback, press to display the play menu.
8. Red / Green / Yellow / Blue buttons
Press to activate shortcut keys on some BD-video
functions.
9. S (previous) button
During playback, press once to return to the
beginning of the current title, chapter, track or file.
During playback, press twice to return to the
previous title, chapter, track or file.
During the JPEG playback, press to return to the
previous file.
C (stop) button
Press to stop playback.
k (pause) button
Press to pause playback.
T (next) button
During playback, press to skip to the next chapter,
track or file.
E (reverse) button
During playback, press to fast reverse the playback.
B (play) button*
Press to start playback or resume playback.
D (forward) button
During playback, press to fast forward the playback.
When playback is in pause, press to slow forward
the playback.
10. -10s button
Press to reverse the playback by 10 seconds.
11. +60s button
Press to forward the playback by 60 seconds.
12. Number buttons
Press to select a chapter during playback.
Press to enter numbers and letters in the input field.
13. A (open/close) button*
Press to open or close the disc tray.
14. BACK Y button
Press to return to the previously displayed menu or
screen function.
15. INFO T button
Press to display the information display.
16. YouTube button*
Press to launch YouTube™.
EN 13
C Installing the Batteries in the Remote Control
Install 2 AAA (1.5V) batteries matching the polarity
indicated inside battery compartment of the remote
control.
123
CautionC
Incorrect use of batteries can result in hazards such as
leakage and bursting. Please observe the following:
Do not mix alkaline, standard (carbon-zinc), or
rechargeable (ni-cad, ni-mh, etc) batteries.
Do not mix new and old batteries together.
Do not use different kinds of batteries together.
Although they may look similar, different batteries may
have different voltages.
Make sure that the + and - ends of each battery match
the indications in the battery compartment.
Remove batteries from battery compartment, when the
remote is not going to be used for a month or more.
When disposing of used batteries, please comply with
governmental regulations or environmental public rules
that apply in your country or area.
Do not recharge, short-circuit, heat, burn or disassemble
batteries.
C Using the Remote Control
Remote Control Usage Guidelines:
Make sure that there are no obstacles between the
remote control and the infrared sensor window on the
unit.
Remote operation may become unreliable if strong
sunlight or fluorescent light is shining on the infrared
sensor window of the unit.
Remote controls of different devices can interfere with
each other. Avoid using a remote control from another
device which is located close to the unit.
Replace the batteries when you notice a fall-off in the
operating range of the remote control.
The maximum operable ranges from the unit are as
follows.
Line of sight:
approx. 23 feet (7 m)
Either side of the center:
approx. 16 feet (5 m) within 3
Above:
approx. 16 feet (5 m) within 15°
Below:
approx. 10 feet (3 m) within 3
30˚ 30˚
16 feet (5 m) 23 feet (7 m) 16 feet (5 m)
3.4. Guide to On-Screen Display
C Home Menu
When you turn on the unit, the Home Menu will appear
automatically. Otherwise, press [ Q (home)].
Photos SetupVideos Music
Home
Network
Browse
Net TV
Videos: Accesses the Video menu
Music: Accesses the Music menu
Photos: Accesses the Photo menu
Home Network: Accesses the DLNA Server menu
Browse Net TV: Accesses the Network Services
menu
Setup: Accesses the Setup Menu
C Setup Menu
HDMI
Video
Audio
3D
Language
Network
Ratings
System
Audio Language
Subtitle Language
Menu Language
On-screen Language
Closed Caption
Original
Auto
English
English
L
HDMI
Video
Au
d
i
o
3
D
Language
Netw
o
r
k
Rating
s
ste
Au
d
io Lan
g
ua
g
e
Su
b
tit
l
e Lan
g
ua
ge
Menu Lang
uage
On-screen Lan
g
ua
ge
C
losed Ca
ption
O
ri
g
ina
l
A
ut
o
English
English
L
12
1. Category
2. Menus / Options :
Displays options for the highlighted item on the left
whenever available.
C Play Menu
During playback, press [ OPTIONS U ] to display the play
menu.
e.g.) Blu-ray Disc™
Soundtrack
Subtitle Settings
Angle
Repeat Play
Secondary Video
Playback Information Window
Top Menu
Pop-up Menu
Closed Caption
1ENG DTS-HD MSTR Multi
1
O
Operation Menu
EN 14
4. Connections
When you change the connections, all devices should be turned off.
When making connections with external devices, please refer to their user manuals for additional setup help.
4.1. HDMI Video /Audio Connection
(Supports up to 1080i, 1080p, 1080p/24, 4K resolution.)
No analog audio connection required.
C Connecting with the HDMI OUT Port Only
HDMI IN
HDMI cable
(supplied)
or
HDMI OUTHDMI IN HDMI IN
HDMI cable
(supplied)
HDMI cable
(not supplied)
With this connection, the HDMI OUT port outputs both video and audio.
In order for Ultra HD Blu-ray™ video playback to work with this connection, a 4K/HDR compatible AV receiver/
amplifier and 18 Gbps high-speed HDMI cables are required.
In order for Blu-ray 3D™ video playback to work with this connection, a 3D compatible AV receiver/amplifier and 3D
compatible HDMI cables are required.
C Connecting with the HDMI OUT and HDMI OUT (AUDIO) Ports
HDMI IN HDMI IN
HDMI cable
(supplied)
HDMI cable
(not supplied)
With this connection, the HDMI OUT port only outputs video, and the HDMI OUT (AUDIO) port only outputs audio.
The EasyLink function is only available for the HDMI OUT port.
In order for Ultra HD Blu-ray™ content playback to work on this unit, a 4K/HDR compatible display device and AV
receiver/amplifier must be connected to this unit. Otherwise, the Audio will not be output.
In order for 3D content playback to work on this unit, a 3D compatible display device and AV receiver/amplifier must
be connected to this unit. Otherwise, the Audio will not be output.
EN 15
In order to play 4K/HDR content, this unit must be connected to a 4K/60p/4:4:4 and Ultra HD Blu-ray HDR compliant
device.
For 4K/60p/4:4:4, an 18Gbps high-speed HDMI cable is required.
Required TV
Specifications
Playback Content
Recommended Settings Video Signals from the Unit
HDMI
Resolution
4K60p Output
24p
Output
High Dynamic
Range Output
Output
Resolution
Frame Rate /
Color Space
Up to
4K
60p
4:4:4
BD-Video 24p
Auto 4K/60p (4:4:4)
Auto
Auto 4K
24p/4:4:4
Ultra HD Blu-ray
24p 24p/4:4:4
60p 60p/4:2:2
BD-Video 24p
Off
60p/4:4:4
Ultra HD Blu-ray
24p 60p/4:2:2
60p 60p/4:2:2
Up to
4K
60p
4:2:0
BD-Video 24p
Auto 4K/60p (4:2:0)
Auto
Auto 4K
24p/4:4:4
Ultra HD Blu-ray
24p 24p/4:2:2
60p 60p/4:2:0
BD-Video 24p
Off
60p/4:2:0
Ultra HD Blu-ray
24p 60p/4:2:0
60p 60p/4:2:0
Up to
4K
24p/30p
BD-Video 24p
Auto Off
Auto
Auto
4K
24p/4:4:4
Ultra HD Blu-ray
24p 24p/4:2:2
60p 2K 60p/4:4:4
BD-Video 24p
Off 2K
60p/4:4:4
Ultra HD Blu-ray
24p 60p/4:4:4
60p 60p/4:4:4
Ultra HD Blu-ray content is created in 4K resolution.
TVs supporting 4K60p are compatible with HDCP 2.2.
NoteD
Do not tilt the HDMI connector when inserting it into the HDMI port, and make sure the shapes of the HDMI port and
the HDMI cable's connector match.
If this unit is connected to an HDCP incompatible display device, video will not be displayed properly.
Use a certified HDMI cable (an HDMI cable with the HDMI logo) for this connection. High-Speed HDMI cable (also
known as HDMI category 2 cable) is recommended for better compatibility.
In order for Ultra HD Blu-ray™ video playback, connect this unit to a 4K/HDR compatible display device using an 18
Gbps high-speed HDMI cable.
In order for Blu-ray 3D™ video playback, connect this unit to a 3D compatible display device using a 3D compatible
HDMI cable.
EN 16
4.2. Connection to an Audio System
C HDMI Audio Connection
AV receiver / amplifier with an HDMI input jack
HDMI IN
HDMI cable
(supplied)
C Audio Output from HDMI OUT jack
“DD/DD+/DTHD” Setting
“DTS/DTS-HD” Setting
“Bitstream” “LPCM”
“BD-Video Secondary Output” Setting
Off On Off On
Media
Audio Souce
Which audio format can be output depends on the compatibility of the
connected device.
Ultra HD Blu-ray
Blu-ray
Dolby Digital Dolby Digital Multi LPCM
Dolby Digital Plus Dolby Digital Plus Dolby Digital Multi LPCM*
1
Multi LPCM*
2
Dolby TrueHD Dolby TrueHD Dolby Digital Multi LPCM*
3
Multi LPCM*
4
DTS DTS Multi LPCM
DTS-HD DTS-HD DTS Multi LPCM*
1
Multi LPCM*
5
LPCM Multi LPCM Multi LPCM
DVD-Video Dolby Digital Dolby Digital Multi LPCM
DTS DTS Multi LPCM
LPCM Multi LPCM Multi LPCM
DTS-CD DTS DTS Multi LPCM
AVCHD Dolby Digital Dolby Digital Multi LPCM
LPCM Multi LPCM Multi LPCM
Audio CD LPCM 2ch LPCM 2ch LPCM
MP3 MP3 2ch LPCM 2ch LPCM
AAC AAC 2ch LPCM 2ch LPCM
FLAC FLAC 2ch/Multi LPCM 2ch LPCM
WAV WAV 2ch LPCM 2ch LPCM
MPEG2(TS/PS) Dolby Digital Dolby Digital Multi LPCM
Dolby Digital Plus Dolby Digital Plus Dolby Digital Multi LPCM*
1
Multi LPCM*
2
LPCM Multi LPCM Multi LPCM
Netflix Dolby Digital Plus Dolby Digital Plus Multi LPCM*
1
HE-AAC 2ch LPCM 2ch LPCM
YouTube™ HE-AAC 2ch LPCM 2ch LPCM
*1 Fully decoded.
*2 Only the independent substream is decoded.
*3 Dolby TrueHD stream is decoded.
*4 Only the Dolby Digital substream is decoded.
*5 Only the core substream is decoded.
NoteD
If the connected device is not compatible with HDMI BITSTREAM, audio will be output as multi LPCM or 2-channel
down-mixed LPCM depending on the capability of the connected device even if you select “Bitstream” in “HDMI
Audio” setting.
When playing back a BD-video which only contains the primary audio, the audio output will be the same case as
“Off” even if “BD-Video Secondary Audio” is set to “On”.
Discs containing DTS audio with over 5.1ch surround signals at the sampling rate of 192kHz may not play correctly on
this unit.
When playing such discs while this unit is connected to an Audio System (over 5.1ch) such as an A/V amplifier, HDMI
receiver, etc., select “Bitstream” under the “DTS/DTS-HD” in “Digital Audio Output” of “Audio” setting of this unit. (If
“PCM” is selected, audio with over 5.1ch surround signals may not be output correctly.)
EN 17
4.3. Connection to the Network
By connecting this unit to the Internet, you can update the software via the Internet or access BD-Live™, Netflix, and
YouTube services.
For a stable connection, wired connection is recommended when using following features. (Using following features
with Wireless LAN connection can be affected by other devices using radio frequencies.)
Video streaming services (Netflix / YouTube™)
–Network update
C Wired Connection
WAN LAN
12345
LAN
Networking equipment (modem, etc.)
Internet
Broadband router or hub
LAN cable (not supplied)
CautionC
Do not insert any cable other than a LAN cable to the LAN terminal to avoid damaging the unit.
Do not connect your PC directly to the LAN terminal of this unit.
NoteD
After you make a wired connection, set up necessary network settings.
(For network setting of wired connection, refer to “Wired” on page 44.)
If your modem does not have router functions, connect a wired router.
If your modem has router functions but there is no vacant port, add a hub.
For a wired router, use a router which supports 10BASE-T / 100BASE-TX / 1000BASE-T ETHERNET standard.
Please purchase shielded LAN cables at your local store and use them when you connect to network equipment.
EN 18
C Wireless LAN Connection
LAN WAN
Networking equipment (modem, etc.)
Internet
LAN cable (not supplied)
Wireless LAN router
NoteD
After you made the Wireless LAN connection, set up necessary network settings.
(For the network setting of Wireless LAN connection, refer to “Wireless” on page 46.)
For a Wireless LAN router, use a router which supports IEEE 802.11 b/g/n/ac.
(“ac” type is recommended for stable operation of the Wireless LAN network.)
Set the Wireless LAN router to Infrastructure mode. This unit does not support Ad-hoc mode.
Other radio devices or obstacles may cause interference to the Wireless LAN network connection.
With a 2.4GHz wireless router (access point), using a USB3.0 compatible device with this unit may cause wireless
connection instability. Place the wireless router as far away as possible from this unit.
When using a 5GHz compatible wireless router (access point), 5GHz bandwidth use is recommended.
EN 19
5. BEFORE YOU START
5.1. Finding the Viewing Channel /Source
on Your TV
After you have completed all the connections, you must
find the viewing channel (external input source) on your TV.
1. After you have made all the necessary
connections, press [ B (standby/on)] to turn on the
unit.
2. Turn on your TV.
3. Press the button on the TV’s remote control that
accesses the external input channel. It may be
labeled “SOURCE”, “AV”, “AUX” or “SELECT” (refer
to your TV’s user manual). Or press “2” on the TV’s
remote control, then press channel down button.
Please wait.
This is the correct viewing channel (external input
source).
If the TV is connected by an HDMI cable, it may take
a while for the Philips splash screen to come up.
If a certain amount of time has passed since you
turned on the unit, welcome screen appears the first
time you turn on this unit.
5.2. Initial Setup
Please follow the instructions below to complete the initial
setup.
1. While “On-Screen Language” screen is displayed,
use [ K / L ] to select your language, then press
[OK].
English
Français
Español
On-screen Language
Select the On-Screen Language.
Sélectionnez la langue d'achage.
Seleccione un Idooma para el menú en pantalla que
desee desplegar.
When this unit is connected to a 4K-compatible TV,
the “4K/60p Output” screen will appear. Otherwise,
move on to step 3.
2. Follow the on-screen instructions, and if the “Is this
message displayed?” screen is displayed, select
“Yes”, then press [OK].
If a confirmation screen* appears, select “Yes”, then
press [OK].
* It takes some time until the confirmation screen
appears.
3. The “Quick start” screen will appear. Use [ K / L ] to
select “On” or “Off, then press [OK].
“On”: In order to make the unit start faster, then set to
"On". If done then this will increase the Power
Consumption during Standby mode.
“Off”: “Off” will reduce the Power Consumption during
Standby mode rather than “On”.
4. Press [OK].
“Easy Settings” is finished.
5. “Easy Network Setting” screen will appear. Use
[ K / L ] to select the desired mode, then press [OK].
If you select “Wired, refer to “Wired” on page 43
for further operation.
If you select “Wireless”, refer to “Wireless” on page
45 for further operation.
6. The Home menu will appear.
EN 20
6. INFORMATION ON PLAYBACK
6.1. Information on Playback
Before you start playing back a disc, read the following
information.
C Playable Discs and Files
Playable Discs Logo
Blu-ray Disc
Ultra HD Blu-ray
–BD-video
Blu-ray 3D™ Disc
Blu-ray 3D™ only Disc
BD-RE* (ver. 2.1/3.0)
(Recorded in BDMV format)
BD-R* (ver. 1.1 / 1.2 / 1.3/2.0)
(Recorded in BDMV format)
(Unfinalized disc may not be played back.)
DVD-video
DVD-RW
(finalized VR mode discs only)
DVD-R
(finalized VR mode discs only)
CD-DA (audio CD)
CD-RW
CD-R
DTS-CD
-
*
Due to the intentional progression of the Blu-ray Disc™
format by its standard setting authority, the company
cannot guarantee or warrant the playability of future
extensions of the Blu-ray Disc™ format with this product.
Playable Files Media
AVCHD DVD-RW/-R, DVD+RW/+R
MP3
DVD-R, CD-RW/-R,
USB storage device
FLAC
WAV
AAC
JPEG BD-RE/-R, DVD-R, CD-RW/-R,
USB storage device
Readable devices Media
USB storage devices supporting
USB2.0 / USB3.0
MP4, MPEG2, MP3, FLAC,
WAV, AAC, JPEG, Picture-in-
Picture commentary, subtitles
or other extras for BD-ROM
ver. 2 (Profile 2.0 / Profile 1.1)
C Recommended Specifications
AVCHD
This unit cannot play back standalone AVCHD files (*.m2ts,
*.mts or *.m2t) written to a DVD. The DVD containing
AVCHD files must have a proper file and folder structure
meeting AVCHD format specifications.
Please use AVCHD compliant device / software to burn or
copy AVCHD files to DVD. (Please refer to user manuals of
the device / software for more information.)
MP3
Maximum sampling frequency: 48kHz
Maximum constant bit rate: 320kbps
File extention: .mp3
JPEG
• Resplution
Upper limit: 4,096 x 4,096 dots (sub sampling: 4:4:4)
8,192 x 8,192 dots (sub sampling: 4:2:2)
8,192 x 8,192 dots
(sub sampling: up to 4:2:0)
Lower limit: 34 x 34 dots (sub sampling: 4:4:4)
34 x 34 dots (sub sampling: 4:2:2)
34 x 34 dots (sub sampling: up to 4:2:0)
File extention: .jpg
FLAC
Maximum sampling frequency: 192 kHz
Correspond sampling frequency: Maximum 192 kHz
Maximum quantization bit rate: 24 bit
File extention: .flac
AAC
Maximum sampling frequency: 48 kHz
Correspond sampling frequency: Maximum 48 kHz
Maximum constant bit rate: 320 kbps
File extention: .m4a
WAV
Maximum sampling frequency: 192 kHz
Correspond sampling frequency: Maximum 192 kHz
Maximum quantization bit rate: 24 bit
File extention: .wav
MP4
• File extention: .mp4, .mov
MPEG2(TS/PS)
File extention: .mpg, .mpeg, .m2ts, .mts, .ts
DLNA - PCM
Maximum sampling frequency: 44.1, 48 kHz
Correspond sampling frequency: Maximum 48 kHz
1 / 1

Philips BDP7501 User manual

Category
Blu-Ray players
Type
User manual
This manual is also suitable for

Ask a question and I''ll find the answer in the document

Finding information in a document is now easier with AI

Ask the document