User Manual
Thank you for using the Wi-Fi Smart Camera
Wi-Fi Smart Camera
NSH-3000
Reset Button: Press a small object into the “Reset” hole on the back of the
device and hold for 5 seconds. A voice prompt will state “Reset camera
successfully” when properly completed.
It is recommended that you insert an 8-64GB high-speed Micro SD card.
Otherwise, the camera will not be able to store, view old video, or support
important functions, such as firmware upgrading.
Specifications
Getting Started
Wi-Fi Smart Camera
NSH-3000
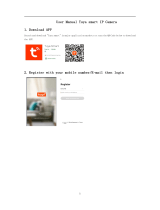
Install the Smart Life App
Download the Smart Life App: Access the Smart Life app from your Google Play /
Apple App Store or scan the QR code below to download and install.
Register and Login: Open the Smart Life App and follow the prompts to register
and log in.
Please make sure that there is an available Wi-Fi network and that you are
connected to the internet.
Find the USB port on the bottom of the smart camera and insert the power
cord to turn on the device.
Then go to the Smart Life app home page and click “ADD DEVICES” on the
main screen. Choose “Security camera”.
Select the “QR Code” in the upper right corner of the screen. Click confirm
and proceed according to the prompts on your mobile phone.
Video Browsing in the Smart Life App
7. Important Reminders
• Avoid contact with sharp objects,
• Avoid placing on furniture or places where it might fall.
•Avoid tangling the wires, and keep them tucked away from the
camera to avoid tripping hazards and pinching.
• Ensure that the camera is within coverage range of the wireless Wi-Fi
signals.
• When switching to a new network environment: Reset the camera via
the reset hole on the back, by inserting a small object and holding the
reset button for about 5 seconds. A voice prompt will state “Reset
camera successfully”. Then you may connect to the new network.
User Manual
5. App Interface
1. Click the to enable the microphone function. By holding the
speaker button down, you can communicate with the people/pets
that you see on screen with the camera. Click when the
listening functionality is on and you can hear audio from the
camera end.
2. Click to adjust the camera.
3. Click or to start recording or take a screenshot (files recorded
in mobile phone).
4. Click to view the motion sensor and alerts settings. (Three
sensitivity options: Low, Medium, High.)
5. Click to view in full-screen mode.
6. Image-quality adjustment: Two modes, SD and HD).
7. Recording and playback: You can watch the recorded videos on the
local disc and SD card.
8. Alarm notification and triggered screenshot can be viewed in the
message center.
6. More Settings
1. Click to view more settings.
2. Device Sharing: Share the device to multiple users with the Smart
Life app (only the admin account is allowed to change the settings).
3. Device info: IP address, device ID, timezone, and Wi-Fi signal (6.2).
4. Basic features settings: Set flip and time stamp.
5. SD card settings: Check the status of the SD card and set
recording and alarm mode.
8
8. Support
If you have problems with your device, please consult the instructions in
this manual. Please also visit us on the web at ww.naxa.com to get daily
news, alerts, and documentation for your device. For additional
assistance, please contact Naxa Technical Support.
NAXA Technical Support
2320 East 49th St.
Vernon, CA 90058
http://www.naxa.com/supportcenter/
09
8. FCC Notice
This device complies with part 15 of the FCC Rules. Operationi ssubject to
the following two conditions:
(1)This device may not cause harmful interference, and
(2)This device must accept any interference received, including
interference that may cause undesired operation.
This equipment has been tested and found to comply with the limits for a
Class B digital device, pursuant to Part 15 of the FCC Rules. These limits
are designed to provide reasonable protection against harmful
interference in a residential installation. This equipment generates, uses,
and can radiate radio frequency energy and, if not installed and used in
accordance with the instructions, may cause harmful interference to radio
communications. However, there is no guarantee that interference will not
occur in a particular installation. If this equipment does cause harmful
interference to radio or television reception, which can be determined by
turning the equipment off and on, the user is encouraged to try to correct
the interference by one or more of the following measures:
• Reorient or relocate the receiving antenna.
• Increase the separation between the equipment and receiver.
• Connect equipment into an outlet on a circuit different from that to
which the receiver is connected.
• Consult the dealer or an experienced radio/TV technician for help.
9. Trademark & Regulatory Statements
The Smart Life App and all Smart Life Features are a trademark of Tuya,
LLC.
Google Play™ store and all Google Brand Features are trademarks of
Google Inc., LLC.
Apple App Store™ and all Apple Brand Features are registered
trademarks or trademarks of Apple Inc.
-
 1
1
Ask a question and I''ll find the answer in the document
Finding information in a document is now easier with AI
Related papers
Other documents
-
Shenzhen Anjia Information Technology CF-Q812ES Installation guide
-
Tuya BYT31XV11 User guide
-
 Tuya Smart JSP159 Tuya smart IP Camera App User guide
-
Tuya JSP158 Smart Wifi Camera User manual
-
Tuya E96K User guide
-
Oppo A83 2018 User manual
-
Oppo R17 Neo Owner's manual
-
 Shenzhen Aoni Electronic E97V User guide
-
Neffos C9 User guide
-
Neffos C9A User guide


